 20
20
ASUS ROG Maximus Z690 Extreme Glacial Review
VRM Overview »Board Layout
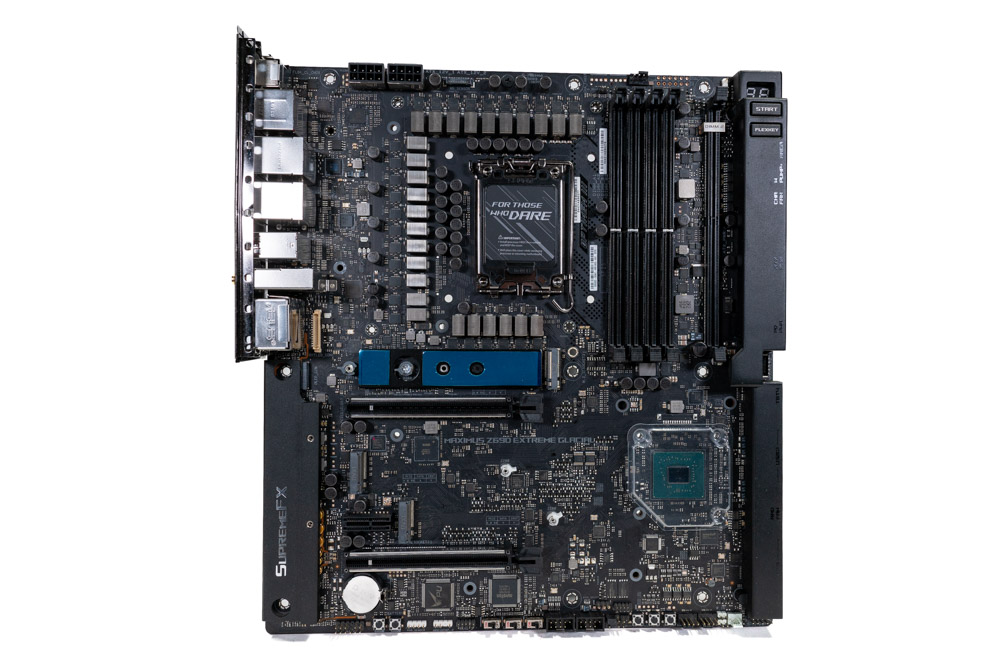
The ASUS ROG Maximus Z690 Extreme Glacial is using the E-ATX format, which can look a bit on the larger side to some who aren't used to the form factor. While it is generally frowned upon to increase the PCB size without a purpose besides a bit of "I'm bigger, therefore better" marketing, in this case the ASUS engineering team has put the extra space to good use. All of which we will go into detail further along in this review.
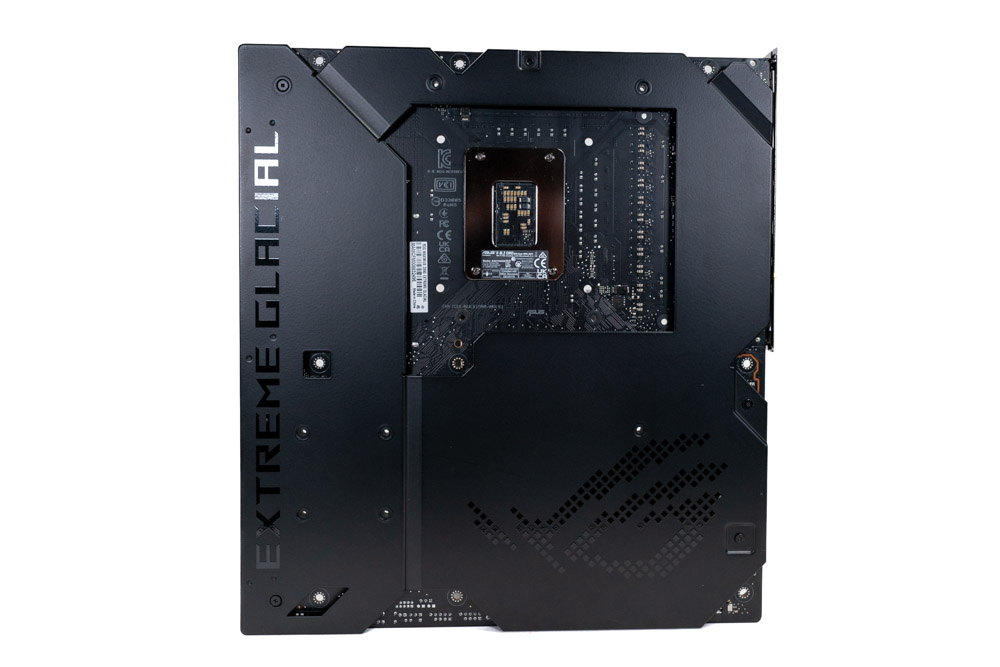
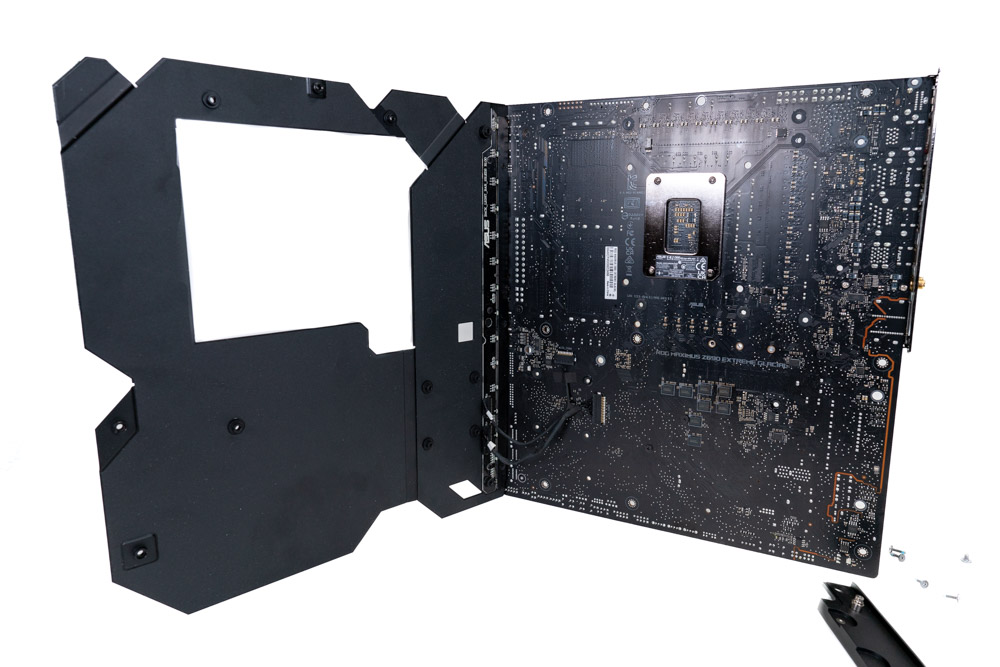
Before that, a quick glance at the back and it can be seen that this motherboard has a protective back-shield with an RGB strip down one side. This It isn't meant to be taken apart as wires can be seen taped down. It is easy to rip these connectors out if not careful in disassembly. These types of black plates can add passive thermal heat dissipation with thermal pads and or PCB support. In this case, it's just to help strengthen the PCB.
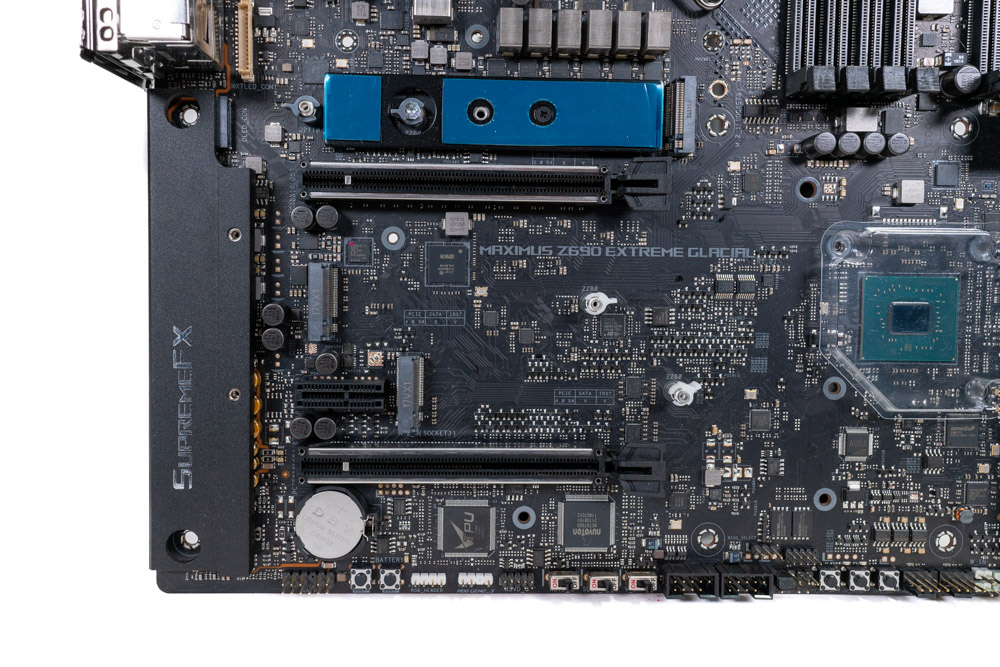
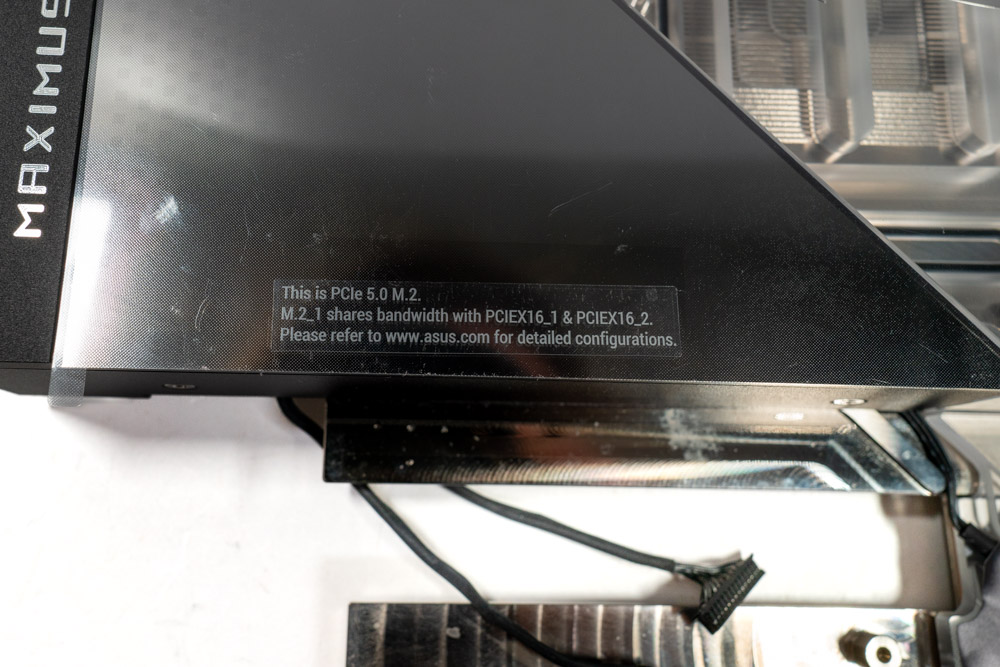
The ASUS ROG Maximus Z690 Extreme Glacial offers two PCI Express x16 slots, with the top two reinforced for extra stress support. PCIe slot one and two are PCIe Gen5 certified with a total of x16 lanes coming from the CPU. This means that slot one can either operate at x16 or x8. Slot 2 is wired for PCIe Gen5 x8 and will split the available lanes with the first slot when populated. This second 16x PCIe slot will become disabled if the M.2 Gen5 socket is populated because it shares the PCIe lanes.
These are all backwards compatible, allowing older PCIe devices to work without issue. Sandwiched between the two is a dedicated 1x PCIe Gen3 slot (open-ended) which does not become disabled even when the motherboard is fully populated. This is good news for those who may have a use for an additional PCIe slot.
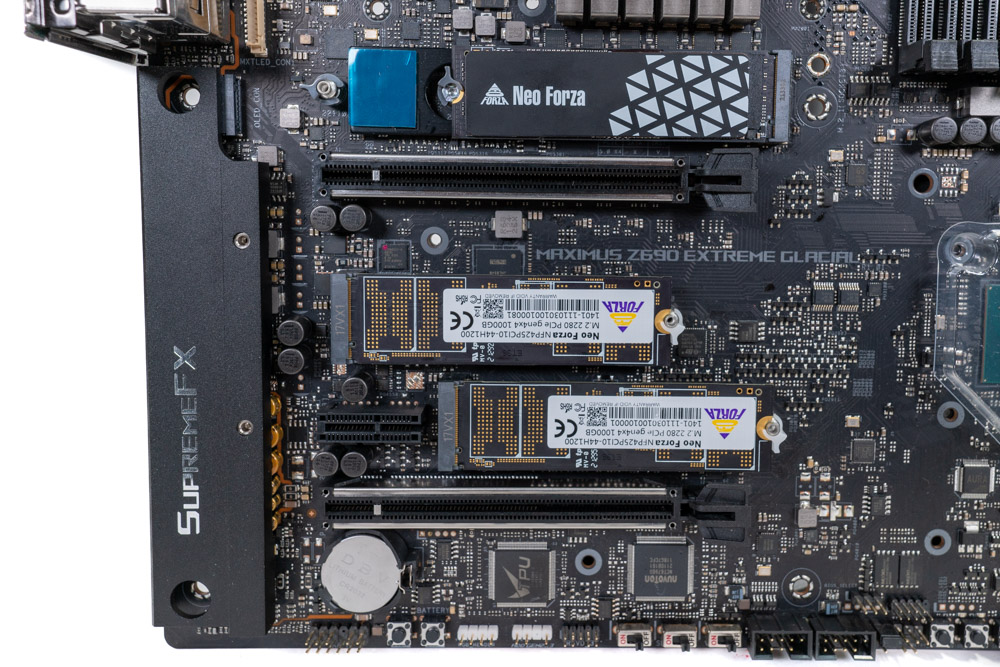
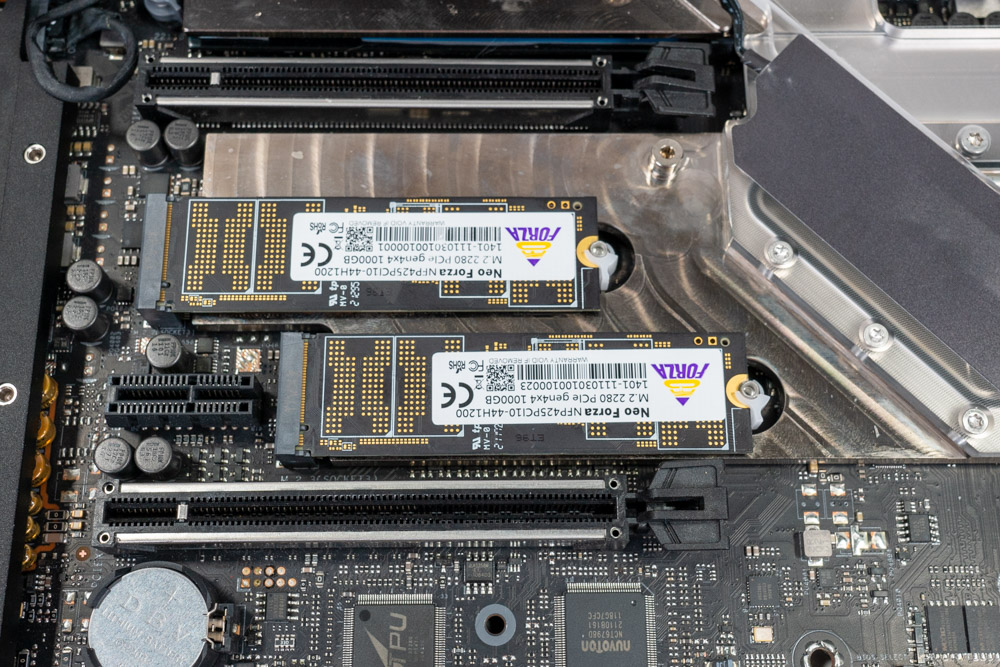
The M.2 socket configuration can often become complicated without first consulting the motherboard manual. First up is the PCIe Gen5 4x socket (at the top), which shares bandwidth with the PCIe 16x slots as explained previously. Next is two Gen4 4x sockets, one of which is routed through the Z690 chipset while the other is directly connected to the CPU. All three M.2 sockets here make direct contact with the monoblock.
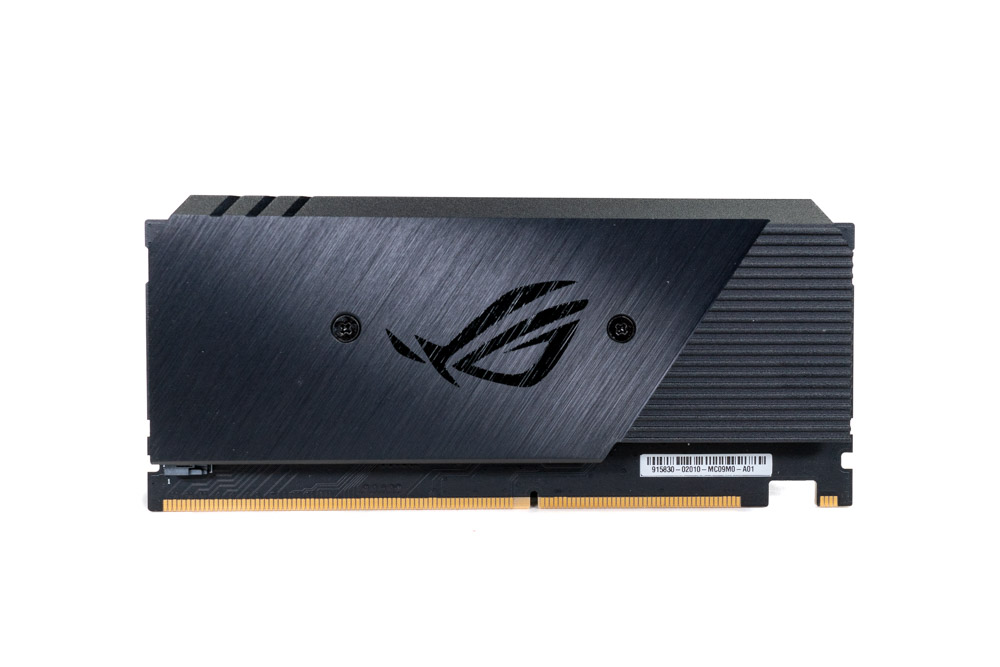
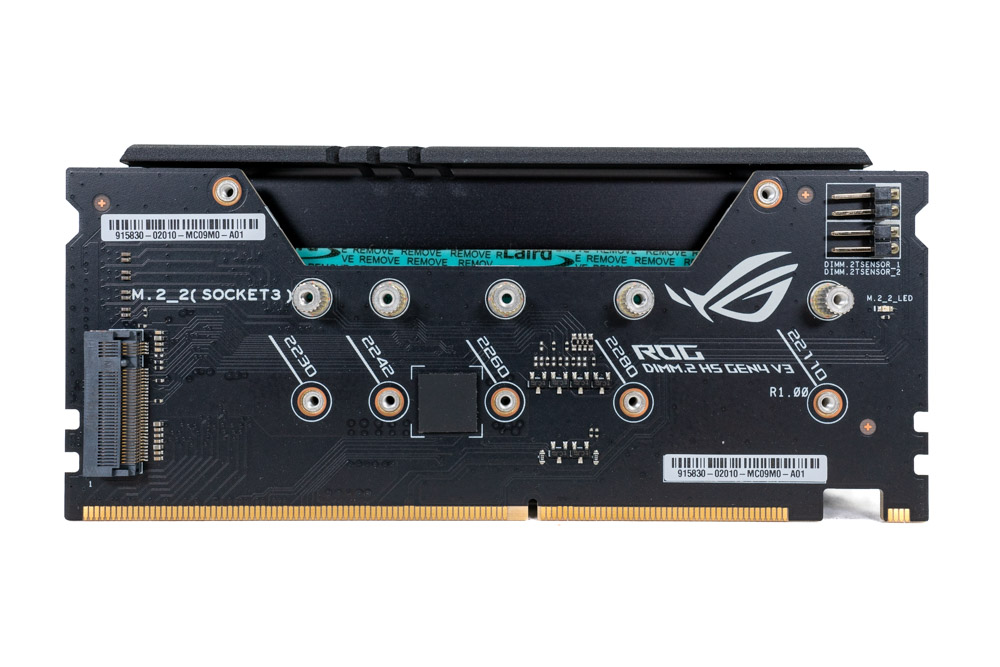
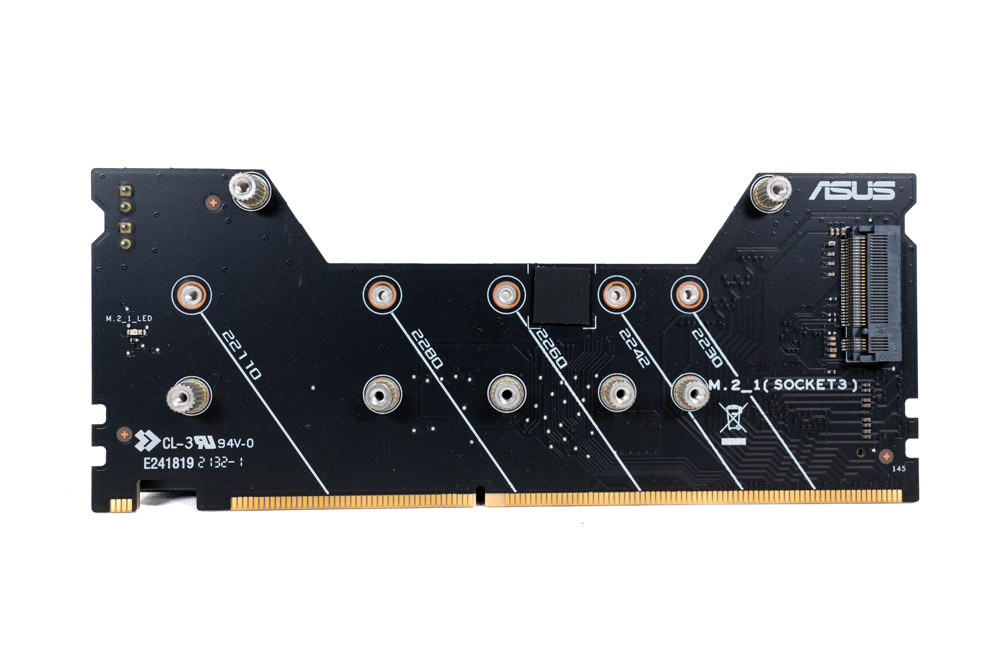
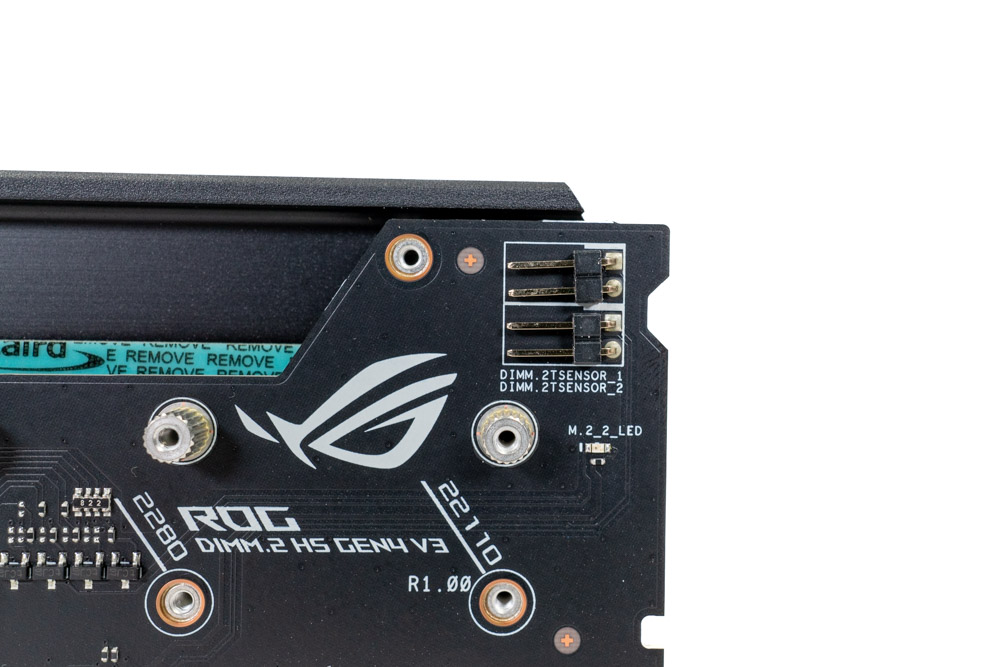
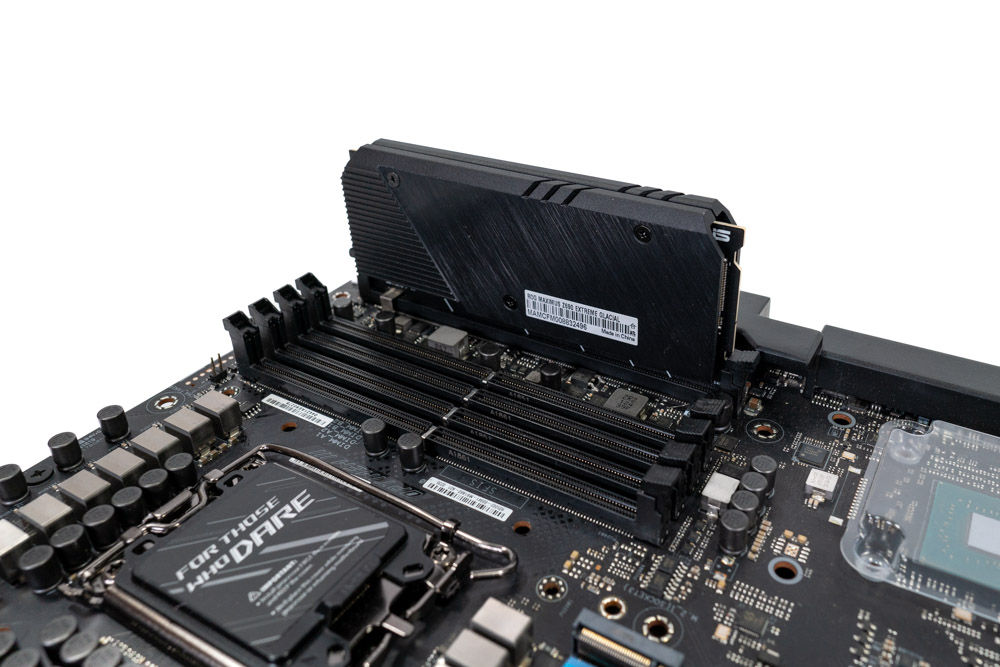
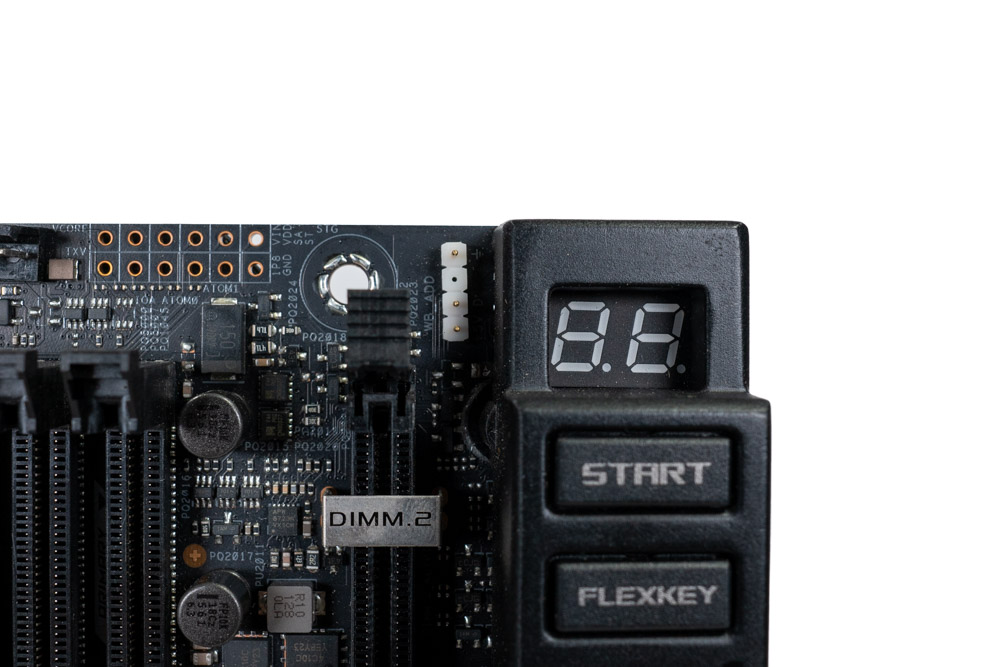
More M.2 sockets can be connected via the ASUS ROG DIMM.2 slot. Essentially a proprietary add-on card that allows for two additional Gen4 4x M.2 sockets. These are routed through the Intel Z690 chipset.
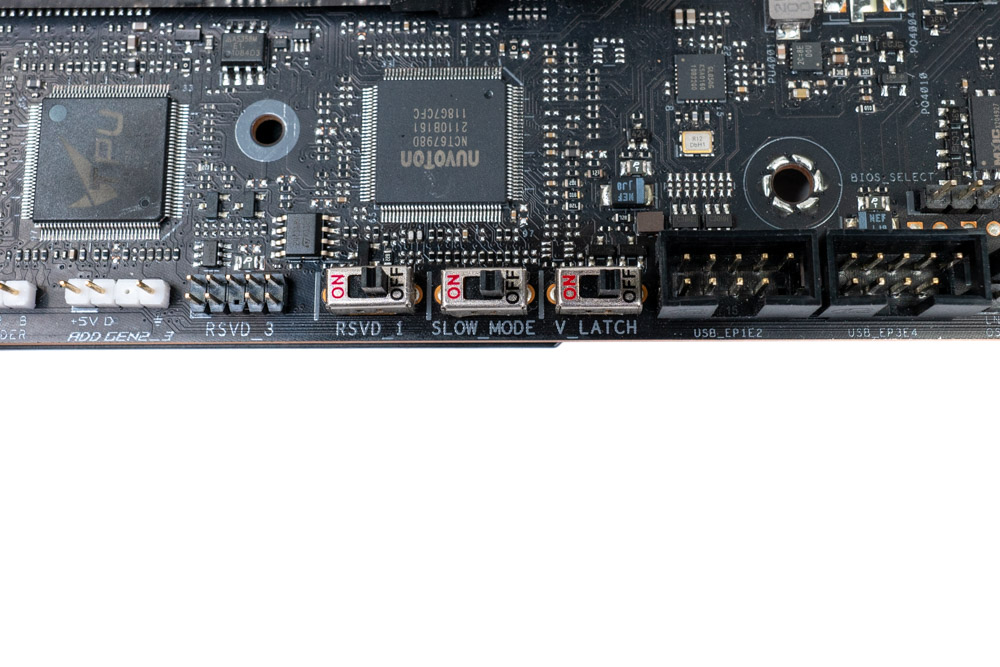
Across the bottom of the motherboard is numerous headers, switches and buttons. First up are three switches; RSVD_1, SLOW_MODE, V_Latch. RSVD_1 is for ASUS authorized technicians and has no function for the consumer. Next is slow SLOW_MODE. This sets the CPU to the lowest frequency (800 MHz) in real-time and can be used for extreme overclocking between benchmark runs.
Lastly is the V_Latch. This is a special circuit that allows extremely accurate recordings of the CPU Vcore maximum and minimum values during CPU load showing the overshoot and Vdroop. Without an oscilloscope it is unlikely the data would be seen otherwise due to the slow refresh rate and/or limited data capture points in software. With V_Latch enabled, it can now be paired with HWiNFO software and gets its own sensor tab. It will record in real-time and can be exported as a CSV file for bonus points.
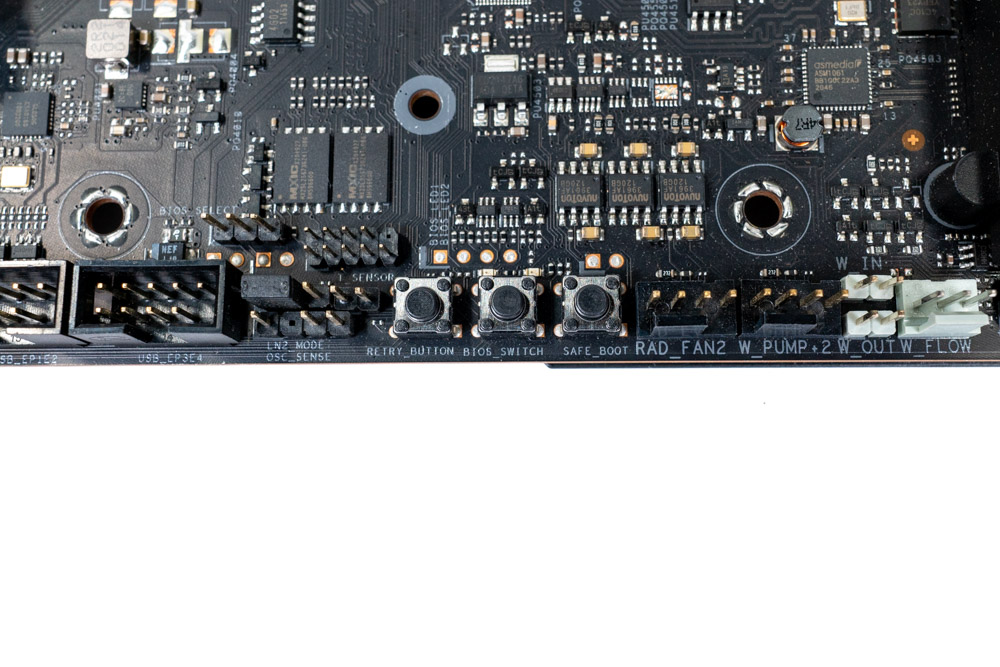
Next up is a few buttons which read as the following; RETRY_BUTTON, BIOS_SWITCH and SAFE_BOOT. In order, the Retry button can be pressed when the motherboard is stuck in the boot process. Every time this is pressed, the system will retry the current step until it passes on or you give up (mostly used for failed memory training). BIOS switch is self explanatory. The ASUS ROG Maximus Z690 Extreme Glacial has two BIOSes to pick from. Press the button to switch between the two. Lastly is the Safe boot. This will boot directly into the BIOS safe-mode while retaining all the overclocking settings. This allows for adjustments to be made without losing the current unsaved BIOS profile that Clear CMOS would remove otherwise.
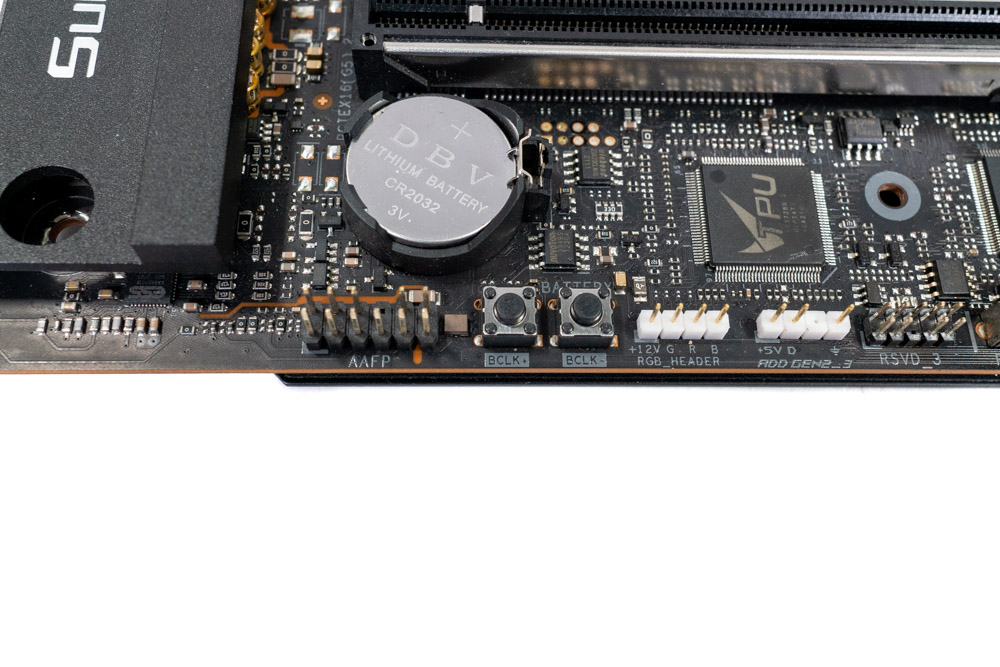
The final set of specialty buttons on this motherboard is the BCLK+/-. This allows for the BCLK frequency to be adjusted plus or minus 1 MHz in real time. Note that this must be enabled in the BIOS. It is disabled by default.
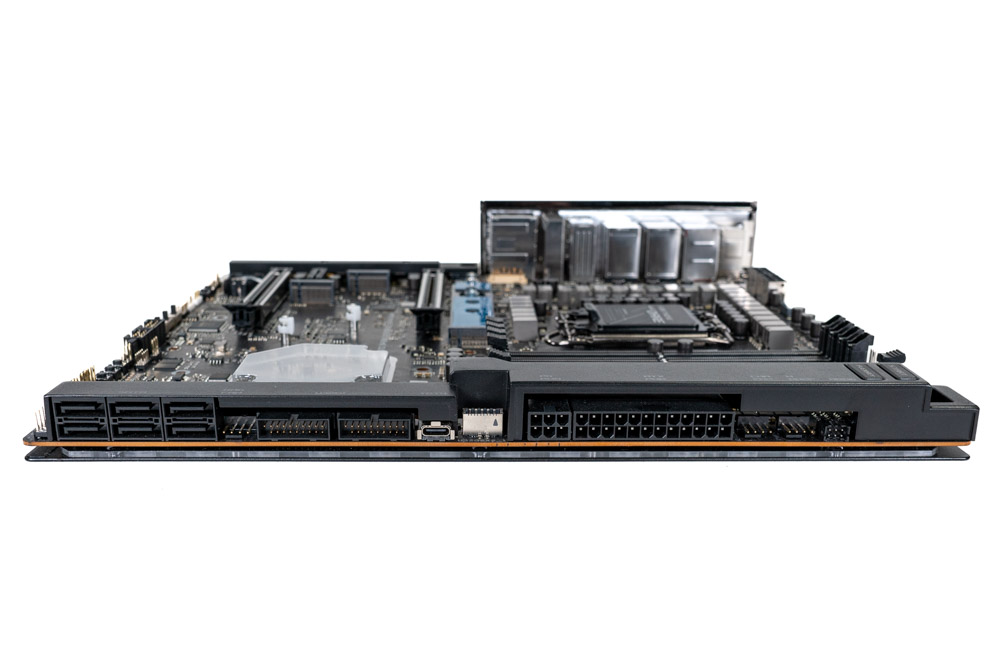
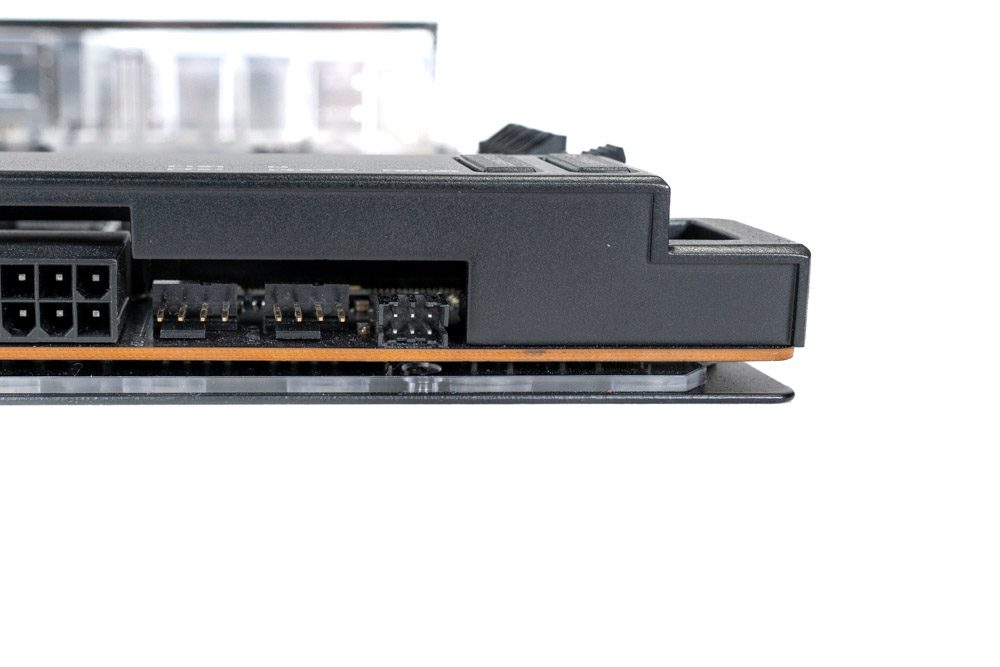
A quick look from the side can give a better perspective for header placement. These will be revisited in closer detail as we continue along in this review.
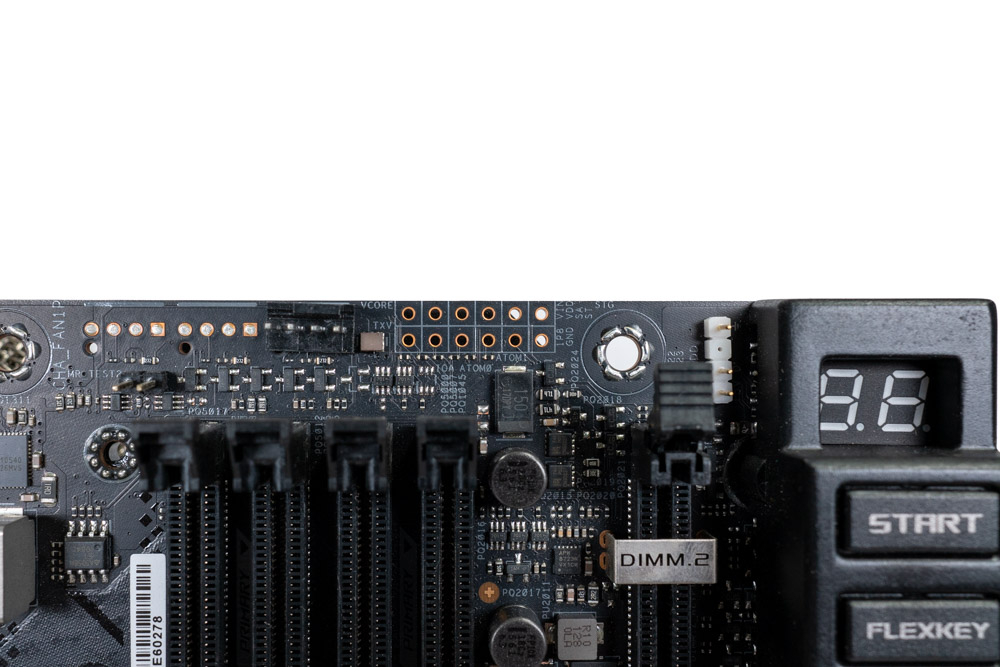
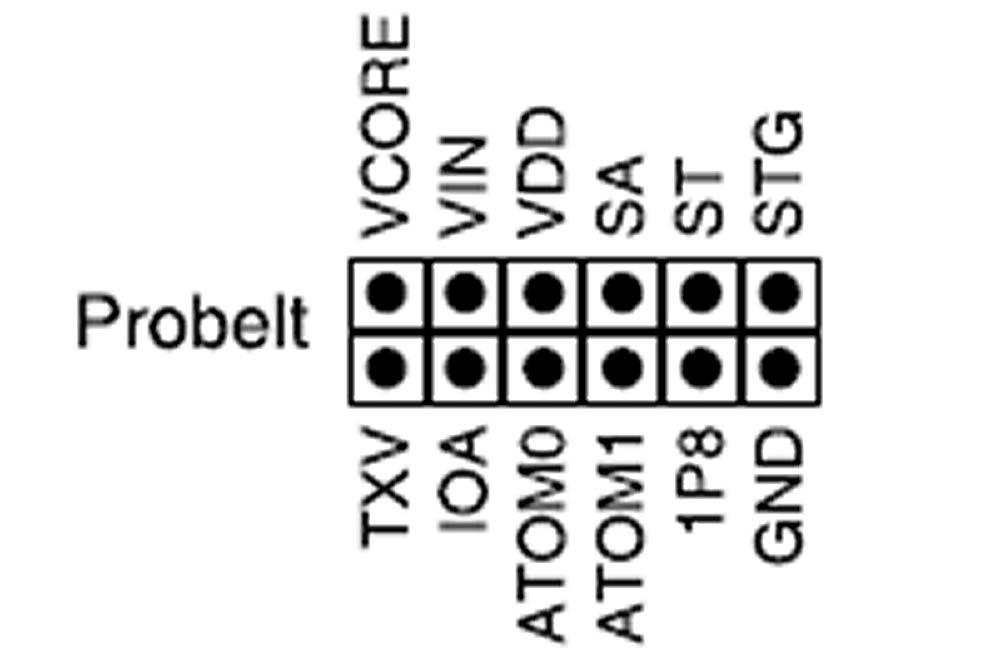
ASUS has included voltage read points on the motherboard which is a nice addition to see for overclocking enthusiasts.
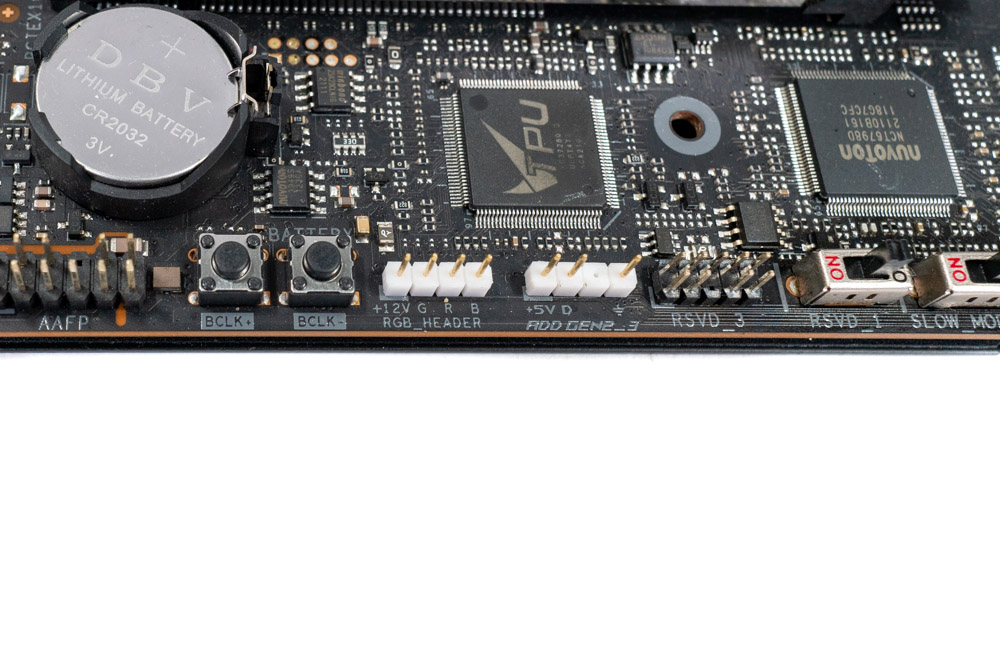
The Maximus Z690 Extreme Glacial RGB headers are a bit misleading visually. At first it seems like only two are available after the top 5 V header is paired off with the EK Monoblock. This would potentially only leave one 5 V and one 12 V standardized RGB header on the motherboard to be used. Though don't be fooled into thinking that is everything. Part of the accessories is extra 1-2 RGB breakout cables and an additional custom 6-pin header can be found on the side which uses a different breakout cable for an additional two. On top of all these, is the ROG RGB fan controller that is an option as well, increasing the number of 5 V ARGB headers by another six.
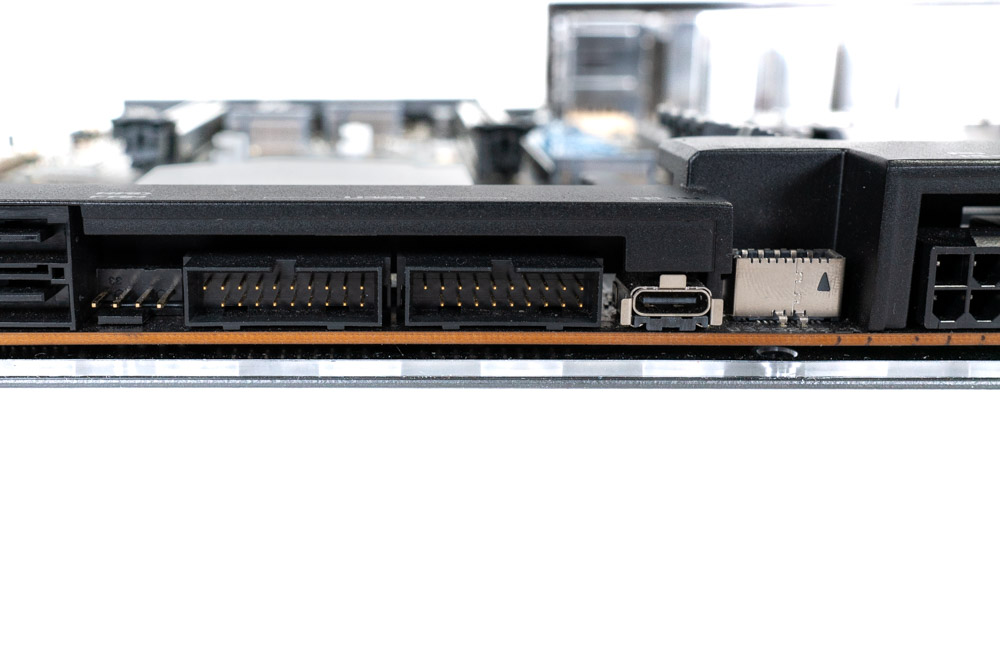

The ASUS ROG Maximus Z690 Extreme Glacial has two USB 3.2 Gen1 headers and two USB 2.0 headers in total. On the side next to the Thunderbolt 4 port is an internal USB 3.2 Gen 2x2 (20 Gbps) Type-E header as well.
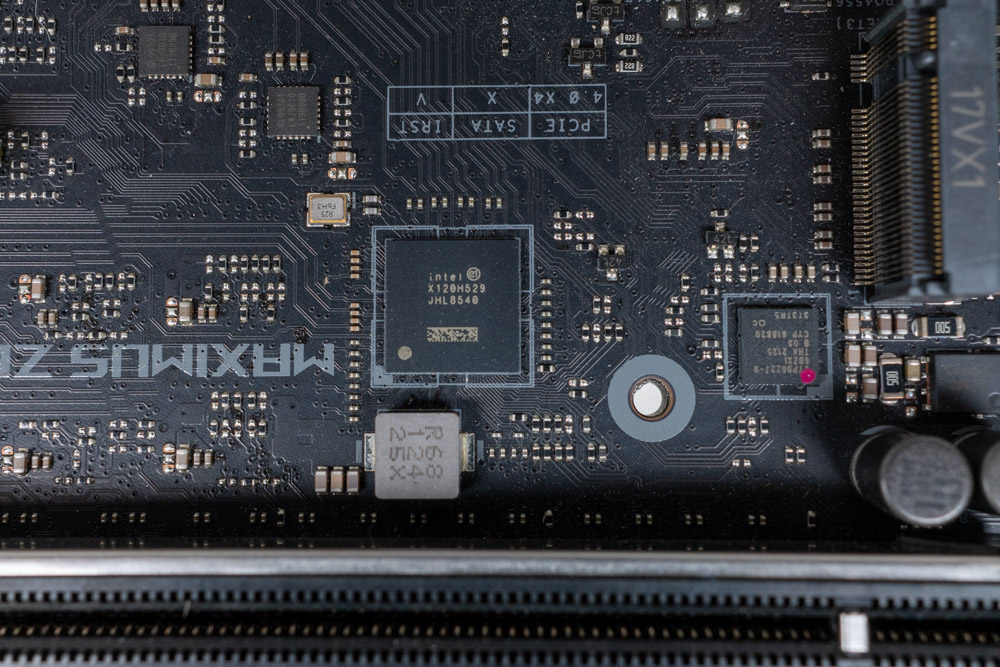
The ASUS ROG Maximus Z690 Extreme Glacial uses an Intel JHL8540 for its Thunderbolt 4 connectivity in the rear I/O section (and internally). It may also be used to output integrated graphics from an Intel CPU over USB-C or DisplayPort 1.4.
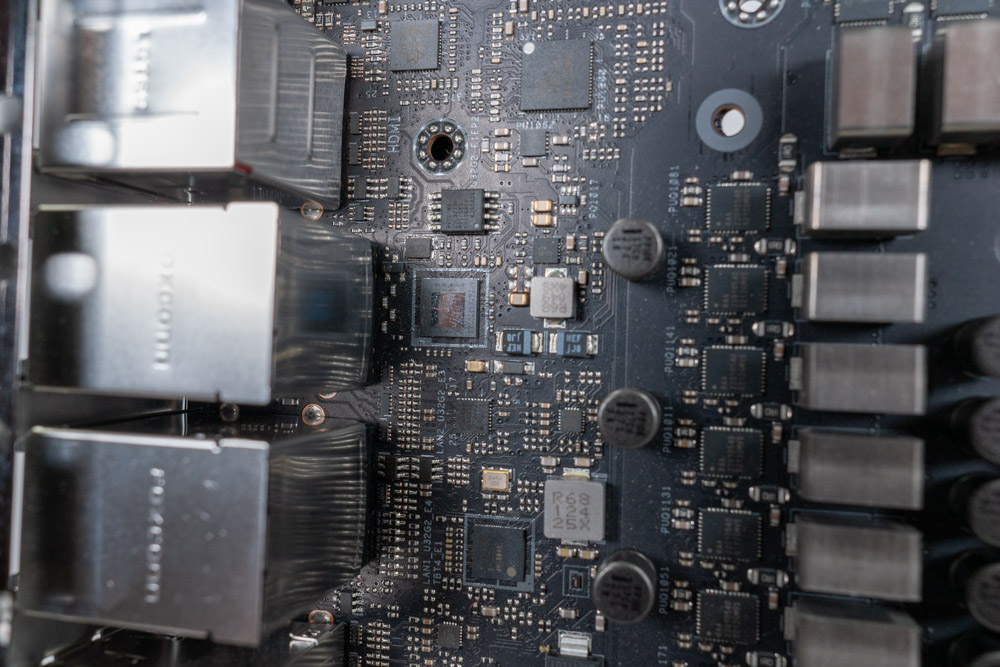
A Marvell AQtion AQC113C 10GbE LAN chip is used for the 10 Gb LAN.
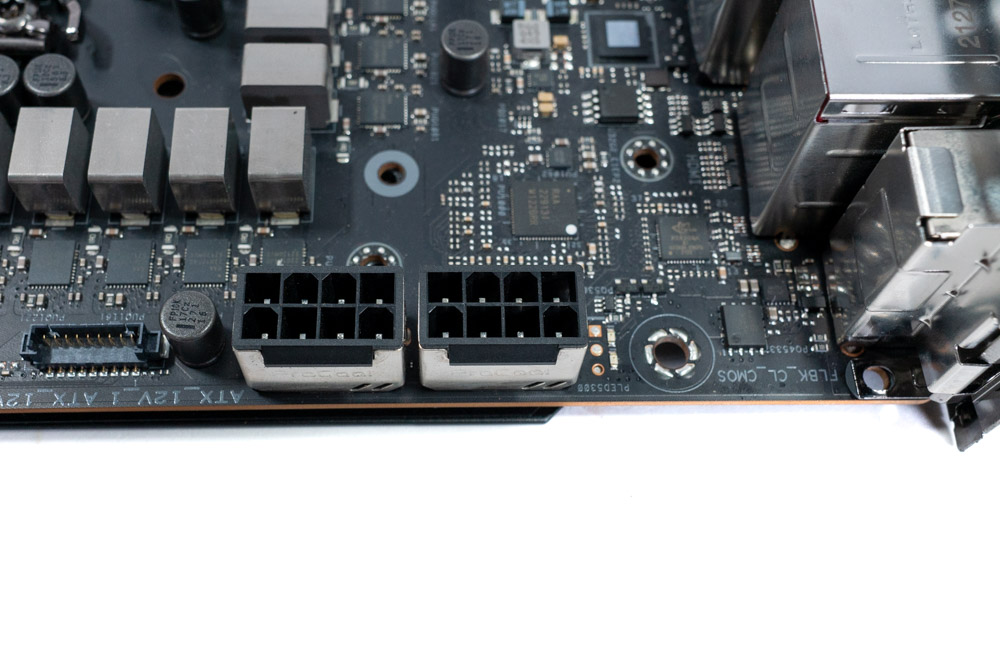
This motherboard also features dual 8-pin EPS connectors to make sure power delivery is never an issue when it comes to overclocking the CPU.
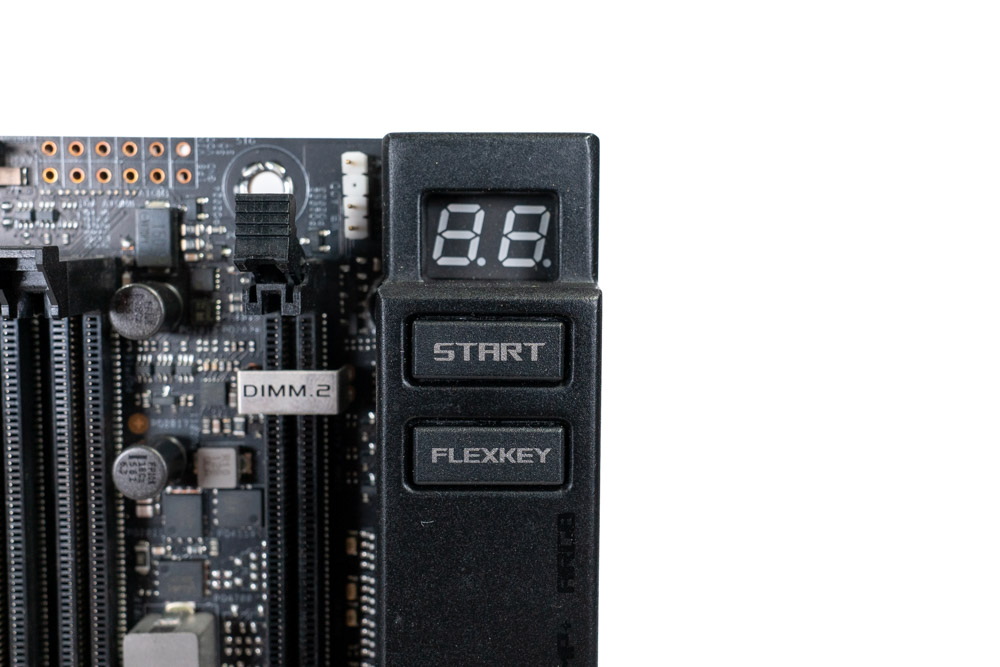
The standard debug POST is included for troubleshooting via code output. Below that is a Start button and a FlexKey. This FlexKey can be configured in the BIOS to be the Restart, Safe Boot or Aura On/Off button. By default it is set as a Restart button.
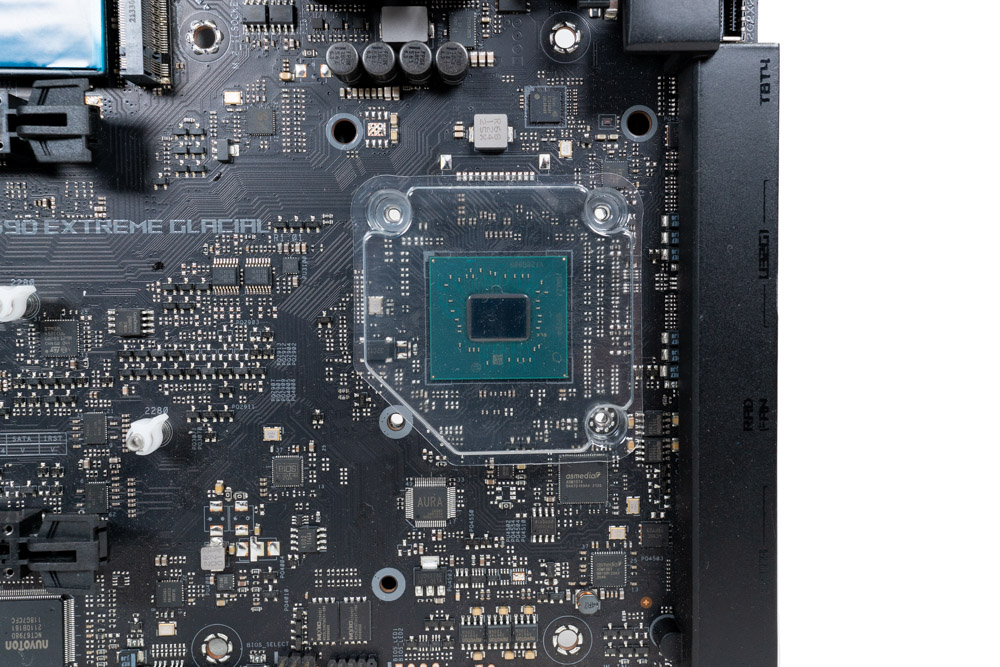
The Z690 chipset (PCH) before it is covered and actively cooled by the monoblock.
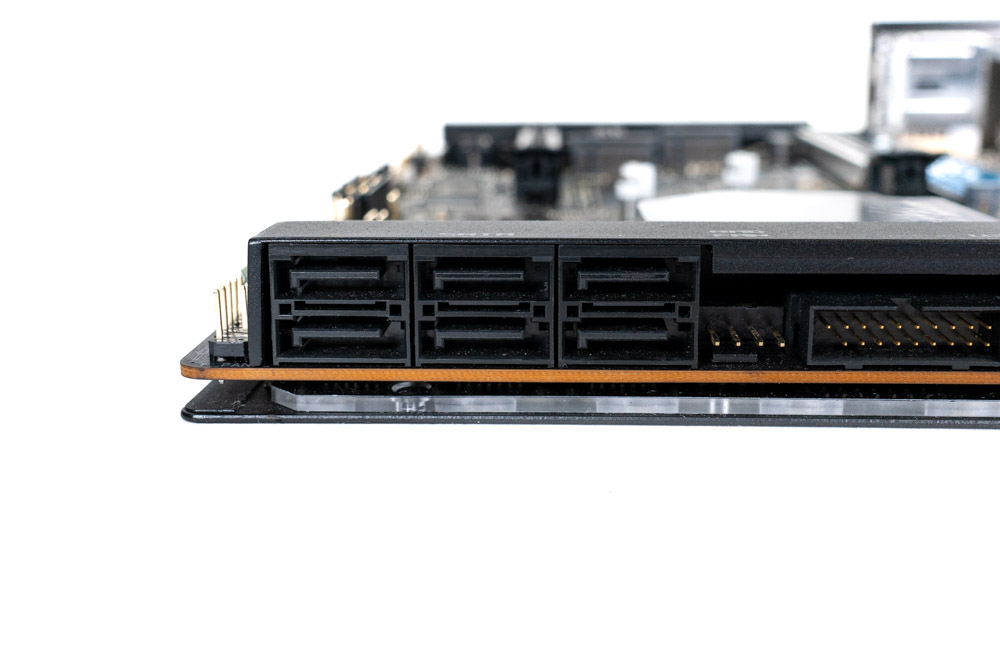
The board has a total of six SATA 6 Gb/s ports on the side, angled 90 degrees from the board. These ports draw their bandwidth from the Z690 chipset.
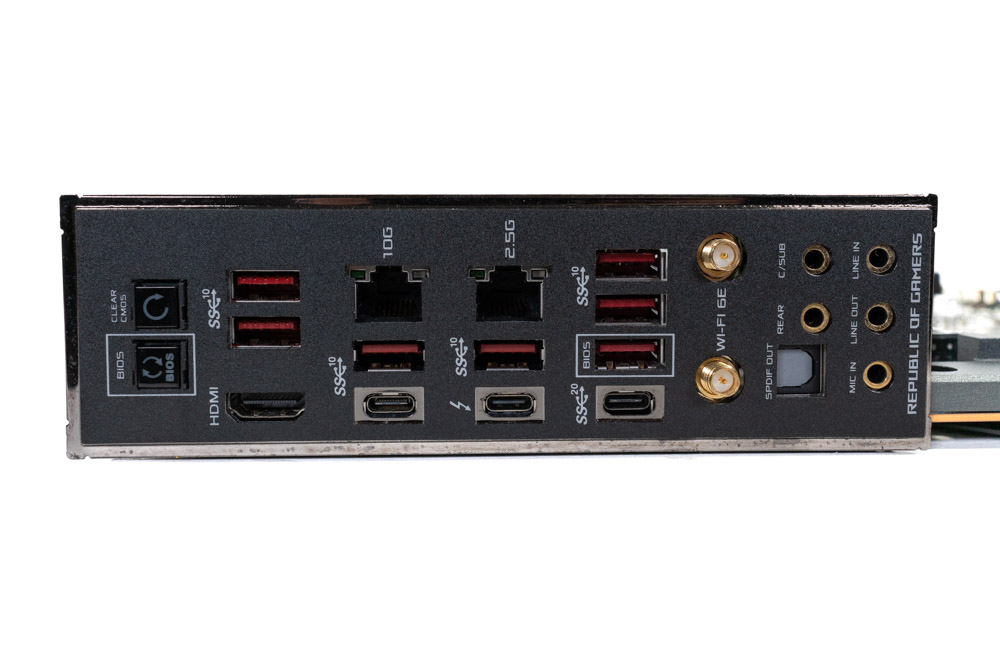
As expected from any flagship motherboard, ASUS has gone all out in terms of external connectivity options. The only thing missing would be the PS/2 port, which has limited use-case in modern computers and is unlikely to be missed.
Starting off, the rear section has seven USB 3.2 Gen2 Type-A 10 Gbps ports. This should provide enough USB connectivity for the average user. If that isn't enough, an additional 20 Gbps and 10 Gbps USB-C port is present. A single Thunderbolt 4 port (40 Gbps) can be used as a USB hub and 10 Gb LAN brings even more high-speed connectivity across the network. A few things are less obvious, like the Clear CMOS button and BIOS Flashback USB port (labeled "BIOS") which is found here as well. Overall ASUS has done a great job in providing enough connectivity options for every type of user.
- 1x Thunderbolt 4 USB Type-C port
- 1x USB 3.2 Gen 2x2 port (1x USB Type-C)
- 8x USB 3.2 Gen 2 ports (7x Type-A + 1x USB Type-C)
- 1x HDMI port
- 1x ASUS Wi-Fi Module
- 1x Intel 2.5Gb Ethernet port
- 1x Marvell AQtion 10 Gb Ethernet port
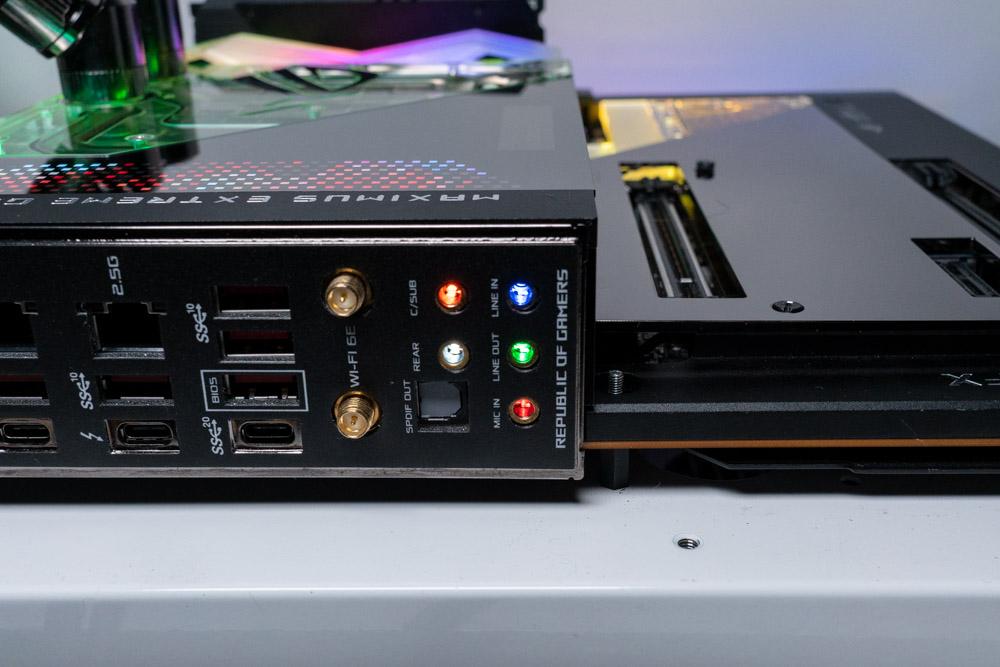
- 5x LED-illuminated audio jacks
- 1x Optical S/PDIF out port
- 1x BIOS FlashBack button
- 1x Clear CMOS button
Apr 15th, 2025 17:32 EDT
change timezone
Latest GPU Drivers
New Forum Posts
- Technical Issues - TPU Main Site & Forum (2025) (96)
- Flash another RTX 4060 vBIOS to get zero rpm fan support (6)
- Regarding fan noise (44)
- The TPU UK Clubhouse (26101)
- TPU's Nostalgic Hardware Club (20249)
- Setting 4k sector size on NVMe SSDs: does performance actually change? (69)
- What are you playing? (23382)
- Windows 11 fresh install to do list (6)
- SK hynix A-Die (Overclocking thread) only for RYZEN AM5 users (42)
- SSD becomes read only and cannot boot, is it dead? (18)
Popular Reviews
- G.SKILL Trident Z5 NEO RGB DDR5-6000 32 GB CL26 Review - AMD EXPO
- ASUS GeForce RTX 5080 TUF OC Review
- Thermaltake TR100 Review
- The Last Of Us Part 2 Performance Benchmark Review - 30 GPUs Compared
- DAREU A950 Wing Review
- TerraMaster F8 SSD Plus Review - Compact and quiet
- Sapphire Radeon RX 9070 XT Pulse Review
- Zotac GeForce RTX 5070 Ti Amp Extreme Review
- Sapphire Radeon RX 9070 XT Nitro+ Review - Beating NVIDIA
- Upcoming Hardware Launches 2025 (Updated Apr 2025)
Controversial News Posts
- NVIDIA GeForce RTX 5060 Ti 16 GB SKU Likely Launching at $499, According to Supply Chain Leak (182)
- NVIDIA Sends MSRP Numbers to Partners: GeForce RTX 5060 Ti 8 GB at $379, RTX 5060 Ti 16 GB at $429 (124)
- Nintendo Confirms That Switch 2 Joy-Cons Will Not Utilize Hall Effect Stick Technology (105)
- Over 200,000 Sold Radeon RX 9070 and RX 9070 XT GPUs? AMD Says No Number was Given (100)
- Nintendo Switch 2 Launches June 5 at $449.99 with New Hardware and Games (99)
- Sony Increases the PS5 Pricing in EMEA and ANZ by Around 25 Percent (85)
- NVIDIA PhysX and Flow Made Fully Open-Source (77)
- NVIDIA Pushes GeForce RTX 5060 Ti Launch to Mid-April, RTX 5060 to May (77)