 8
8
BitFenix Prodigy M Review
Assembly & Finished Looks »A Closer Look - Inside


You can clearly see another bracket for hard drives along the interior's side once the main side panel has been removed. Four screws that need to removed for assembly to take place attach the bracket to the frame. Once gone, you have a clear path to the motherboard tray. A large opening in that tray allows for easy access to the CPU cooler's underside, but there is unfortunately no room to hide cables behind the tray.
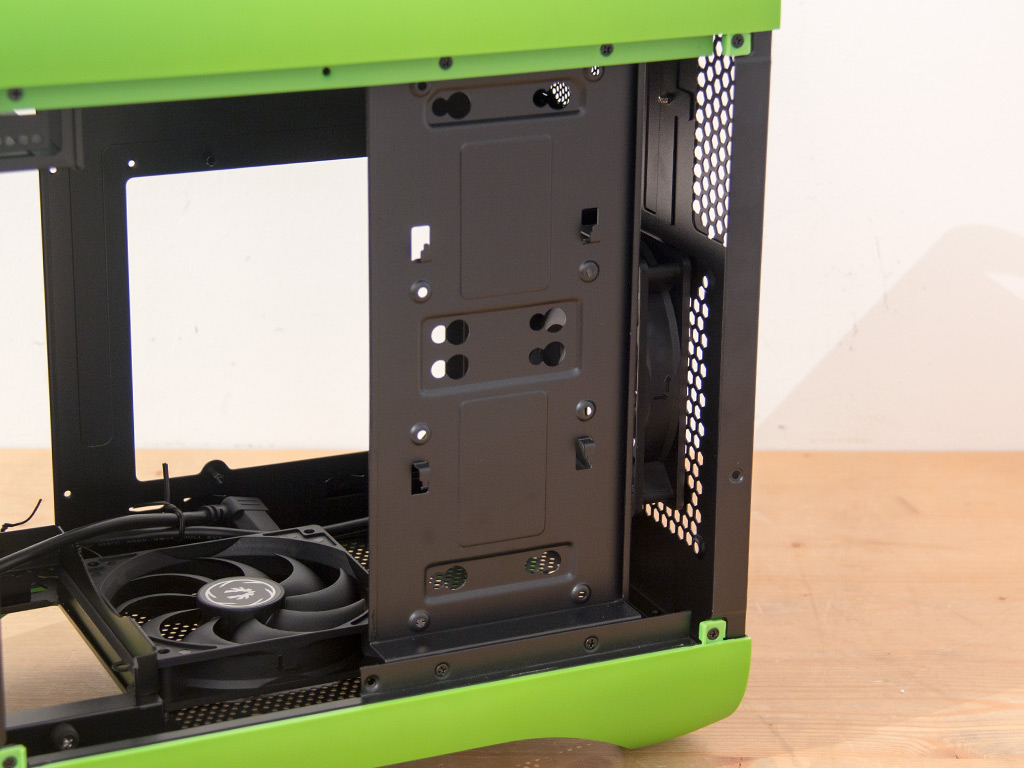

The hard drive panel may hold three 2.5" and two 3.5" drives. The interior's inverted nature makes the main panel the one with the I/O and hard-drive cages, so you have to connect the separate leads as you close up the case. As the Prodigy M uses the same side panel as the Prodigy, you will also find two spots for 2.5" HDDs here.


There is a large air vent with several fan-mounting possibilities in the front, though the PSU, once installed, will block it off. The very top has the single 5.25" drive bay, which you can also get to from outside. The Phenom M, for example, offers the same bay, but without the ability to get to it from outside.
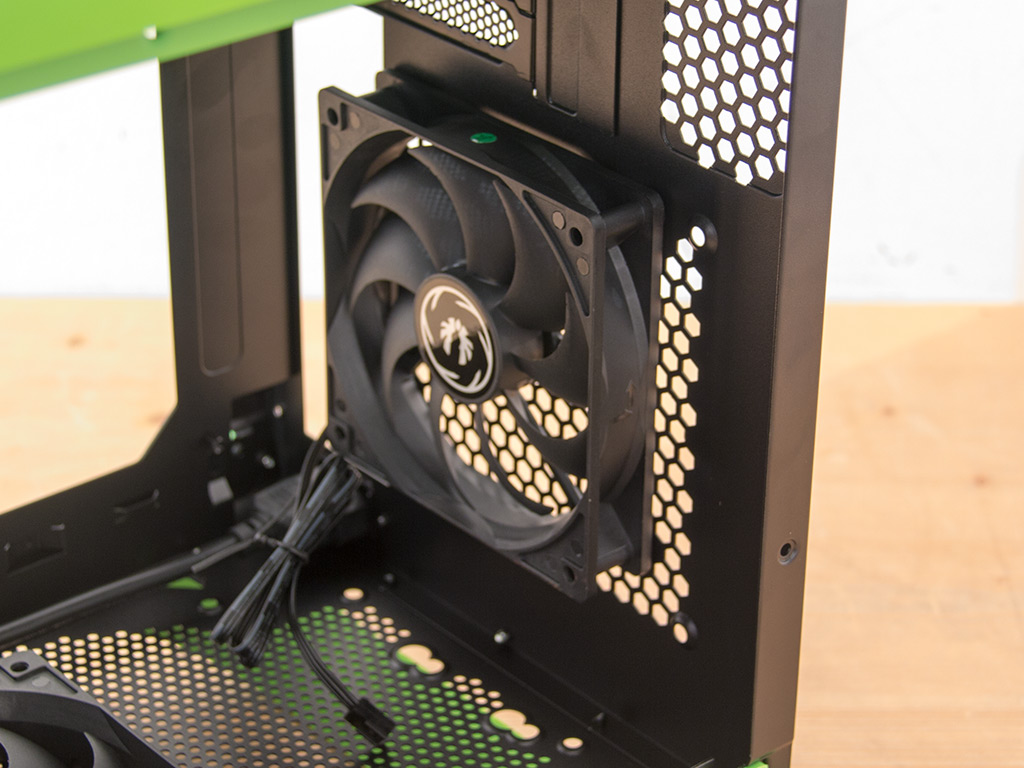
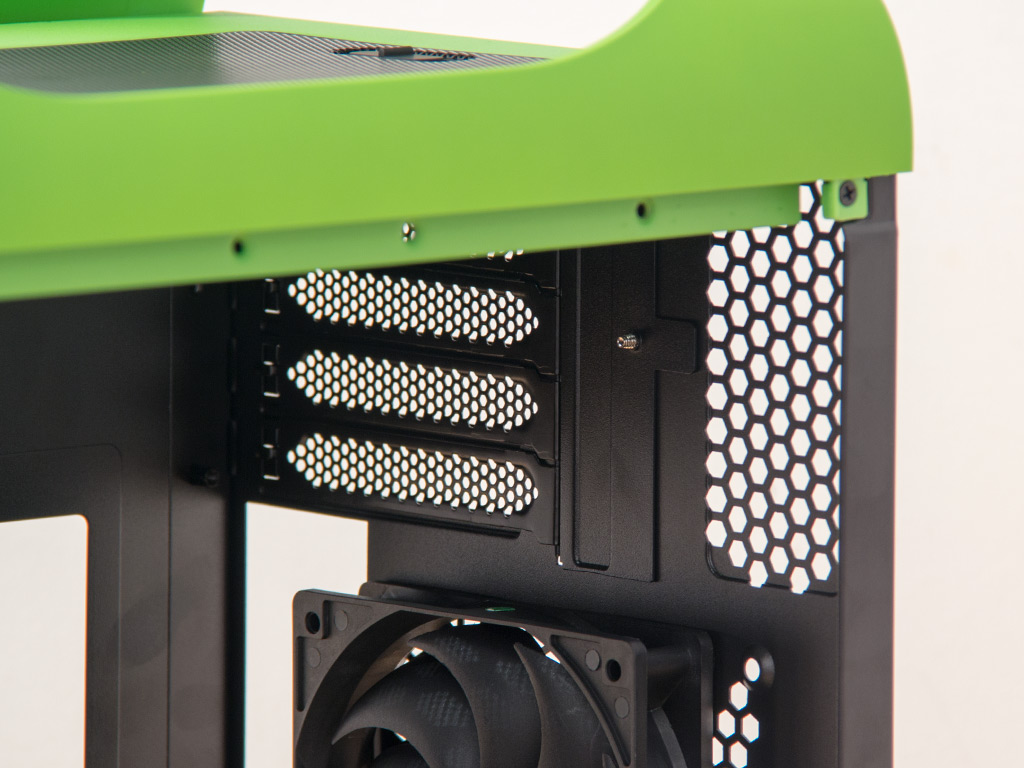
There is nothing out of the ordinary in the rear, aside from the arrangement. The exhaust fan in the back is of the retail BitFenix Spectre variety and utilizes a 3-pin connector. Above that are the five expansion slots, and that is pretty much it here.
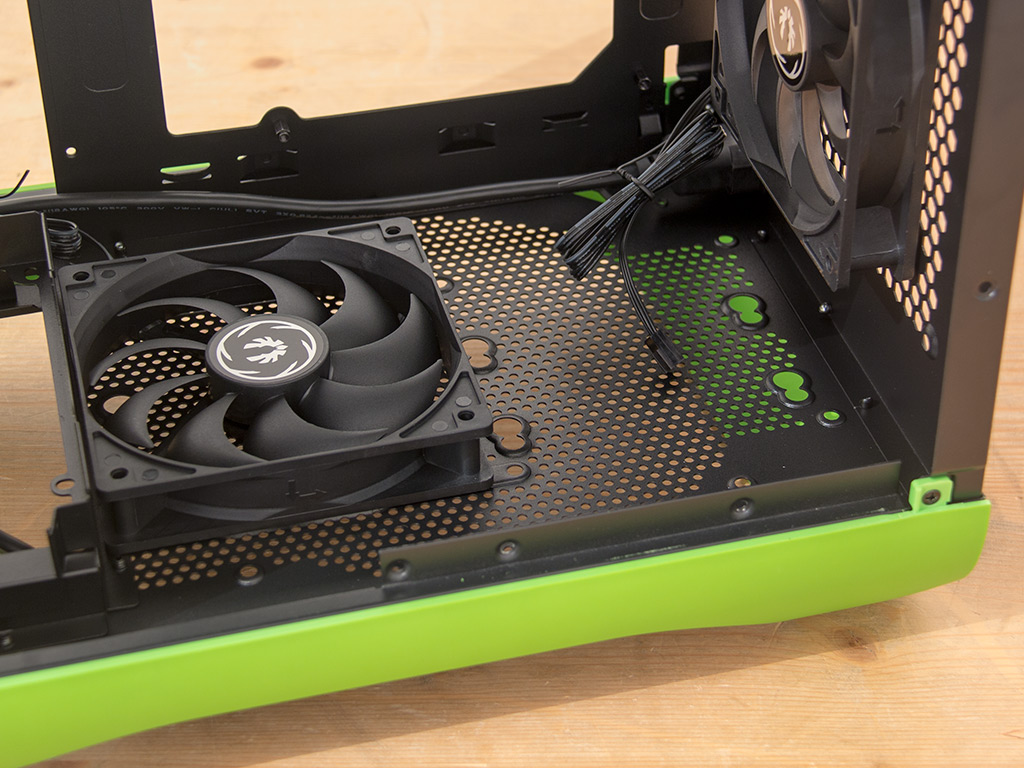
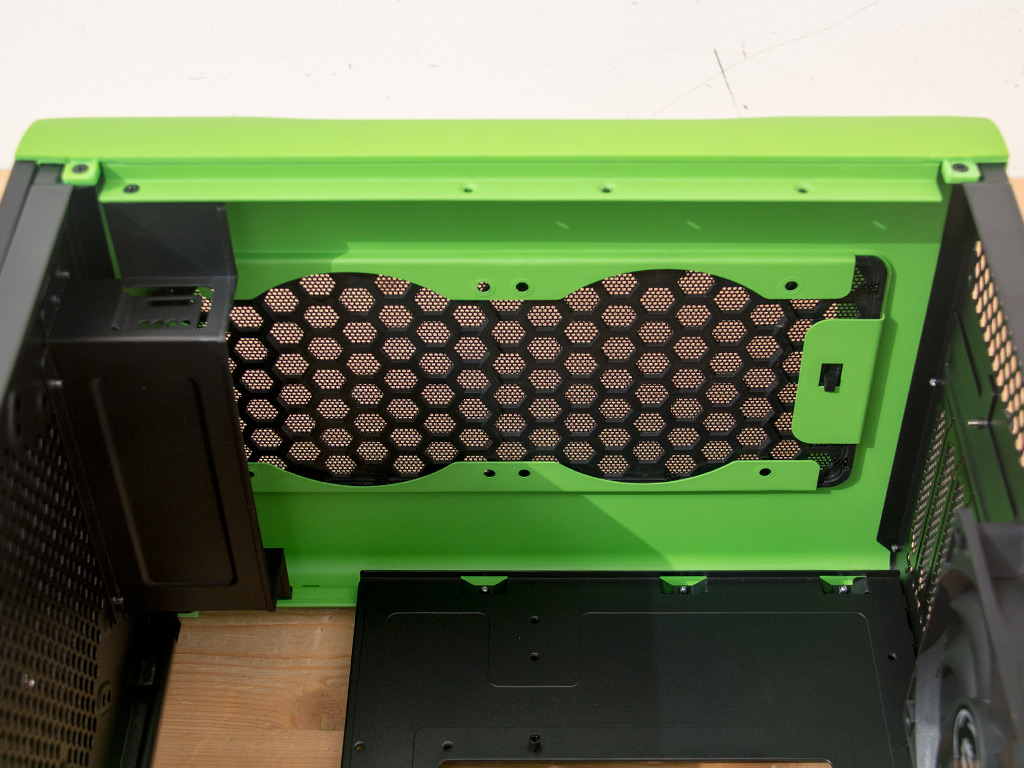
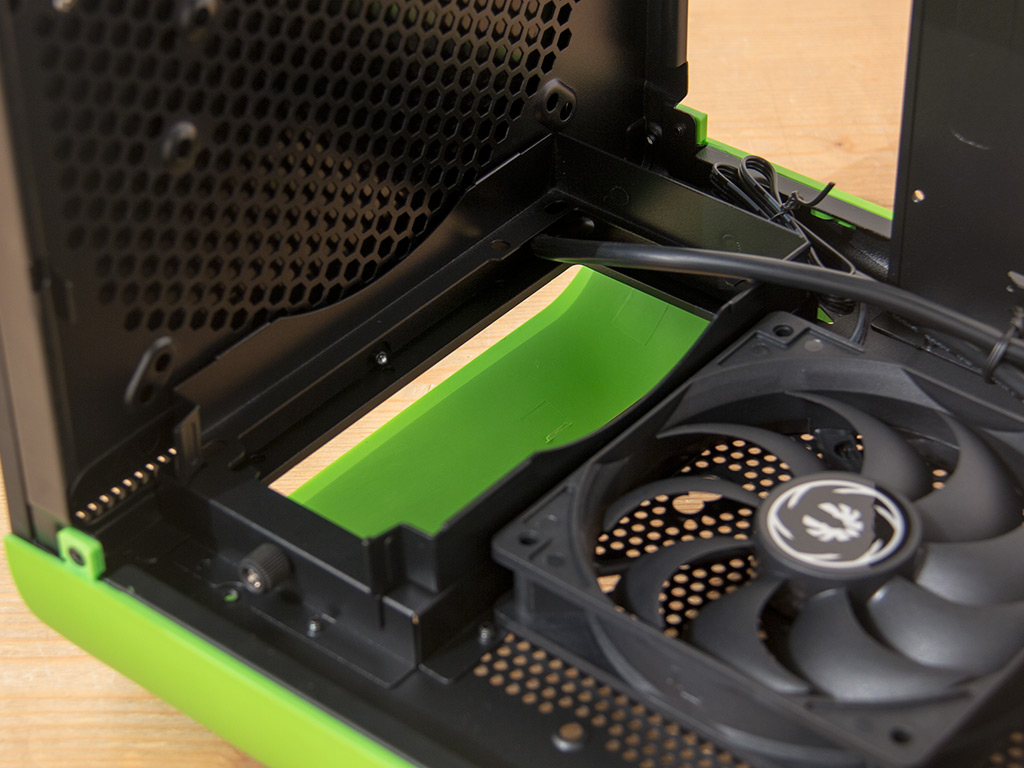
You will find a 120 mm fan on the floor. While it will certainly help with airflow, it will also suck in dust, and you will have to remove the solid plastic cover to really use it properly; there is even a spot for a 3.5" hard drive. You may install either two fans or go for a liquid-cooling setup of up to 240 mm in the top. However, doing so will block off your optical drive bay.

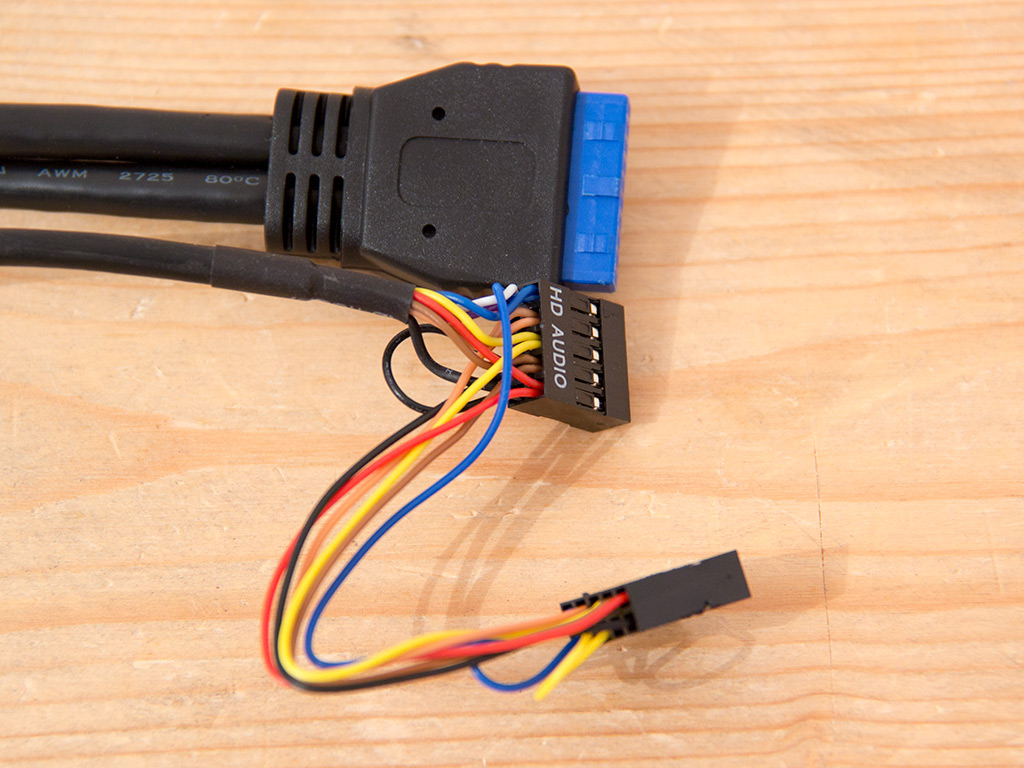
Before diving into the assembly process, let us take a quick look at the main cables within the Phenom Micro-ATX. There are the USB 3.0 and audio ones, both sleeved black to go with the color of the chassis, and the usual case cables for the Power and Reset buttons and LEDs. You will also find a special, angled PSU plug with which to route the PSU connector to the back of the case.
Apr 18th, 2025 23:48 EDT
change timezone
Latest GPU Drivers
New Forum Posts
- RTX5000 Series Owners Club (182)
- AsRock 9070 XT Taichi BIOS confusion (2)
- Dangerous RAM temps? (4)
- New PC: Instability and unexpected shutdowns when gaming. (6)
- Can Intel recover in DYI market anytime soon? (22)
- Need thoughts on a quiet PC that's great for rendering, video editing and office work... (1)
- 5070ti overclock...what are your settings? (11)
- NVidia 576.02 breaks GPU temperature and rpm sensor read out and use for some applications (6)
- How to relubricate a fan and/or service a troublesome/noisy fan. (256)
- SSD becomes read only and cannot boot, is it dead? (19)
Popular Reviews
- ASUS GeForce RTX 5060 Ti TUF OC 16 GB Review
- NVIDIA GeForce RTX 5060 Ti PCI-Express x8 Scaling
- Palit GeForce RTX 5060 Ti Infinity 3 16 GB Review
- Teevolution Terra Pro Review
- ASUS GeForce RTX 5060 Ti Prime OC 16 GB Review
- MSI GeForce RTX 5060 Ti Gaming OC 16 GB Review
- Zotac GeForce RTX 5060 Ti AMP 16 GB Review
- MSI GeForce RTX 5060 Ti Gaming Trio OC 16 GB Review
- G.SKILL Trident Z5 NEO RGB DDR5-6000 32 GB CL26 Review - AMD EXPO
- ASRock X870E Taichi Lite Review
Controversial News Posts
- NVIDIA GeForce RTX 5060 Ti 16 GB SKU Likely Launching at $499, According to Supply Chain Leak (182)
- NVIDIA Sends MSRP Numbers to Partners: GeForce RTX 5060 Ti 8 GB at $379, RTX 5060 Ti 16 GB at $429 (127)
- Nintendo Confirms That Switch 2 Joy-Cons Will Not Utilize Hall Effect Stick Technology (105)
- NVIDIA Launches GeForce RTX 5060 Series, Beginning with RTX 5060 Ti This Week (103)
- Over 200,000 Sold Radeon RX 9070 and RX 9070 XT GPUs? AMD Says No Number was Given (100)
- Nintendo Switch 2 Launches June 5 at $449.99 with New Hardware and Games (99)
- Sony Increases the PS5 Pricing in EMEA and ANZ by Around 25 Percent (85)
- NVIDIA PhysX and Flow Made Fully Open-Source (77)