 6
6
Coolink Chipchilla Chipset Cooler Review
(6 Comments) »Introduction

I would like to thank Coolink for providing the review sample.
This is what Coolink has to say about themselves on their website:
"Coolink is a brand of the Kolink International Corporation and stands for an effective conjunction of no-frills performance, excellent quality and attractive pricing. Coolink - the direct link to affordable high-end cooling!
About Kolink
Kolink International Corporation is a cooling specialist established in 1996 and well known among industry insiders. Throughout the years, Kolink designed and manufactured many top-performing heat-sinks under various brand names that succeeded in international markets. An experienced R&D team and ultra-modern production plants in Taiwan ensure continuous progress, efficient manufacturing conditions and strict quality standards.
About Coolink & Coolink-Europe
Kolink's retail brand Coolink stands for an effective conjunction of no-frills performance, excellent quality and attractive pricing. While Coolink held a strong presence in the Asian market ever since the late 90ies, it was not until 2005 that the brand was introduced to the European market on a large scale. After the launch of Coolink-Europe.com in late 2005, Coolink quickly became a well recognized brand for high-quality cooling components in Europe too. "
Features
- Large 6mm dual-heatpipe for maximum cooling performance
- Quiet 60mm fan for faster heat dissipation at minimum noise levels (2200RPM, 19dB)
- Asymmetrical design ensures optimal compatibility
- Flexible, easy-to-use mounting system for Intel and AMD mainboards with push-pins and mounting-hooks
Height (without fan): 94mm Width (without fan): 60mm Depth (without fan): 32mm Height (with fan): 94mm Width (with fan): 60mm Depth (with fan): 37mm Weight (with fan): 130g Material: Copper (base and heat-pipes), aluminum (cooling fins) Compatibility: Push-Pins & Mounting-Hooks Fan size: 60x60x10mm Rotational Speed (+/- 10%): 2200rpm Acoustical Noise: 19dB(A) Scope of Delivery: Cooler, Fan, Mounting Parts, Thermal Paste, Installation Manual Warranty: 3 Years
Packaging & Contents
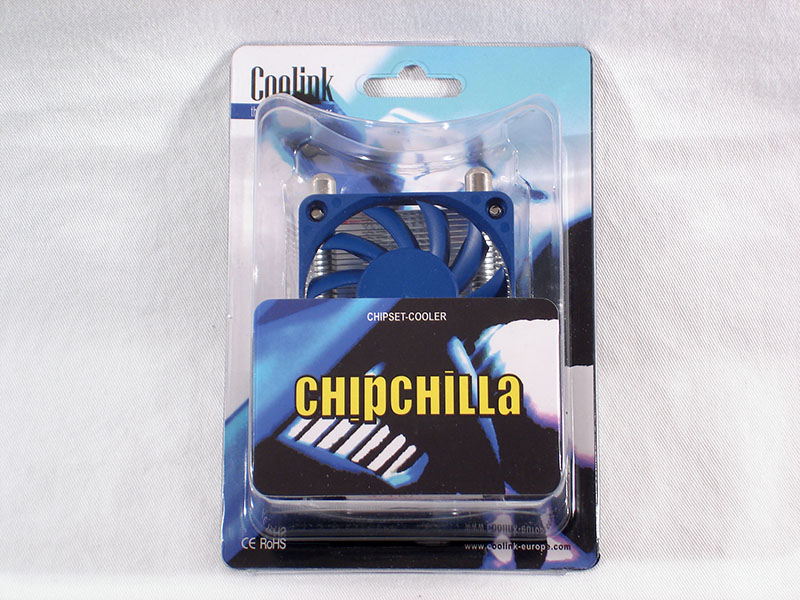
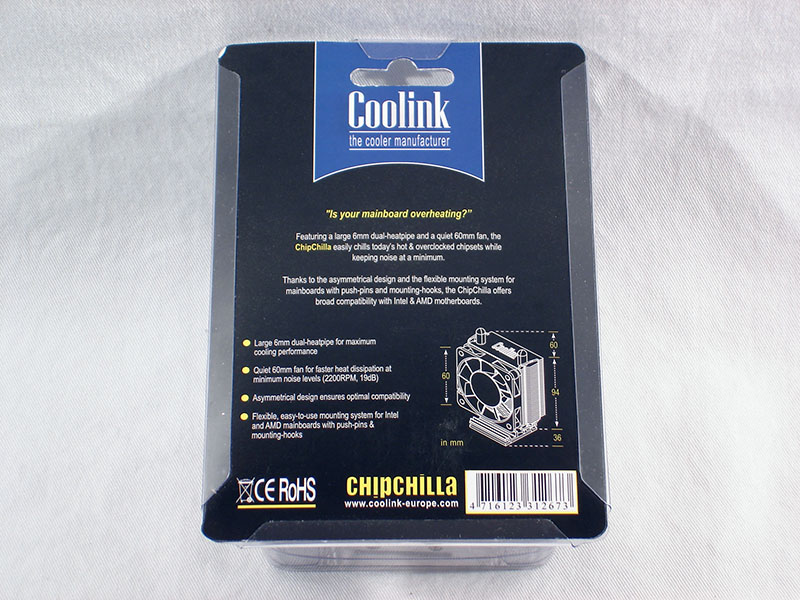
The Chipchilla is shipped in a small plastic package with a light cardboard backing. In bright yellow lettering is the catchy name Chipchilla and other markings for the company name and website. On the back of the package you will find some features and dimensions for the Chipchilla. Since the package is clear you can get a great look at what you are buying.
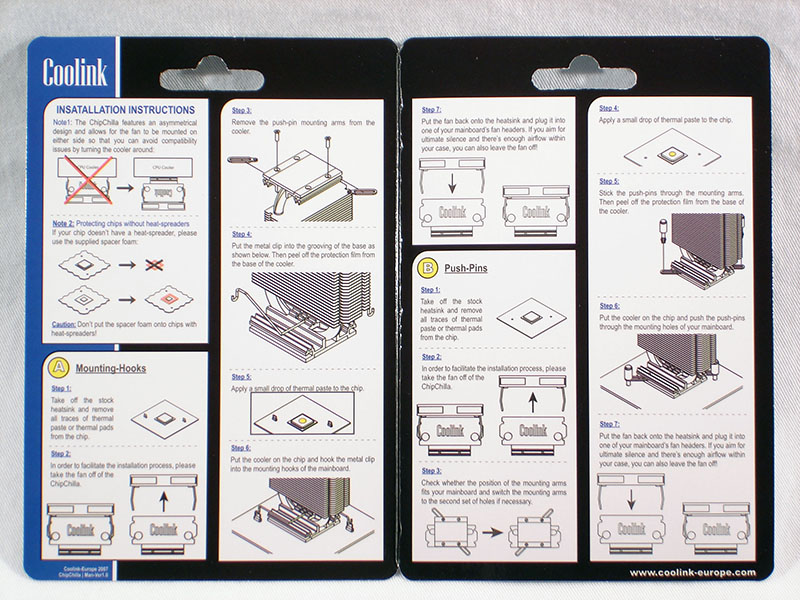
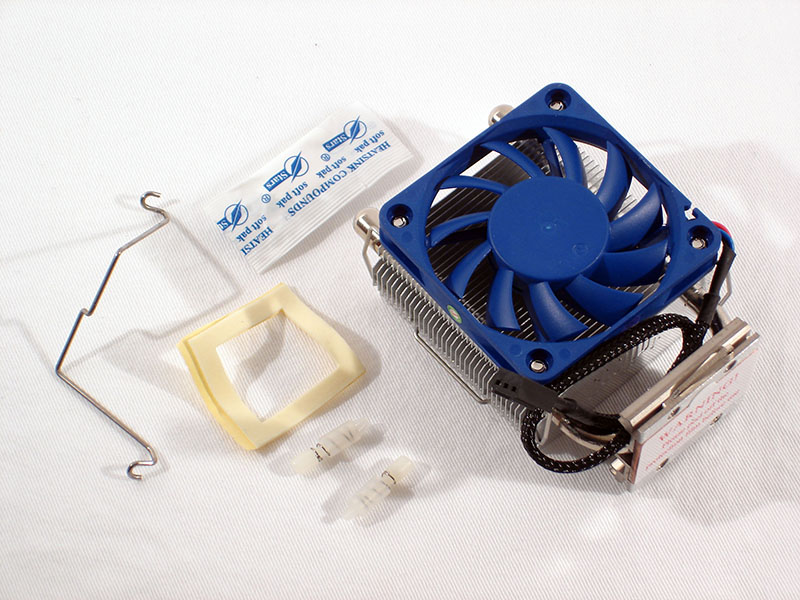
When removing the backing if you were to take a moment to open it up you will find instructions to help you along with installing the cooler with either the mounting hooks or the push-pins onto chipsets with or without heat spreaders. In the package you will receive along with the cooler a set of push-pins, a foam spacer, and some thermal grease.
A Closer Look

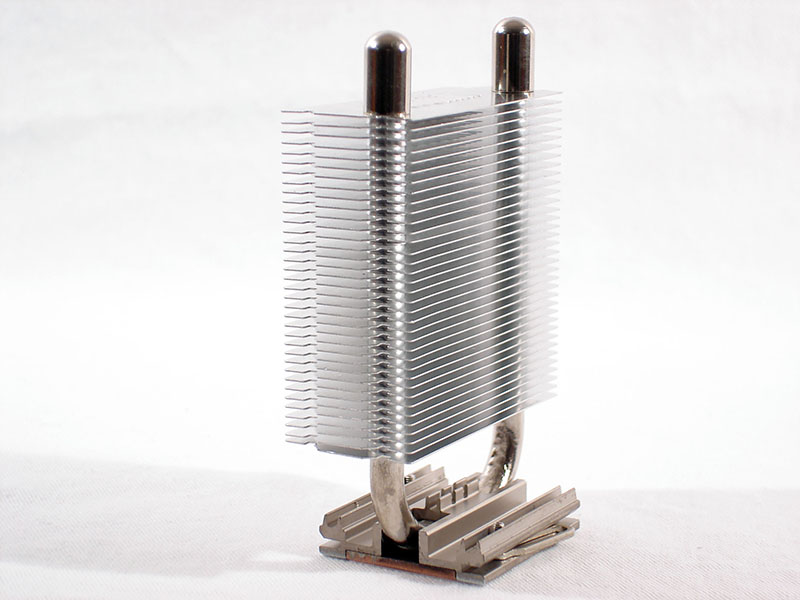

Right away I notice how light in weight the cooler is. This is very good in the fact that it wont put any more tension on your chipset than your existing cooler. The Chipchilla has a very clean and simple look to it. Although it looks to be completely aluminum the two heat pipes are actually copper along with the base. There are thirty-six aluminum fins evenly spaced on this cooler. This is pretty impressive given the small size and should make a difference in the cooling ability.

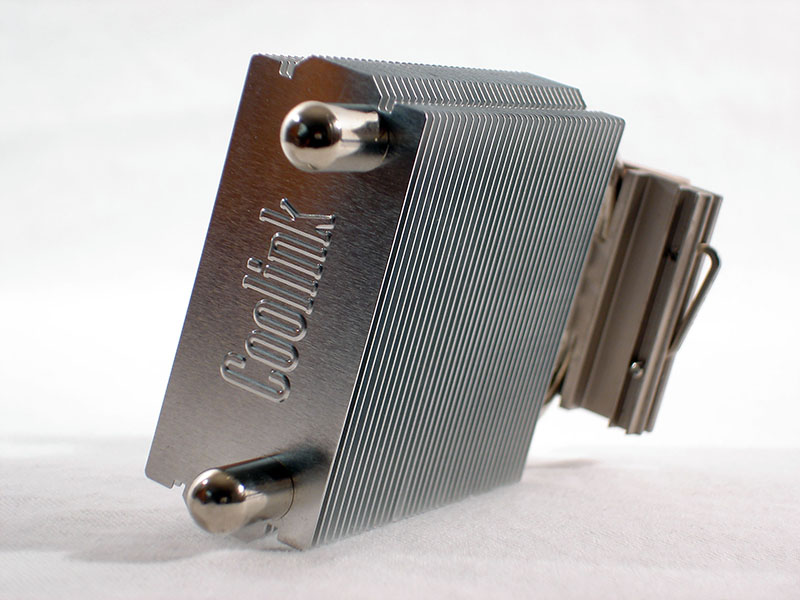
While the base is of copper construction the mounting portion of the base is aluminum. Here you can get a good look at the mounting system when using the push-pins in which case we will be doing today. Notice that there are four screw holes in the base so that you may switch the location of the arms when mounting if need be. The fact that the arms can swivel and have elongated holes in them was great foresight on Coolink's part. This will aid in the many different mounting conditions that are inevitable and give the user a couple of different options for mounting. The ends of the heat pipes have very shiny and smooth solid cap on them which is a pleasing aesthetic change from other heatpipe coolers. And of course there is the obligatory company logo on the top fin of the cooler.
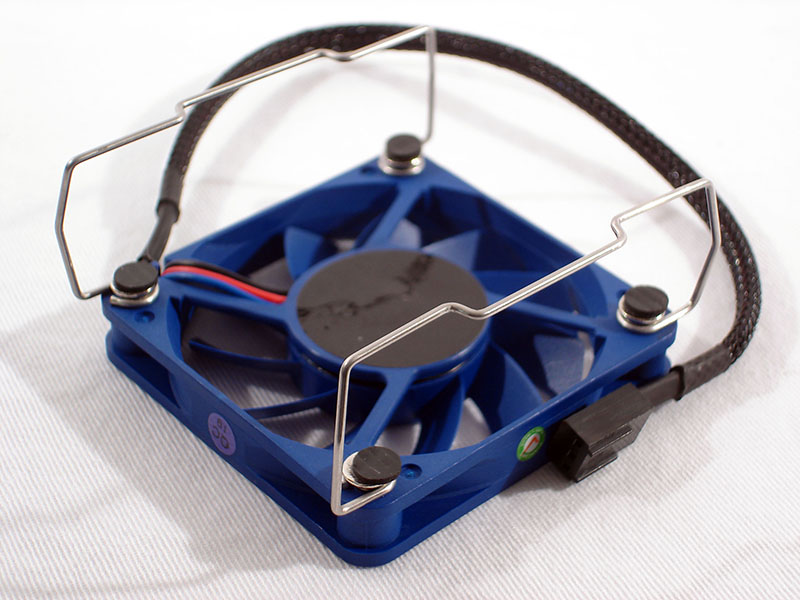

The 60mm fan that comes installed on the Chipchilla is blue in color and is attached to the fins by metal clips that are screwed into the back of the fan itself. Covering those said screws are black rubber pads. These pads sit in between the fins on the cooler and the fan. They will help absorb some of the vibration and overall help reduce noise. Notice also that the cooler is asymmetrical and that you may install the fan on either side of the cooler which can speed up install time.


On the base you will find a protective warning sticker which basically states the obvious. Once peeled off you will see the copper base which still has some minor marks.
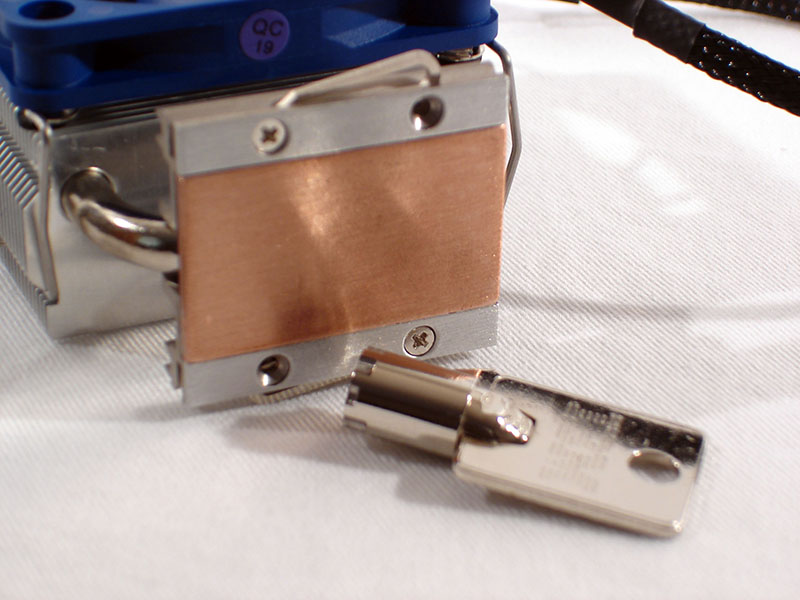

Although the base is not very reflective it feels very smooth to touch. When I gave the base the razor blade test I was pleased by just how flat it was. Only the ends were starting to roll which is understandable and not really critical. The base is wide enough that there will be plenty of spare room anyway.
Our Patreon Silver Supporters can read articles in single-page format.
Apr 19th, 2025 03:36 EDT
change timezone
Latest GPU Drivers
New Forum Posts
- Undervolt/TPL on i7-10700k (0)
- NVCleanstall loading driver versions failed (7)
- Tried installing 576.02 - installer window disappears (22)
- [Test Build] Fix for 576.02 Driver Install (0)
- HP Zbook 15 G2 GPU Upgrade (2)
- I have a dual bay pump reservoir combo question (4)
- (omg)vflash | Fully Patched nvflash from X to Ada Lovelace [v5.780] (365)
- Which 5080 graphics card? (8)
- (Some of) What I'd like to See From a Final Fantasy IX Remake (31)
- 3090 zotac Trinity Oc dead or psu weak? (41)
Popular Reviews
- ASUS GeForce RTX 5060 Ti TUF OC 16 GB Review
- NVIDIA GeForce RTX 5060 Ti PCI-Express x8 Scaling
- Palit GeForce RTX 5060 Ti Infinity 3 16 GB Review
- Teevolution Terra Pro Review
- ASUS GeForce RTX 5060 Ti Prime OC 16 GB Review
- MSI GeForce RTX 5060 Ti Gaming OC 16 GB Review
- Zotac GeForce RTX 5060 Ti AMP 16 GB Review
- ASRock X870E Taichi Lite Review
- MSI GeForce RTX 5060 Ti Gaming Trio OC 16 GB Review
- G.SKILL Trident Z5 NEO RGB DDR5-6000 32 GB CL26 Review - AMD EXPO
Controversial News Posts
- NVIDIA GeForce RTX 5060 Ti 16 GB SKU Likely Launching at $499, According to Supply Chain Leak (182)
- NVIDIA Sends MSRP Numbers to Partners: GeForce RTX 5060 Ti 8 GB at $379, RTX 5060 Ti 16 GB at $429 (127)
- Nintendo Confirms That Switch 2 Joy-Cons Will Not Utilize Hall Effect Stick Technology (105)
- NVIDIA Launches GeForce RTX 5060 Series, Beginning with RTX 5060 Ti This Week (103)
- Over 200,000 Sold Radeon RX 9070 and RX 9070 XT GPUs? AMD Says No Number was Given (100)
- Nintendo Switch 2 Launches June 5 at $449.99 with New Hardware and Games (99)
- Sony Increases the PS5 Pricing in EMEA and ANZ by Around 25 Percent (85)
- NVIDIA PhysX and Flow Made Fully Open-Source (77)