 0
0
Kinesis Gaming Freestyle Edge Keyboard Review
Driver »Disassembly
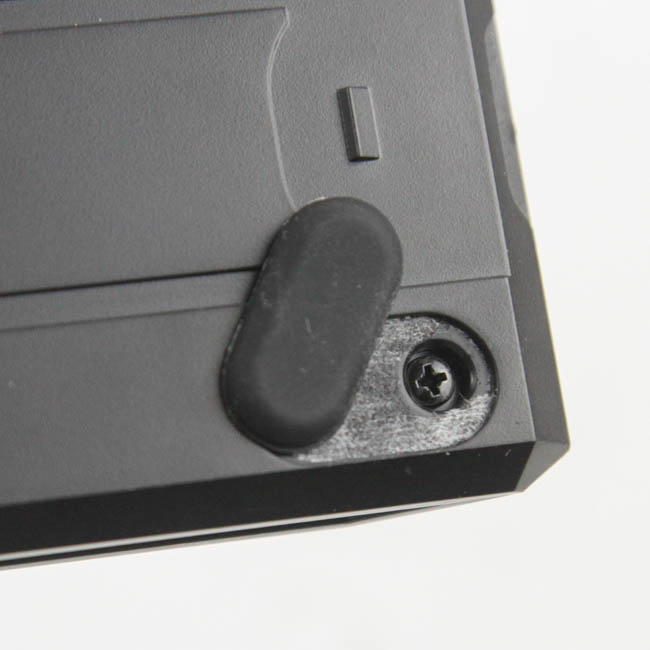

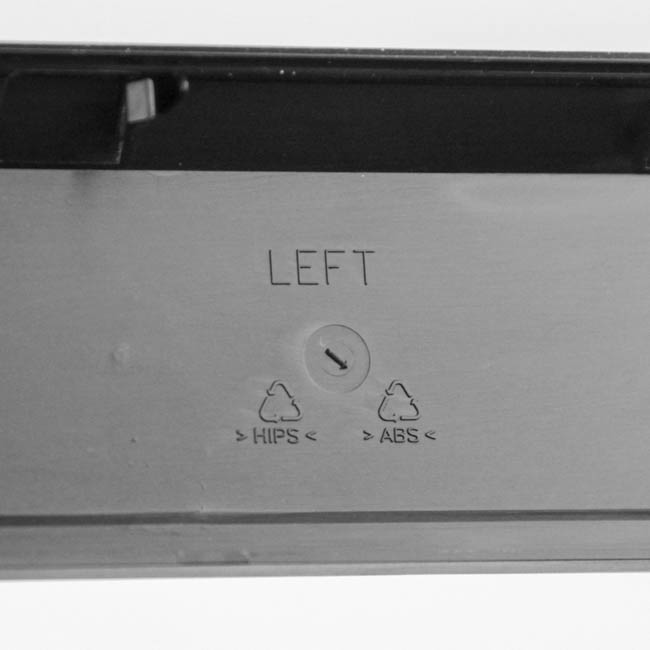
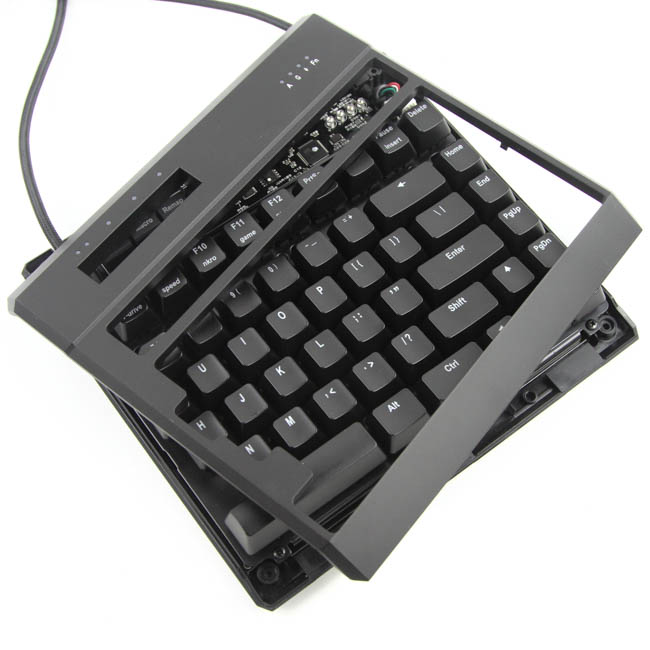
Knowing that the USB cable is coming off the right half, it is logical to assume that the microcontroller for the keyboard is also inside that half. As such, I began with the disassembly of the left half. There are four screws that need to be removed with a Phillips screwdriver—one under each rubber pad in each corner. Once done, the top plastic panel piece can easily be pried off the rest of the piece, and a closer look confirms the ABS plastic construction here. The remaining piece has the bottom case screwed into the plate/PCB via four more screws that are accessible through the front.

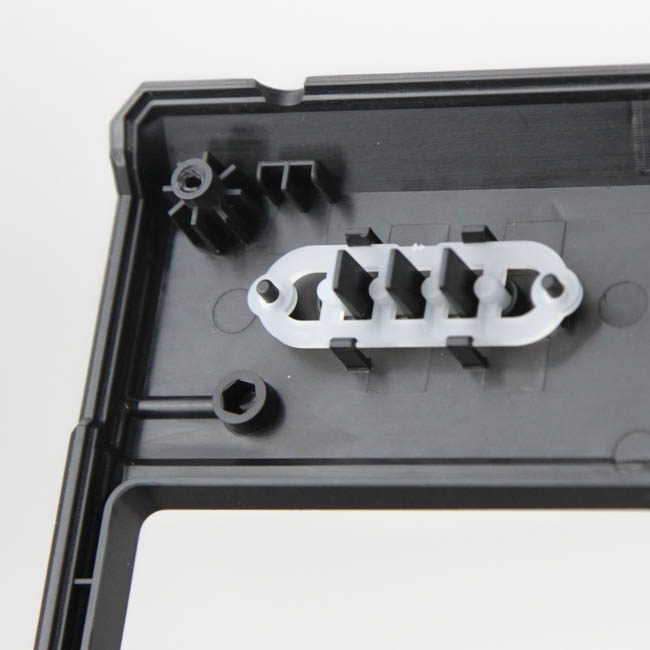
The removal of those four screws will allow for the pieces to be separated by enough to dislodge the internal link cable connector that connects the two halves. We can see now that the case contains the cutout for the extra length of the link cable at the top and is also made out of ABS plastic. The PCB has a Kinesis mark on front, and here is also where we see that the design was likely finalized in April of 2017.
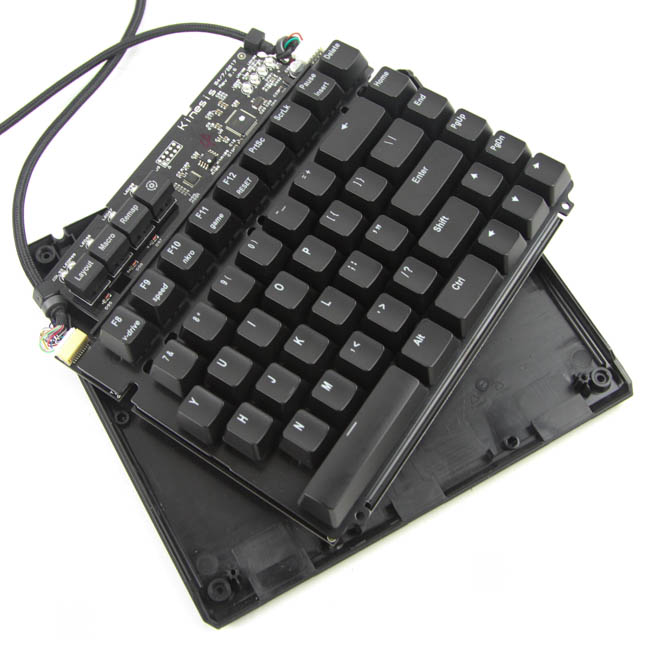
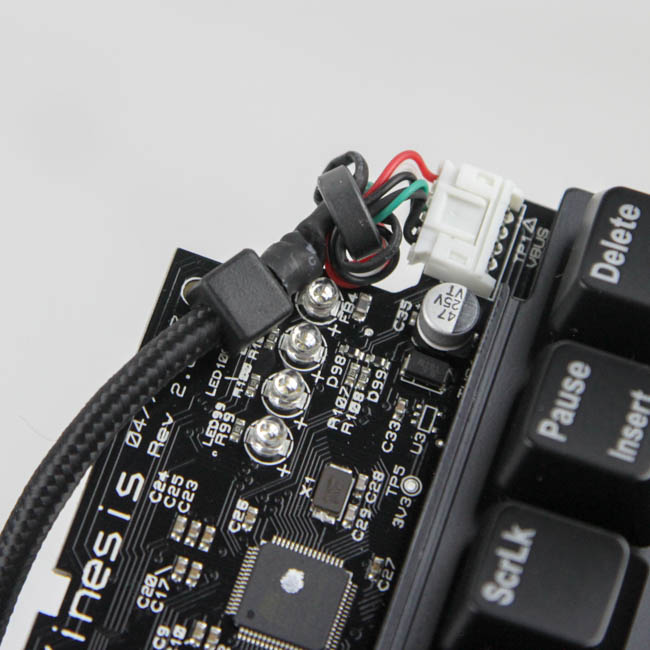
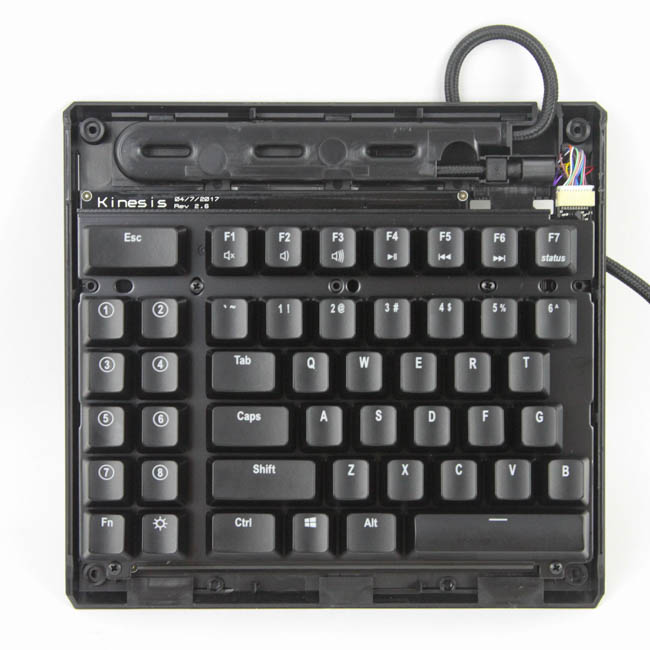
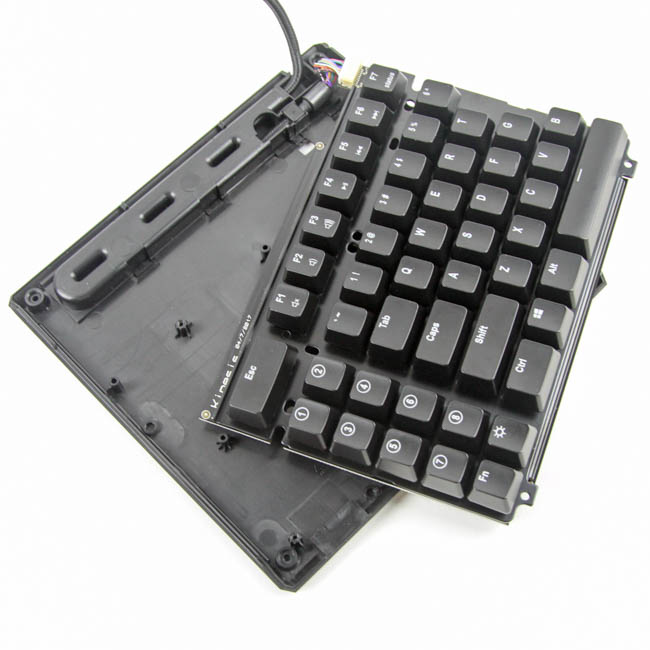
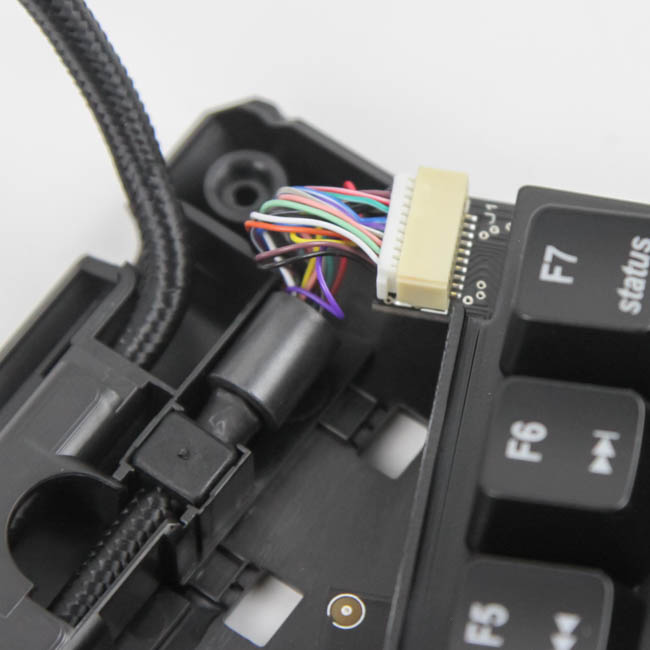
The right half is similarly held together with four screws under the rubber pads on the back, and their removal again helps with the removal of the top panel piece. Given the presence of several indicator and status LEDs here, there are diffuser pieces in the top piece. Four more screws keep the bottom case panel screwed in, as with the left half, and with those removed, we are given enough room to dislodge the link cable connector and internal USB connector on the right.

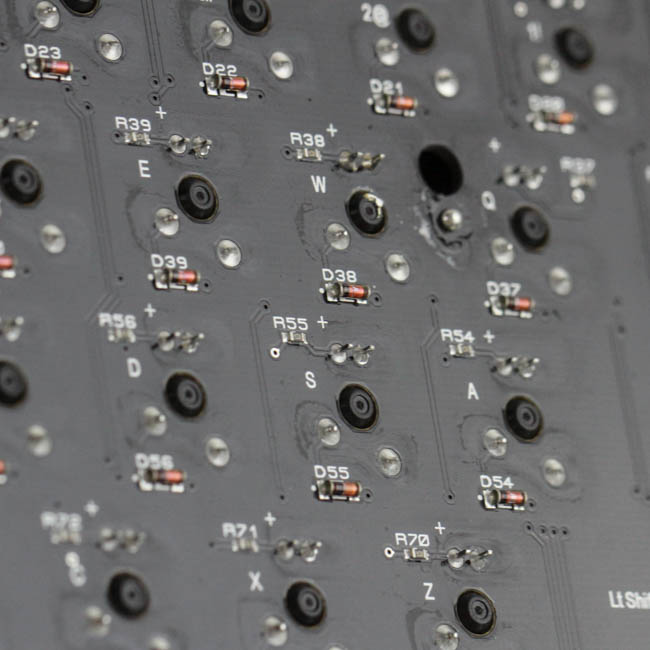
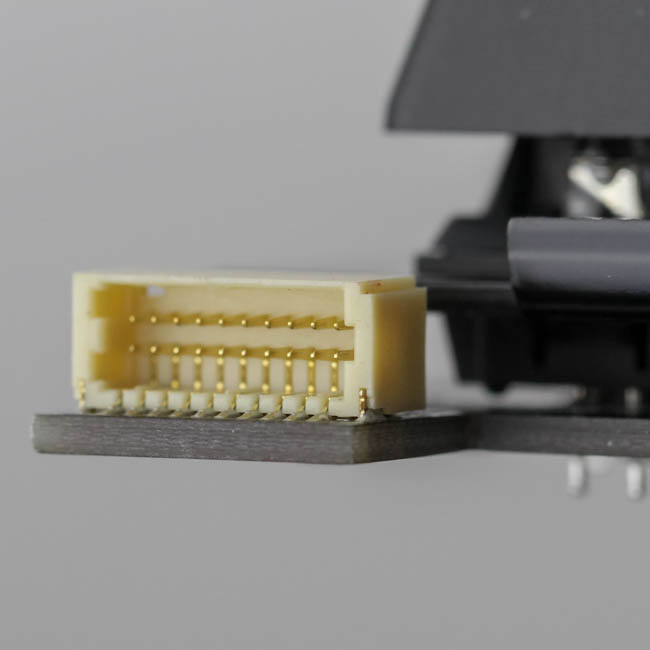
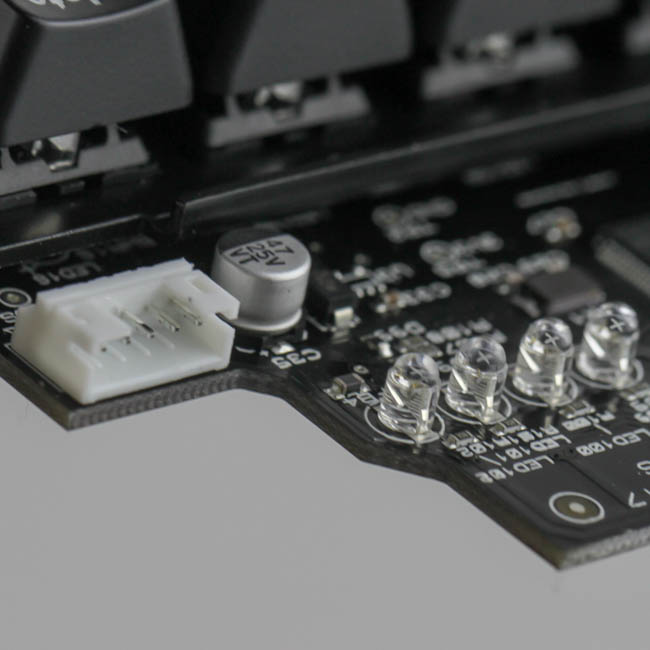
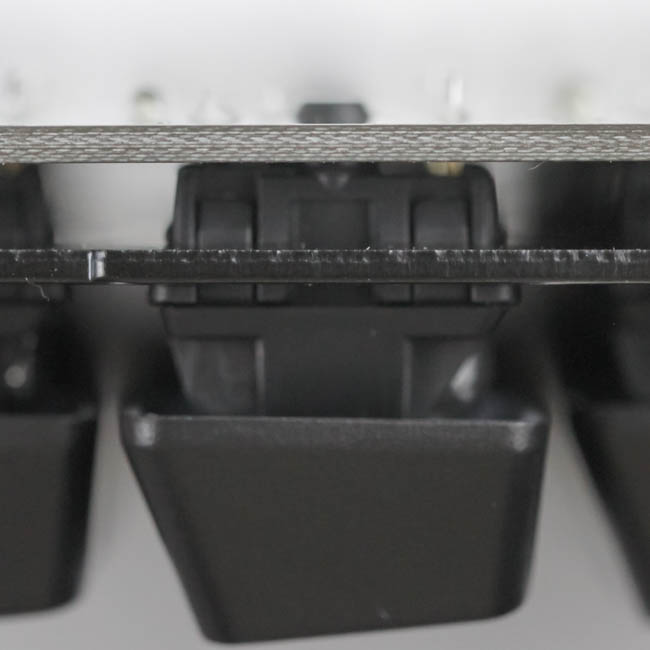
We can now better compare the two PCBs, and we can see that the right PCB is taller than the left one so as to house the control drivers. Kinesis made good use of the available space on the left half by including room for the extra length for the link cable to be tucked in here, which makes both halves similarly sized. In order to swap out the link cable for the extra long one, you will have to disassemble the keyboard accordingly. There are steel plates to add structural integrity, and we can see that the solder quality is really good throughout. A closer look at the two different connector types reveals a higher pin count for the link cable, possibly to help maintain signal strength even with the optional cable that is all of 74" long. There also appears to be a solid capacitor next to the USB connector instead of the usual, smaller tantalum capacitors we see.
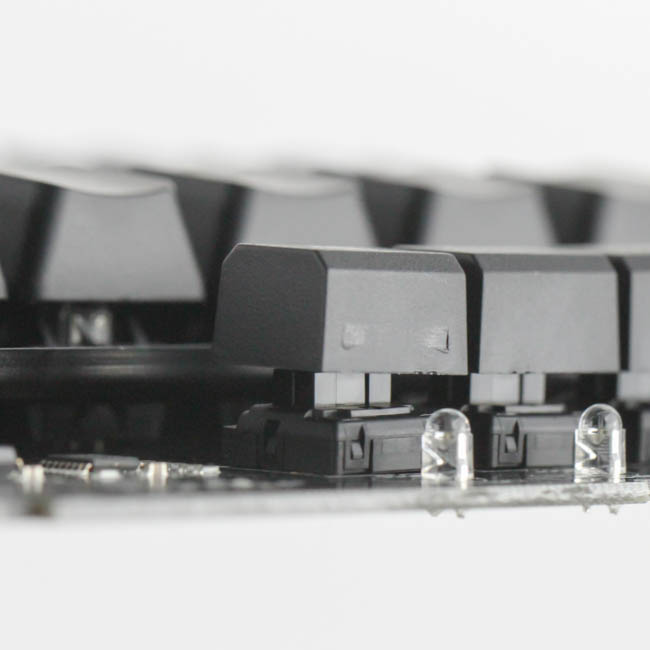

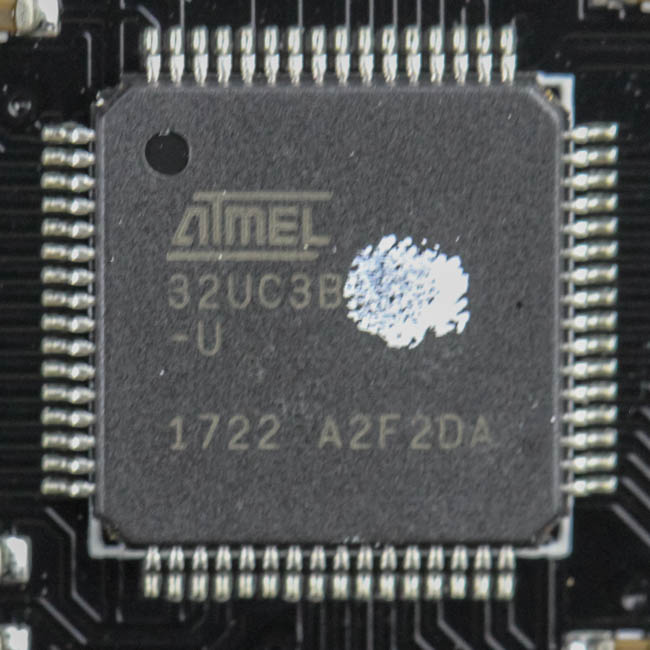
The four buttons in the top-left corner of the right half, as seen from the front, are also mechanical switches. Kinesis uses the rarely seen low-profile Cherry ML switches which are not to be confused with the new Cherry MX low-profile switches that were announced at CES this year here, and they are linear switches. The ones on my review sample were not the smoothest in use, with a scratchy feeling on their downstroke, and Kinesis got back to me about this saying that they will be implementing a solution soon. The keyboard is powered by an Atmel AT32UC3B0256 low-power 32-bit AVR RISC-based USB microcontroller. While an older driver, it is still capable, with 256 KB of flash memory and 32 KB SRAM. Kinesis used this very MCU with their previous generation of keyboards to good effect, and have added in a 4 MB dedicated flash memory module to store all the pre-programmed functions as well as, well, you will see what else on the next page.
Before we move on, be advised that disassembly will void the warranty and that TechPowerUp is not liable for any damages incurred if you decided to go ahead and do so anyway.
Feb 8th, 2025 07:32 EST
change timezone
Latest GPU Drivers
New Forum Posts
- Help choosing a GPU (2)
- RTX 3060 i5-10400 32gb ram become very slow after cleaning (12)
- Post your Monster Hunter Wilds benchmark scores (75)
- TPU's Rosetta Milestones and Daily Pie Thread (2181)
- Asus crosshair x870e hero Q Led Issue (3)
- Have you got pie today? (16582)
- Milestones (13979)
- The TPU UK Clubhouse (25687)
- WCG Daily Numbers (12757)
- Folding Pie and Milestones!! (9365)
Popular Reviews
- Kingdom Come Deliverance II Performance Benchmark Review - 35 GPUs Tested
- Spider-Man 2 Performance Benchmark Review - 35 GPUs Tested
- Formovie Cinema Edge 4K UST Laser Projector Review
- Kingdom Come: Deliverance 2 Handheld Performance Review
- ASUS ROG Harpe Ace Extreme Review
- Civilization VII Performance Benchmark Review - 35 GPUs Tested
- Corsair Frame 4000D Review
- NVIDIA GeForce RTX 5080 Founders Edition Review
- ASRock Phantom Gaming B850I Lightning Wi-Fi Review
- AMD Ryzen 7 9800X3D Review - The Best Gaming Processor
Controversial News Posts
- AMD Radeon 9070 XT Rumored to Outpace RTX 5070 Ti by Almost 15% (286)
- AMD is Taking Time with Radeon RX 9000 to Optimize Software and FSR 4 (256)
- AMD Denies Radeon RX 9070 XT $899 USD Starting Price Point Rumors (239)
- Edward Snowden Lashes Out at NVIDIA Over GeForce RTX 50 Pricing And Value (235)
- AMD Radeon RX 9070 XT & RX 9070 Custom Models In Stock at European Stores (226)
- New Leak Reveals NVIDIA RTX 5080 Is Slower Than RTX 4090 (215)
- AMD's Radeon RX 9070 Launch Faces Pricing Hurdles (175)
- AMD Radeon RX 9070 XT Tested in Cyberpunk 2077 and Black Myth: Wukong (169)