 30
30
Noctua NH-D15 Review
Finished Looks »Installation

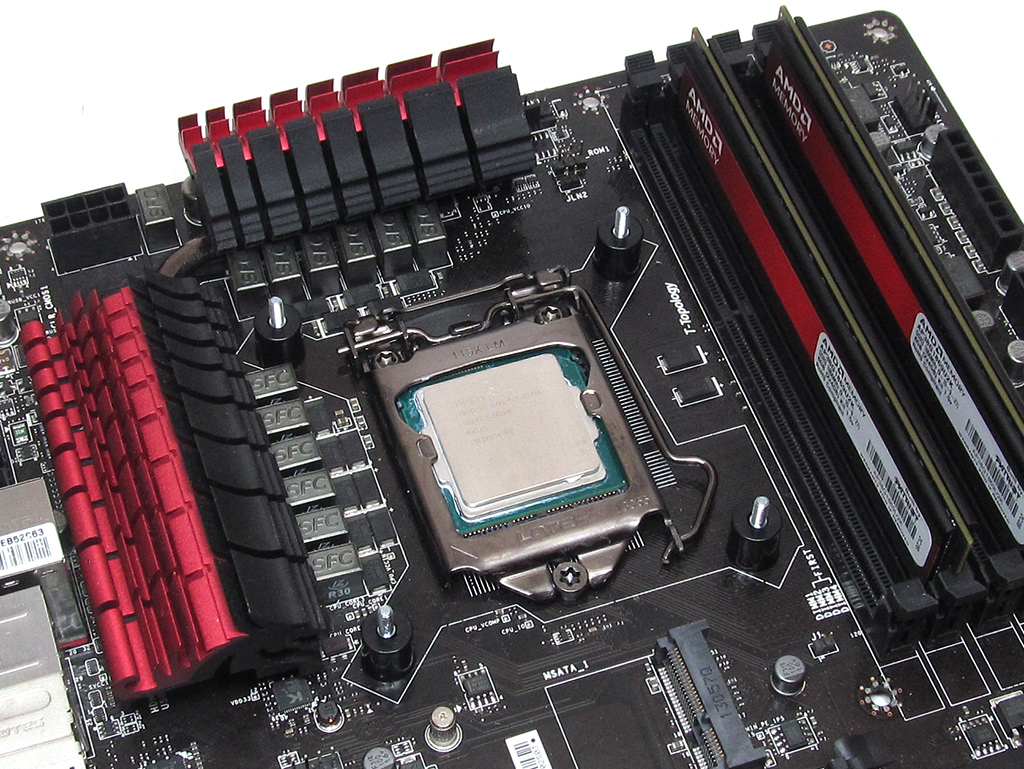
To install the Noctua NH-D15, users will first have to install the backplate. That is, before putting the four proper spacers in place over the backplate's screws.
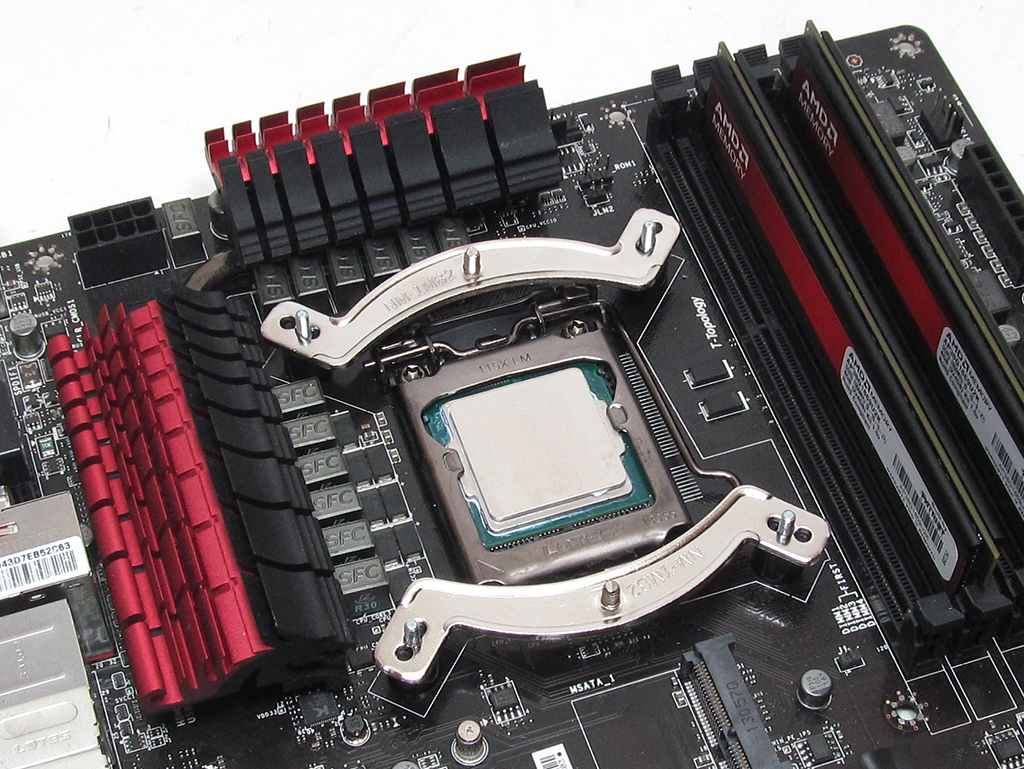
Next, slide both mounting arms into place, securing them in place with the provided nuts. After that, apply some thermal compound in preparation to mounting the heatsink itself.

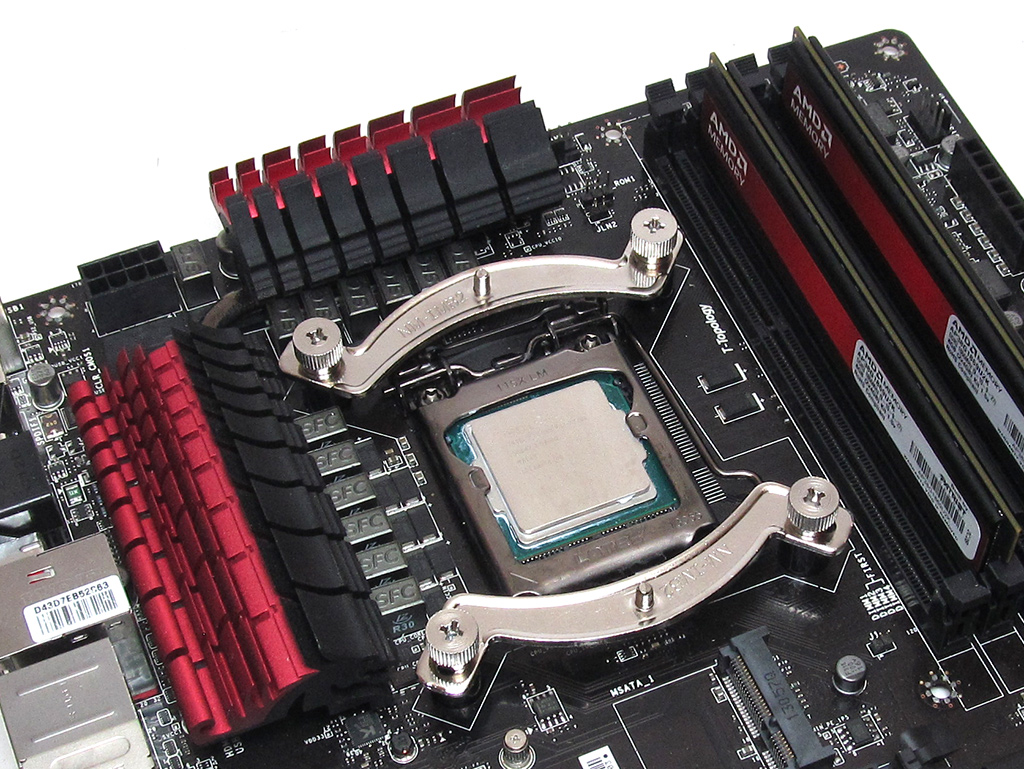
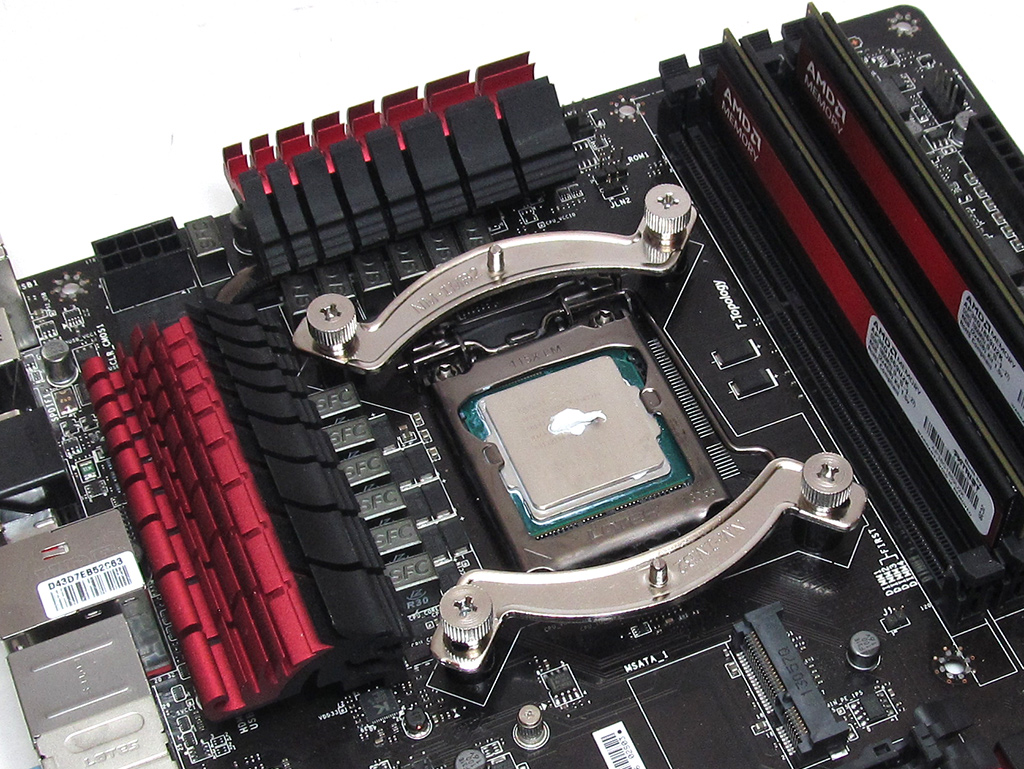
Line the posts up with both mounting arms and put the cooler's spring-loaded screws into place. Use the provided screwdriver to fasten the heatsink to the mounting arms by screwing down its spring-loaded screws.


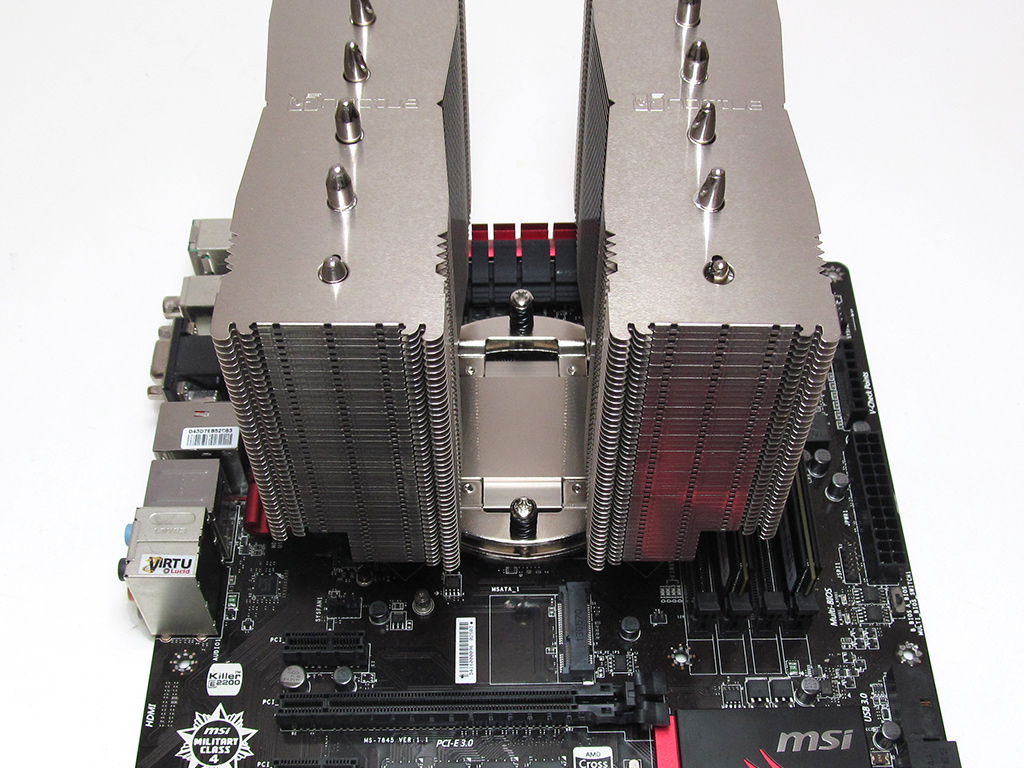
All that remains now is to attach the fans to the heatsink. Simply plug the fans into the CPU fan header to complete the installation once you have.
Noctua's SecuFirm 2 mounting hardware is very easy to work with. I would rate the installation procedure a 9 on a scale of 1 (hardest) to 10 (easiest). This is in part due to Noctua's attention to detail and the inclusion of a screwdriver. These little extras and its solid design make Noctua's mounting system one the of best on the market. That said, trying to install the NH-D15 into a case might prove troublesome due to its size.
Apr 23rd, 2025 18:43 EDT
change timezone
Latest GPU Drivers
New Forum Posts
- Companies should be called out for this (81)
- What are you playing? (23446)
- 5060 Ti 8GB DOA (255)
- RX 9000 series GPU Owners Club (495)
- DTS DCH Driver for Realtek HDA [DTS:X APO4 + DTS Interactive] (2151)
- To distill or not distill what say ye? (66)
- Are the 8 GB cards worth it? (103)
- Just for lolz, Post your 3DMark2001SE Benchmark scores! (95)
- Asus Rx570 o4g cannot losd drivers error code 43 (12)
- EXTREMEHW Invites TECHPOWERUP to our 3RD ANNUAL 96-HOUR FOLDING CHALLENGE April 26th 00:00 UTC (3)
Popular Reviews
- NVIDIA GeForce RTX 5060 Ti 8 GB Review - So Many Compromises
- ASRock X870E Taichi Lite Review
- ASUS GeForce RTX 5060 Ti TUF OC 16 GB Review
- Upcoming Hardware Launches 2025 (Updated Apr 2025)
- Sapphire Radeon RX 9070 XT Pulse Review
- NVIDIA GeForce RTX 5060 Ti PCI-Express x8 Scaling
- Sapphire Radeon RX 9070 XT Nitro+ Review - Beating NVIDIA
- Palit GeForce RTX 5060 Ti Infinity 3 16 GB Review
- AMD Ryzen 7 9800X3D Review - The Best Gaming Processor
- MSI GeForce RTX 5060 Ti Gaming OC 16 GB Review
Controversial News Posts
- NVIDIA GeForce RTX 5060 Ti 16 GB SKU Likely Launching at $499, According to Supply Chain Leak (182)
- NVIDIA Sends MSRP Numbers to Partners: GeForce RTX 5060 Ti 8 GB at $379, RTX 5060 Ti 16 GB at $429 (127)
- NVIDIA Launches GeForce RTX 5060 Series, Beginning with RTX 5060 Ti This Week (115)
- Nintendo Confirms That Switch 2 Joy-Cons Will Not Utilize Hall Effect Stick Technology (105)
- Nintendo Switch 2 Launches June 5 at $449.99 with New Hardware and Games (99)
- Sony Increases the PS5 Pricing in EMEA and ANZ by Around 25 Percent (85)
- NVIDIA PhysX and Flow Made Fully Open-Source (77)
- Windows Notepad Gets Microsoft Copilot Integration (75)