 0
0
QNAP TS-109 Pro Turbo Station Review
Services »Installation


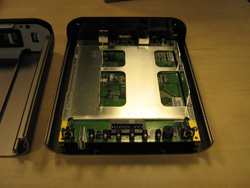
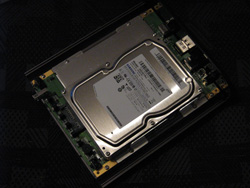
Before the unit can go into service it requires a hard drive, the drive I used is a 320 GB Samsung Spinpoint. Installing it is as easy as sliding open the case, pushing it towards the connectors and putting in a few screws. Without a hard drive installed you cannot set up the device unfortunately, not even as print or DHCP server.
Once a hard drive is installed the first use is about 5 minutes away. The cabling is as easy as connecting the power adapter and the network cable. I connected the device directly to my secondary Gigabit port on the PC so it won't be bottlenecked by any network devices. The NIC used is an Intel Gilgal. Even though the Turbo Station comes with a CAT5 cable which technically doesn't meet the Gigabit standard requirement, the cable works fine at these speeds.

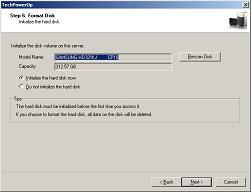
The unit has no default IP, to find it there is a "QNAP finder" on the CD. This small utility detects the device and allows you to set it up for the first time. It is an easy to use application which simply asks some questions after which you click next. Initially you can change the password, IP, name, hard drive configuration (and initialize it).

When you're done the unit is ready to be filled with files via Windows file sharing. I named my unit TechPowerUp (how original), entering \\TechPowerUp in my address bar shows me several shares named after the services that use them. The public folder can be used as network share for the whole network.

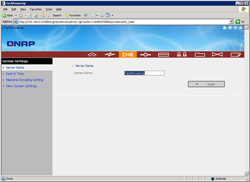
Later on you can always change the setings via the same tool or via the web interface.

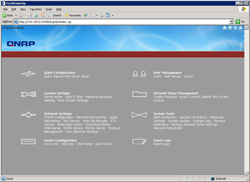
Additional settings can be changed via the webmanagement program, since the unit is also a webserver the webmanagement goes via port 8080. In my case TechPowerUp:8080, at this point I figured the chosen name wasn't that smart.
Apr 18th, 2025 16:47 EDT
change timezone
Latest GPU Drivers
New Forum Posts
- Gtx 1080 TI which is the best stable driver version available (2)
- RX 9000 series GPU Owners Club (394)
- Which 5080 graphics card? (0)
- Request for BIOS file of nVidia GeForce RTX A5000 from ThinkPad P15 Gen 2 (4)
- How to relubricate a fan and/or service a troublesome/noisy fan. (242)
- It's happening again, melting 12v high pwr connectors (1027)
- Can Intel recover in DYI market anytime soon? (11)
- Place your bets, what node will rtx 6000/RDNA 5(UDNA 1?) use (8)
- TPU's Nostalgic Hardware Club (20257)
- GPU Pricing and Performance (15)
Popular Reviews
- ASUS GeForce RTX 5060 Ti TUF OC 16 GB Review
- NVIDIA GeForce RTX 5060 Ti PCI-Express x8 Scaling
- Palit GeForce RTX 5060 Ti Infinity 3 16 GB Review
- G.SKILL Trident Z5 NEO RGB DDR5-6000 32 GB CL26 Review - AMD EXPO
- ASUS GeForce RTX 5060 Ti Prime OC 16 GB Review
- Teevolution Terra Pro Review
- MSI GeForce RTX 5060 Ti Gaming OC 16 GB Review
- Zotac GeForce RTX 5060 Ti AMP 16 GB Review
- MSI GeForce RTX 5060 Ti Gaming Trio OC 16 GB Review
- ASUS GeForce RTX 5080 TUF OC Review
Controversial News Posts
- NVIDIA GeForce RTX 5060 Ti 16 GB SKU Likely Launching at $499, According to Supply Chain Leak (182)
- NVIDIA Sends MSRP Numbers to Partners: GeForce RTX 5060 Ti 8 GB at $379, RTX 5060 Ti 16 GB at $429 (127)
- Nintendo Confirms That Switch 2 Joy-Cons Will Not Utilize Hall Effect Stick Technology (105)
- NVIDIA Launches GeForce RTX 5060 Series, Beginning with RTX 5060 Ti This Week (102)
- Over 200,000 Sold Radeon RX 9070 and RX 9070 XT GPUs? AMD Says No Number was Given (100)
- Nintendo Switch 2 Launches June 5 at $449.99 with New Hardware and Games (99)
- Sony Increases the PS5 Pricing in EMEA and ANZ by Around 25 Percent (85)
- NVIDIA PhysX and Flow Made Fully Open-Source (77)