 9
9
Xigmatek AIO S80DP Review
Performance »Installation
Installing the heatsink was not that difficult. Getting it running correctly was. But I’m getting ahead of myself here…Up for the test is a DFI nF4 Expert motherboard with an Opteron 144 CPU, clocked at three different levels: 1.8 GHz, 2.5 GHz and 2.7 GHz. The maximum TDP was 125W.

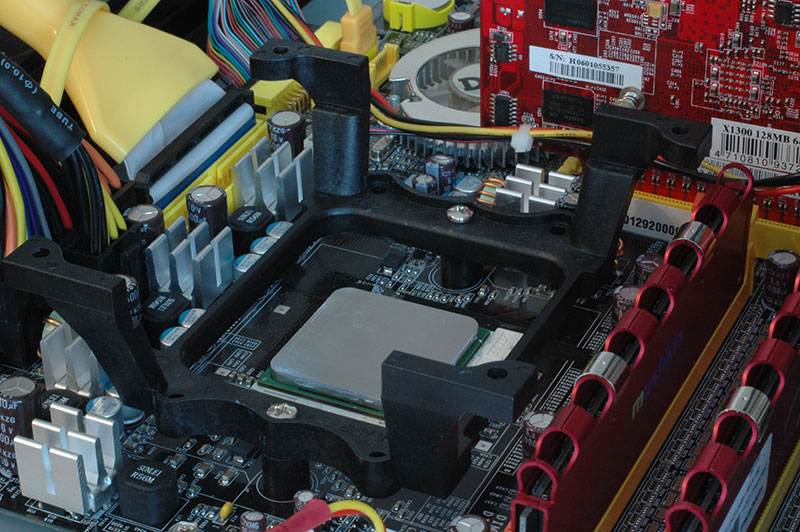
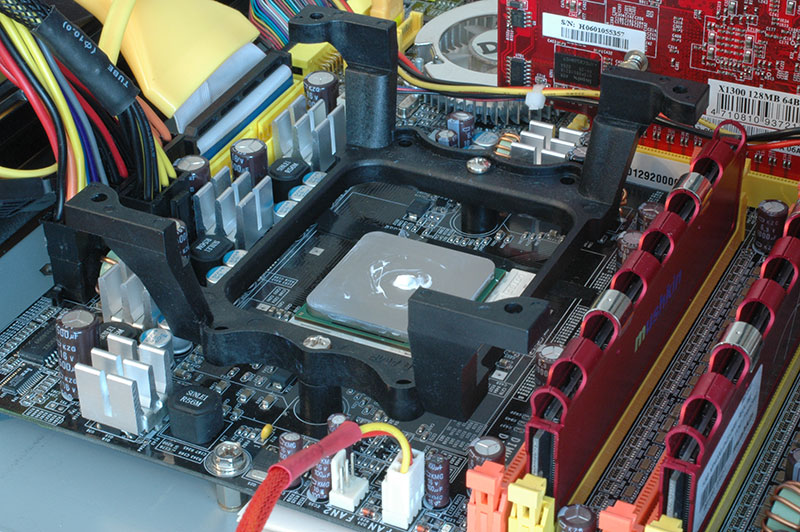
I began installing the heatsink as stated in the manual.
- First I took the plastic bracket and attached two standoffs from the mounting kit to the screw holes.
- I then aligned the bracket with the Socket 939 mounting holes, and connected the backplate and bracket with the original screws.
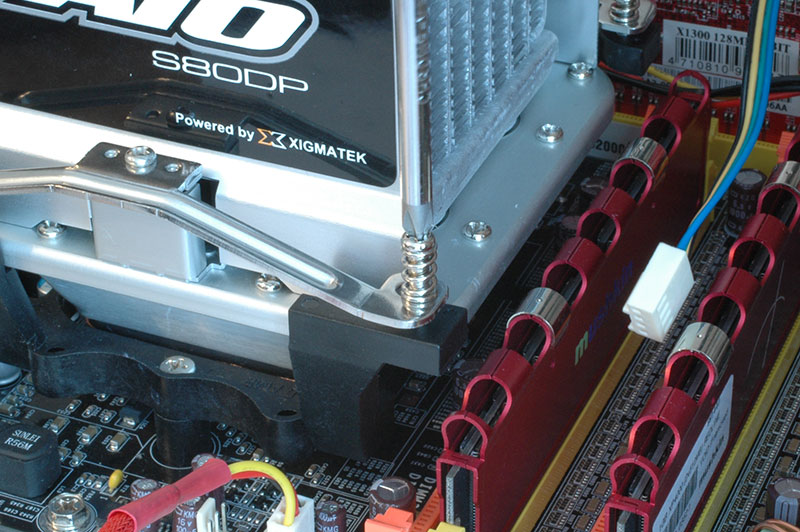
- I applied a small, rice-grain sized ball of Arctic Ceramique to the CPU’s IHS. Next, I attempted to install the heatsink with the screws and springs provided, but I stumbled upon a problem – the heatsink would hit the heatspreaders of my Mushkin Redline memory.
- I had to move the memory to the adjacent slot, and then the cooler fit perfectly. It is necessary to keep in mind that the heatspreaders on Redline memory from Mushkin are higher than those on most other memory modules, which should fit with no problems.
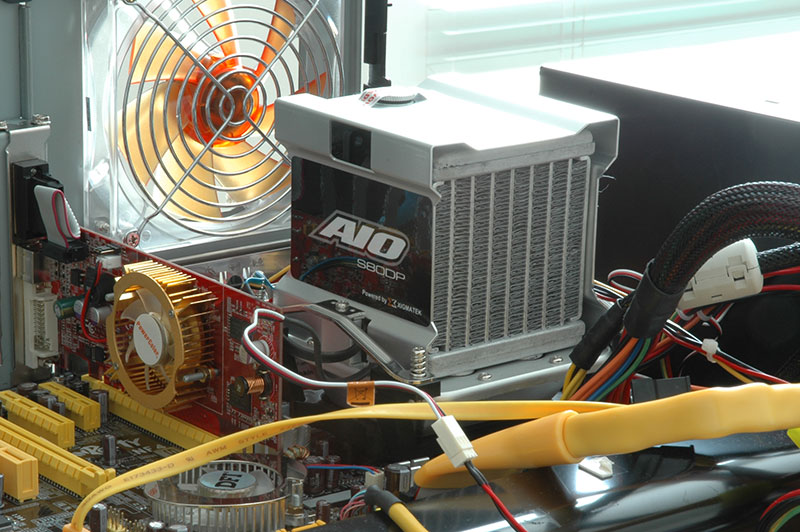
- Lastly, I cranked down the screws as far as they could go in a criss-cross pattern, connected the cable from the fan to the motherboard, the cable from the pump directly to the PSU, and was ready to boot the PC.
As soon as I pressed the power button, gurgling of water could be heard, and the fan on the S80DP spun to life. The fan installed is neither loud nor silent – right in between.
I then proceeded to install Windows, and all my testing tools.
Apr 23rd, 2025 20:52 EDT
change timezone
Latest GPU Drivers
New Forum Posts
- Companies should be called out for this (88)
- RTX 5070ti - Which MSRP model has the better/quieter cooler design, ASUS Prime, Gigabyte Windforce or PNY? (3)
- Share your AIDA 64 cache and memory benchmark here (3055)
- What are you playing? (23449)
- To distill or not distill what say ye? (73)
- Just for lolz, Post your 3DMark2001SE Benchmark scores! (96)
- Help getting a mini pc (0)
- RX 9000 series GPU Owners Club (498)
- 5060 Ti 8GB DOA (255)
- DTS DCH Driver for Realtek HDA [DTS:X APO4 + DTS Interactive] (2151)
Popular Reviews
- NVIDIA GeForce RTX 5060 Ti 8 GB Review - So Many Compromises
- ASUS GeForce RTX 5060 Ti TUF OC 16 GB Review
- ASRock X870E Taichi Lite Review
- Upcoming Hardware Launches 2025 (Updated Apr 2025)
- Sapphire Radeon RX 9070 XT Pulse Review
- Colorful iGame B860M Ultra V20 Review
- Sapphire Radeon RX 9070 XT Nitro+ Review - Beating NVIDIA
- NVIDIA GeForce RTX 5060 Ti PCI-Express x8 Scaling
- AMD Ryzen 7 9800X3D Review - The Best Gaming Processor
- ASUS GeForce RTX 5080 TUF OC Review
Controversial News Posts
- NVIDIA GeForce RTX 5060 Ti 16 GB SKU Likely Launching at $499, According to Supply Chain Leak (182)
- NVIDIA Sends MSRP Numbers to Partners: GeForce RTX 5060 Ti 8 GB at $379, RTX 5060 Ti 16 GB at $429 (127)
- NVIDIA Launches GeForce RTX 5060 Series, Beginning with RTX 5060 Ti This Week (115)
- Nintendo Confirms That Switch 2 Joy-Cons Will Not Utilize Hall Effect Stick Technology (105)
- Nintendo Switch 2 Launches June 5 at $449.99 with New Hardware and Games (99)
- Sony Increases the PS5 Pricing in EMEA and ANZ by Around 25 Percent (85)
- NVIDIA PhysX and Flow Made Fully Open-Source (77)
- Windows Notepad Gets Microsoft Copilot Integration (75)