Ice Blue
Owner:
Posted:
January 1st 2021
Updated:
Viewed:
4,783 times
Submit vote:
Please register on the forums & login to vote.
Key Features:


This modder's other projects:
System Specs:
Performed Mods:
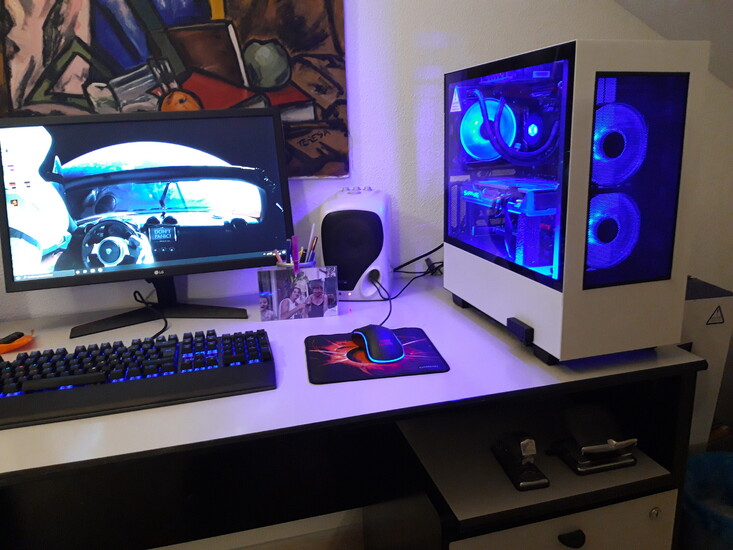
Cut the front to add black painted stainless steel mesh. Paint the bottom edge of the glass like the rest of the edges.
Special Tools Used:
- Grinder,
- drill,
- shear,
- glue,
- paint,
Time Spent:
10 hours.
Sponsors:
The pc case is cool but it doesn't breathe. It would be easy for it to come from the factory like that. The thermals improve a lot. It's for my grandson. Happy new year.
Feb 6th, 2025 18:08 EST
change timezone
Latest GPU Drivers
New Forum Posts
- I just got Primo Cache yesterday and it looks promising! (11)
- Post your Monster Hunter Wilds benchmark scores (39)
- AM4 and Combining Different RAM? (8)
- TECHPOWERUP HWBOT Contest Submissions List (58)
- RTX 5090 ridiculous price! (166)
- S20+ boot looping (11)
- I find the lack of Battle Mage owners threads disturbing. My Onix Odyssey B580 arrived. (49)
- anyone use thermalright 360 AIO? (6)
- RX 580 Aorus with wrong vbios (8)
- Optane / 3DXPoint - legacy and fate (3)
Popular Reviews
- Spider-Man 2 Performance Benchmark Review - 35 GPUs Tested
- Kingdom Come Deliverance II Performance Benchmark Review - 35 GPUs Tested
- Corsair Frame 4000D Review
- NVIDIA GeForce RTX 5080 Founders Edition Review
- Formovie Cinema Edge 4K UST Laser Projector Review
- Gigabyte GeForce RTX 5080 Gaming OC Review
- MSI GeForce RTX 5080 Vanguard SOC Review
- AMD Ryzen 7 9800X3D Review - The Best Gaming Processor
- ASUS GeForce RTX 5080 Astral OC Review
- NVIDIA GeForce RTX 5090 Founders Edition Review - The New Flagship
Controversial News Posts
- NVIDIA 2025 International CES Keynote: Liveblog (470)
- AMD Radeon 9070 XT Rumored to Outpace RTX 5070 Ti by Almost 15% (285)
- AMD is Taking Time with Radeon RX 9000 to Optimize Software and FSR 4 (256)
- AMD Denies Radeon RX 9070 XT $899 USD Starting Price Point Rumors (239)
- Edward Snowden Lashes Out at NVIDIA Over GeForce RTX 50 Pricing And Value (235)
- AMD Radeon RX 9070 XT & RX 9070 Custom Models In Stock at European Stores (226)
- New Leak Reveals NVIDIA RTX 5080 Is Slower Than RTX 4090 (215)
- AMD's Radeon RX 9070 Launch Faces Pricing Hurdles (175)


5 Comments on Ice Blue