 7
7
Akasa Venom Review
Installed »Installation
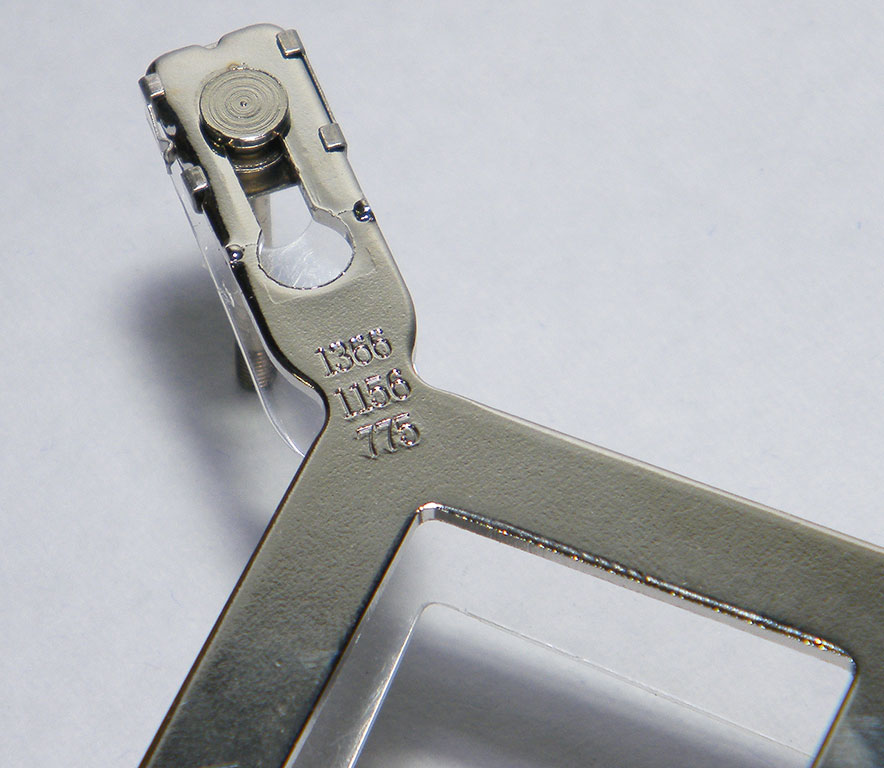

Installation begins with selecting the right mount-hole spacing for the pre-fitted bolts on the back-plate. The Easy-Select Clip mechanism locks the blot into three positions: furthest from the center being for LGA1366, in the middle for LGA1156 and LGA1155, and closest to the center for LGA775. Now you know that LGA1155 and LGA1156 have the same exact mount-hole spacing. So don't fall for "Supports LGA1155" marketing. If it supports LGA1156, it will support LGA1155. Drive the bolts through the mount-holes of the motherboard, flip the board for the next steps.
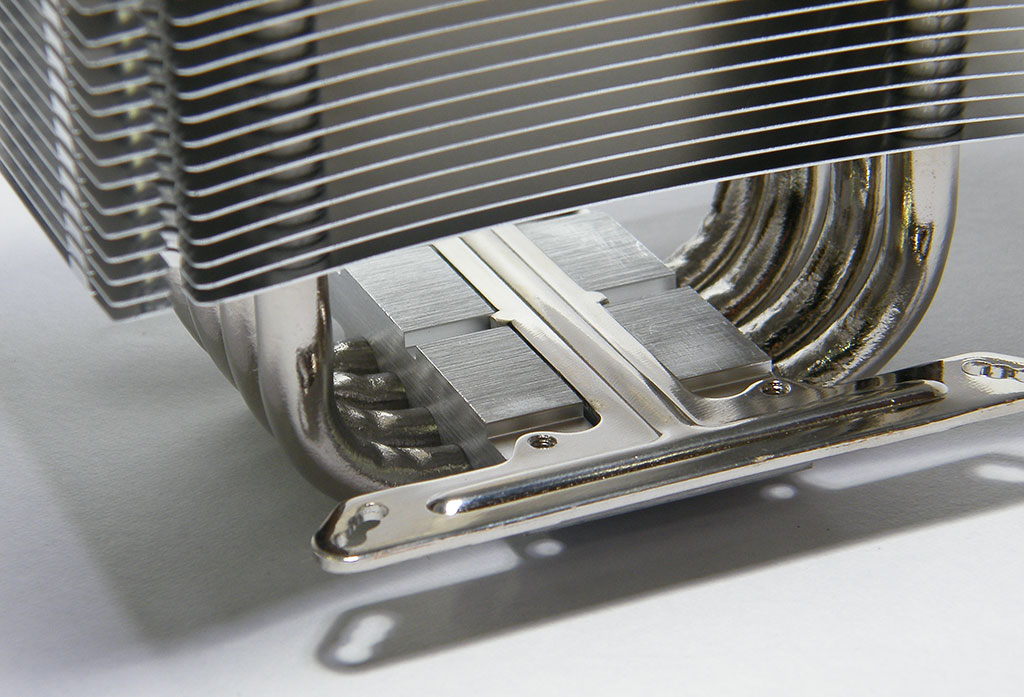

Slide the H-shaped retention plate through the gap between the CPU base and the aluminum fin array. The central beam should fit into the grooves of the upper side of the CPU base. While holding the retention plate, tilt the heatsink, fasten the heatsink to the retention plate with the four screws provided.
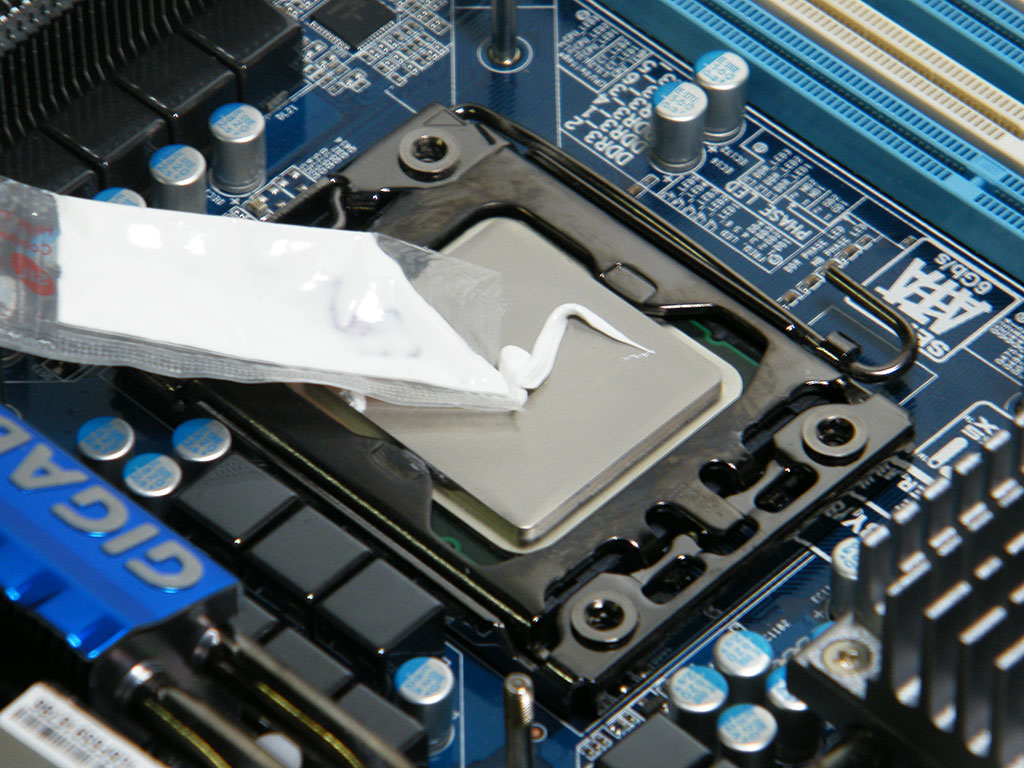
Apply the thermal interface material (TIM) provided. Akasa's TIM is not as viscous as silver-based compounds. Apply a small dab in the center, let the heatsink's pressure spread it out. Another method is to use an old plastic card to create a thin layer of TIM. Be sure to keep the layer very thin, too thick a layer, and it will actually pose as an insulator.
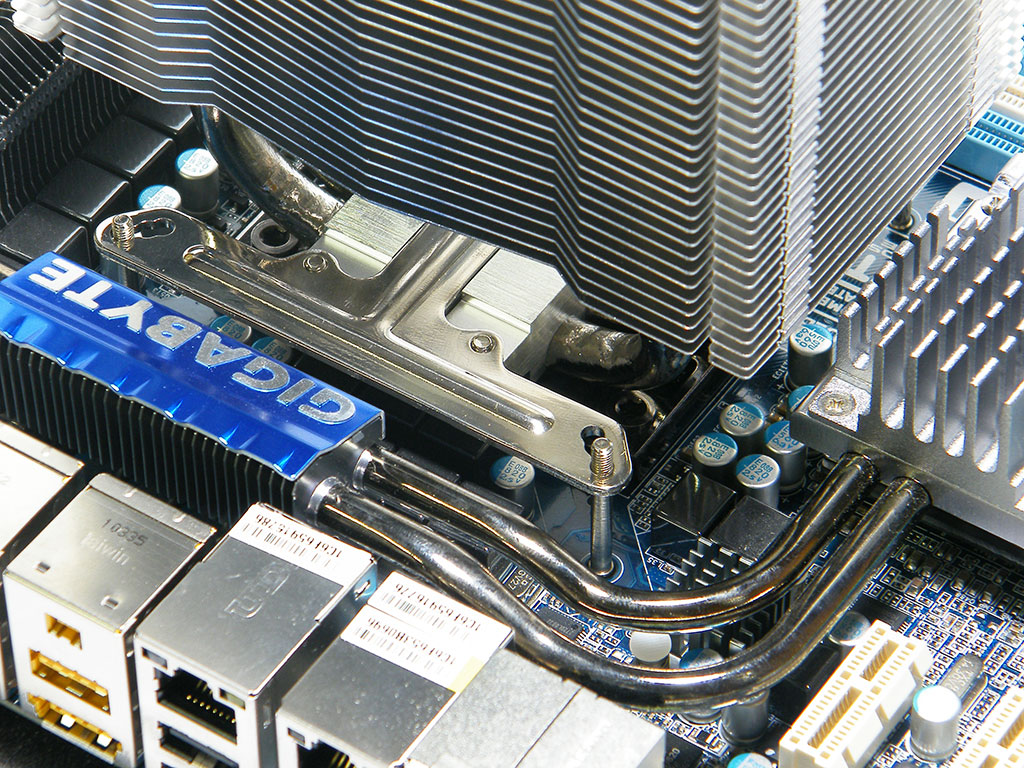
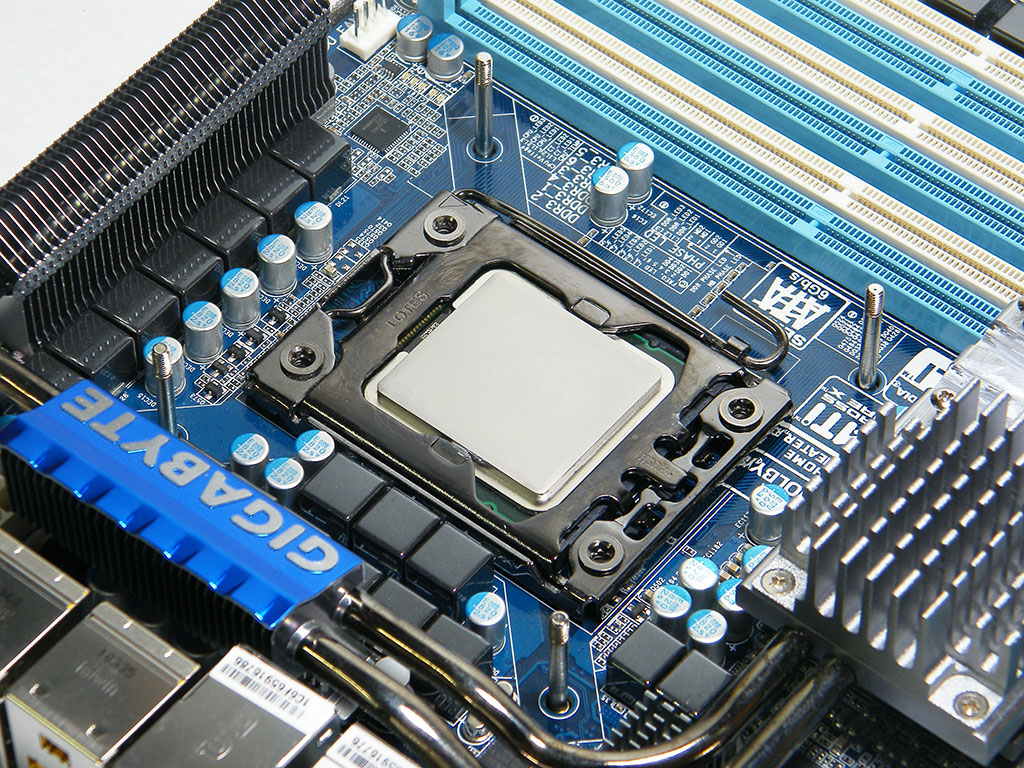
Now place the heatsink onto the motherboard with the bolts passing through the holes on the H-shaped retention plate. At this step, you get to pick the orientation of the heatsink, whether you want it to blow hot air out from the rear of the case, or from the top vents of the case (if available).
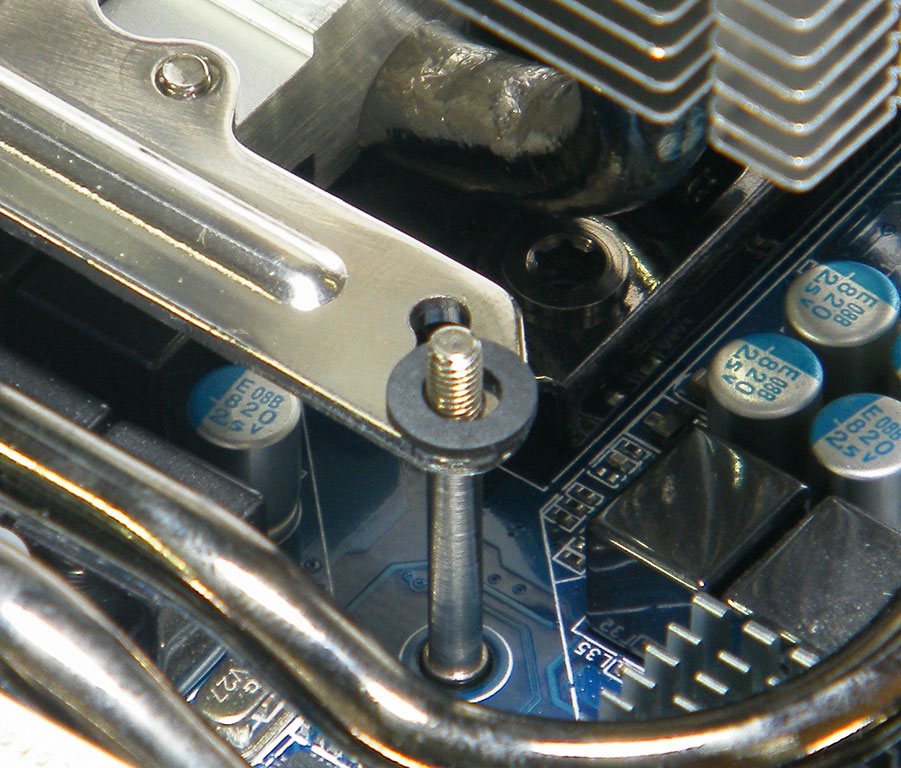
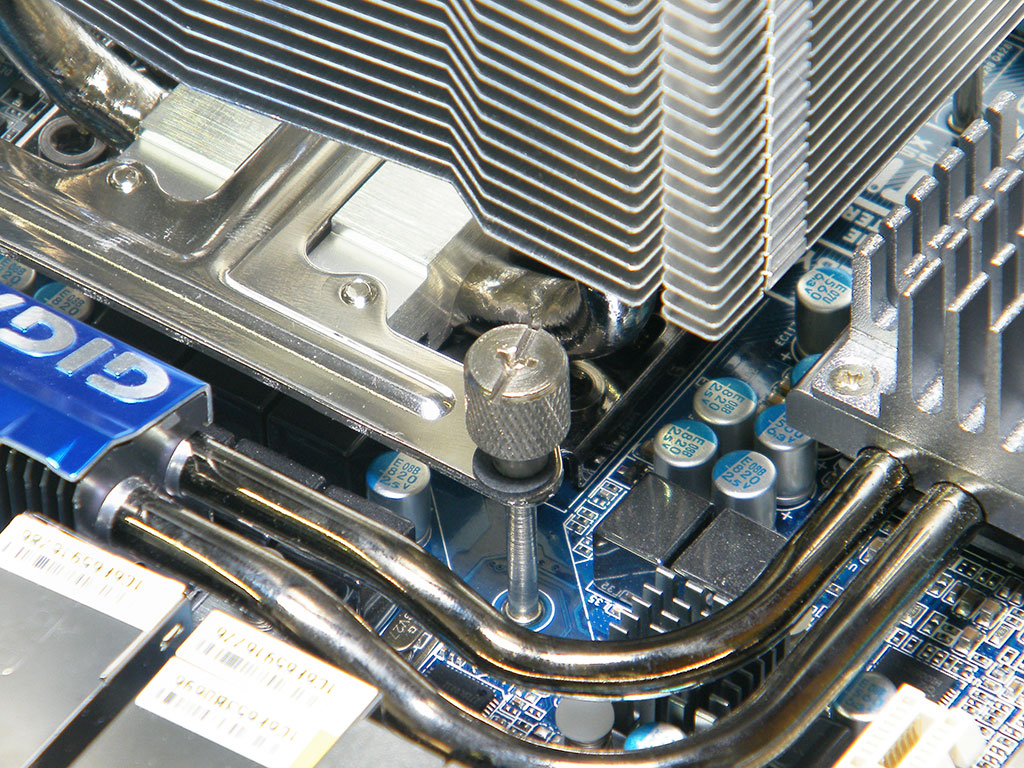
Place washers around the threaded parts of the bolts that are protruding out the retention plate. Then fasten the retention plate onto the bolts using the thumb-nuts provided. First loosely fasten all four nuts, then tighten them gradually. This makes sure that when tightening the nut on one corner, the retention plate doesn't slip out of the opposite bolt.
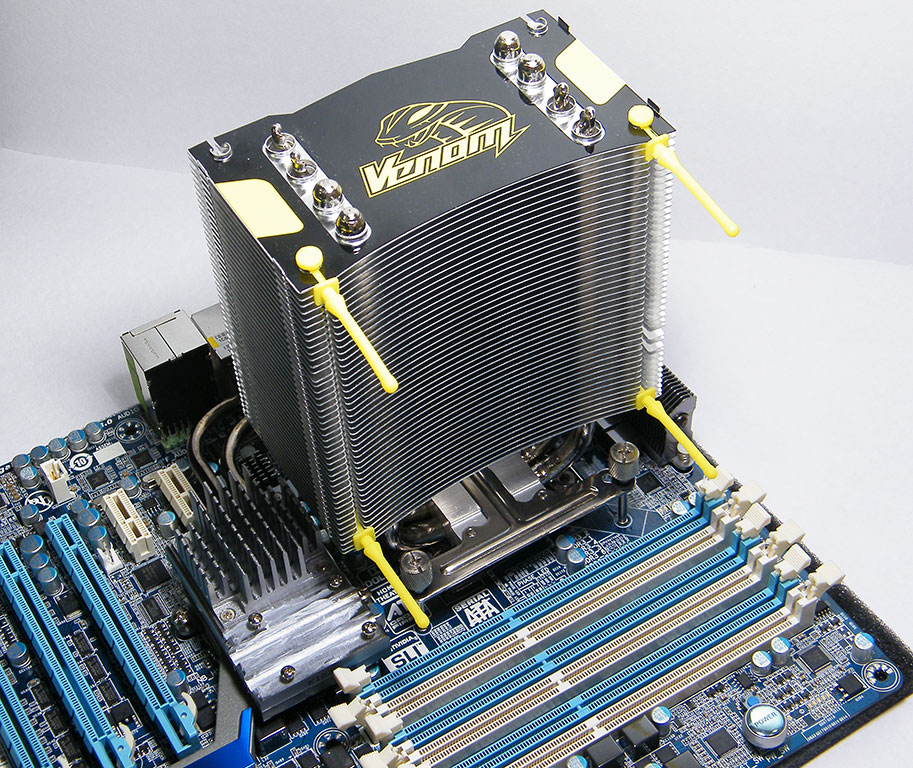
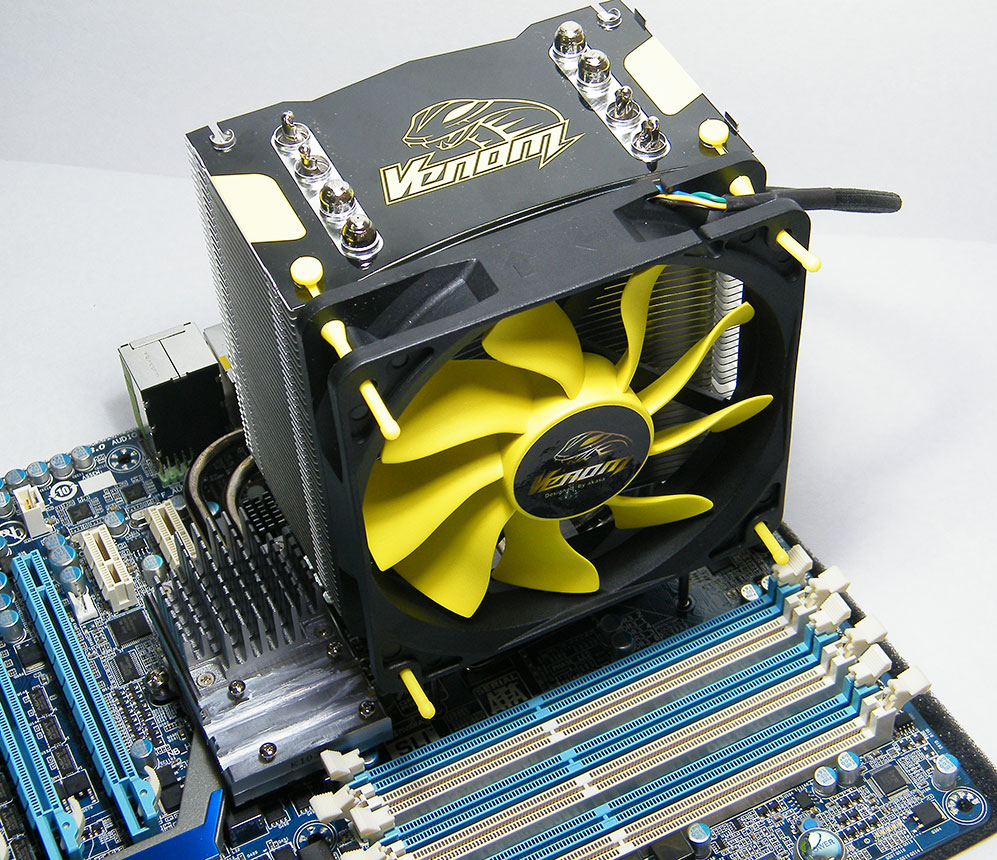
First attach all four rubber bolts to the heatsink, then pass the bolts through the holes on both sides of the fan frame, stretch the rubber bolts to lock them into the holes on the side facing the heatsink. The rubber bolts provided with Venom aren't very flexible. This step takes quite some time and effort. Connect the fan to the 4-pin CPU fan header.
On a scale of 10, I'd rate the ease of installation at 8. Installing the Akasa Venom requires that you have access to the back of the motherboard. If the motherboard tray of your case doesn't have a hole under the CPU socket area, you will have to dissemble your system and pull out the motherboard. A cumbersome task. Rubber bolts as fan retention can also be cumbersome to install or remove, compared to metal clips.
Feb 7th, 2025 11:00 EST
change timezone
Latest GPU Drivers
New Forum Posts
- Help me decide..........OLED monitors (5)
- AM4 and Combining Different RAM? (56)
- Post your Monster Hunter Wilds benchmark scores (59)
- RTX 2070 Super build (68)
- X79 and/or rampage IV OC'ing thread for those of us still left.... (2378)
- Power Throttling with no limited power (3)
- Opinions on AI (427)
- Modified drivers for X-Fi sound cards. (21)
- What's your latest tech purchase? (23101)
- Some VR for Mom (12)
Popular Reviews
- Kingdom Come Deliverance II Performance Benchmark Review - 35 GPUs Tested
- Spider-Man 2 Performance Benchmark Review - 35 GPUs Tested
- Corsair Frame 4000D Review
- Formovie Cinema Edge 4K UST Laser Projector Review
- ASUS ROG Harpe Ace Extreme Review
- NVIDIA GeForce RTX 5080 Founders Edition Review
- Kingdom Come: Deliverance 2 Handheld Performance Review
- Gigabyte GeForce RTX 5080 Gaming OC Review
- MSI GeForce RTX 5080 Vanguard SOC Review
- AMD Ryzen 7 9800X3D Review - The Best Gaming Processor
Controversial News Posts
- AMD Radeon 9070 XT Rumored to Outpace RTX 5070 Ti by Almost 15% (285)
- AMD is Taking Time with Radeon RX 9000 to Optimize Software and FSR 4 (256)
- AMD Denies Radeon RX 9070 XT $899 USD Starting Price Point Rumors (239)
- Edward Snowden Lashes Out at NVIDIA Over GeForce RTX 50 Pricing And Value (235)
- AMD Radeon RX 9070 XT & RX 9070 Custom Models In Stock at European Stores (226)
- New Leak Reveals NVIDIA RTX 5080 Is Slower Than RTX 4090 (215)
- AMD's Radeon RX 9070 Launch Faces Pricing Hurdles (175)
- AMD Radeon RX 9070 XT Tested in Cyberpunk 2077 and Black Myth: Wukong (169)