 3
3
Antec DP503 Case Review
Assembly & Finished Looks »A Closer Look - Inside

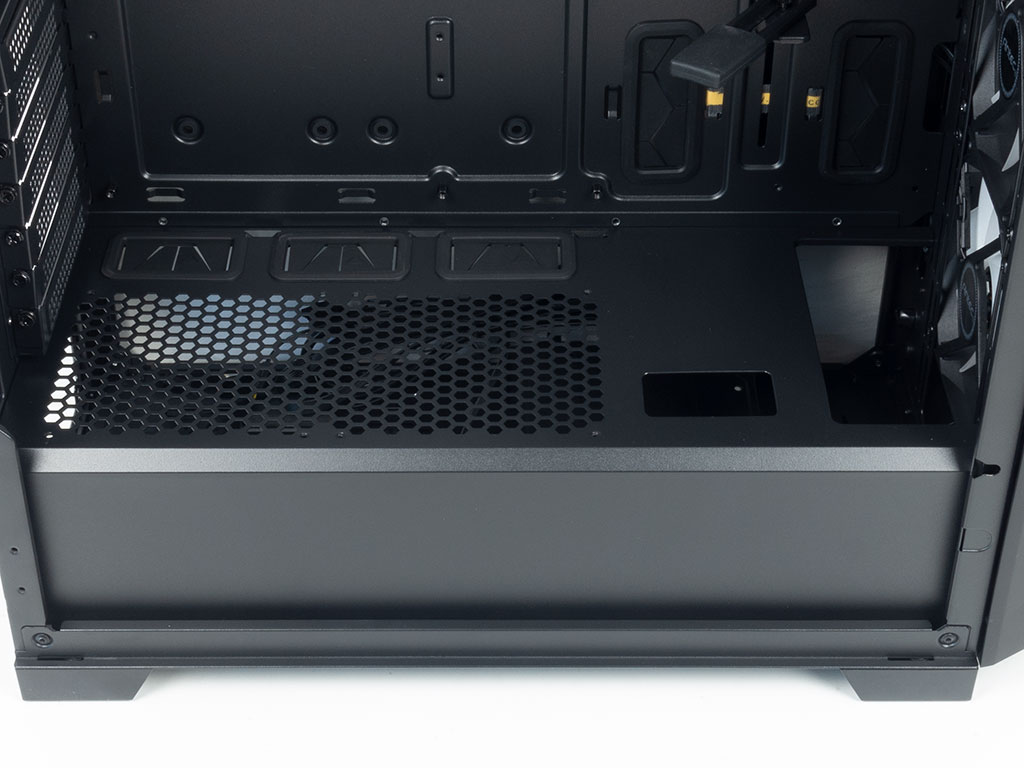
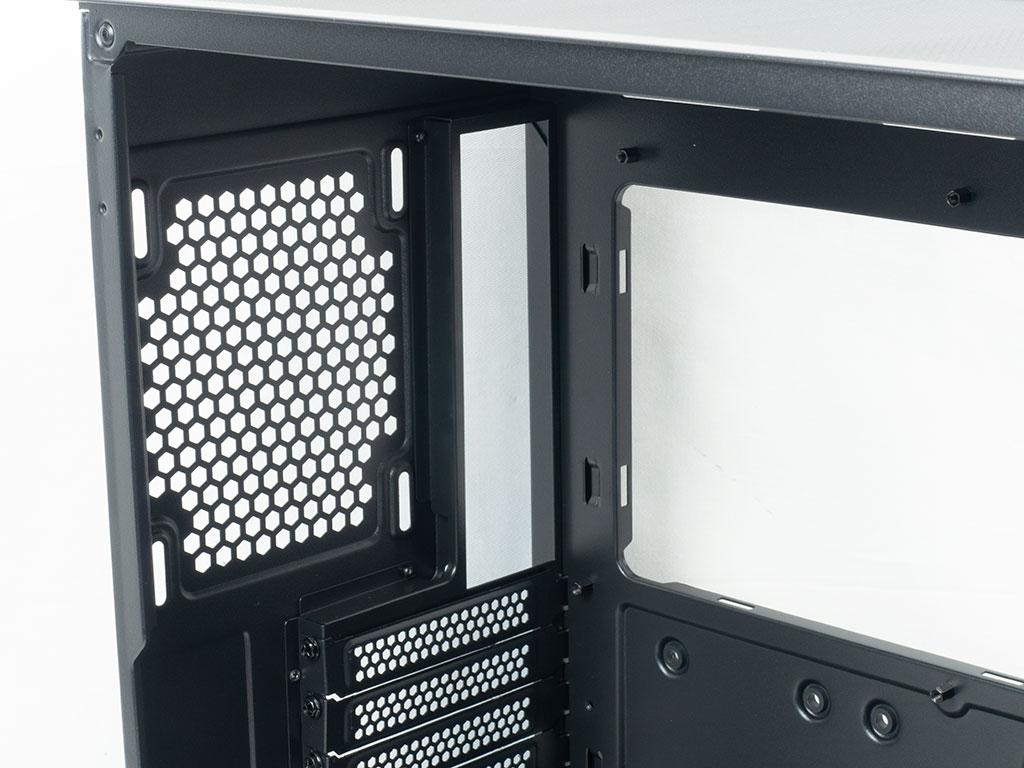
Removing the side panels and taking a first look inside the Antec DP503, there is a clear trend that Antec is setting if you consider some of the details. On one hand, the body of the case and its layout is pretty traditional as there is no need to re-invent the wheel here. But, all the cable routing holes are covered in grommets - including the ones on the shroud, a positively unusual sight. On that shroud you may also install up to two 120 mm fans for additional cooling. Then there is a metal GPU support bracket with a rubber cap on it, which again is actually quite useful for those employing long and heavy cards.
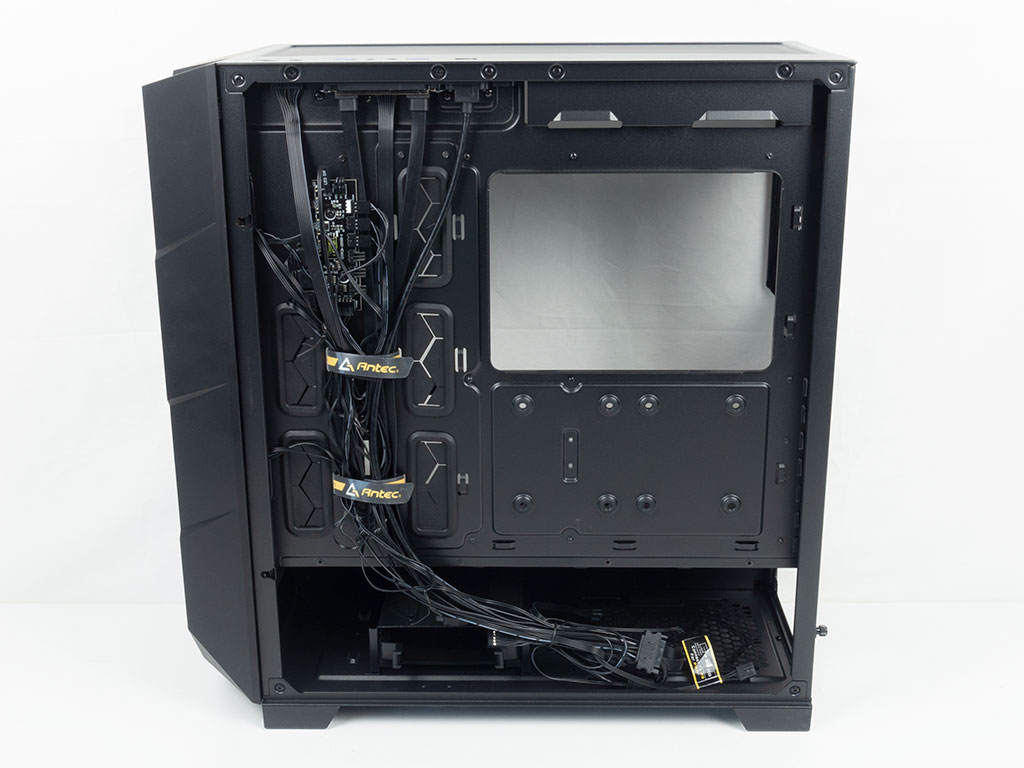
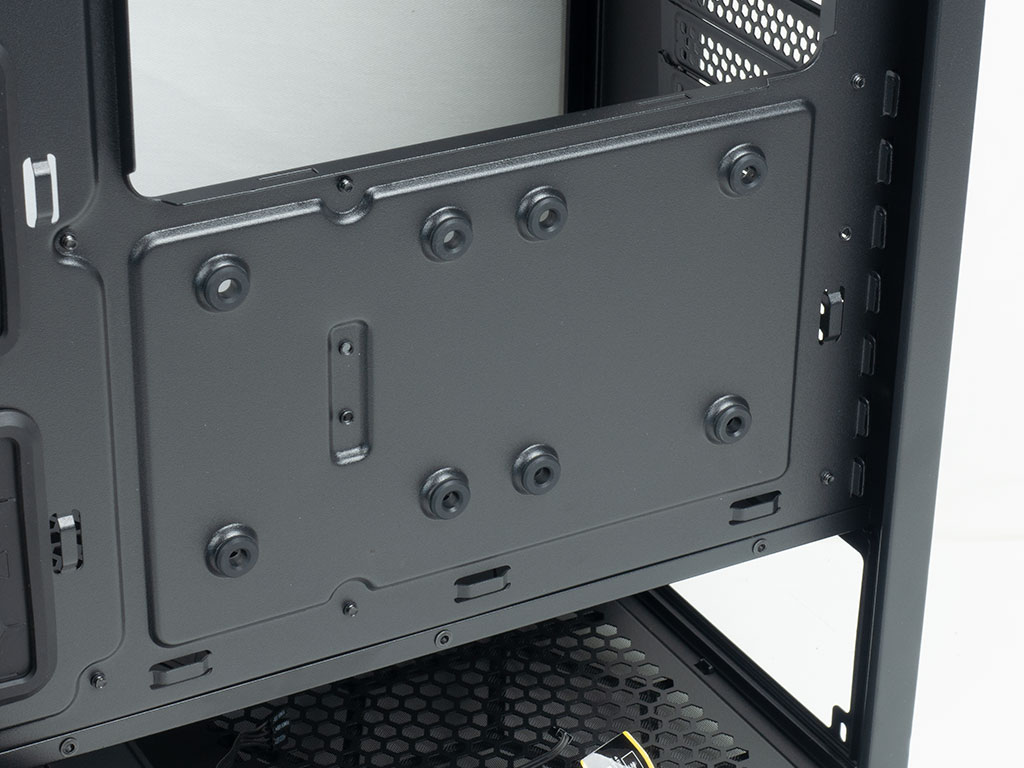
On the other side of the motherboard tray, you can clearly see a large cutout around where the CPU socket will be. Antec has done an excellent job in providing lots of hooks for zip ties and cable management - including around that large, central opening. On top of that, there is a little cap at the top with well shaped cable routing possibilities, giving you just that extra bit of space when routing wires past the top of the motherboard and any installed cooling elements in the ceiling of the DP503.
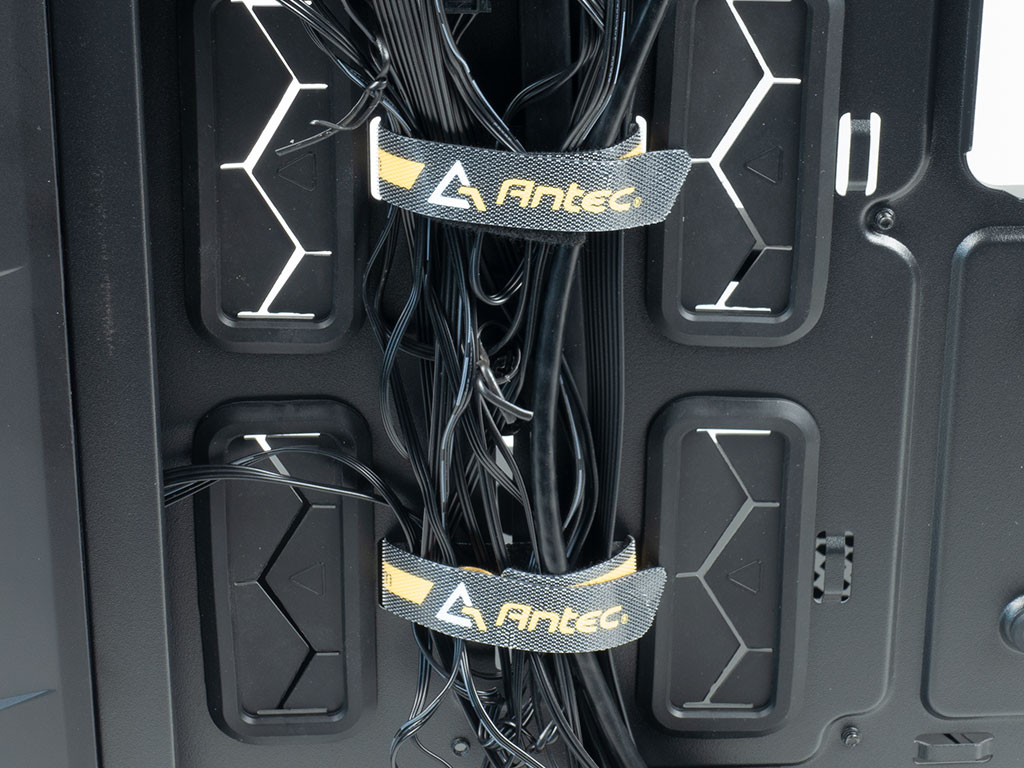
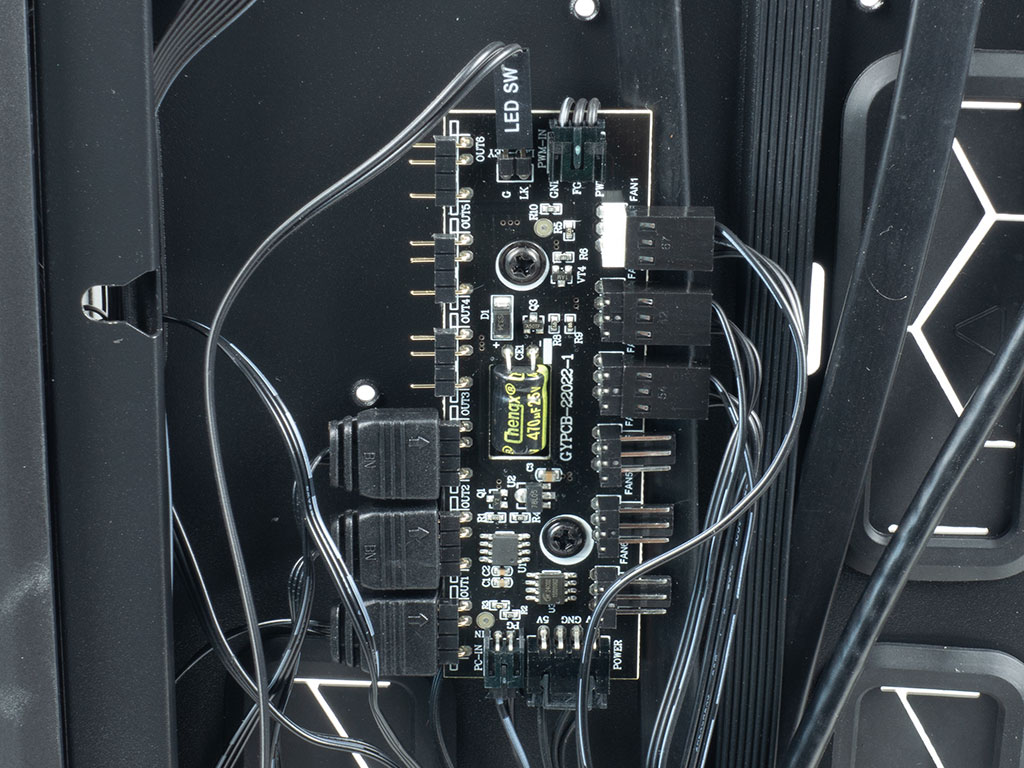
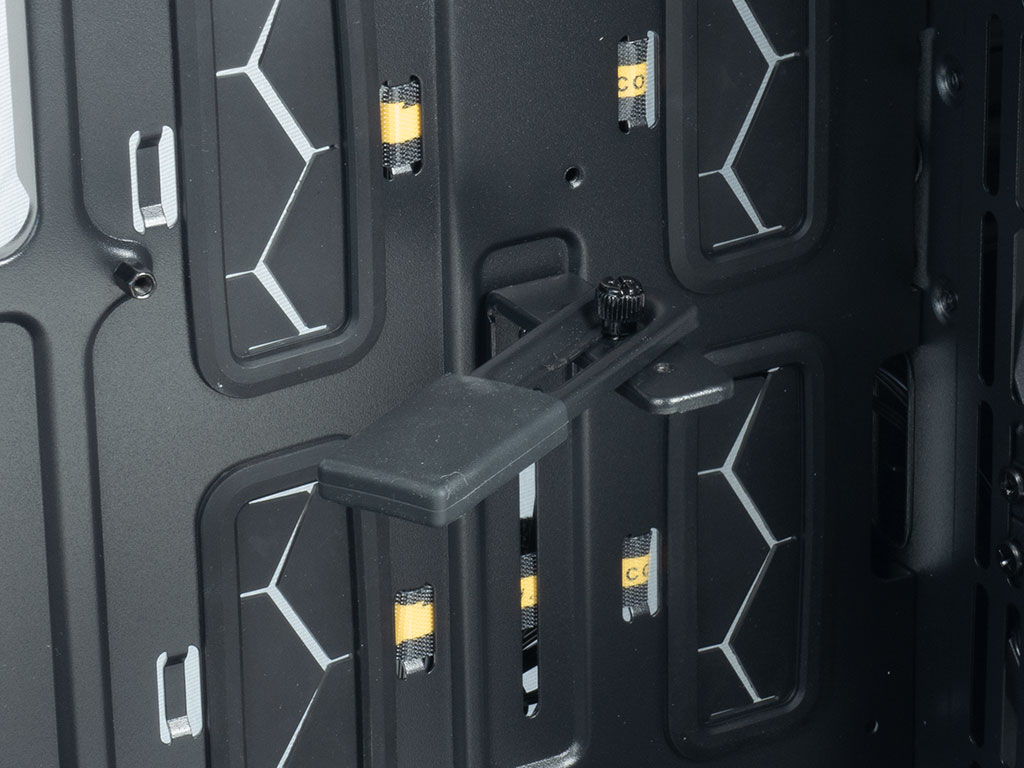
Another interesting surprise with the Antec DP503 is how the 2.5" hard drives are installed. The two placements here come with rubber rings and Antec employs metal pins to hold the drives in place. This is the same method which Cooler Master has been using pretty much exclusively up to now, so it will be interesting to see how well Antec's implementations works. Towards the front, there are two Antec branded Velcro strips, holding the bulk of the cables in place and above that, you will find their fully fledged PCB, which sports six ARGB connections as well as six 3-pin fan headers as the PCB also acts as a fan hub. Interestingly enough, the interface wire for these fans is actually PWM so the PCB translates that signal to work with RPM based fans.
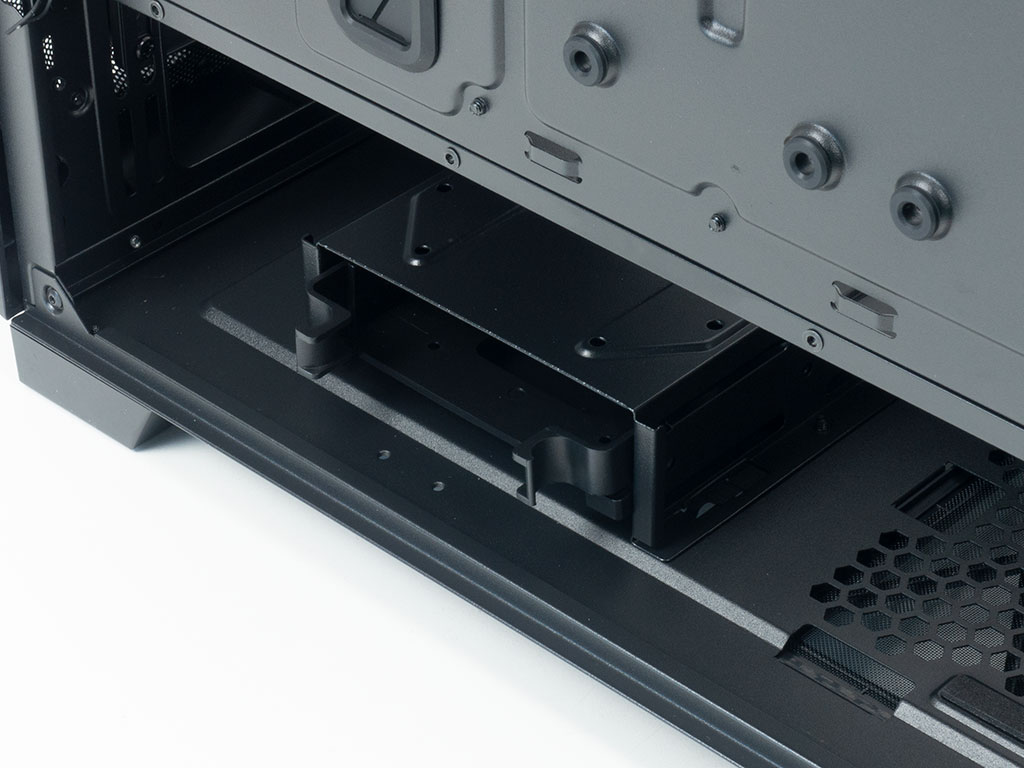
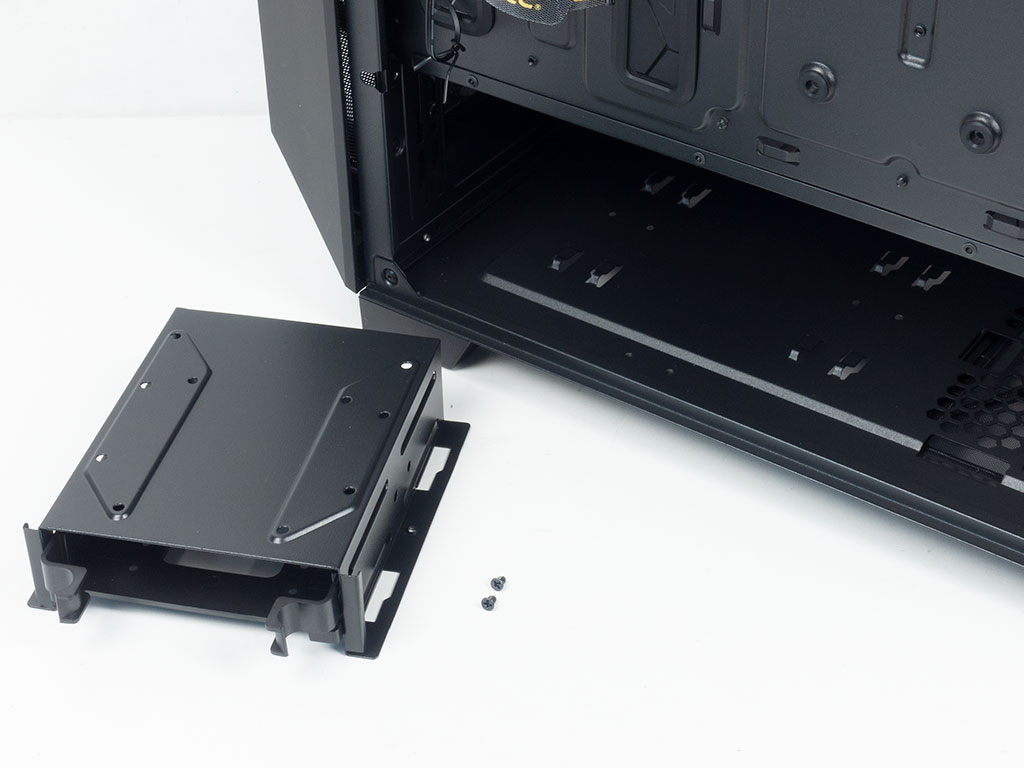
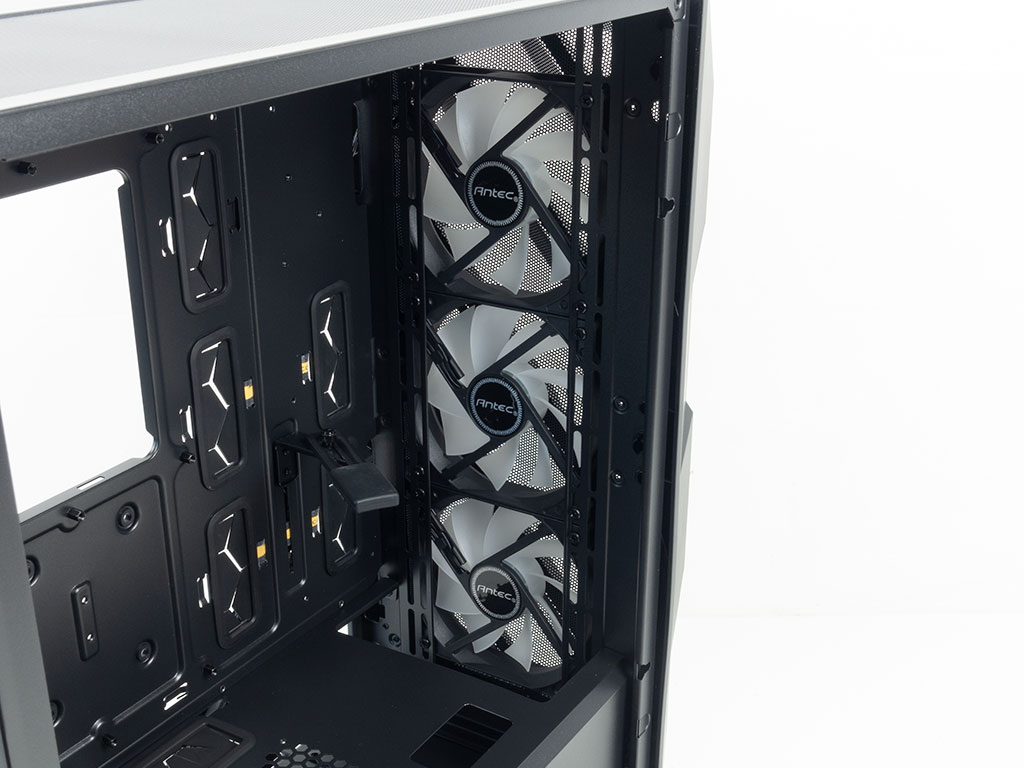
In the front, on the bottom, there is that aforementioned hard drive cage. It can hold up to two 2.5" or 3.5" drives, but only one utilizes a pull out tray. If you want to install that second unit, you will have to unscrew the whole contraption, so that you may use screws and tools to affix a drive on the top of the cage. Above that are the three 120 mm intake fans, with plenty of room so that you may install a 360 mm radiator here as well.
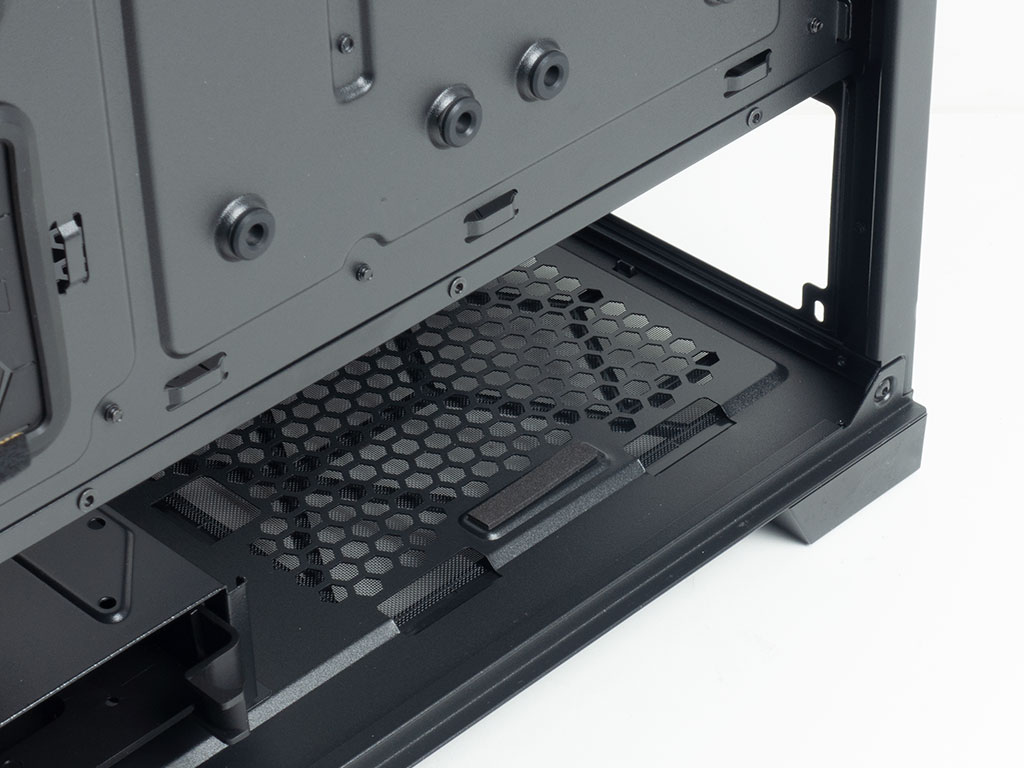
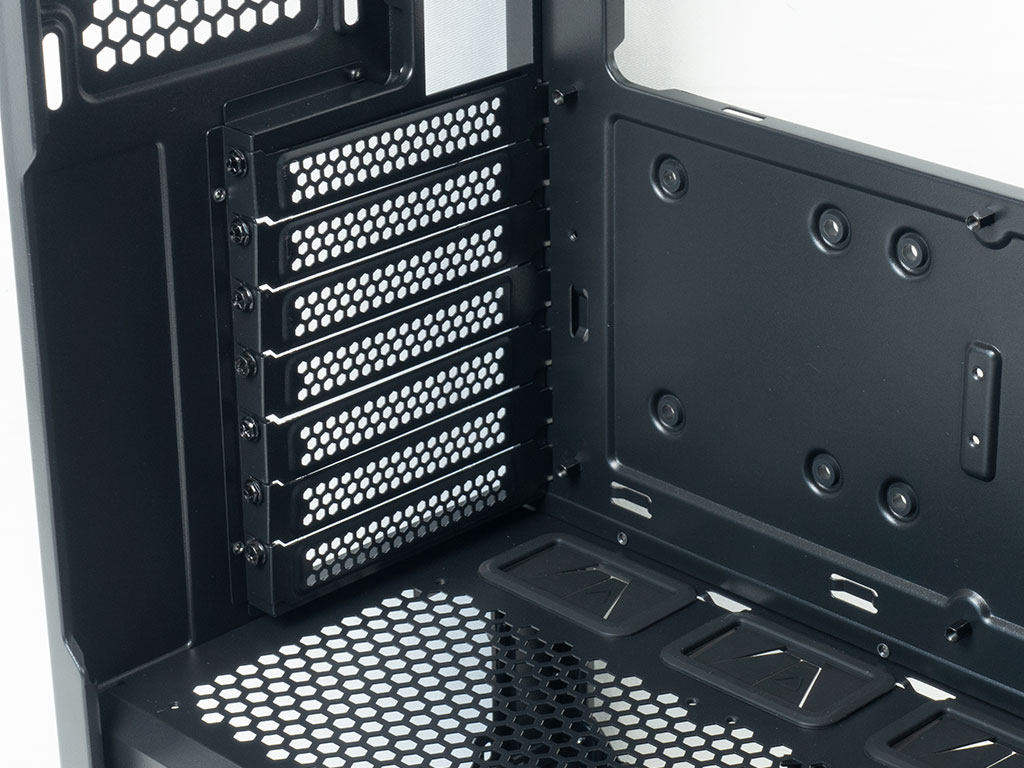
In the rear, there are foam pads for the PSU to slide unto, with plenty of space for high-capacity variants that can be longer than usual, so you may fill your system up and not worry about the power delivery aspect. Above that, the seven expansion slot covers are actually held in place by classic screws instead of thumbscrews - another small way for Antec to walk that fine line between functionality and affordability. In the very top, the fan mounting position has elongated holes in order to adjust its placement height to best suit your needs.
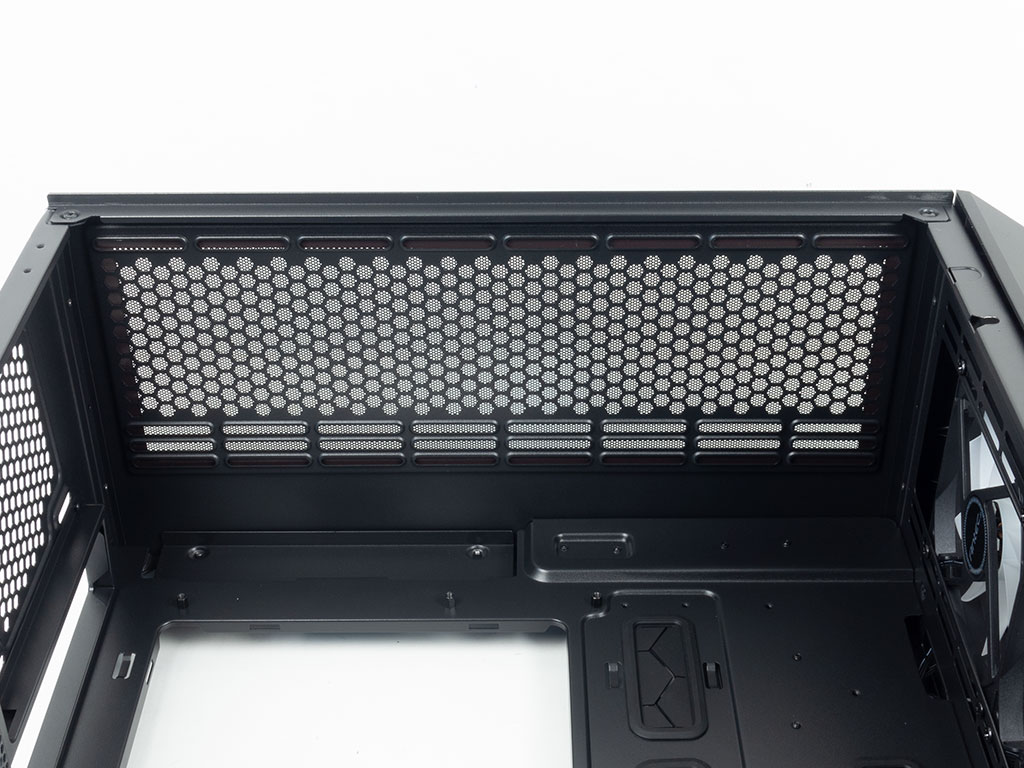
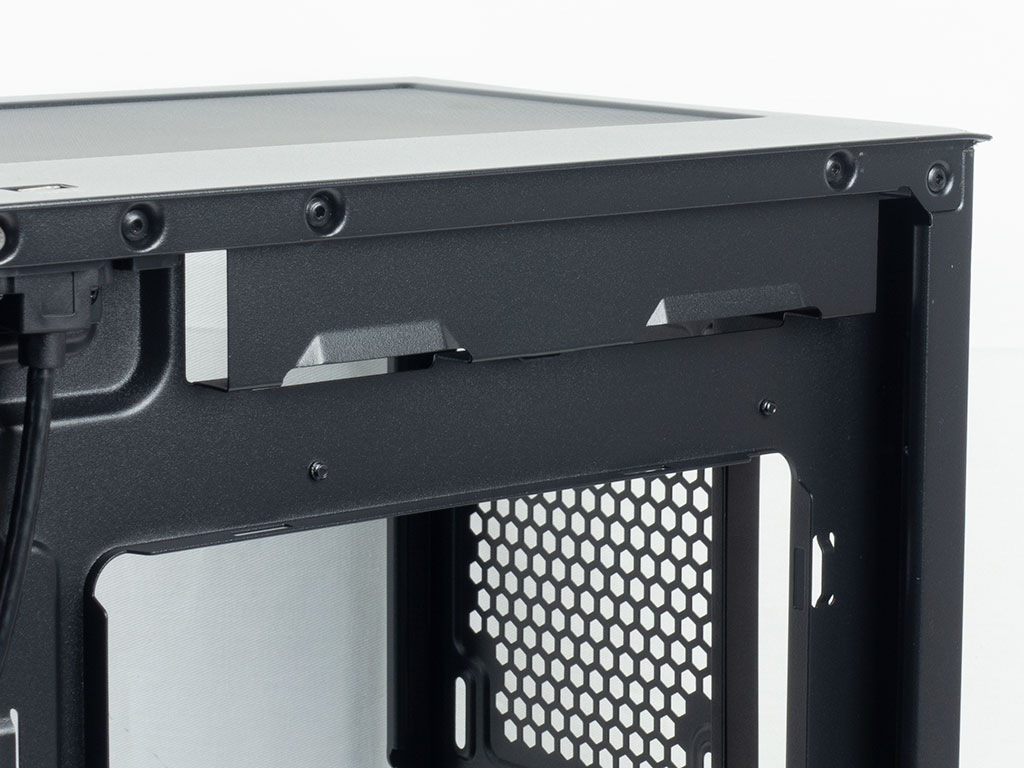
Looking at the ceiling, there is lots of space between the motherboard and any installed cooling. Classic AIO setups with a layer of fans should not interfere with your access to any connectors. While sandwich configurations should clear the board easily, you will have to plan your steps to have all the wires and connections in place first - but that is to be expected.
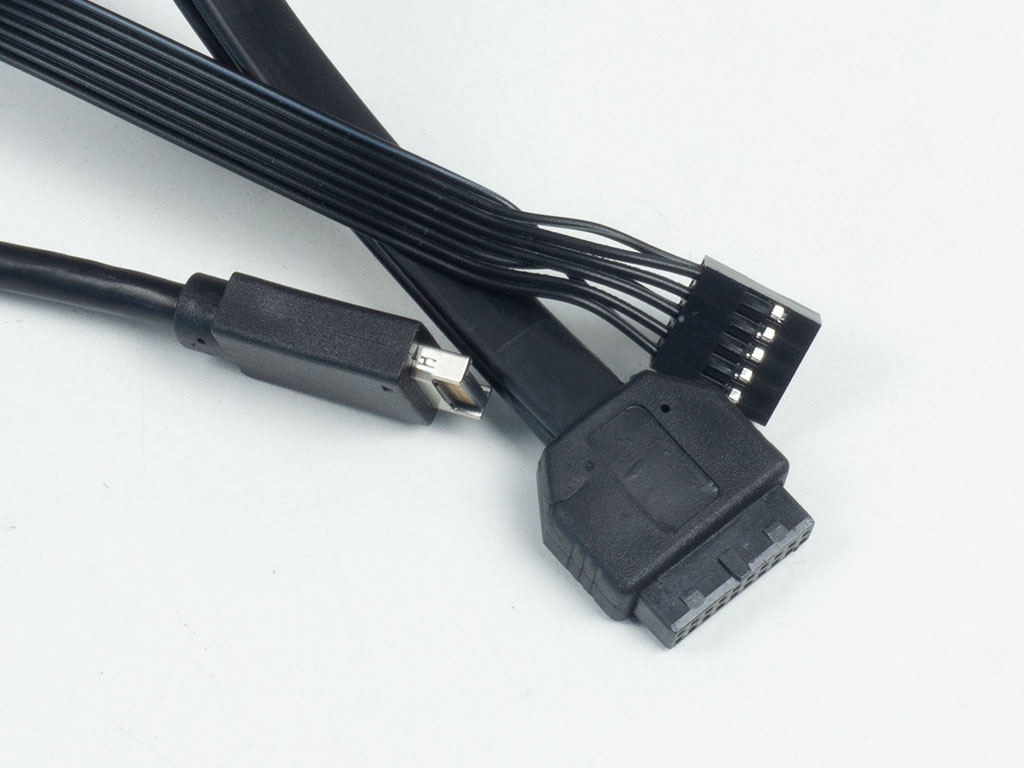

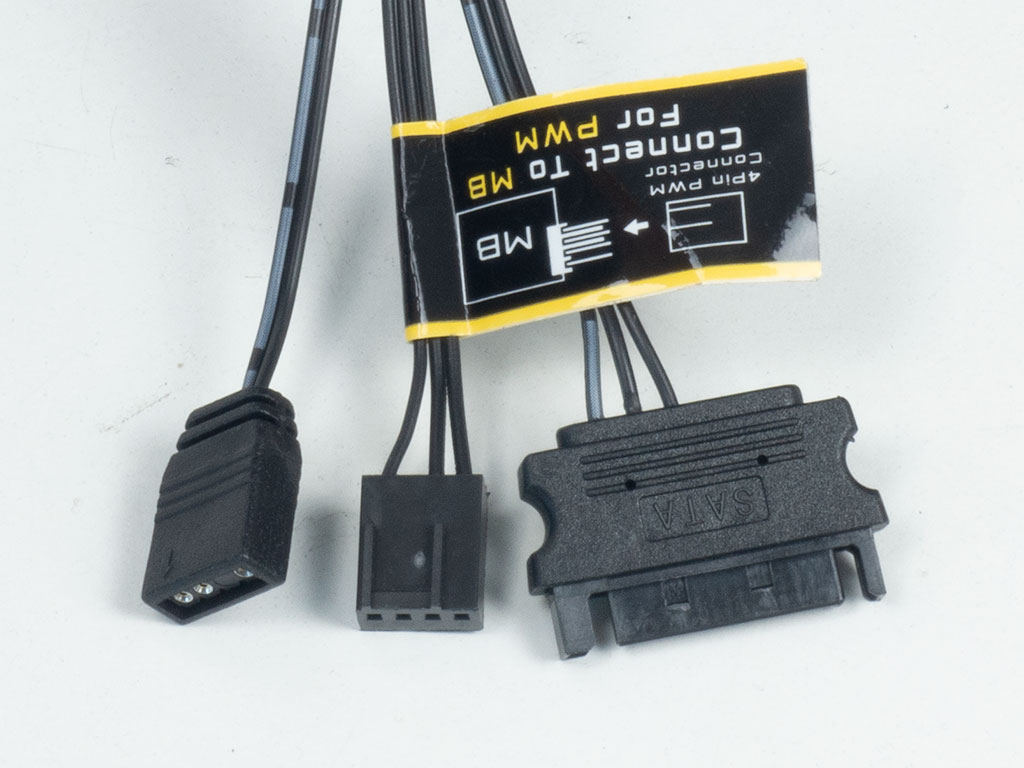
All the wiring within the Antec DP503 is sleeved black. Both the USB 3.0 and audio leads are flat for easier cable routing. The ARGB/fan PCB is powered via SATA and as you can see, there is a label on the PWM connector to ensure that you end up connecting it to the right type of motherboard header. Lastly, the PCB supports motherboard control as well, for which Antec provides the correct interface cable.
Feb 12th, 2025 01:59 EST
change timezone
Latest GPU Drivers
New Forum Posts
- Do you guys have backup GPUs? (20)
- Asteroid 2024 YR4 reaches level 3 on the Torino Scale (96)
- It's happening again, melting 12v high pwr connectors (274)
- Proposed new Power Connector (20)
- win10 or win11 (3)
- Microsoft Officially drops AC3 (Dolby Digital) Support from W11 24H2 (17)
- Anime Nation (13010)
- What are you playing? (22867)
- Do I need to spend extra money on my MOBO? (49)
- The TPU Darkroom - Digital SLR and Photography Club (4049)
Popular Reviews
- Civilization VII Performance Benchmark Review - 35 GPUs Tested
- Kingdom Come Deliverance II Performance Benchmark Review - 35 GPUs Tested
- Team Group T-Force XTREEM DDR5-7200 48GB CL34 Review
- ASRock Phantom Gaming B850I Lightning Wi-Fi Review
- DAREU A980 Pro Max Review
- AMD Ryzen 7 9800X3D Review - The Best Gaming Processor
- NVIDIA GeForce RTX 5080 Founders Edition Review
- Corsair Frame 4000D Review
- Spider-Man 2 Performance Benchmark Review - 35 GPUs Tested
- MSI GeForce RTX 5080 Vanguard SOC Review
Controversial News Posts
- AMD Radeon 9070 XT Rumored to Outpace RTX 5070 Ti by Almost 15% (287)
- AMD is Taking Time with Radeon RX 9000 to Optimize Software and FSR 4 (256)
- AMD Denies Radeon RX 9070 XT $899 USD Starting Price Point Rumors (239)
- Edward Snowden Lashes Out at NVIDIA Over GeForce RTX 50 Pricing And Value (239)
- AMD Radeon RX 9070 XT & RX 9070 Custom Models In Stock at European Stores (226)
- New Leak Reveals NVIDIA RTX 5080 Is Slower Than RTX 4090 (215)
- AMD's Radeon RX 9070 Launch Faces Pricing Hurdles (175)
- AMD Radeon RX 9070 XT Tested in Cyberpunk 2077 and Black Myth: Wukong (169)