 5
5
Antec/Veris Fusion Review
Finished Look »Installation

Installing the mainboard is quite straight forward. Antec has already placed some spacers for a mATX board at the specific locations, but three of them needed to be added by hand. The mainboard connectors for the front I/O and the power, reset and LEDs are quite straight forward and just like any other found in most cases these days.


Antec has supplied plenty of screws to secure the optical drive. These come in a separate bag to avoid any confusion between the larger variants used for the mainboard and hard drive. Installing the optical drive is quite easy as well. There are two possible positions, but one was so far off, that it could be eliminated by simply looking at the overall construction and fit of the drive cage.
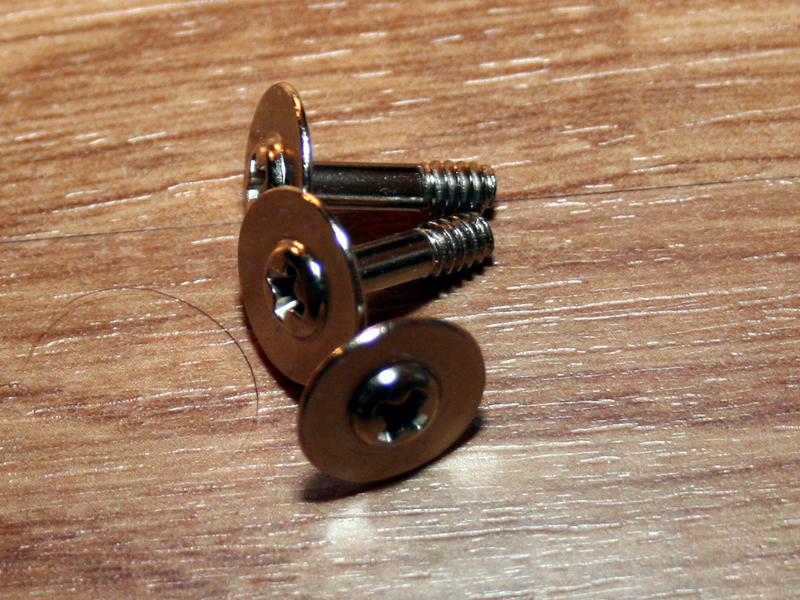
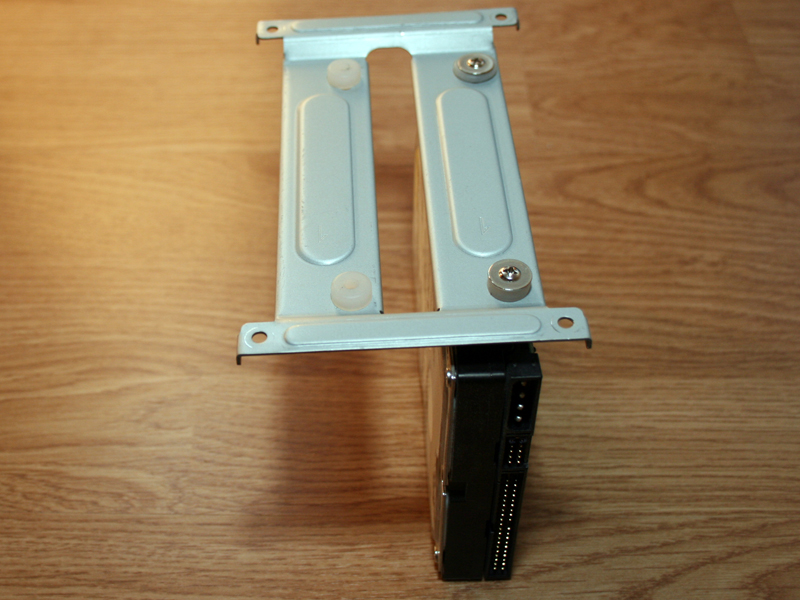

The hard drive screws are far from normal. These are required as Antec is using rubber spacers to absorb vibrations of any installed hard drives. The installation of the hard drives may seem simple at first, but the bottom screws to secure the drive in place at a vertical position need to be screwed in at the bottom of the case. This means that you will either install the hard drives first and flip over an empty case or, as it was the case here, carefully stand up the already filled case to gain access to the screw holes on the bottom of the case. Antec should have supplied fixed metal prongs with a rubber spacer on the bottom of the case instead, to eliminate such a problem.

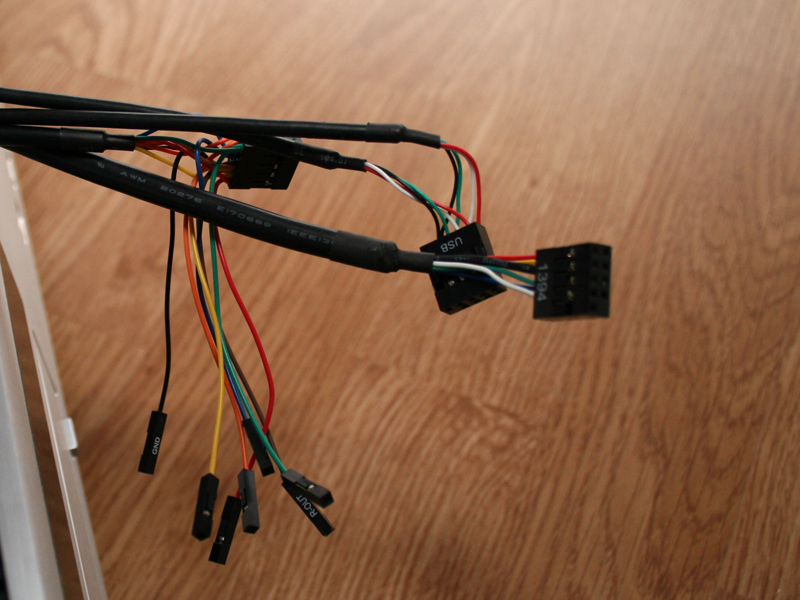
The LCD panel is connected to the USB header of the mainboard or routed through the case out back and plugged into a normal USB port. This type of connector can only be found on Soundgraph VFDs. The supplied software and functionality of the display is identical to that of the Soundgraph iMON VFD we reviewed in the past, but simply without the remote control or IR receiver.
Feb 11th, 2025 16:26 EST
change timezone
Latest GPU Drivers
New Forum Posts
- Proposed new Power Connector (18)
- Asteroid 2024 YR4 reaches level 3 on the Torino Scale (88)
- It's happening again, melting 12v high pwr connectors (217)
- Do I need to spend extra money on my MOBO? (25)
- Folding Pie and Milestones!! (9371)
- Rare GPUs / Unreleased GPUs (2028)
- Get a new motherboard now even though I won't be using it for some years? (51)
- I need tips what could be a problem with gigabyte 3060 ti eagle v2 (6)
- Last game you purchased? (682)
- Case fan with controller (7)
Popular Reviews
- Civilization VII Performance Benchmark Review - 35 GPUs Tested
- Kingdom Come Deliverance II Performance Benchmark Review - 35 GPUs Tested
- ASRock Phantom Gaming B850I Lightning Wi-Fi Review
- Team Group T-Force XTREEM DDR5-7200 48GB CL34 Review
- Spider-Man 2 Performance Benchmark Review - 35 GPUs Tested
- NVIDIA GeForce RTX 5080 Founders Edition Review
- AMD Ryzen 7 9800X3D Review - The Best Gaming Processor
- DAREU A980 Pro Max Review
- Kingdom Come: Deliverance 2 Handheld Performance Review
- Corsair Frame 4000D Review
Controversial News Posts
- AMD Radeon 9070 XT Rumored to Outpace RTX 5070 Ti by Almost 15% (287)
- AMD is Taking Time with Radeon RX 9000 to Optimize Software and FSR 4 (256)
- AMD Denies Radeon RX 9070 XT $899 USD Starting Price Point Rumors (239)
- Edward Snowden Lashes Out at NVIDIA Over GeForce RTX 50 Pricing And Value (239)
- AMD Radeon RX 9070 XT & RX 9070 Custom Models In Stock at European Stores (226)
- New Leak Reveals NVIDIA RTX 5080 Is Slower Than RTX 4090 (215)
- AMD's Radeon RX 9070 Launch Faces Pricing Hurdles (175)
- AMD Radeon RX 9070 XT Tested in Cyberpunk 2077 and Black Myth: Wukong (169)