 5
5
Aqirys Aquilla Case Review
Assembly & Finished Looks »A Closer Look - Inside
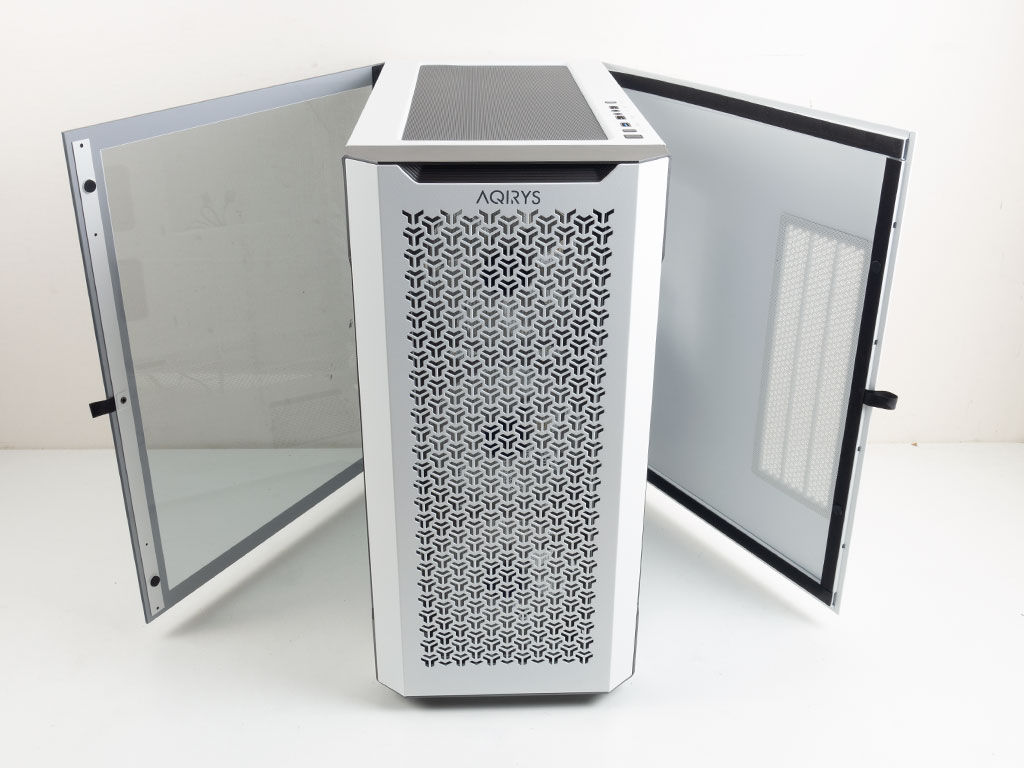
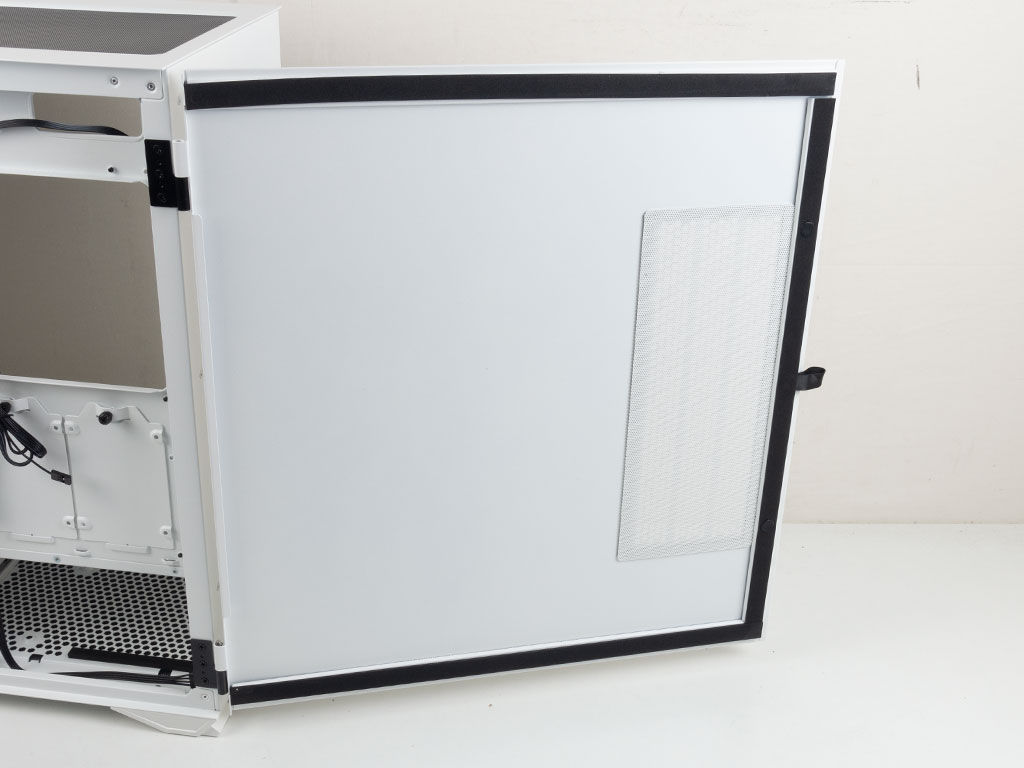
To access the interior, simply pull the tabs on each of the side panels. Aqirys lined the steel one with foam and placed an all-white, magnetic dust filter over the vent for the side intake/exhaust of the Aquilla.
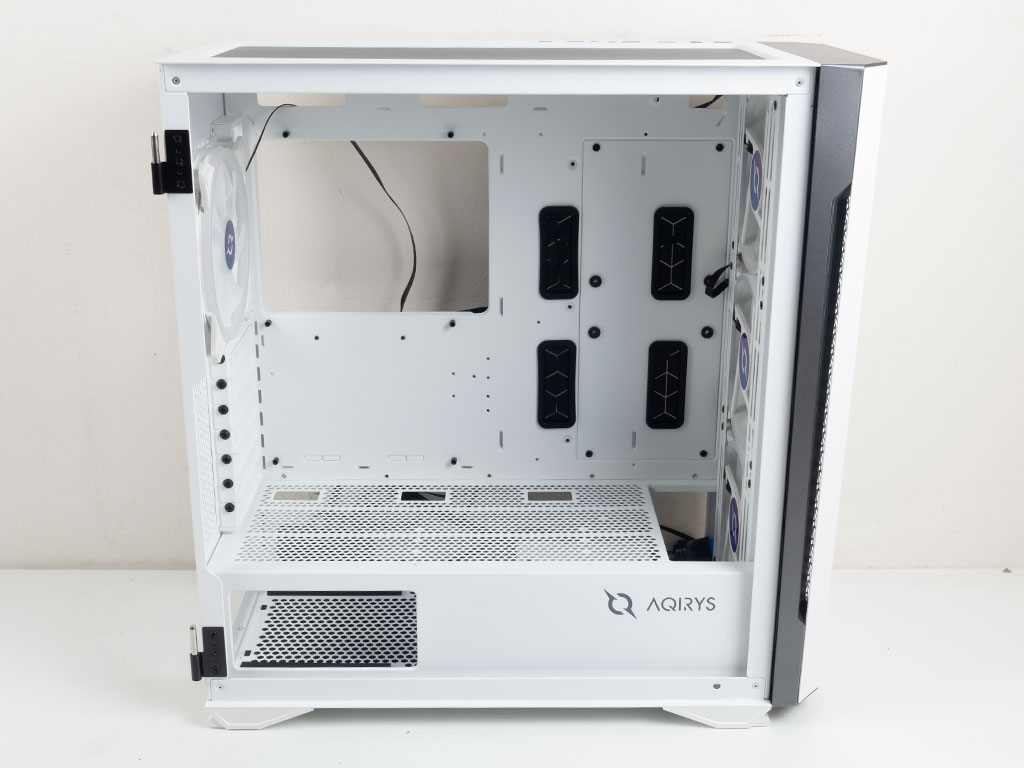
Inside the chassis, you will find that classic layout with a few small black elements, like grommets, screws, and stand-offs. While some enclosures market E-ATX compatibility, most don't manage to offer it without some tangible limitations. The Aquilla, however, provides a set of grommet-covered openings meant to be used in case you opt for such a motherboard. On the shroud is a large vent and three dedicated cable-routing cutouts. If you look closely, there are screw-mounting positions as well, but the manual does not go into any detail on what these could be for; I assume these are part of some tooling for another variant of this chassis body.
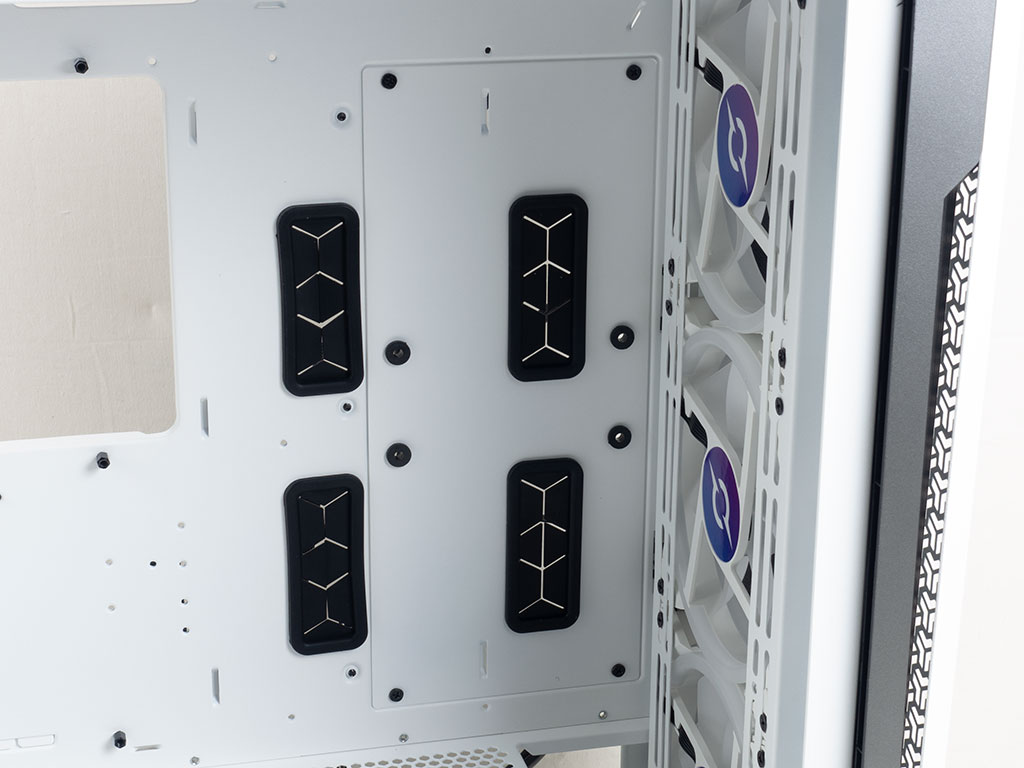
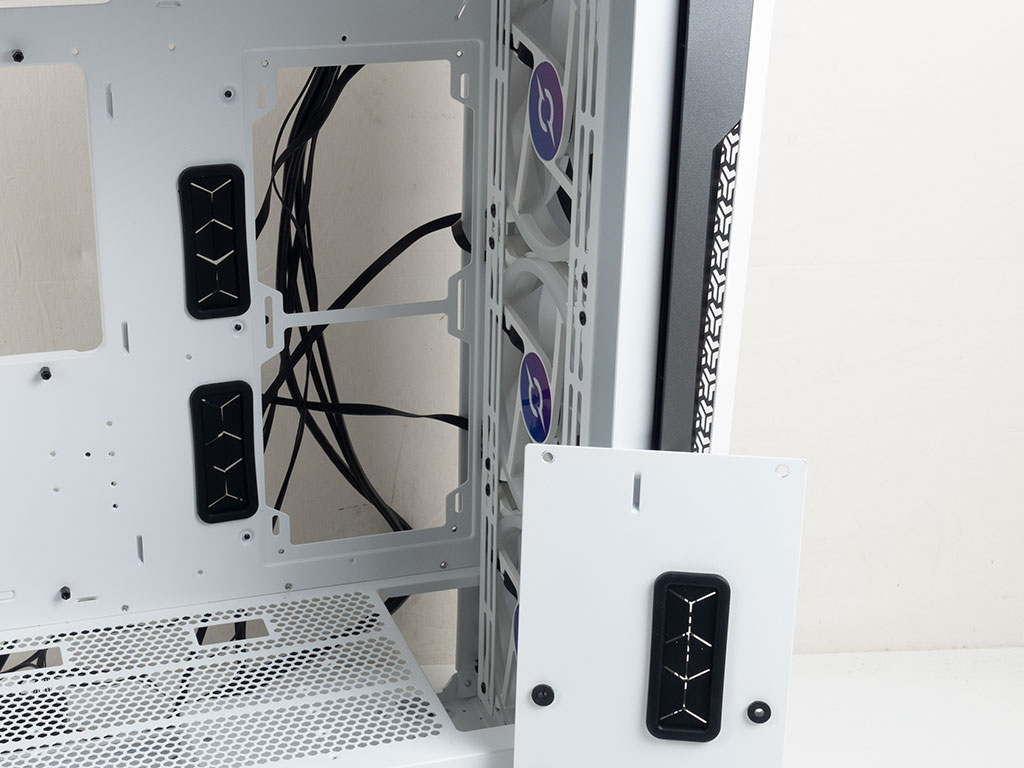
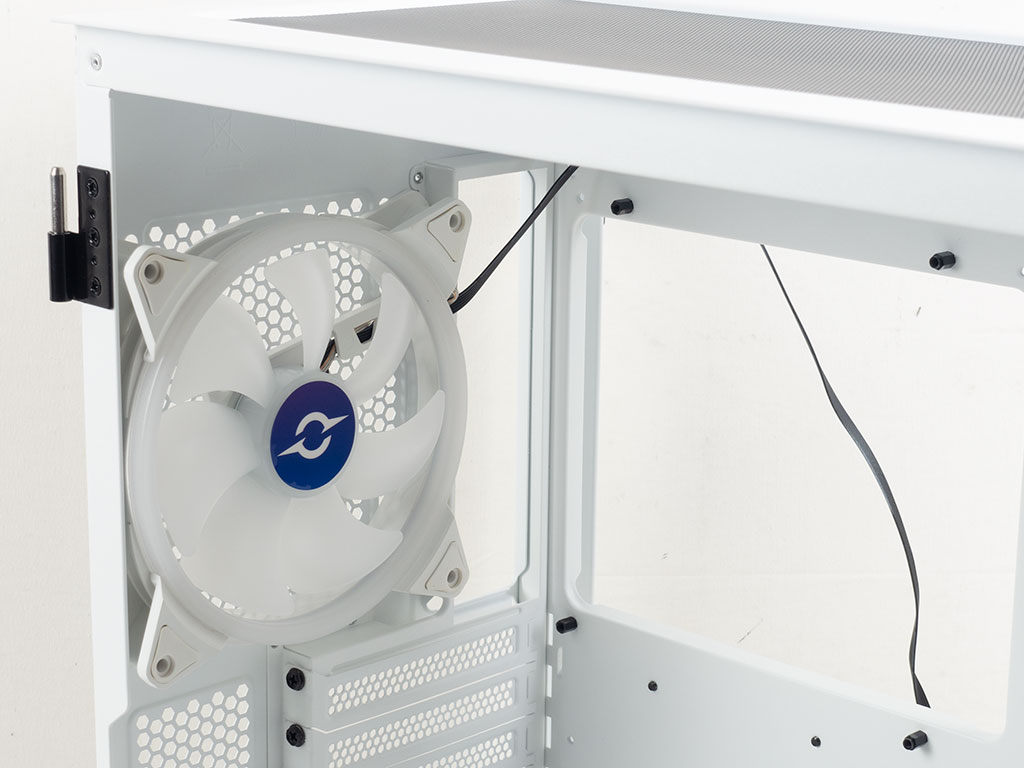
The two 120 mm fan-mounting positions on the side are covered by a single plate with rubber-ringed openings to which you may add a single 3.5" drive, it seems. That said, this is also nothing the manual or official specifications elaborate on. You may remove the cover to reveal the mountings for the two 120 mm fans. As this area is flat with the motherboard tray, using it for fans or even an AIO will limit your GPU length to 270 mm, which is unfortunate. All Aqirys would have had to do was recess this area to at least allow fans in this location to co-exists with long GPUs.
Turning the Aquilla around, the backside of the motherboard tray looks quite traditional as well, with the large cutout for easy access to the CPU cooler mounting. If you look closely, you will notice that the rear fan cable has white paint on it, which is odd as cooling units are usually installed after the painting process. From this angle, you can also clearly see the cover for the side fan mounts. This view also shows that Aqirys could have alternatively pushed the whole mounting area into the case interior just a little bit, which would have provided the same result of the fans and long GPUs fitting without issue.
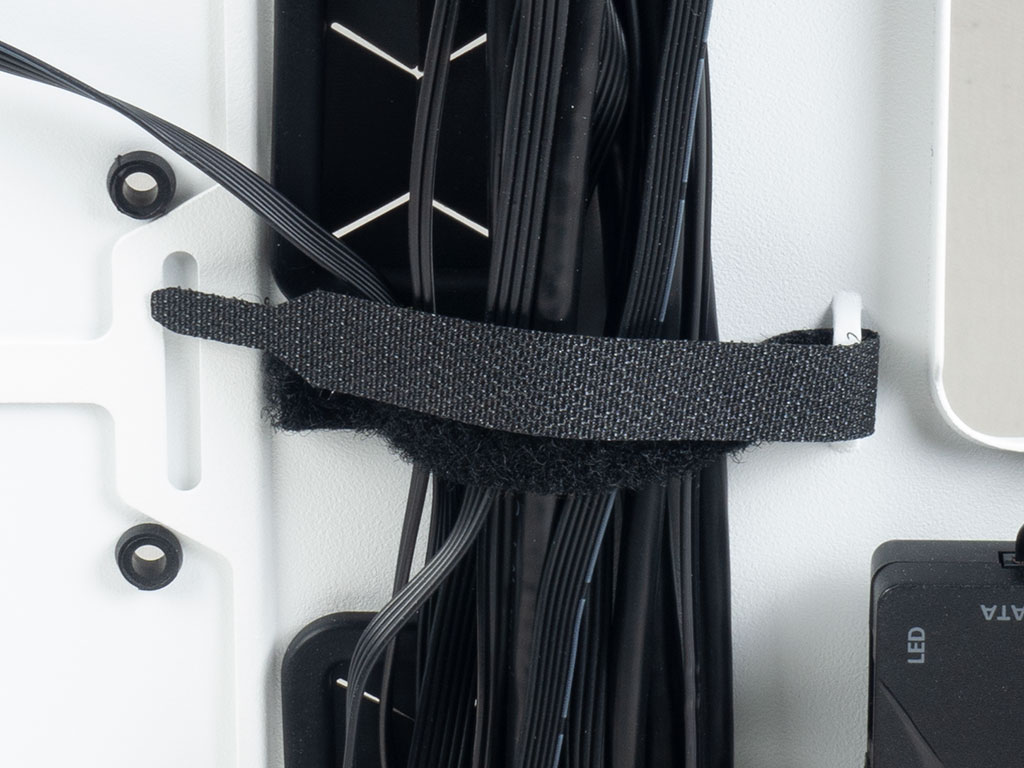
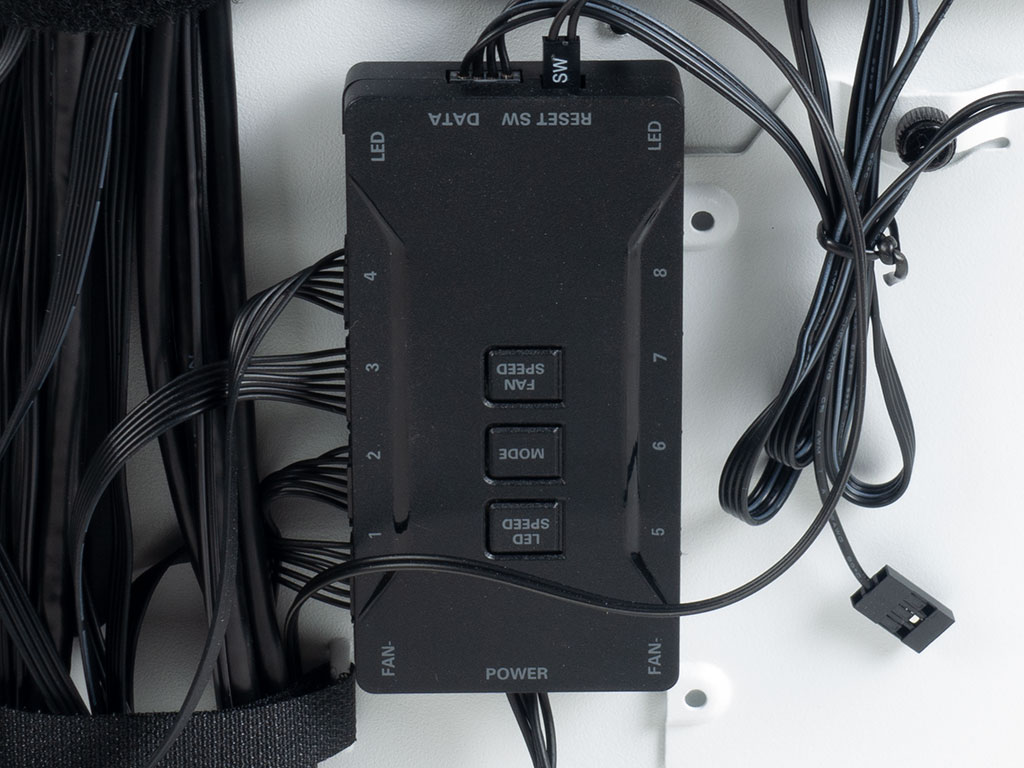
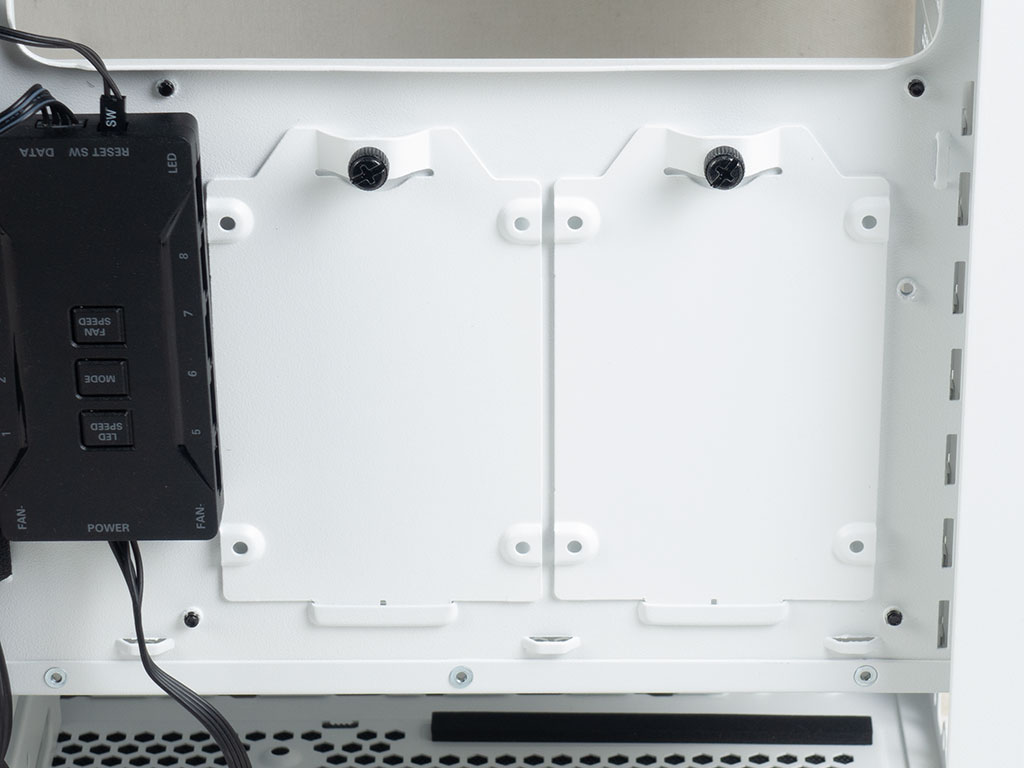
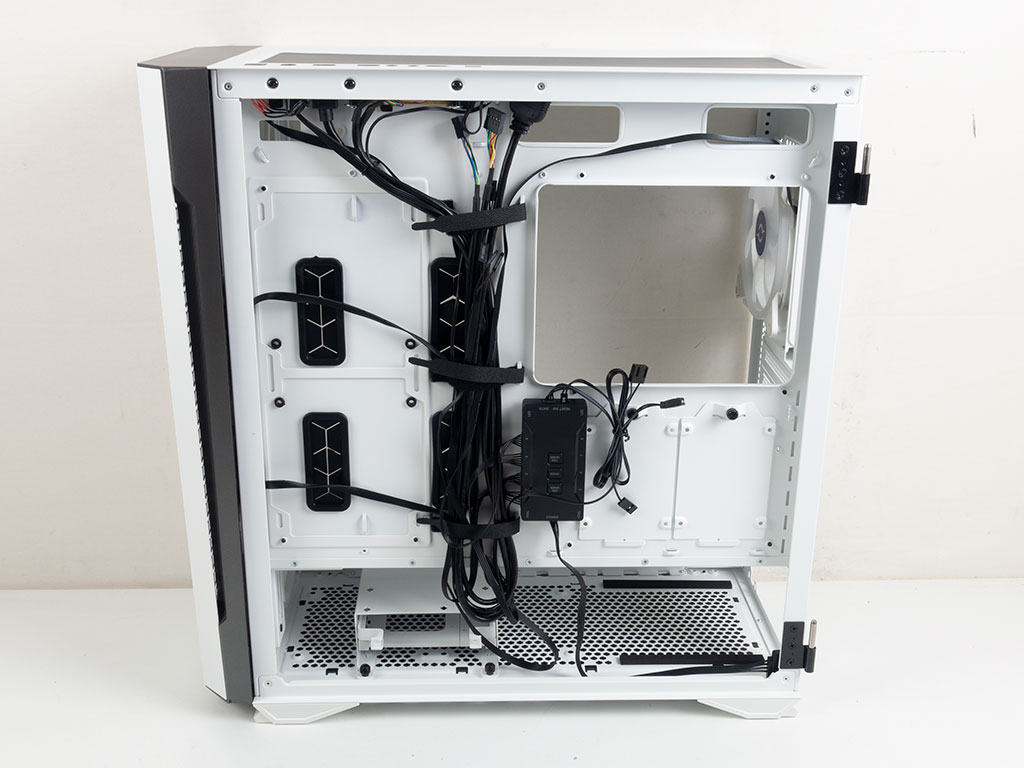
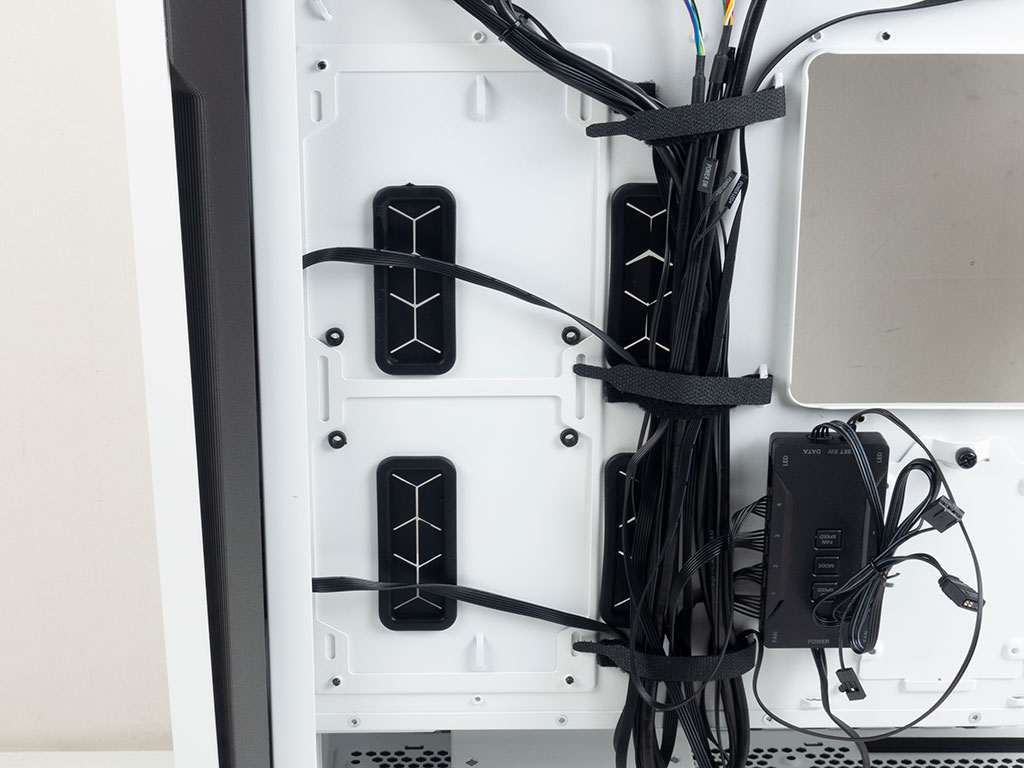
Three long Velcro strips have been pre-installed to allow for flexible cable management. These are firmly secured by screws on one end, which makes using them slightly easier as well. Next to these, you will find the encased controller for the fans. The three button on it are for fan speed (high/low) and ARGB mode and color. There are a total of eight connectors for such fans, but Aqirys unfortunately utilizes the six-cable "combo" for fan and ARGB control of the four pre-installed units. We have seen these numerous times in budget enclosures, but this means you will have to find more with the same wiring if expanding beyond the out-of-the-box setup. Aqirys could have at least included a single adapter cable to allow classic PWM and 3-pin ARGB units to be controlled remotely. Lastly, there are two individual 2.5" HDD trays next the controller. Each of these is held in place by a thumb screw for easy access.
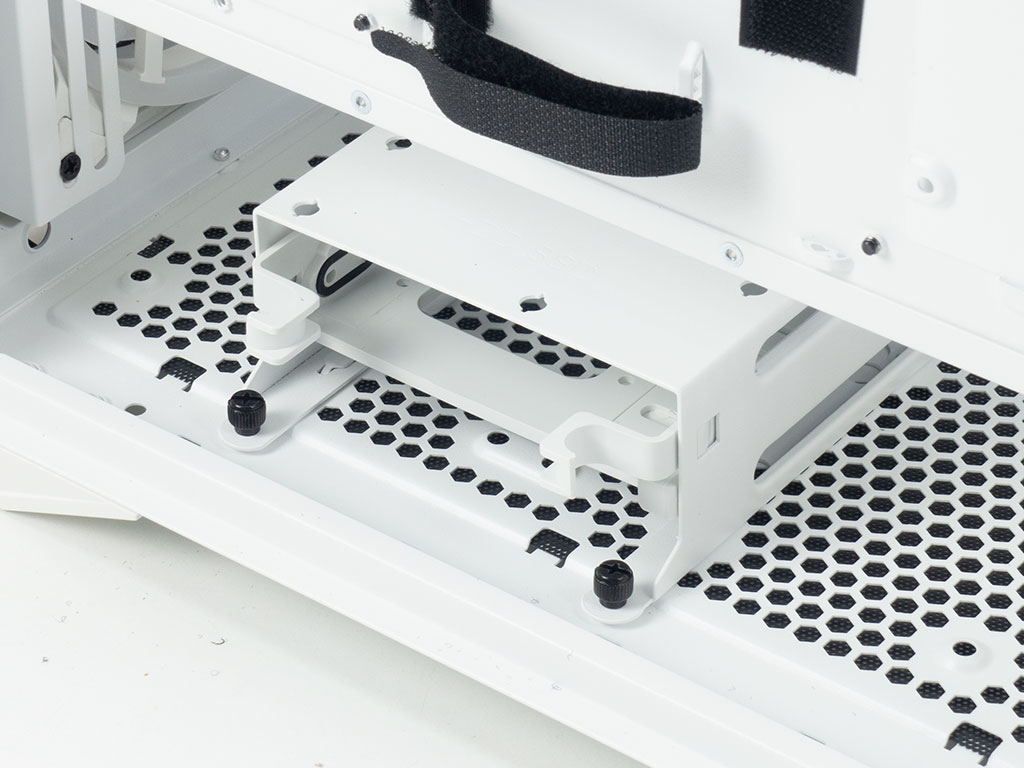
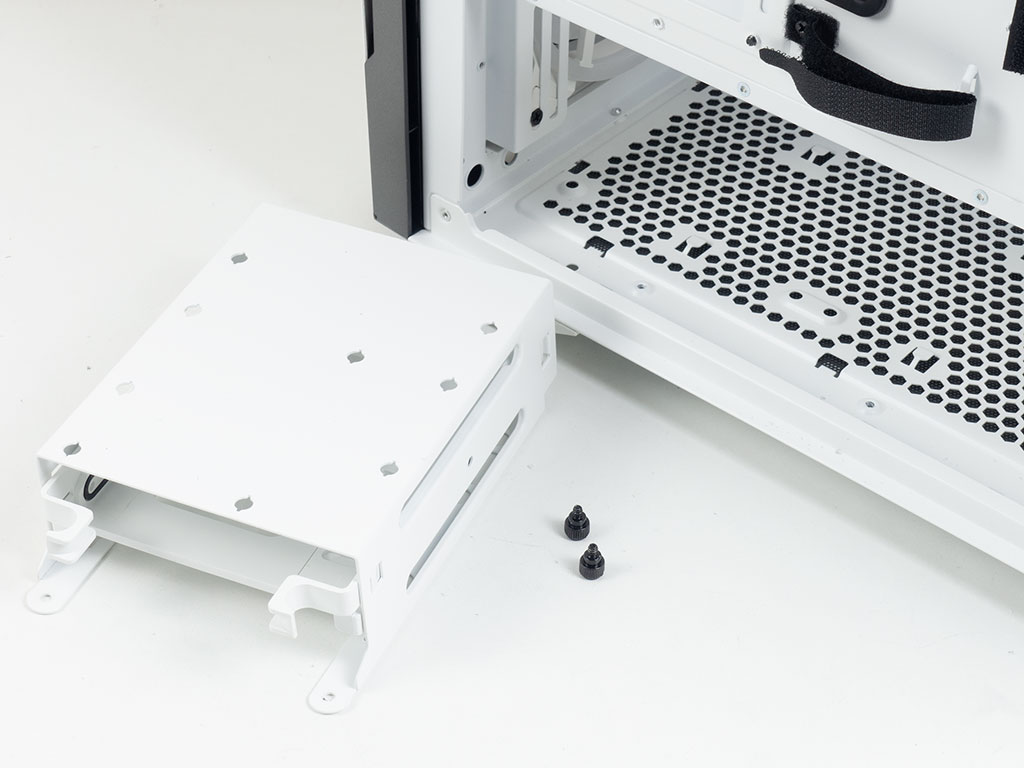
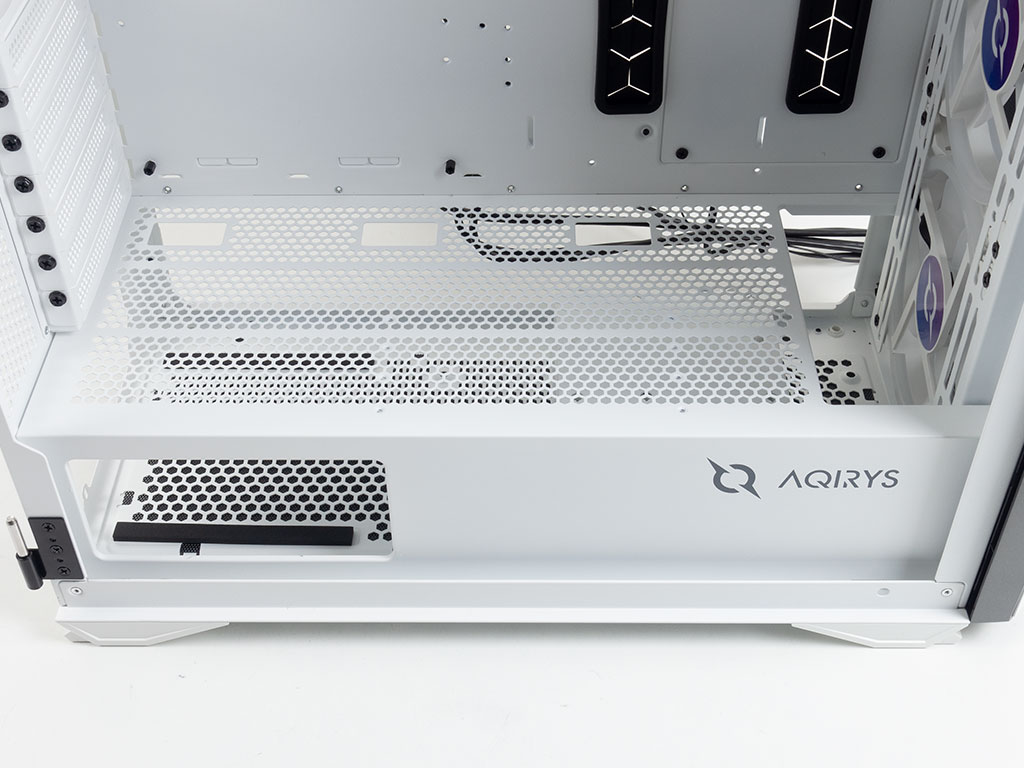
Underneath the shroud, in the front, is a simple 3.5" HDD cage you will need to remove if you want to utilize more than one such drive in this part of the Aquilla because the second storage unit is meant to be screwed onto the top of the metal cage. While this is not a big deal, a cage with two trays would have been nicer. Also, both the tray and frame can hold either a 2.5" or 3.5" unit.
In total, the Aqirys Aquilla can take two 2.5", one 3.5" and two 2.5/3.5" drives, while the specifications incorrectly mention two of each size instead. In fact, you may even install two 120 mm fans in the floor if you were to remove the HDD cage and utilize a short PSU, which is not mentioned anywhere, either.
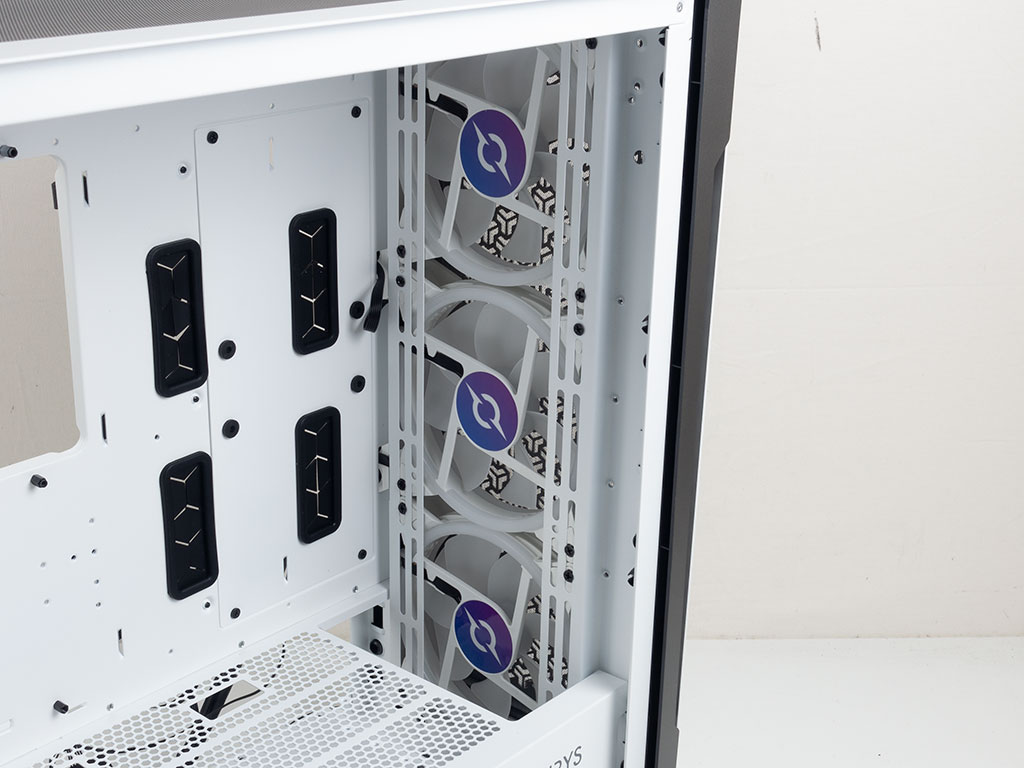
In the top, you can clearly see the three big 140 mm fans, which also means there is room for a radiator of up to 420 mm in this part of the chassis.
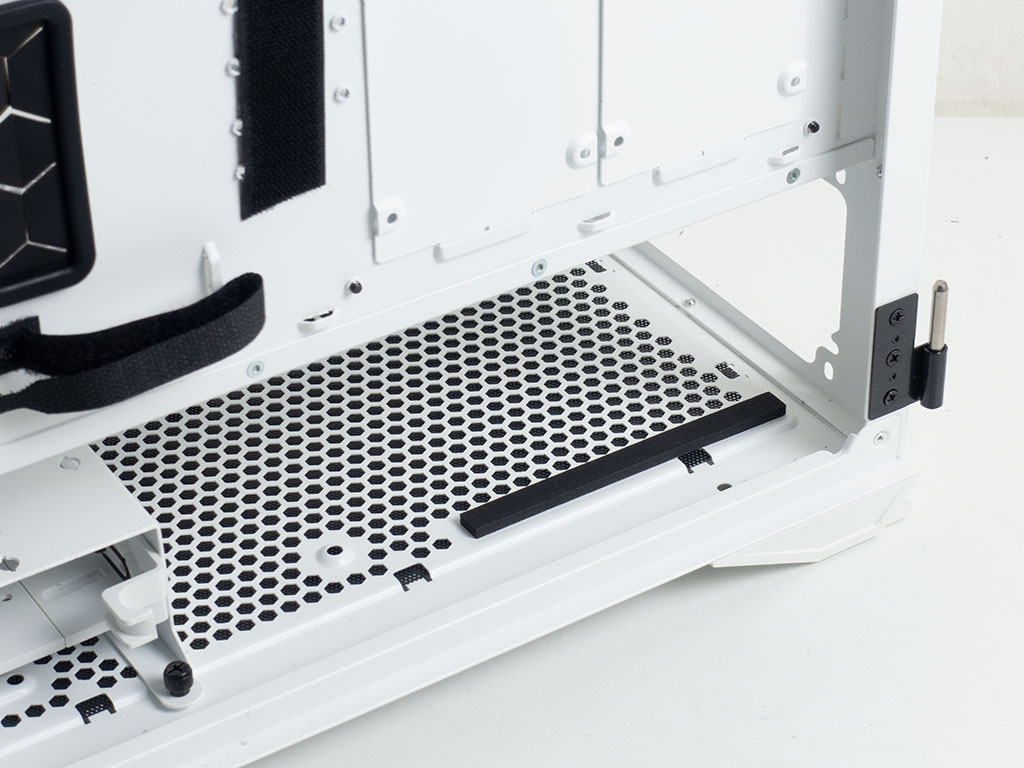
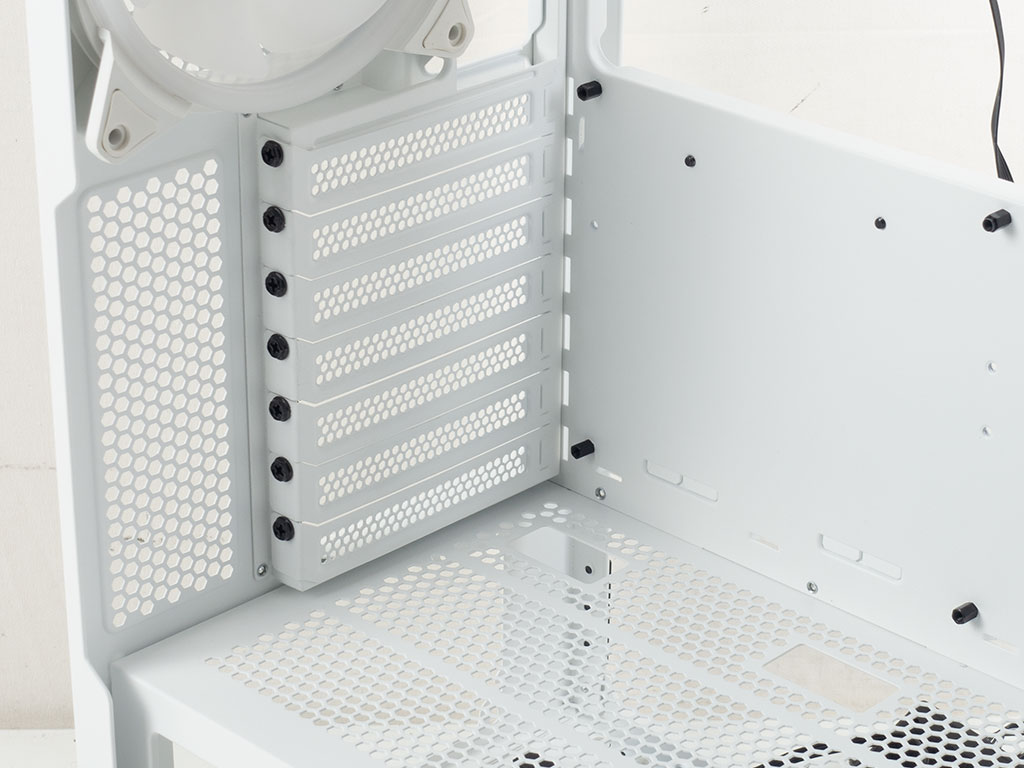
At the rear, underneath the shroud, is the basic, but functional PSU bay with two foam strips on the floor as an anti-vibration measure. Above that, you will find the seven expansion slots with classic screws holding each cover in place. This is unfortunate as thumb screws should be standard for a case in this segment. In the very top is that fourth 140 mm fan.

Taking a look at the ceiling of the Aqirys Aquilla, you will notice the elongated mounting holes for either three 120 mm or two 140 mm fans. Alternatively, you will easily be able to fit a 360 mm AIO here without any worry about blocking the motherboard connectors or the AIO colliding with tall components on it.
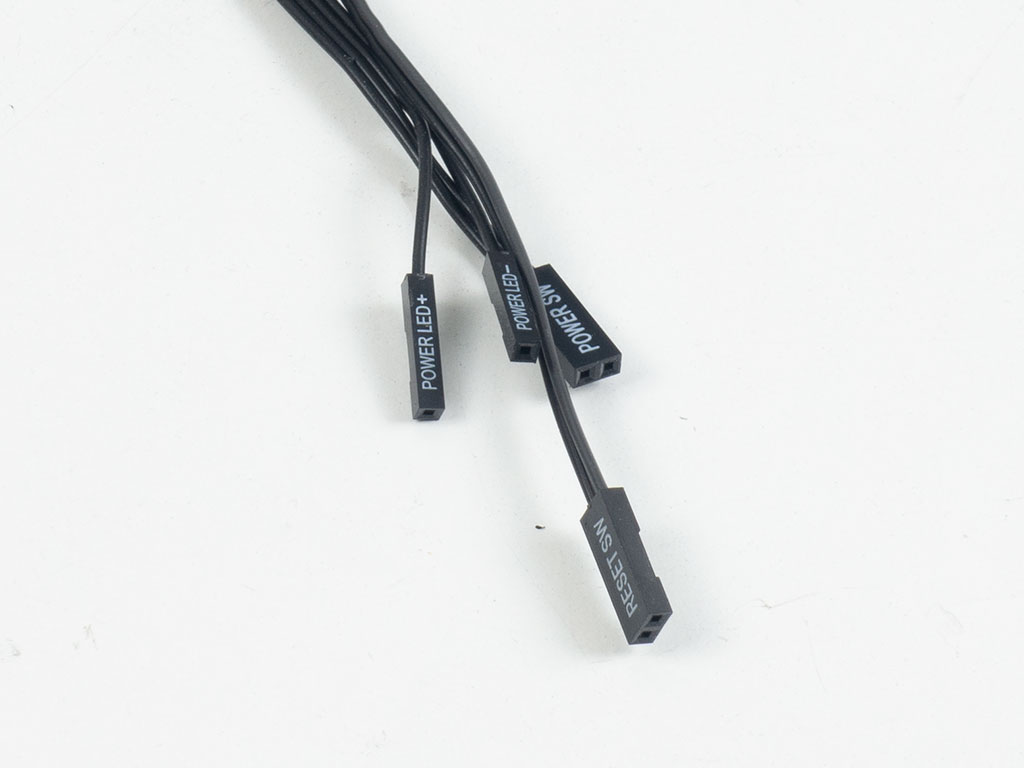
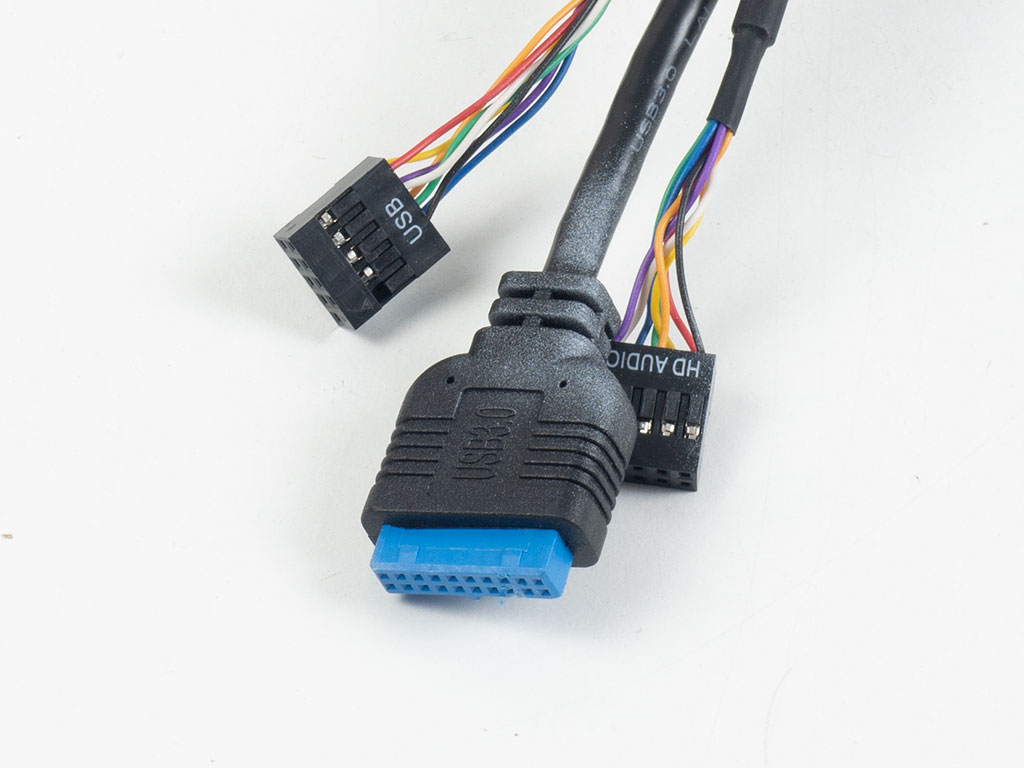
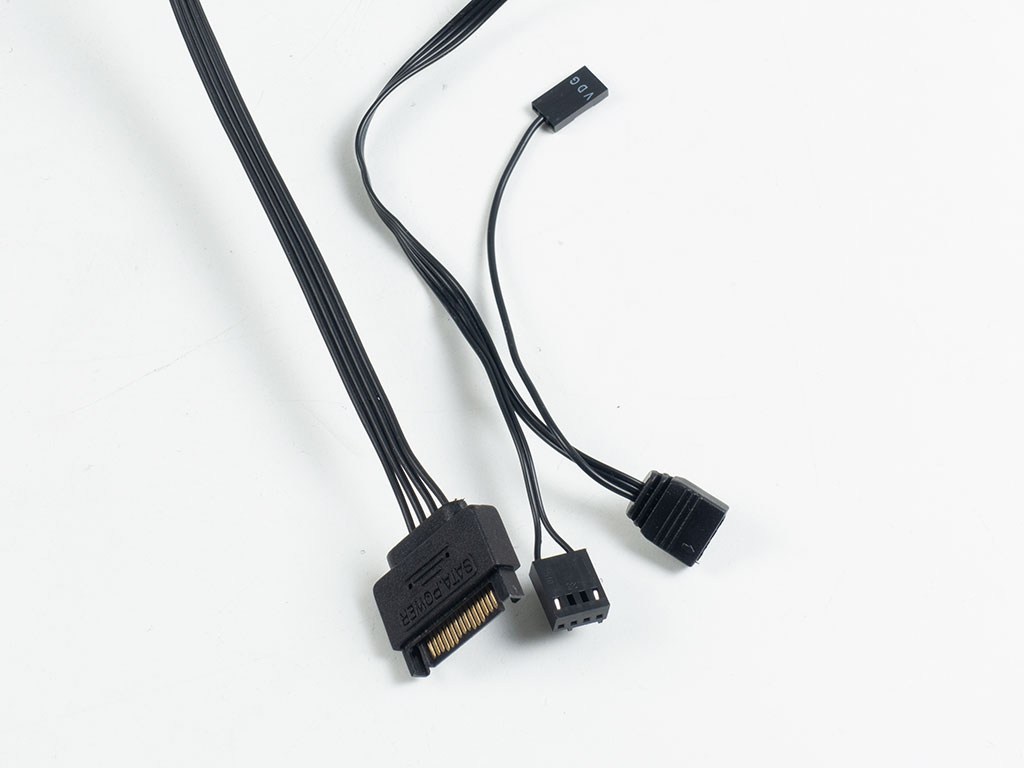
All the cables within the Aqirys Aquilla are of the default variety. Oddly enough, the I/O wires have some paint on them as well, which is unfortunate since this part will be clearly visible in the complete build. The fan/ARGB controller utilizes SATA for power and PWM to allow the motherboard to adjust the fan speed. On top of that is another pair of connectors for board control over the ARGB effects, which could be a partial workaround to syncing up the included fans with generic aftermarket additions.
Feb 21st, 2025 12:17 EST
change timezone
Latest GPU Drivers
New Forum Posts
- As we live the age of game remakes, which game you would like to see to have a remake? (298)
- AAF Optimus Modded Driver For Windows 10 & Windows 11 - Only for Realtek HDAUDIO Chips (328)
- wood workstation project (20)
- What are you playing? (22963)
- RTX 5080 Missing from vBIOS upload (4)
- Monitor Battle! Help me choose between two contenders (27)
- Zotac 5090 Solid disabled ROPs (27)
- GPU-Z not starting (17)
- LGA 1851 Thermal contact frames, yes or no? (14)
- Should I make a thermal maintenance on my GPU? (69)
Popular Reviews
- MSI GeForce RTX 5070 Ti Ventus 3X OC Review
- Gigabyte GeForce RTX 5090 Gaming OC Review
- Galax GeForce RTX 5070 Ti 1-Click OC White Review
- ASUS GeForce RTX 5070 Ti TUF OC Review
- Ducky One X Inductive Keyboard Review
- MSI GeForce RTX 5070 Ti Vanguard SOC Review
- MSI GeForce RTX 5070 Ti Gaming Trio OC+ Review
- AMD Ryzen 7 9800X3D Review - The Best Gaming Processor
- MSI MAG Z890 Tomahawk Wi-Fi Review
- NVIDIA GeForce RTX 5080 Founders Edition Review
Controversial News Posts
- AMD Radeon 9070 XT Rumored to Outpace RTX 5070 Ti by Almost 15% (302)
- AMD Plans Aggressive Price Competition with Radeon RX 9000 Series (268)
- AMD is Taking Time with Radeon RX 9000 to Optimize Software and FSR 4 (256)
- AMD Radeon RX 9070 and 9070 XT Listed On Amazon - One Buyer Snags a Unit (246)
- Edward Snowden Lashes Out at NVIDIA Over GeForce RTX 50 Pricing And Value (241)
- AMD Denies Radeon RX 9070 XT $899 USD Starting Price Point Rumors (239)
- New Leak Reveals NVIDIA RTX 5080 Is Slower Than RTX 4090 (215)
- AMD Radeon RX 9070 XT Launch Allegedly Set for March 6 (152)