 10
10
be quiet! Pure Base 500 FX Review
Thermal Stress Test »Review System
| System Parts for Case Reviews | |
|---|---|
| Processor: | Intel Core i5-12600K Provided by: Intel |
| Motherboards: | ATX: ASUS ROG Strix Z690-E Gaming WiFi mATX: ASUS TUF Gaming B660M-PLUS WiFi D4 ITX: ASUS ROG STRIX Z690-I Gaming WiFi Provided by: ASUS |
| Graphics Card: | Gigabyte Radeon RX 6600 Eagle Provided by: Gigabyte ZOTAC GAMING GeForce RTX 3060 Ti Twin Edge OC Provided by: Zotac |
| Memory: | 32 GB XPG LANCER RGB DDR5 6000 MHz 32 GB XPG CASTER DDR5 6400 MHz 32 GB XPG HUNTER DDR5 5200 MHz Provided by: ADATA |
| HDD: | Toshiba MG08ADA400E 7200 RPM SATA III Provided by: Toshiba |
| SSD: | ATX:XPG GAMMIX S70 BLADE 1 TB mATX: ADATA LEGEND 840 512 GB ITX: XPG SPECTRIX S20G 500 GB ADATA Ultimate SU800 512 GB ADATA Ultimate SU720 500 GB Provided by: ADATA |
| Power Supply: | ATX: Fractal Design ION+ 650W 80 Plus Gold SFX: Fractal Design ION SFX-L 650W 80 Plus Gold Provided by: Fractal Design |
| Cooling: | be quiet! Pure Loop 120/240/280 be quiet! Pure Loop 2 FX 360 Provided by: be quiet! |
Assembly
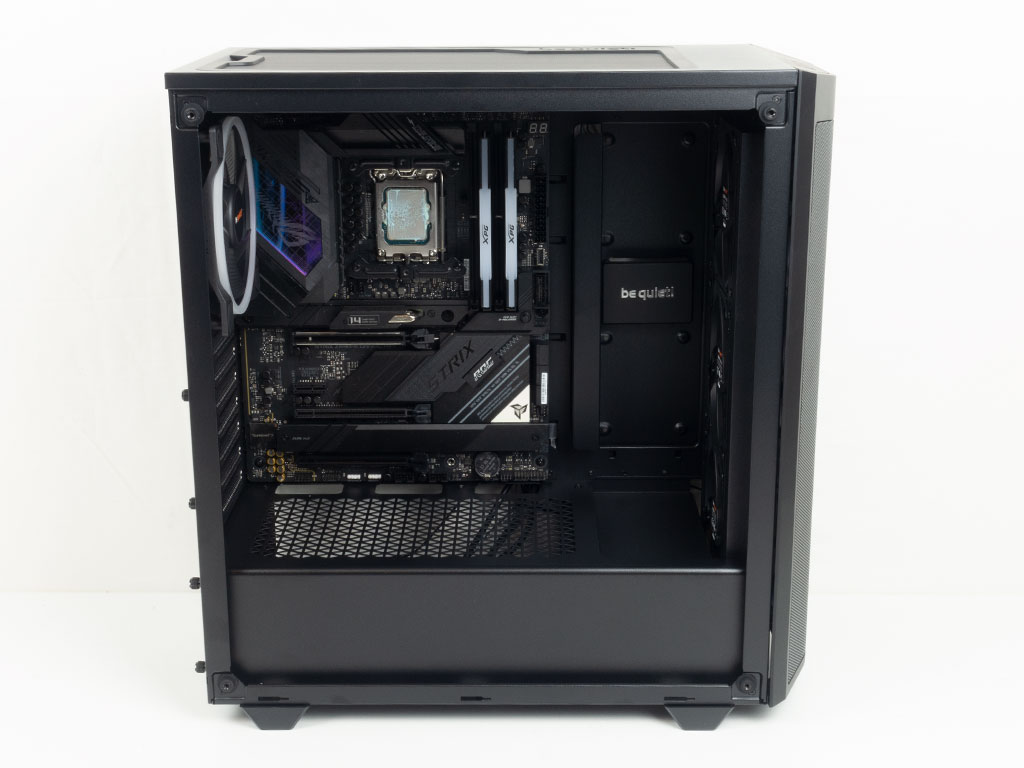

Installing the motherboard is easily done on the pre-installed spacers. An aligning pin in the center also helps with placing it before screwing it down. As you can see, the three openings on the bottom of the motherboard line up perfectly, so you will be able to route everything nicely.
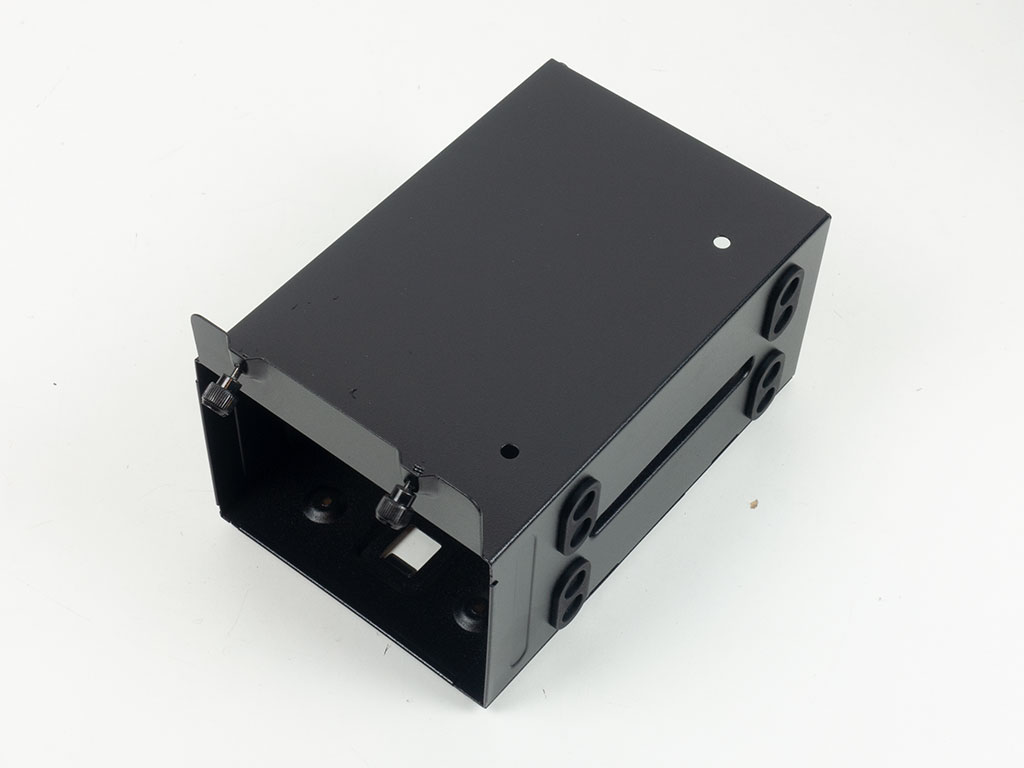

The 3.5" drives also have to be installed outside of the chassis. be quiet! includes special screws that are long enough to go through the rubber-equipped holes. Once filled, simply slide the whole cage back in place and tighten down the two attached thumb screws.
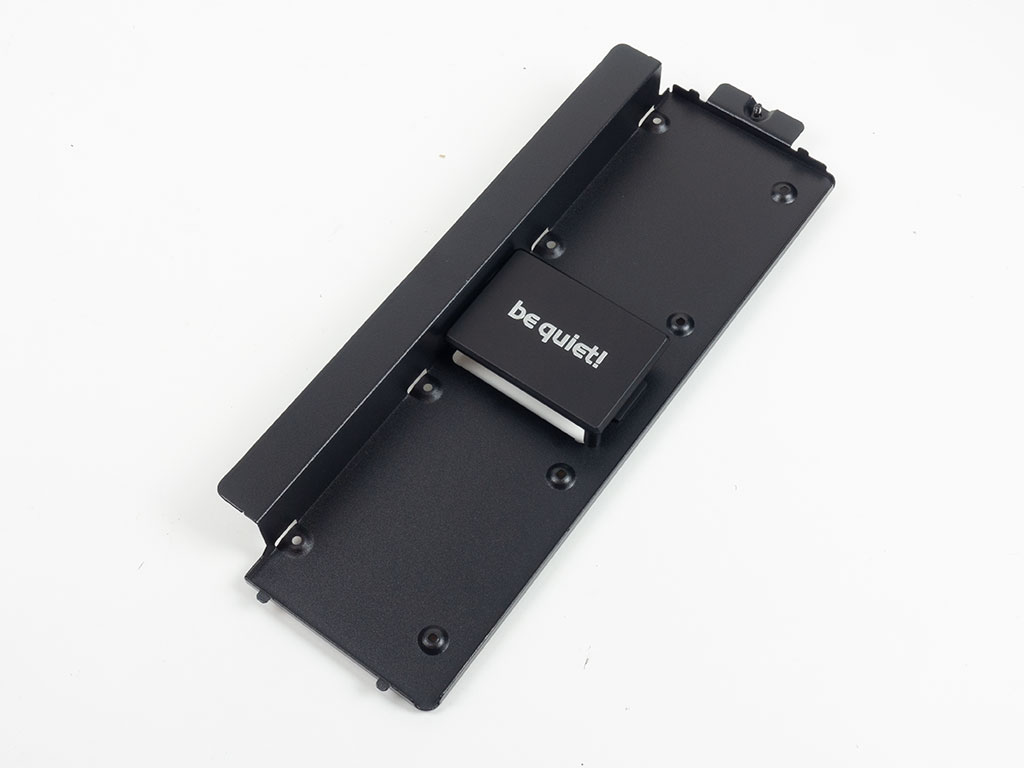
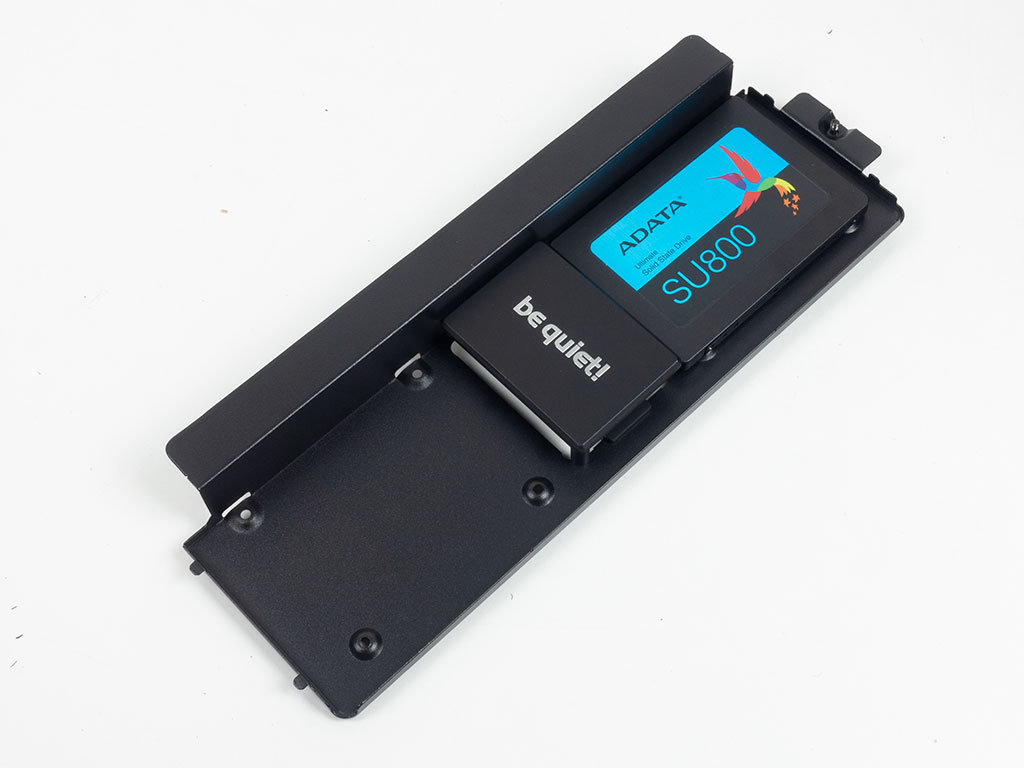
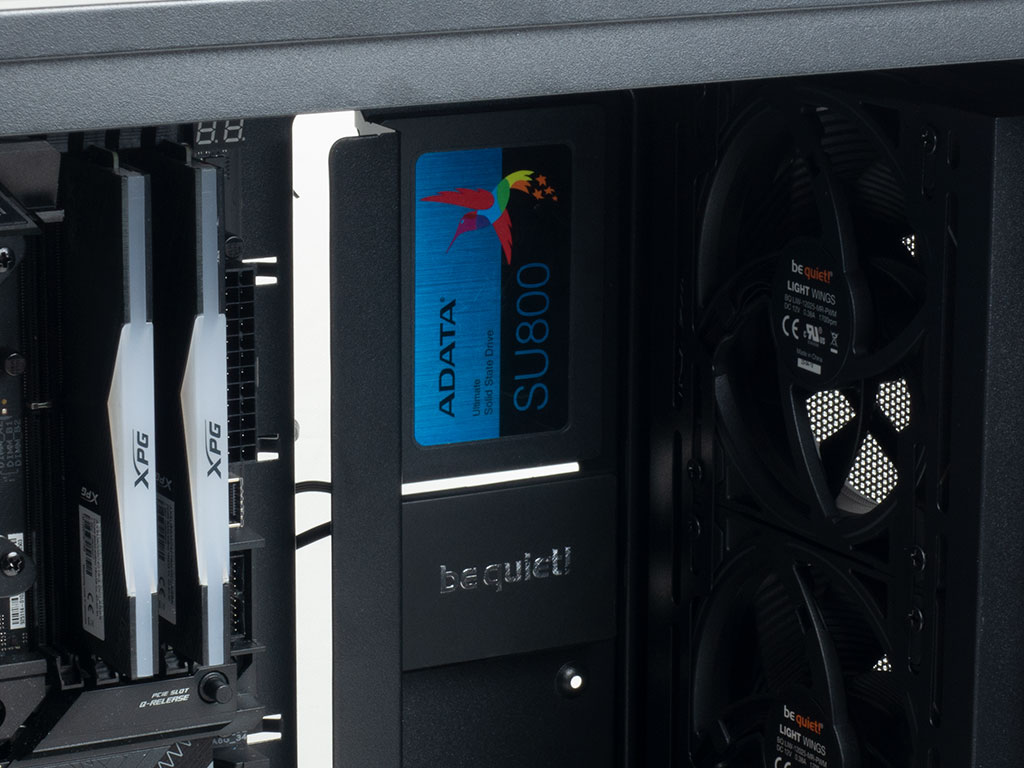
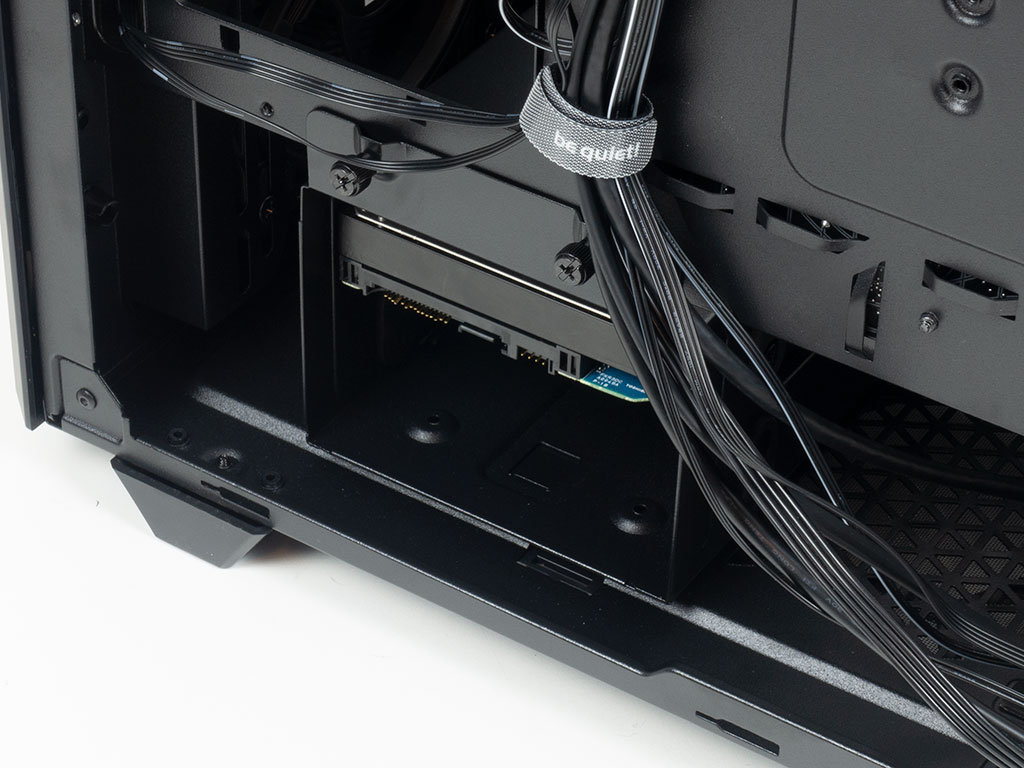
As the mounting plate for SSDs is already partially occupied and pre-wired by the ARGB/Fan PCB, we opted to install the 2.5" drive on the separate mounting plate which allows you to show off your drive alongside the other internal components nicely. This should really benefit those who purchased storage with built-in lighting as well. Drives are held in place with classic screws here and the central cover will hide any SATA power & data leads nicely.
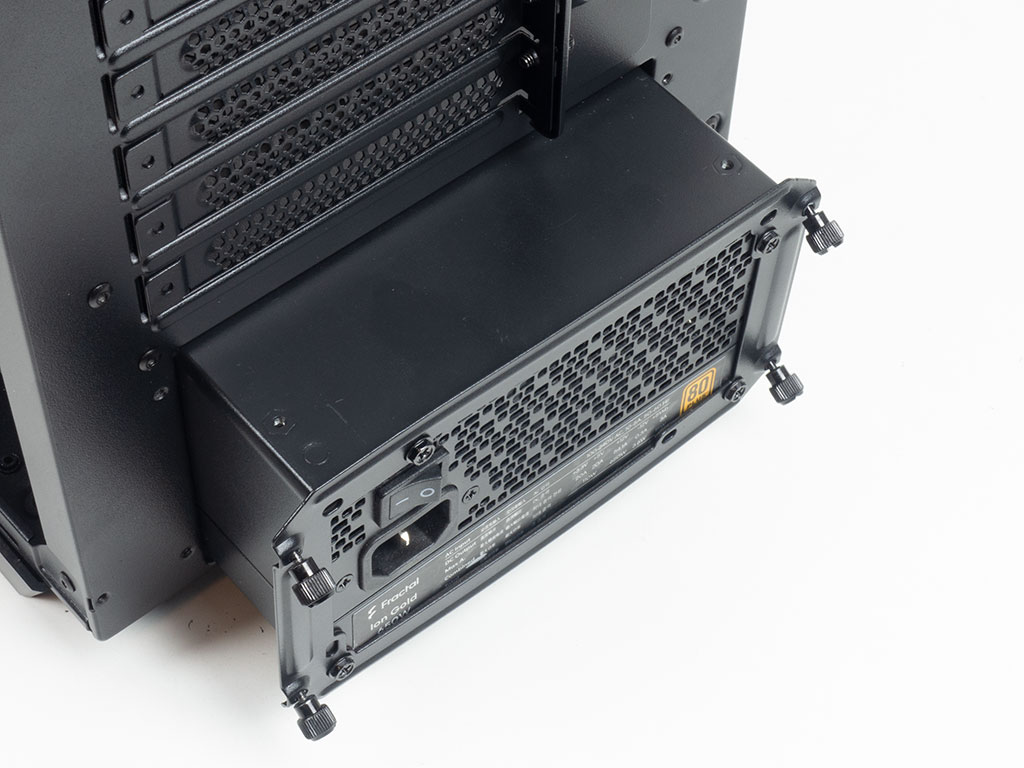
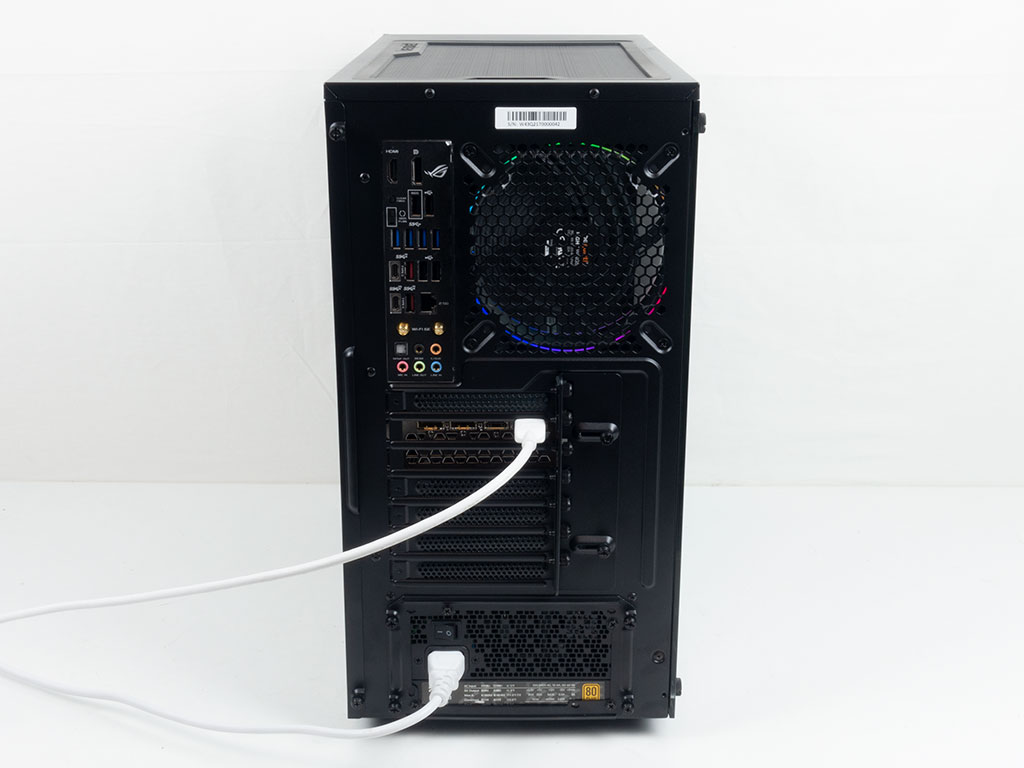
As you cannot remove the metal shroud, the only way to add a PSU is by screwing the frame down onto the PSU and sliding it all in through the back of the Pure Base 500 FX, which is quick, simple, and easy. There is plenty of space for long power supplies, so you should not run into any issues when building a high-performance system.
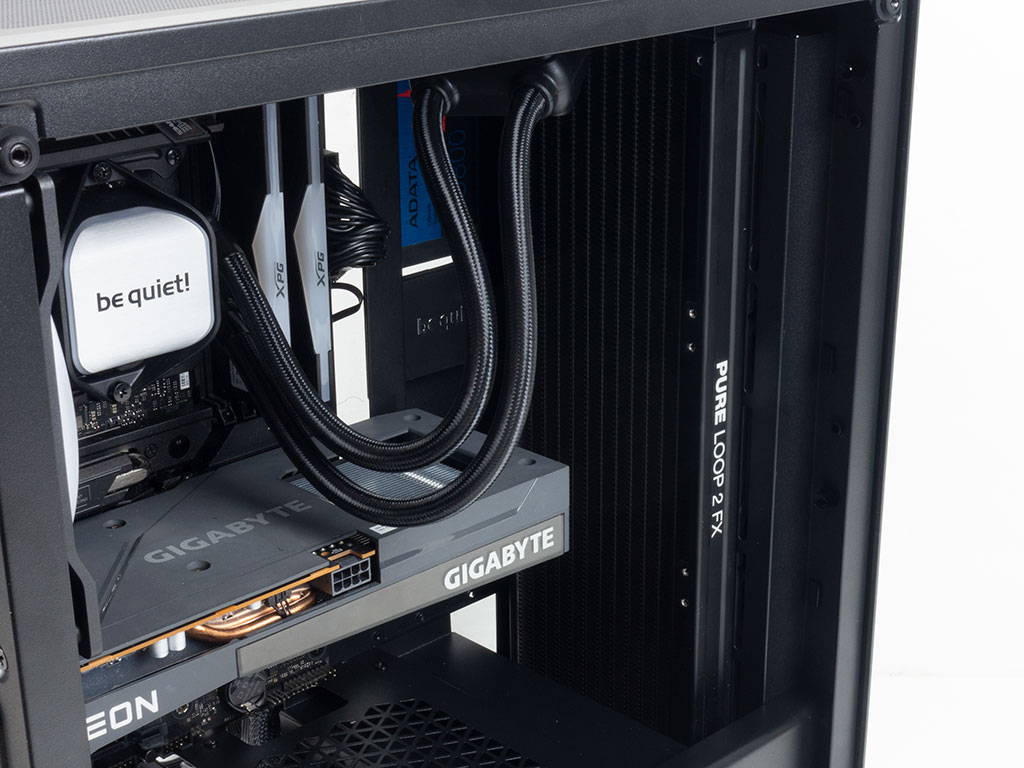
As we received the 360 mm Pure Loop 2 FX, the only place to put that is in the front. As you can see, it easily fits with plenty of room to spare for longer GPUs.
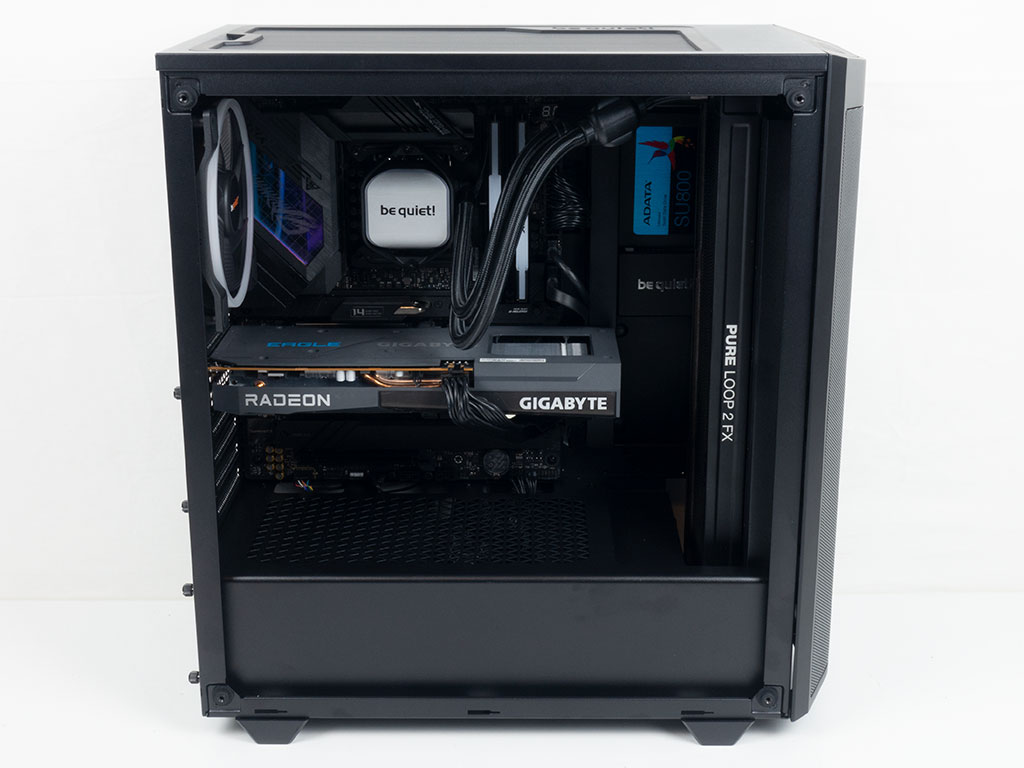
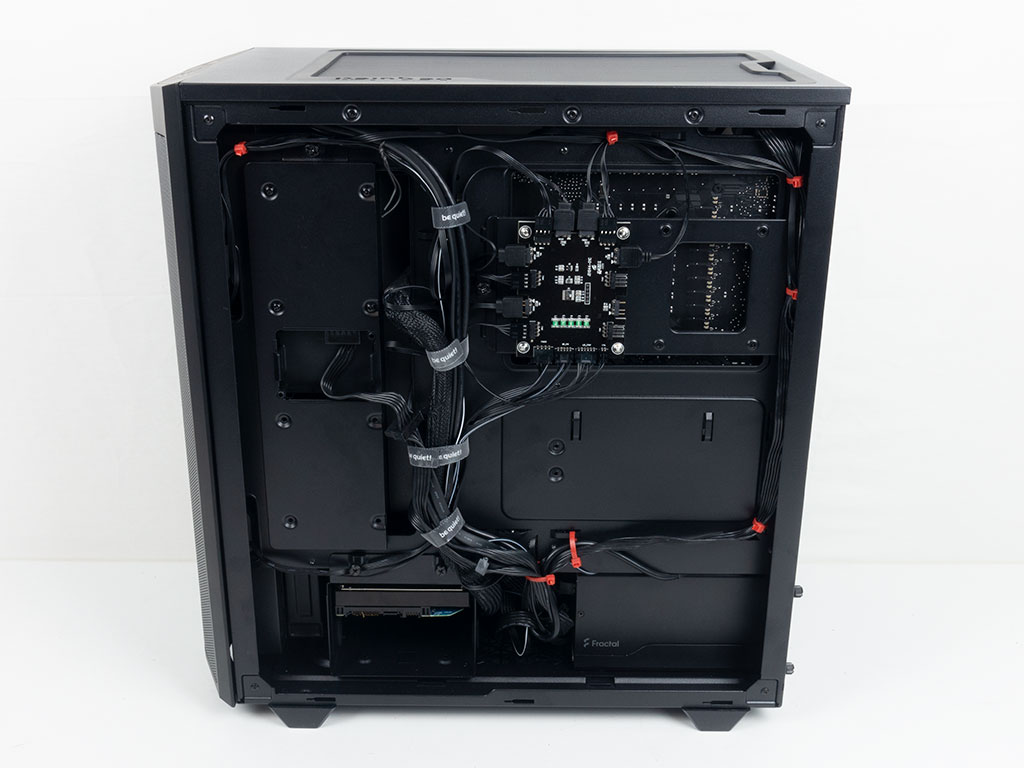
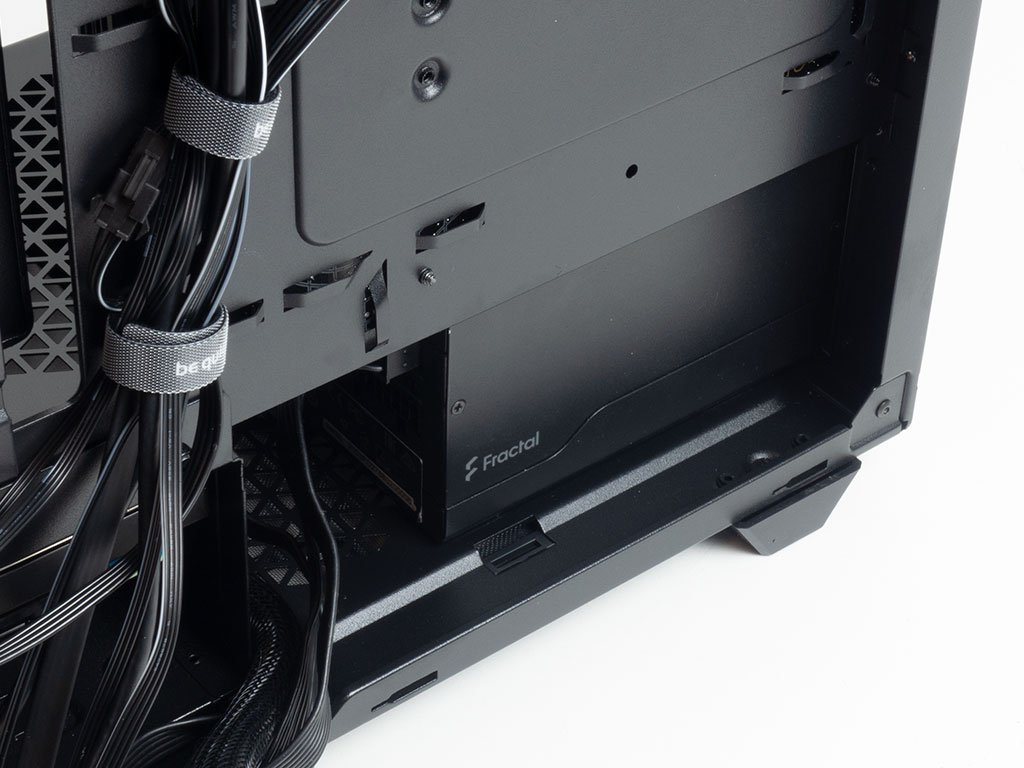
With everything installed, the Pure Base 500 FX is beautifully clean on the interior thanks to the unique bracket in the front, which also acts as a cable channel, and we made sure the GPU power cable hugs the GPU well to keep that distraction to a minimum as well. As we know from the original 500, the plastic cover underneath the SSD also really helps in that regard. On the rear, most the cables are held in place by the four Velcro strips quite alright albeit a bit short, so you won't be able to add many more cables to the mix. I also did use a few zip ties, which was a breeze because of the large hooks.
Finished Looks
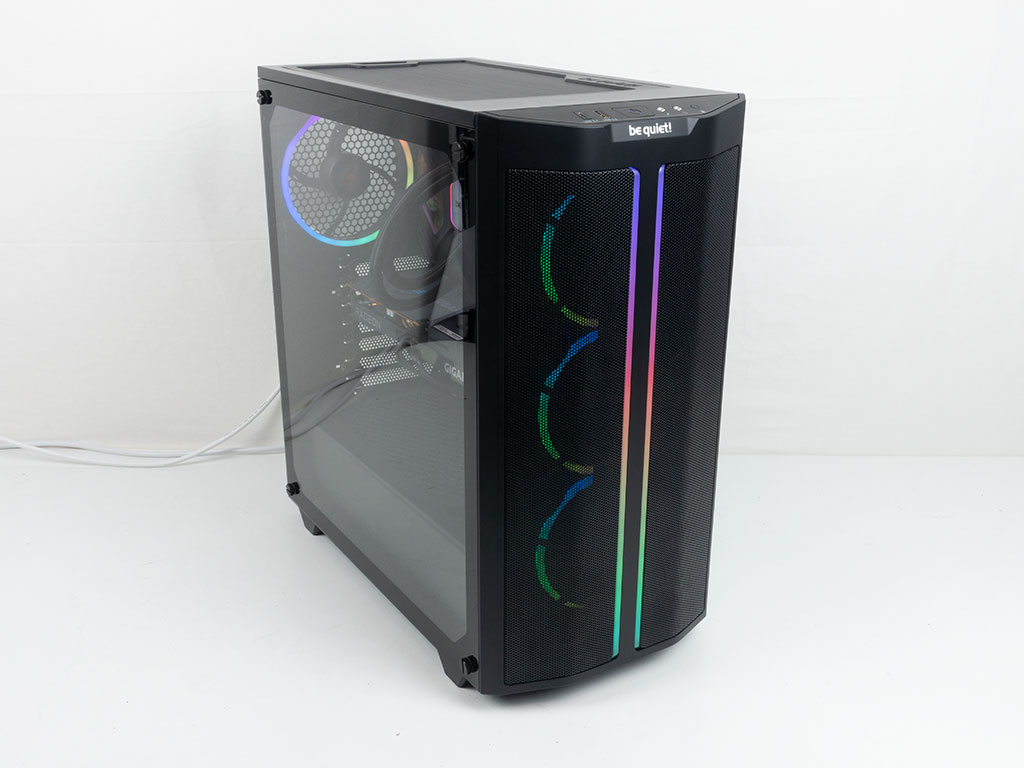
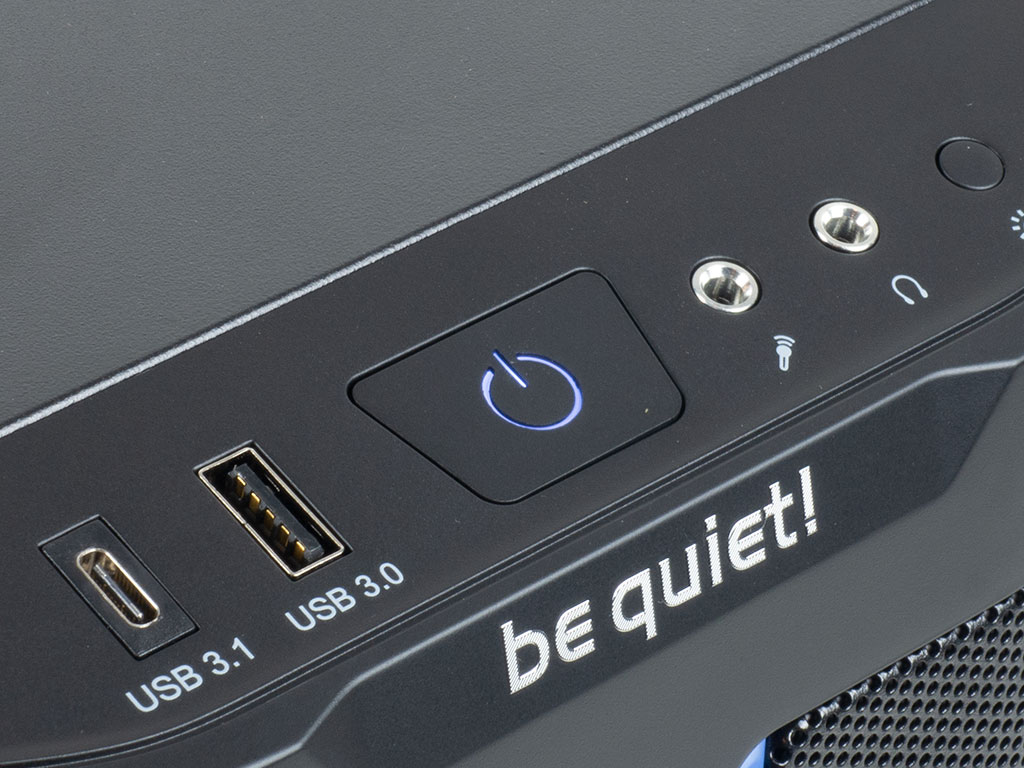
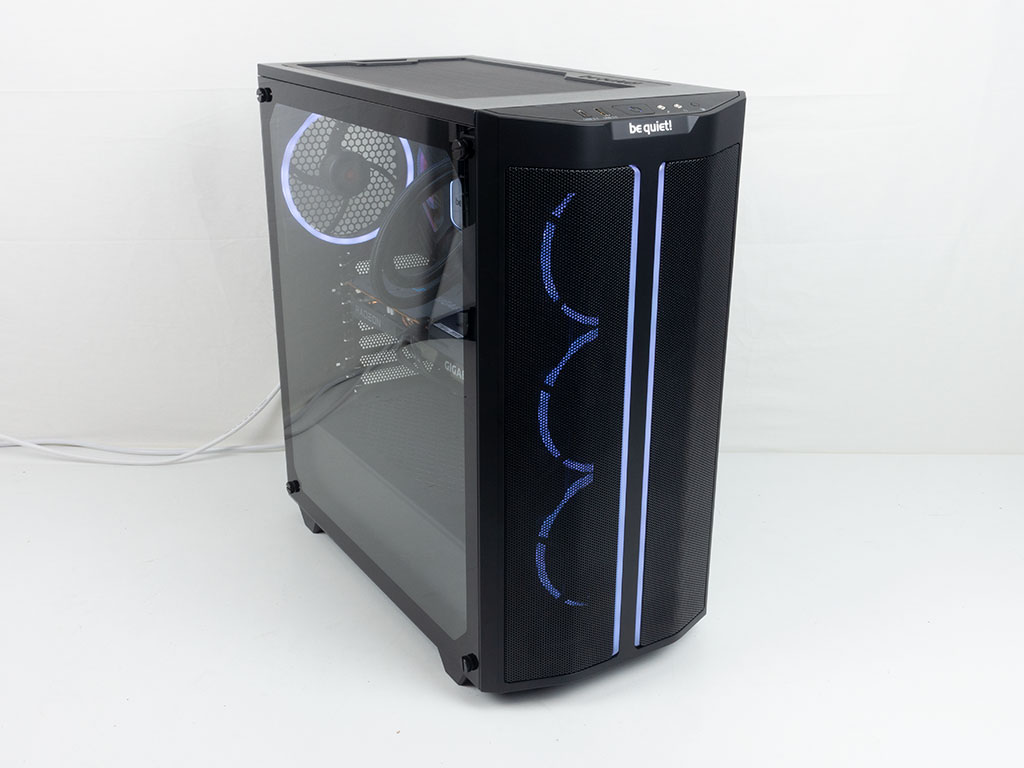
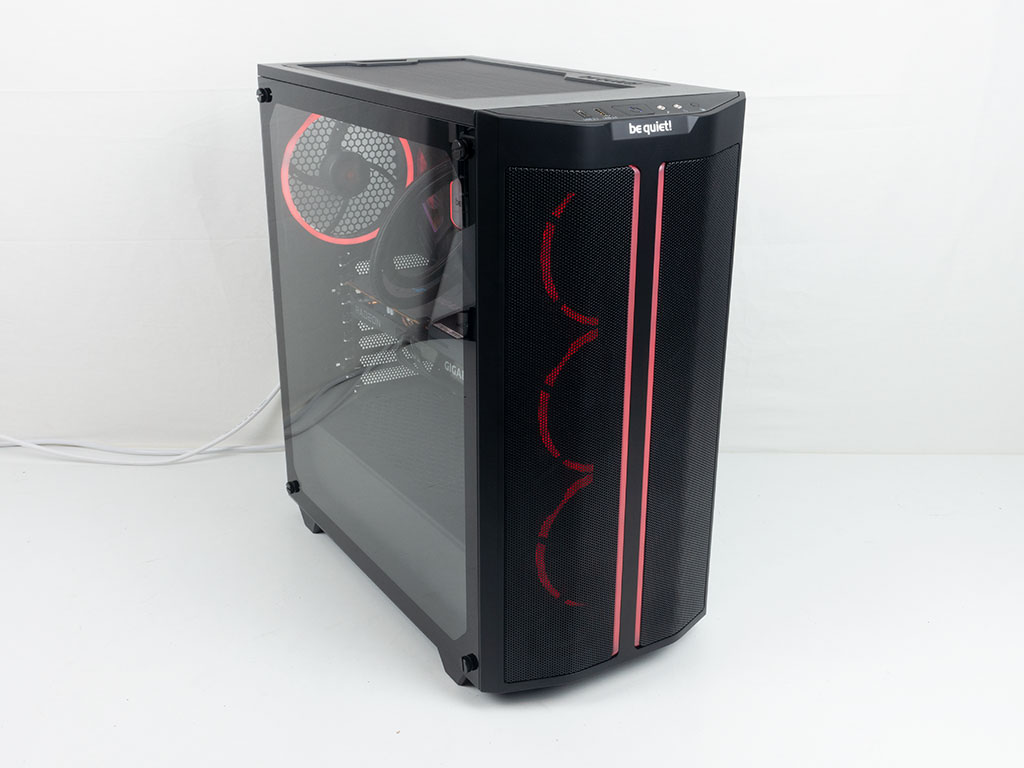
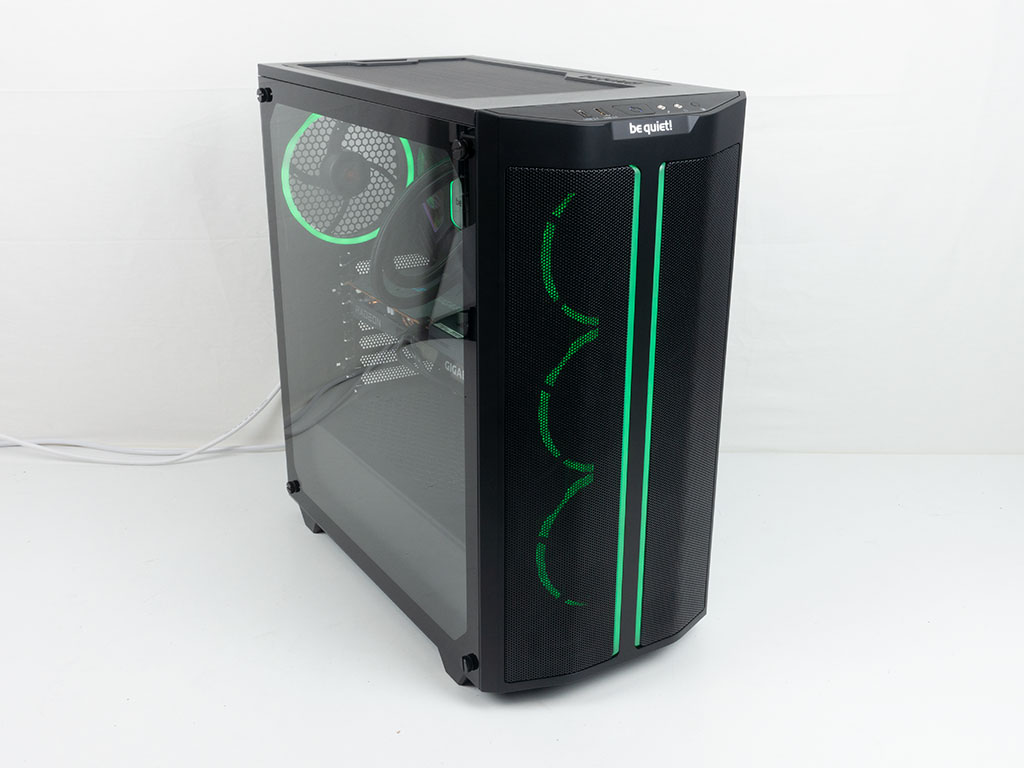
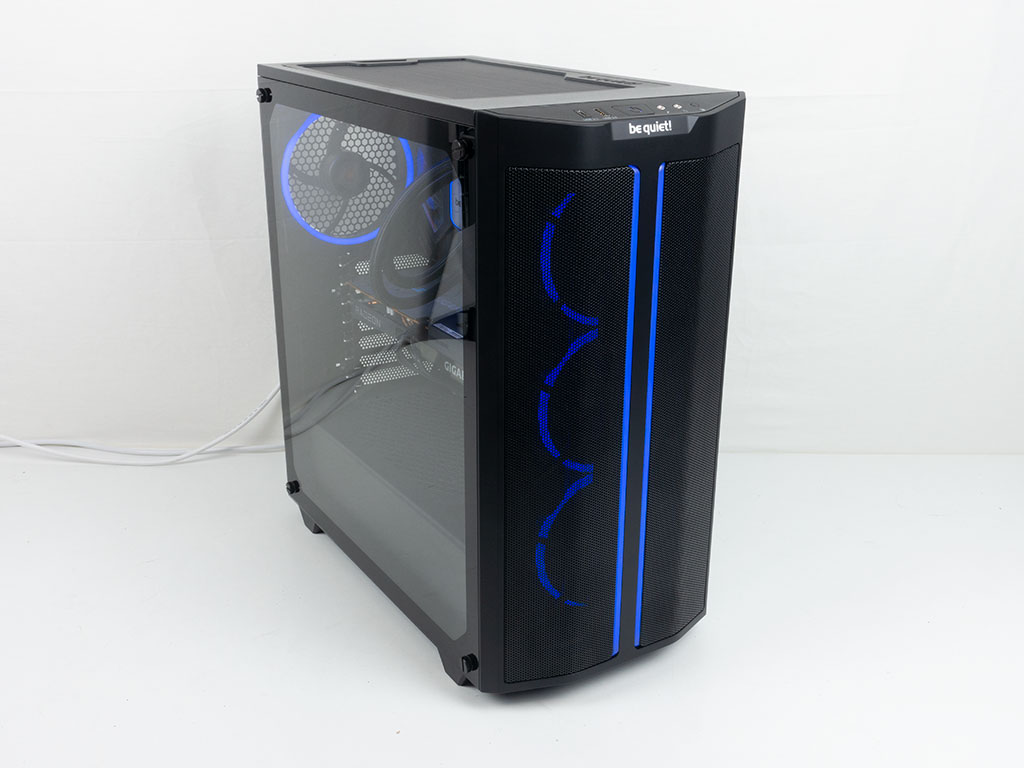
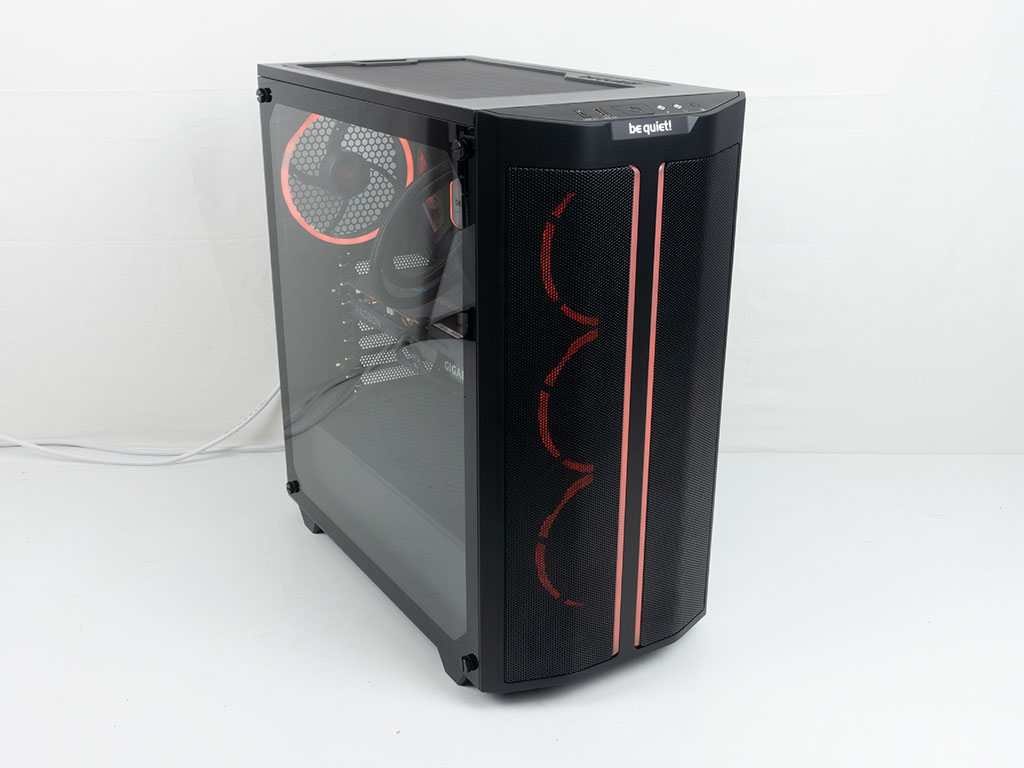
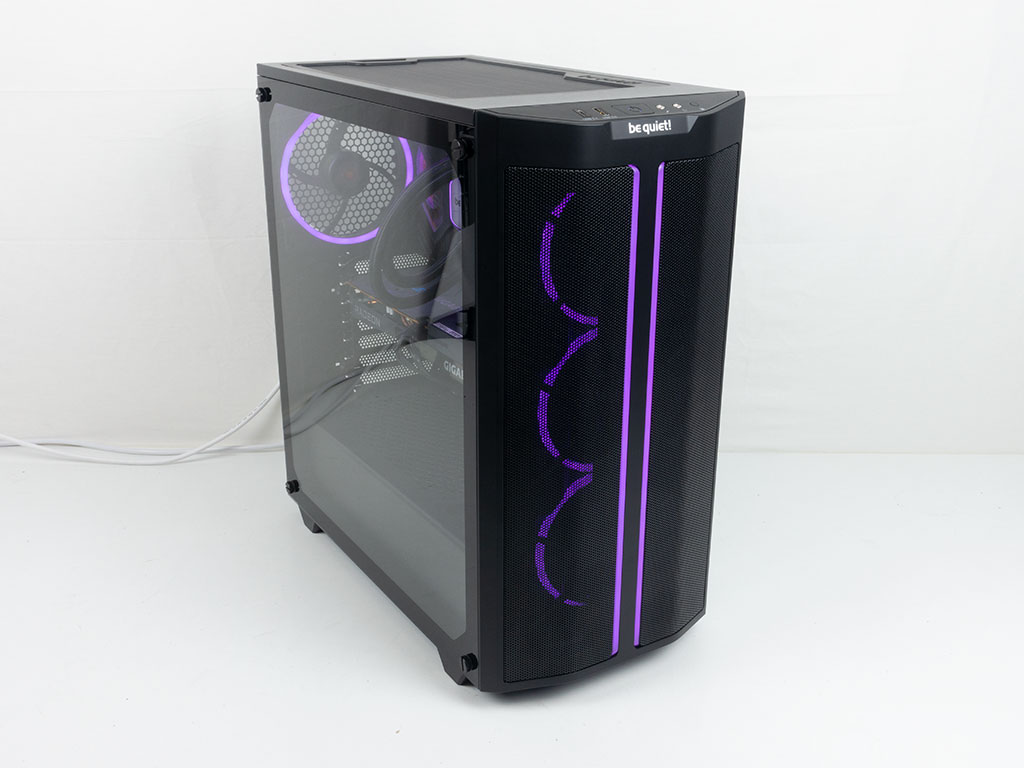
Fully assembled and turned on—with the covers back in place—the Pure Base 500 FX manages to pull out another ace from its sleeve: thanks to the use of the high-quality Light Wings fans, the system is whisper quiet. You will find a white light underneath the power button to let you know the system is powered on should you happen to ignore all the fancy RGB lighting.

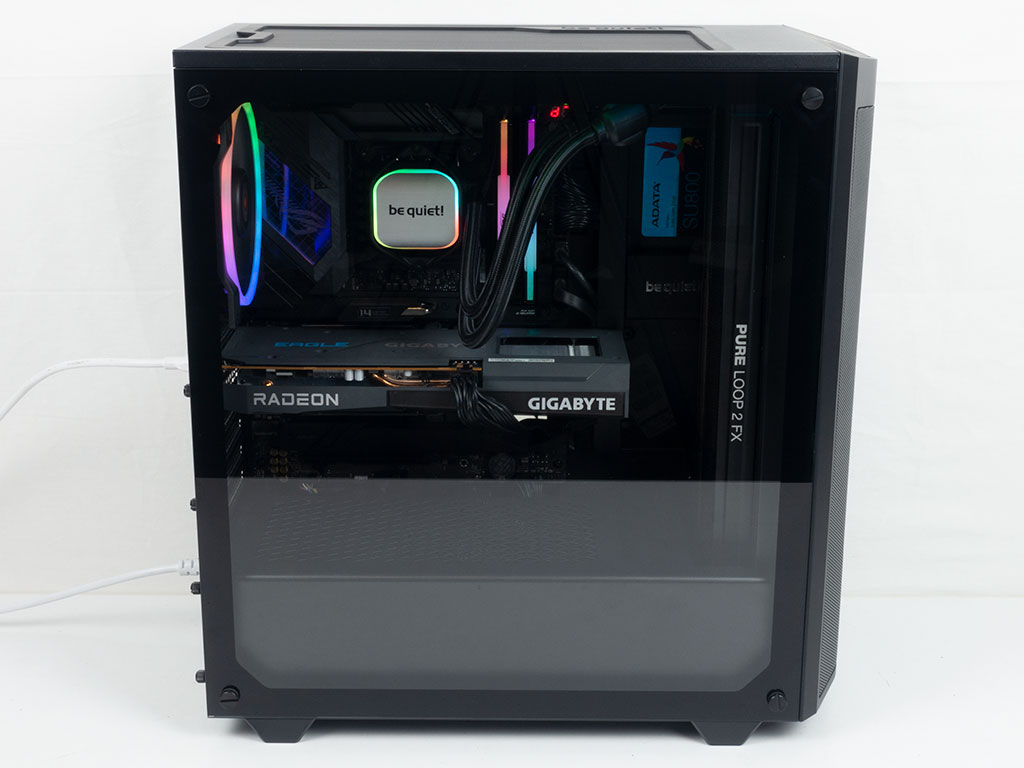
The ARGB strip in the front is diffused nicely and you can also clearly see the ARGB elements of the Light Wings fans as well. Thanks to the clear glass panel, your components are presented in plain sight, gently lit by the ARGB elements of the rear fan and Pure Loop 2 FX ring around the CPU. In the rear, everything is where you would expect to see it from a modern chassis like this. You may toggle through various animations and color modes with the built-in controller. Below are the solid color choices it is capable of.
Feb 12th, 2025 02:56 EST
change timezone
Latest GPU Drivers
New Forum Posts
- It's happening again, melting 12v high pwr connectors (278)
- win10 or win11 (8)
- Were Ryzen 8000 CPUs a big mistake from AMD? (10)
- Why Doesn't AMD Offer Long-Term GPU Availability Like Nvidia? (1)
- AM4 and Combining Different RAM? (72)
- Someone run games on AMD BC-250 under Linux * Cut down PS5 die to 6 CPU cores 24 GPU cores for use in crypto mining (65)
- Do I need to spend extra money on my MOBO? (50)
- Do you guys have backup GPUs? (24)
- Proposed new Power Connector (21)
- Asteroid 2024 YR4 reaches level 3 on the Torino Scale (96)
Popular Reviews
- Civilization VII Performance Benchmark Review - 35 GPUs Tested
- Kingdom Come Deliverance II Performance Benchmark Review - 35 GPUs Tested
- Team Group T-Force XTREEM DDR5-7200 48GB CL34 Review
- ASRock Phantom Gaming B850I Lightning Wi-Fi Review
- DAREU A980 Pro Max Review
- AMD Ryzen 7 9800X3D Review - The Best Gaming Processor
- NVIDIA GeForce RTX 5080 Founders Edition Review
- Corsair Frame 4000D Review
- Spider-Man 2 Performance Benchmark Review - 35 GPUs Tested
- MSI GeForce RTX 5080 Vanguard SOC Review
Controversial News Posts
- AMD Radeon 9070 XT Rumored to Outpace RTX 5070 Ti by Almost 15% (287)
- AMD is Taking Time with Radeon RX 9000 to Optimize Software and FSR 4 (256)
- AMD Denies Radeon RX 9070 XT $899 USD Starting Price Point Rumors (239)
- Edward Snowden Lashes Out at NVIDIA Over GeForce RTX 50 Pricing And Value (239)
- AMD Radeon RX 9070 XT & RX 9070 Custom Models In Stock at European Stores (226)
- New Leak Reveals NVIDIA RTX 5080 Is Slower Than RTX 4090 (215)
- AMD's Radeon RX 9070 Launch Faces Pricing Hurdles (175)
- AMD Radeon RX 9070 XT Tested in Cyberpunk 2077 and Black Myth: Wukong (169)