 5
5
CIDOO ABM084 Wireless Mechanical Keyboard Review
Software »Disassembly
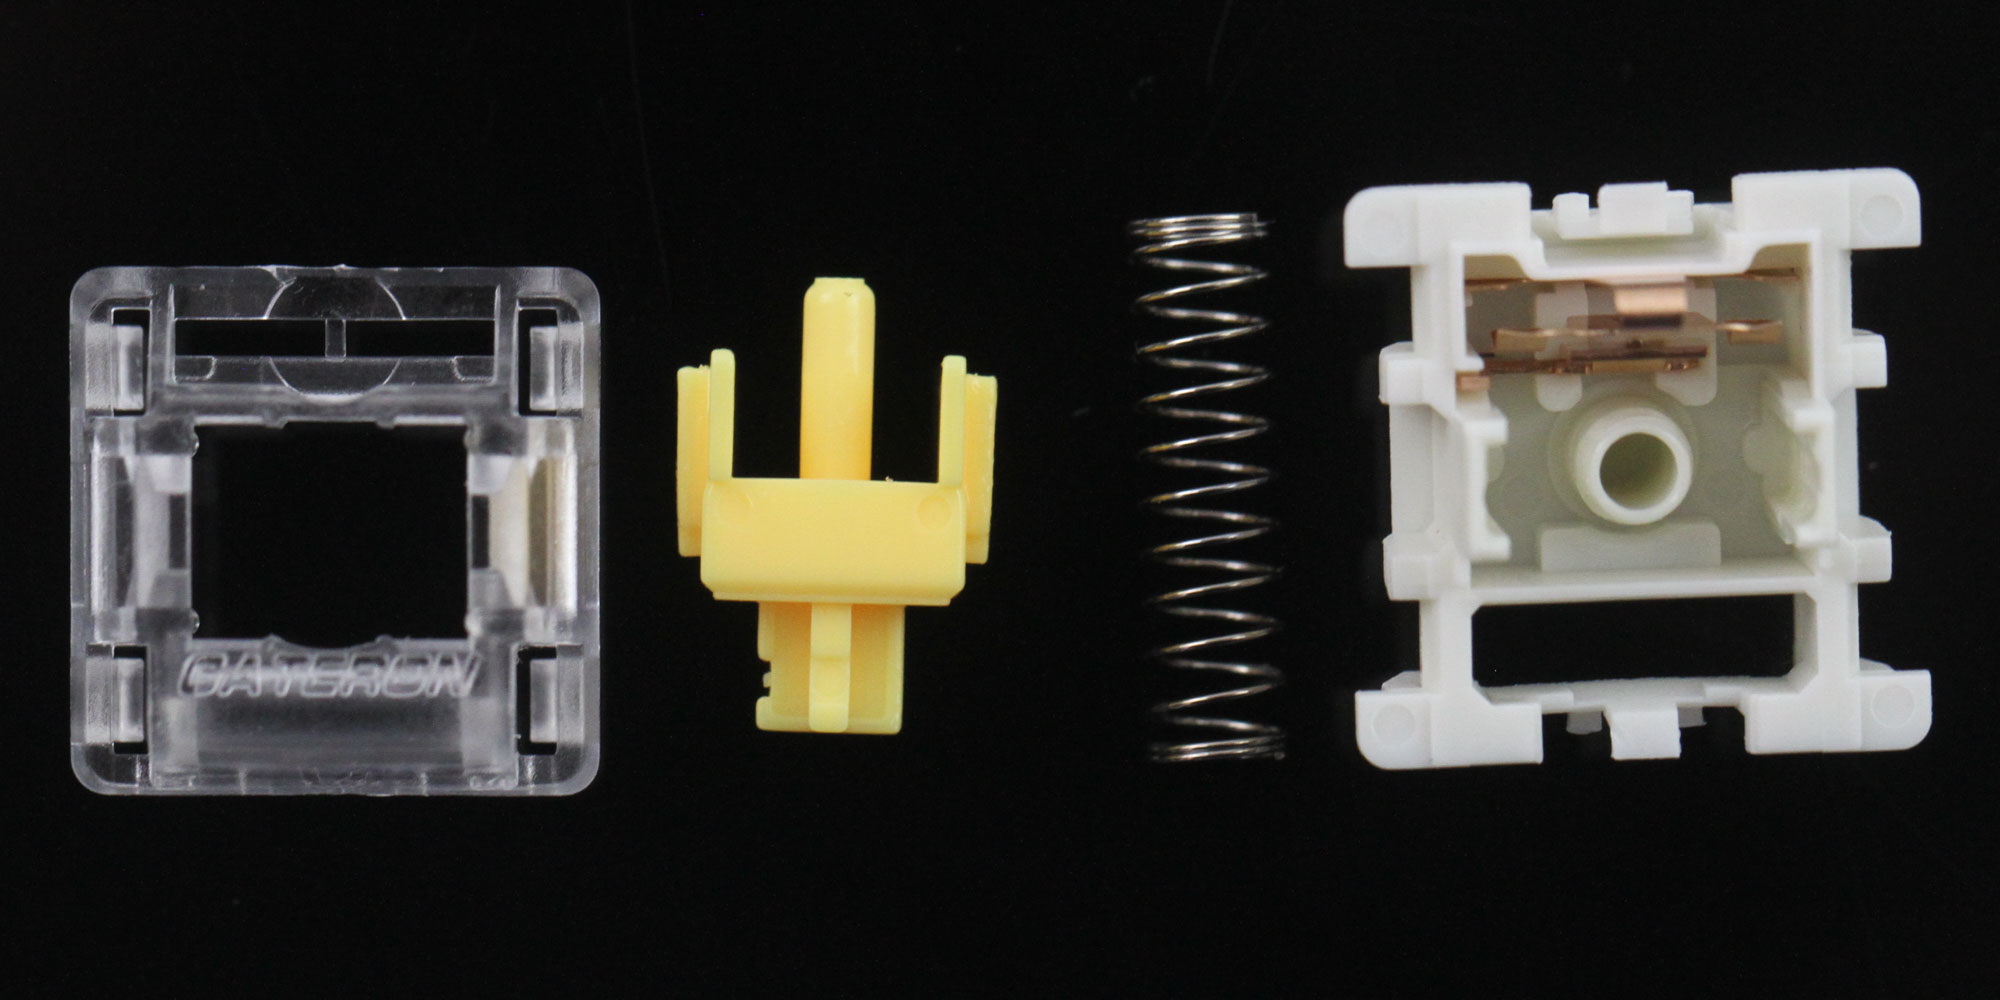
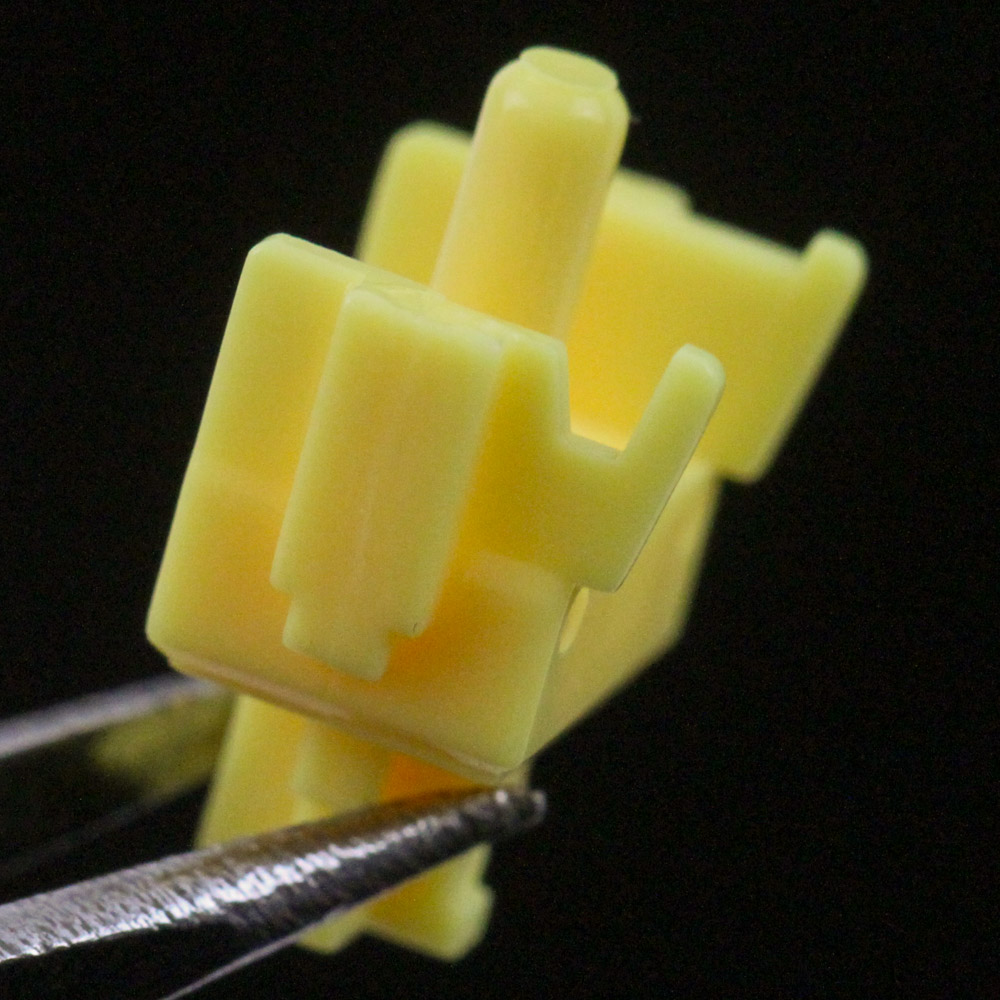

Given the hot-swappable nature of the switches, it only made sense that I take one of the Gateron Pro Yellow switches apart. This is a 3-pin mechanical switch employing the Cherry MX stem design, so we have the usual construction with the top, crosspoint stem/slider, spring, and housing that also has the metal leaf for the actuation mechanism. What makes this Pro version differ from the standard Gateron Yellow (Milky Yellow) is that the stem comes pre-lubed out of the factory, and tolerances for all the moving parts is supposedly tighter. The metal contacts are also supposedly thinly plated with gold, but clearly not to where it makes a difference visually. I did feel the lube slightly on my fingers, and this minimal lube application is the way to go with linear switches.


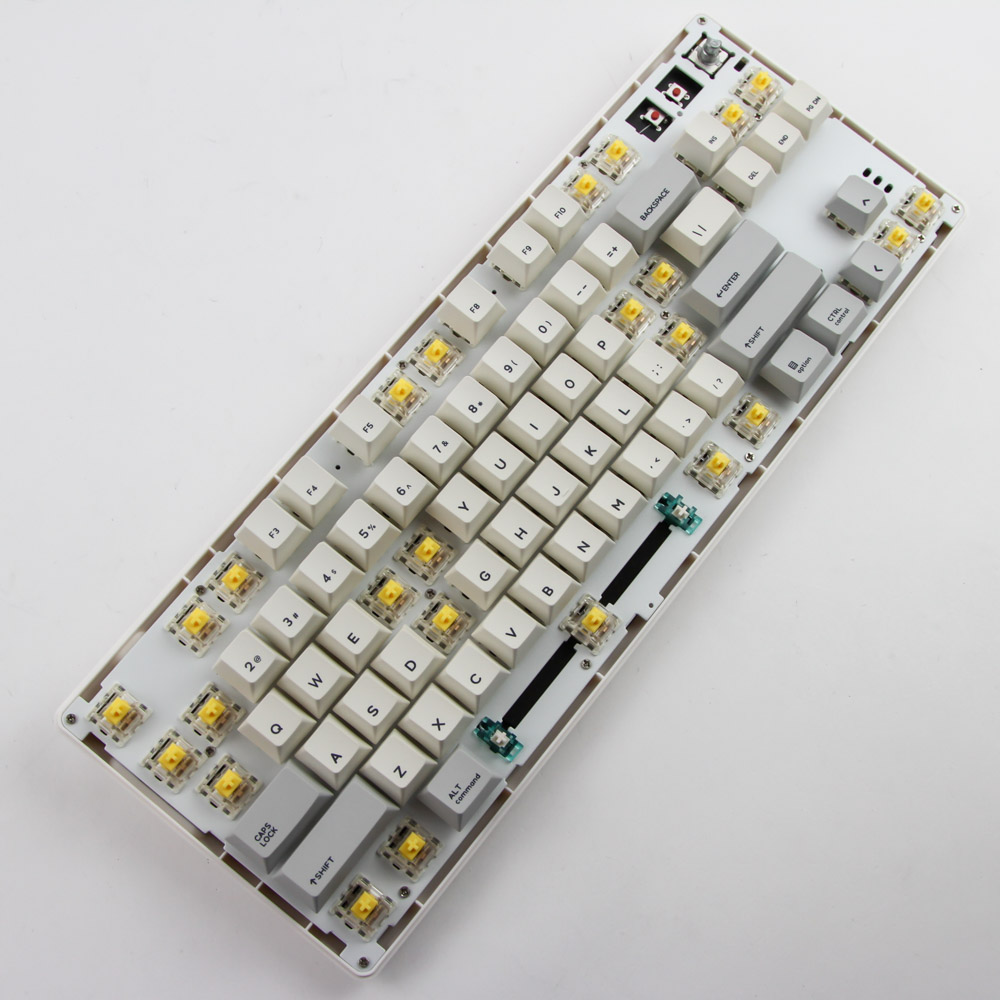

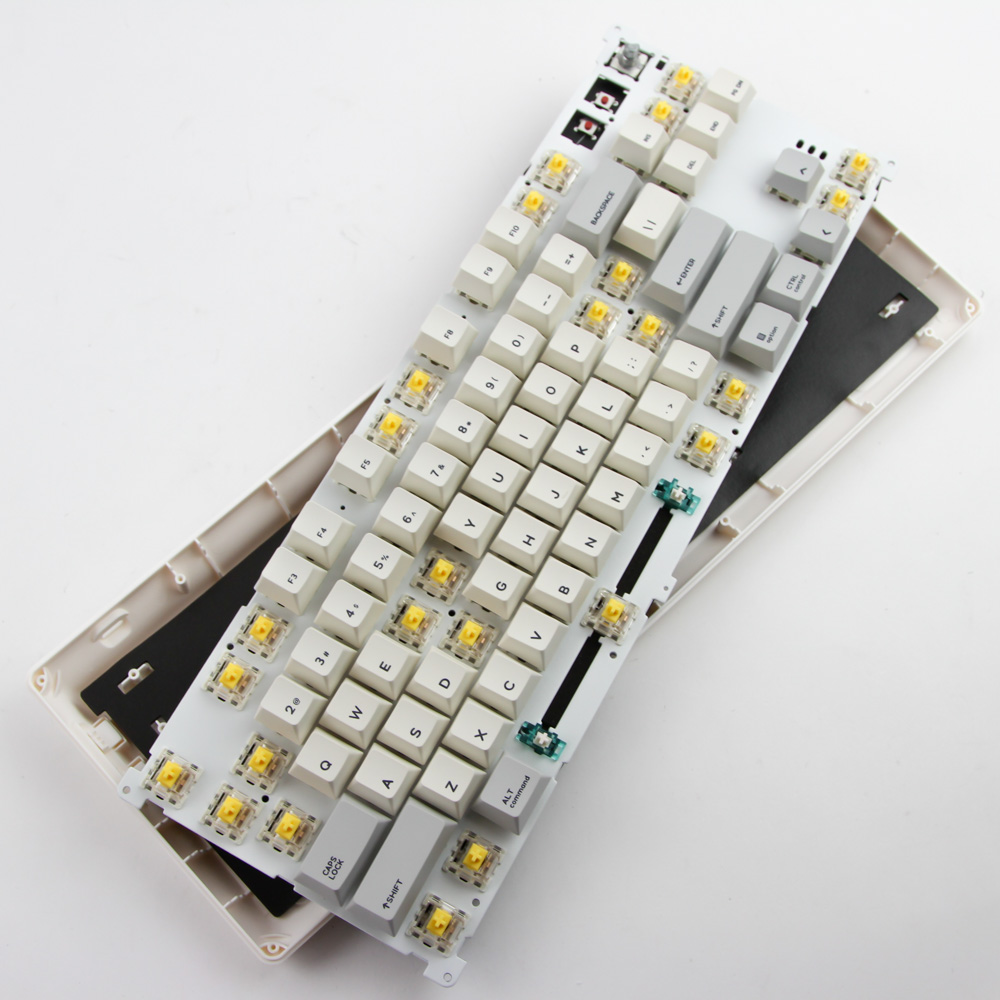
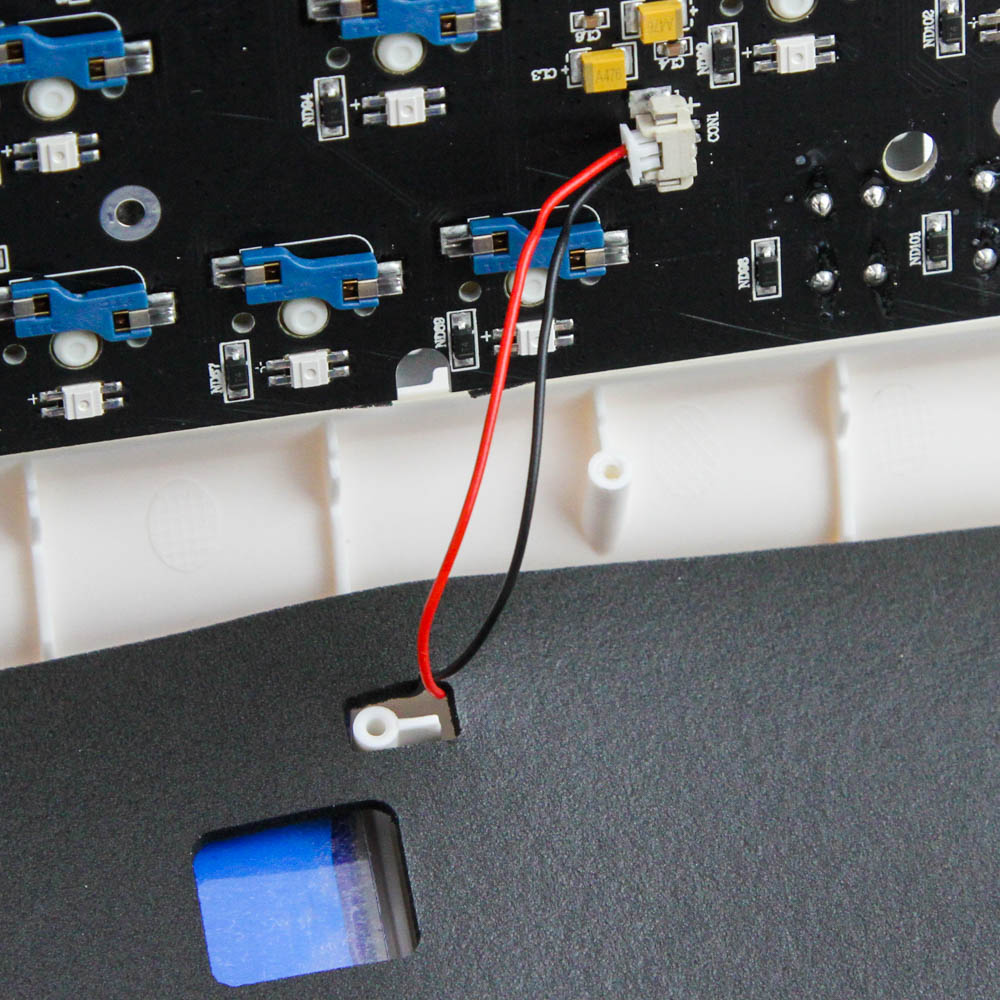
Disassembly of the keyboard begins with pulling off the aluminium knob and then using a thin, flat object to carefully pry apart interlocking plastic tabs securing the two-piece case together. The low profile keycaps over the mode switches would also likely come loose at this time, so store them carefully lest you lose them. With the top case panel removed, you have access to the 15 Phillips-head screws that will require removing several keycaps as seen above. A precision screwdriver will be handy here, and now you can lift off the steel plate/PCB section off the bottom case panel enough to access and dislodge the internal cable connecting the two.
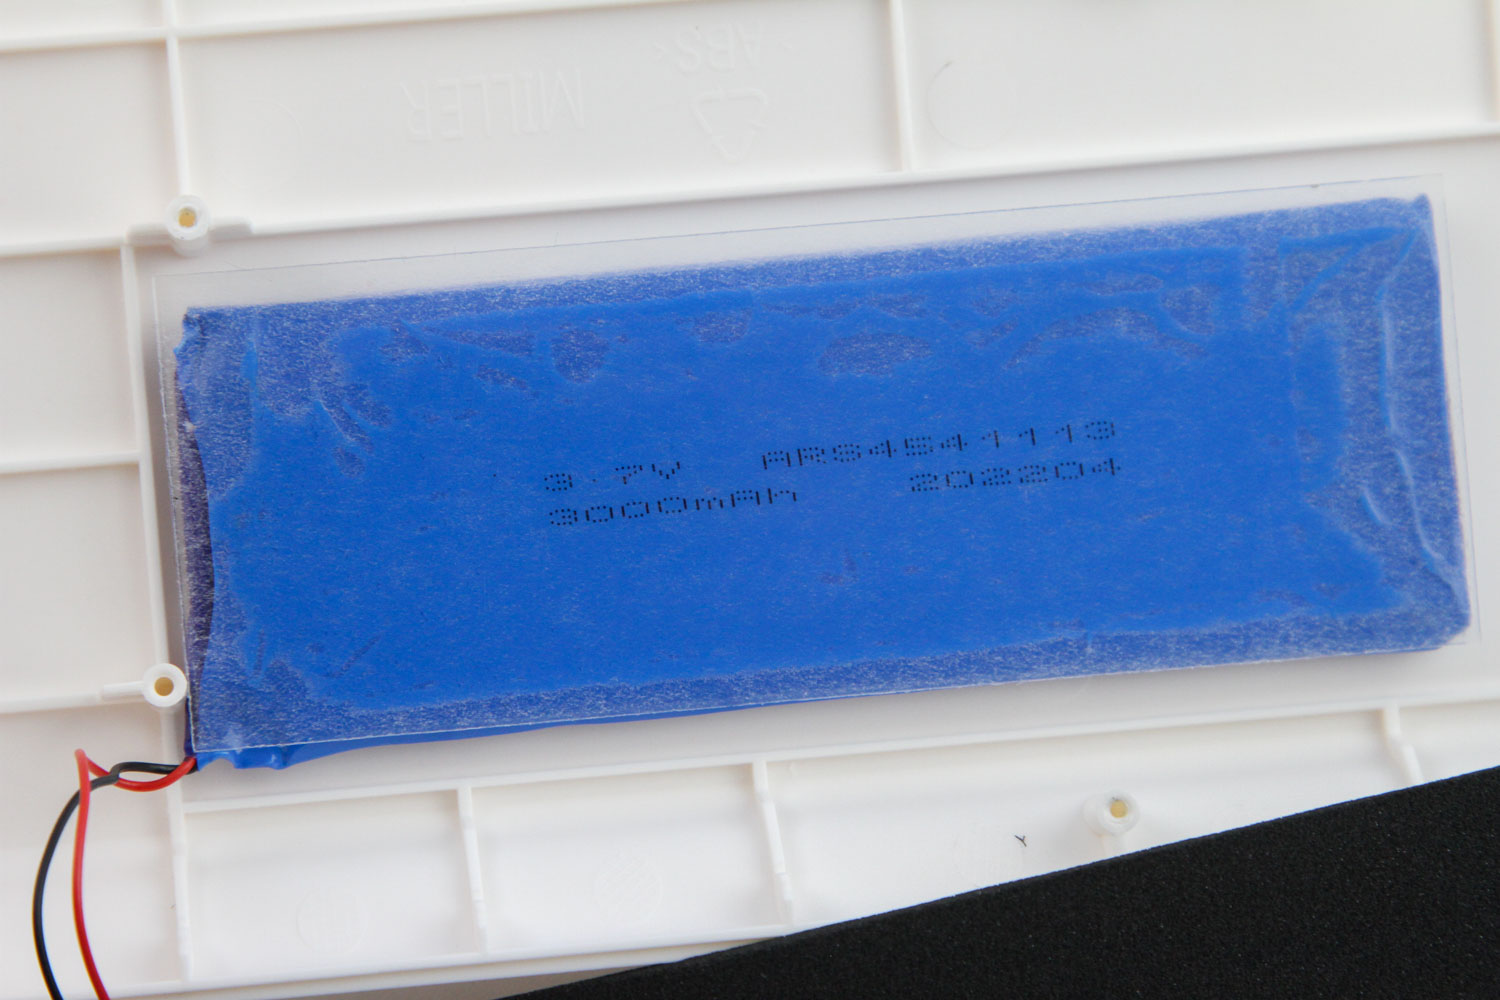
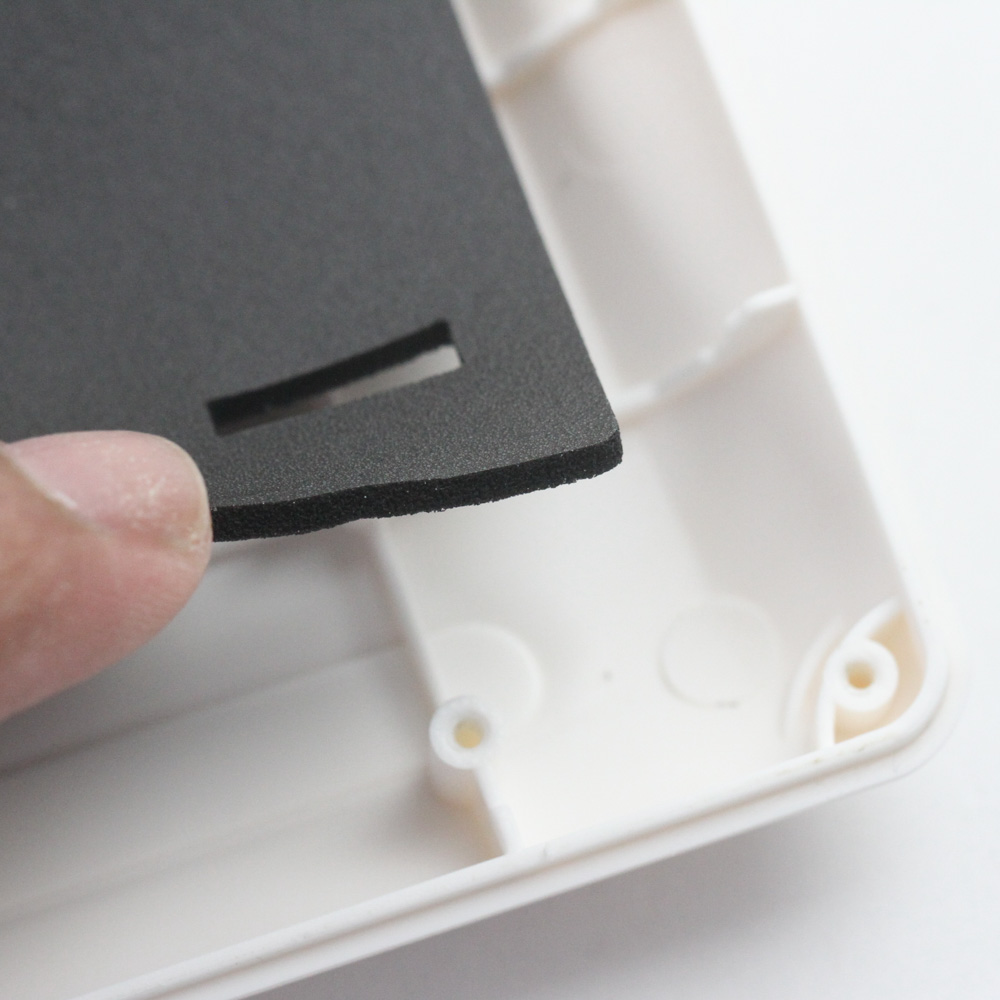


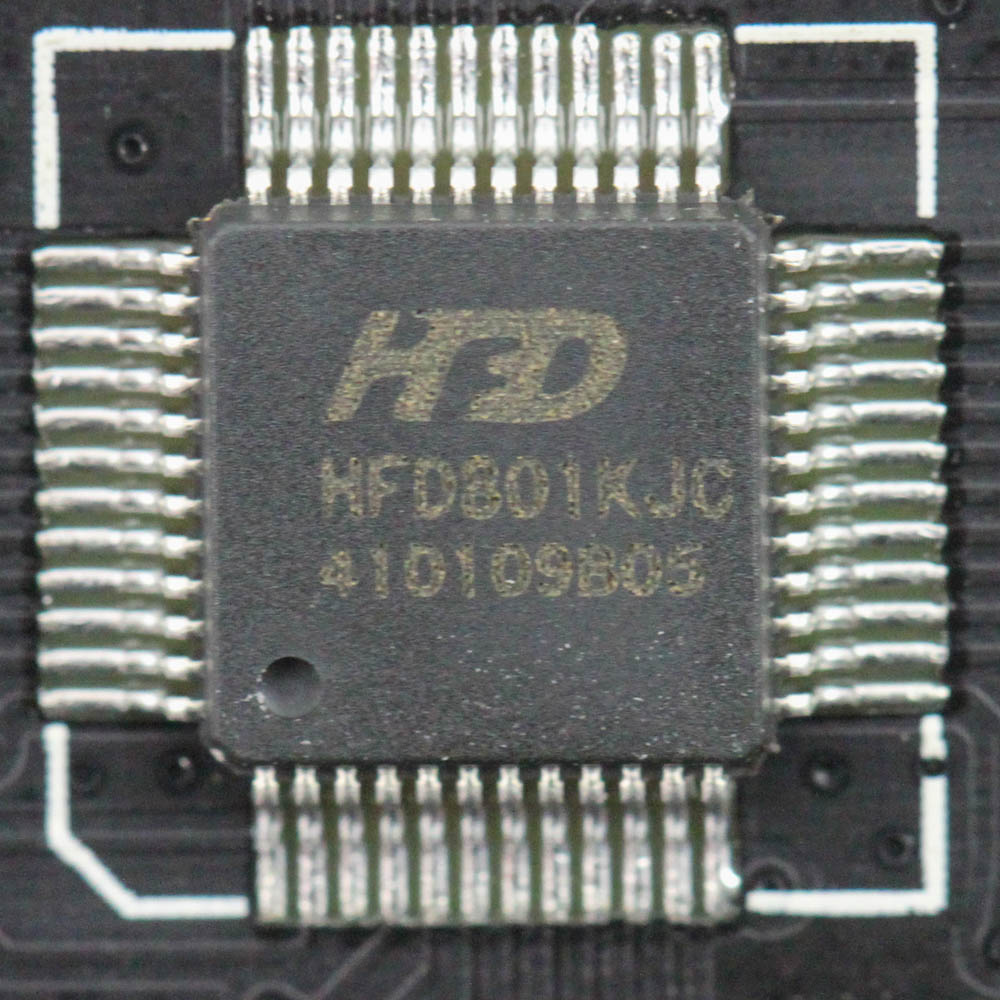

This cable leads to a 3000 mAh battery in the bottom case panel, and it is used to power the keyboard in the two wireless modes. A larger battery would have been nice to see, but admittedly this is still well within reason if the keyboard has been programmed with battery saving measures. There is a thick poron foam sheet between the PCB and the plastic case to absorb typing sounds and dampen keystrokes, and another of the same between the plate and the PCB to enhance this effect. Examining the keyboard shows the use of TTC hot-swap sockets with generally good solder quality, except for the occasional abundance of flux. The keyboard is powered off hardware drivers/transceivers I unfortunately wasn't able to easily identify, although all the components are clearly soldered to a multi-layer PCB, as is the norm today.
Before we move on, be advised that disassembly may void the warranty, and that TechPowerUp is not liable for any damages incurred if you decide to go ahead and do so anyway.
Mar 4th, 2025 05:13 EST
change timezone
Latest GPU Drivers
New Forum Posts
- Game performance testing: are all SKUs necessary? (2)
- Windows 11 General Discussion (5772)
- The future of RDNA on Desktop. (59)
- Ryzen Owners Zen Garden (7706)
- It's happening again, melting 12v high pwr connectors (997)
- HOW TO ADD NVMe M.2 SSD SUPPORT TO OLD MOTHERBOARDS WITH AMI BIOS LEGACY SUPPORT? (0)
- Maxsun RX580 graphics card crashes (3)
- Matrix Deliverance - a fan-made video based on Kingdom Come: Deliverance II game (0)
- Was pentium 4 an over engineered CPU? (104)
- High-end build in the 2025 mad world situation (14)
Popular Reviews
- AMD Radeon RX 9070 Series Technical Deep Dive
- ASUS GeForce RTX 5070 Ti TUF OC Review
- EIZO FlexScan EV4340X Review - A Multitasking Powerhouse
- AMD Ryzen 7 9800X3D Review - The Best Gaming Processor
- be quiet! Pure Base 501 DX Review
- RAWM ES21M Review
- MSI GeForce RTX 5070 Ti Vanguard SOC Review
- MSI GeForce RTX 5070 Ti Ventus 3X OC Review
- ASUS ROG Harpe Ace Mini Review
- MSI GeForce RTX 5070 Ti Gaming Trio OC+ Review
Controversial News Posts
- NVIDIA GeForce RTX 50 Cards Spotted with Missing ROPs, NVIDIA Confirms the Issue, Multiple Vendors Affected (513)
- AMD Plans Aggressive Price Competition with Radeon RX 9000 Series (278)
- AMD Radeon RX 9070 and 9070 XT Listed On Amazon - One Buyer Snags a Unit (260)
- AMD Mentions Sub-$700 Pricing for Radeon RX 9070 GPU Series, Looks Like NV Minus $50 Again (248)
- NVIDIA Investigates GeForce RTX 50 Series "Blackwell" Black Screen and BSOD Issues (244)
- AMD RDNA 4 and Radeon RX 9070 Series Unveiled: $549 & $599 (230)
- AMD Radeon RX 9070 and 9070 XT Official Performance Metrics Leaked, +42% 4K Performance Over Radeon RX 7900 GRE (195)
- AMD Radeon RX 9070-series Pricing Leaks Courtesy of MicroCenter (158)