 9
9
Cooler Master GM34-CWQ2 Review - Win Some, Lose Some
Picture Quality, Uniformity & Calibration »Controls and OSD
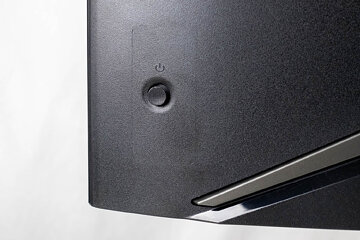
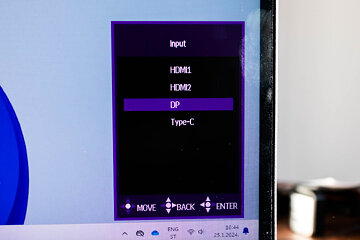
The Cooler Master GM34-CWQ2 uses a four-way joystick, which also works as a button for OSD navigation and monitor setup. You can use it to quickly access various settings like factory picture profiles, virtual crosshairs/timer/FPS counter, KVM switch, and input selection, or to dive into the main menu, where you can adjust everything that the OSD has to offer. As usual, the four-way joystick is an intuitive method of moving around the OSD, and additional props to Cooler Master for improving the overall experience of using the OSD by making the button functions consistent between the quick menu and main menu, which wasn't the case before.
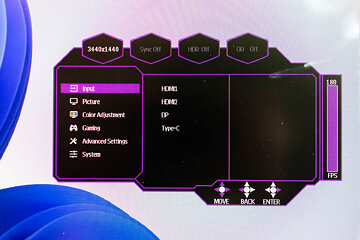
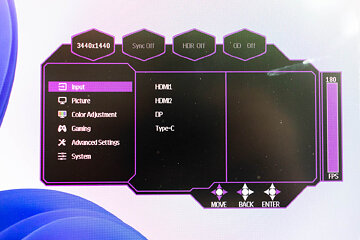
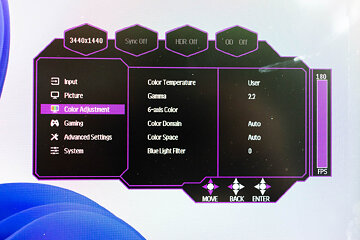
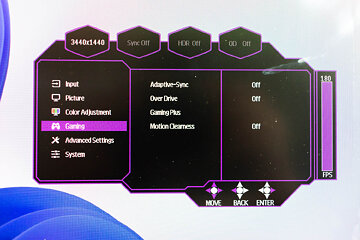
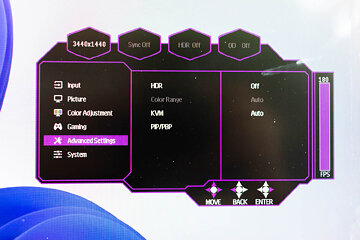
The OSD is completely overhauled both visually and functionally. It now offers six vertical menus and a quick overview of the selected resolution, and adaptive synchronization, HDR and overdrive being on or off. The menus are Input, Picture, Color Adjustment, Gaming, Advanced Settings and System.
The Input menu lets you – wouldn't you know it – select the active video input.
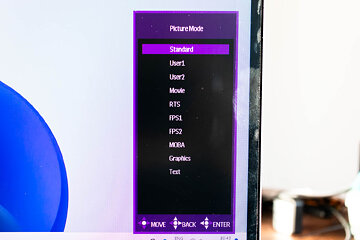
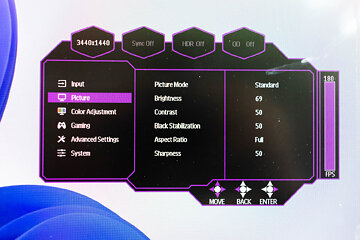
The Picture menu contains a total of 10 picture profiles: Standard, User1, User2, Movie, RTS, FPS1, FPS2, MOBA, Graphics, and Text. The default picture profile is Standard, and that's the one we'll use as the base for any and all adjustments of the monitor after we get to the picture quality section of this review, as it looks by far the best. In this menu you can also adjust the brightness, contrast, black level, aspect ratio and sharpness.
The Color Adjustment menu contains settings related to the color reproduction of the integrated Quantum Dot VA panel, namely color temperature, gamma (1.8 to 2.6 in .2 increments), six-axis hue and saturation (red, green, blue, cyan, magenta, yellow), color domain (RGB or YUV), color space (Auto, sRGB, Adobe RGB, DCI-P3, BT.2020), and blue light filtering (adjustable on a 0-100 scale in increments of 10).
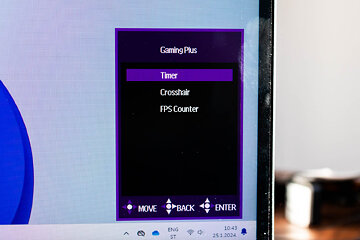
In the Gaming menu you'll find the adaptive sync toggle, overdrive selection (Off, Normal, Advanced, Ultrafast, Dynamic, User), MPRT selection (Off, Low, Medium, High), as well as gaming tools like the timer, virtual crosshairs and FPS counter.
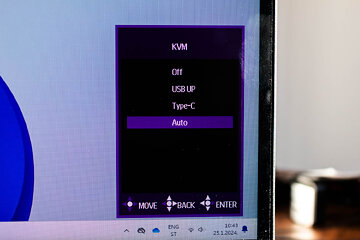
In the Advanced Settings menu you can select the HDR mode (Off or Auto), color range, KVM switch behavior (it's best to have it on Auto and let it switch the peripherals in relation to the currently active video input), and Picture-in-Picture/Picture-by-Picture toggles. If you activate PiP or PbP mode, you can visit the same menu again to select or swap sources, and to select window sizes and exact locations.
The System menu is where Cooler Master stacked together everything else: language settings, OSD menu position, transparency and timeout, sound volume, power indicator toggle, sleep timer, and the factory reset option.
Mar 10th, 2025 15:09 EDT
change timezone
Latest GPU Drivers
New Forum Posts
- Company of Heroes 3 (2)
- BIOS request 10DE:25A2 1043:13DC (10)
- What's your latest tech purchase? (23273)
- What are you playing? (23131)
- I'm looking for a good tool to make the 3D scanning of my mini-pc using the photogrammetry and my Kinect 2. (49)
- AMD RX 9070 XT & RX 9070 non-XT thread (OC, undervolt, benchmarks, ...) (4)
- Cryptocoin Value and Market Trend Discussion (1645)
- FlashMyBoard - Automated BIOS Update Tracking & Notification System (11)
- Nvidia's GPU market share hits 90% in Q4 2024 (gets closer to full monopoly) (772)
- I have latency batch file need some help with please (2)
Popular Reviews
- Sapphire Radeon RX 9070 XT Nitro+ Review - Beating NVIDIA
- XFX Radeon RX 9070 XT Mercury OC Magnetic Air Review
- ASUS Radeon RX 9070 TUF OC Review
- MSI MAG B850 Tomahawk Max Wi-Fi Review
- NVIDIA GeForce RTX 5080 Founders Edition Review
- NVIDIA GeForce RTX 5070 Founders Edition Review
- Corsair Vengeance RGB CUDIMM DDR5-8800 48 GB CL42 Review
- AMD Ryzen 7 9800X3D Review - The Best Gaming Processor
- ASUS GeForce RTX 5070 Ti TUF OC Review
- MSI GeForce RTX 5070 Ti Gaming Trio OC+ Review
Controversial News Posts
- NVIDIA GeForce RTX 50 Cards Spotted with Missing ROPs, NVIDIA Confirms the Issue, Multiple Vendors Affected (513)
- AMD Plans Aggressive Price Competition with Radeon RX 9000 Series (277)
- AMD Radeon RX 9070 and 9070 XT Listed On Amazon - One Buyer Snags a Unit (261)
- AMD RDNA 4 and Radeon RX 9070 Series Unveiled: $549 & $599 (260)
- AMD Mentions Sub-$700 Pricing for Radeon RX 9070 GPU Series, Looks Like NV Minus $50 Again (248)
- NVIDIA Investigates GeForce RTX 50 Series "Blackwell" Black Screen and BSOD Issues (244)
- AMD Radeon RX 9070 and 9070 XT Official Performance Metrics Leaked, +42% 4K Performance Over Radeon RX 7900 GRE (195)
- AMD Radeon RX 9070-series Pricing Leaks Courtesy of MicroCenter (158)
