 26
26
Cooler Master HAF 932 Review
Assembly »A Closer Look - Inside

The side panels are easily taken off by removing the thumb screws. The large 230 fan may be replaced by four 120 mm units if you wish, as Cooler Master has included the appropriate mounting holes.
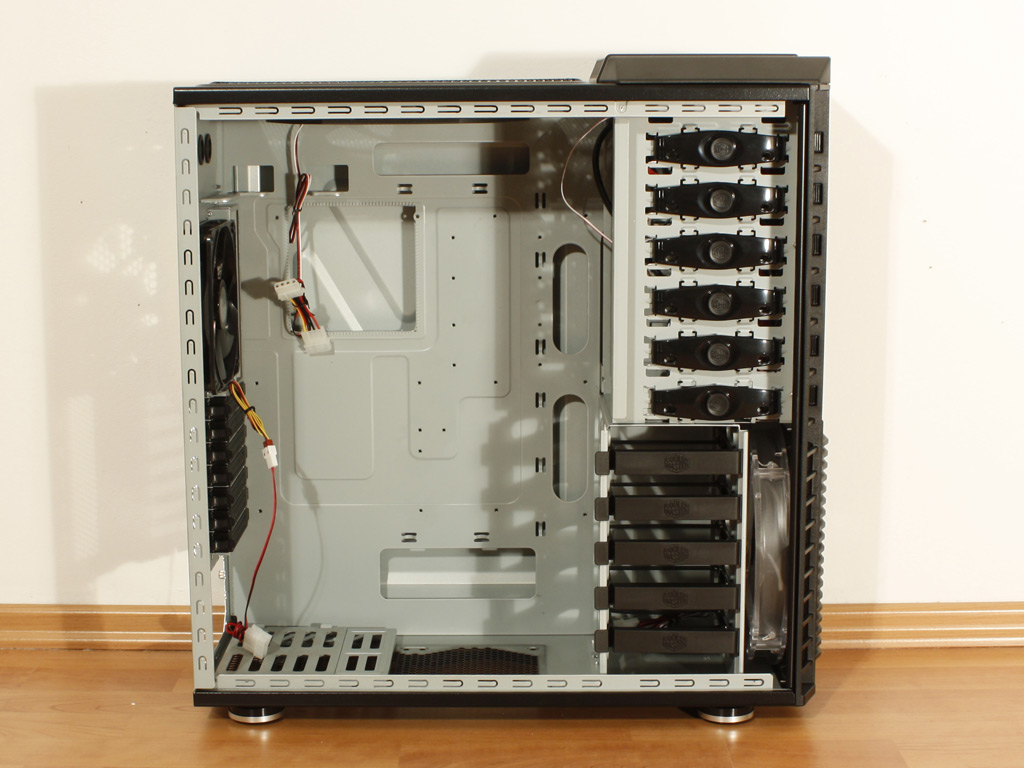
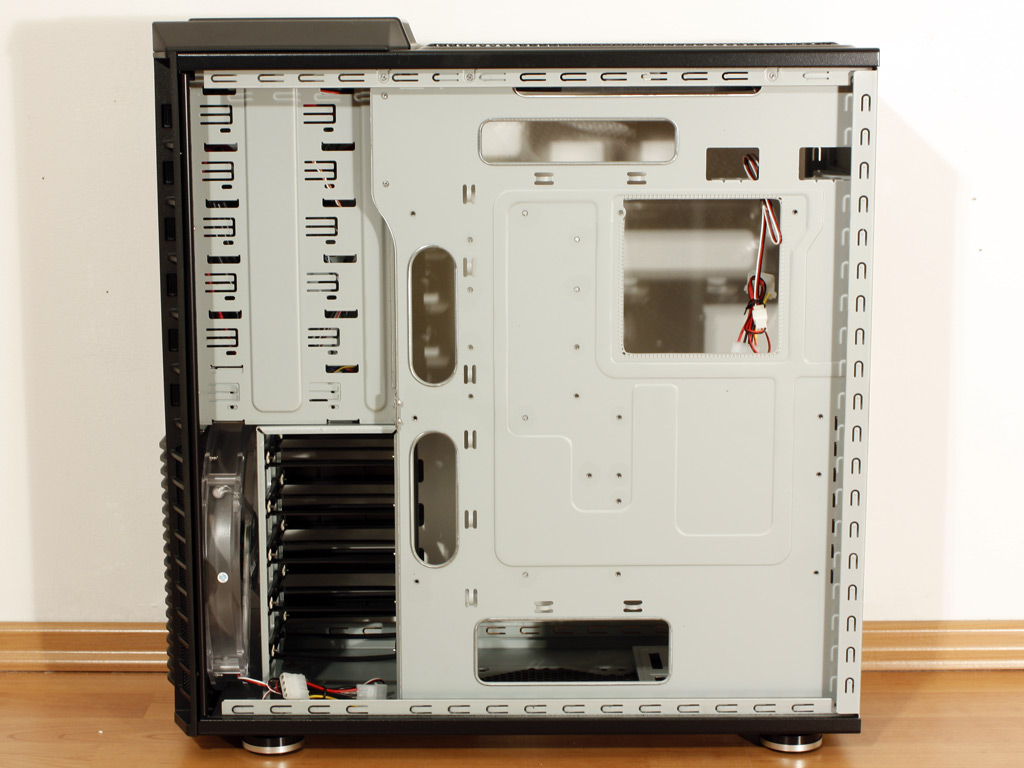
Taking a closer look at the inside, the general interior layout looks quite ordinary. Everything is located where you would expect it to be. Turning it over yields no surprises either. There are several larger cut-outs around the mainboard tray, which should help us in routing the cables nicely.


A simple but effective 5.25" drive bay area is part of the front of the HAF 932. The optical drives are held in place by the same locks we have seen in the Cosmos Series. Cooler Master has just changed the color of them, which is another small part to go with the rest of the case.


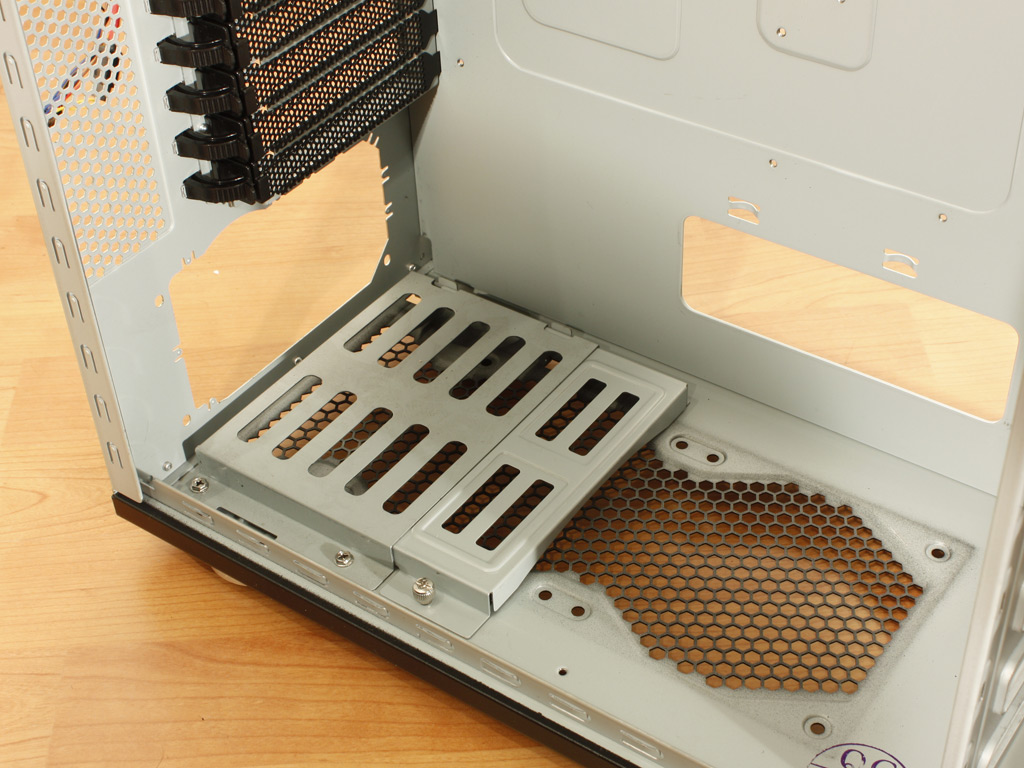
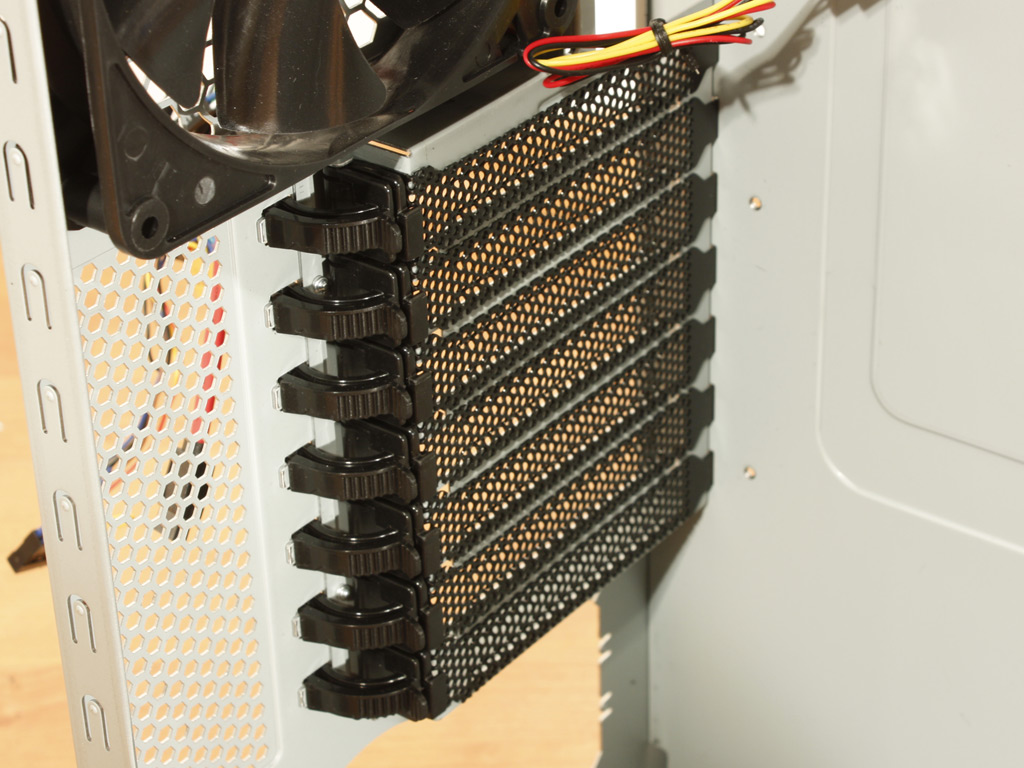
A 5.25 to 3.5 inch tray is included in the bottom drive bay. This goes perfectly with the supplied front cover and should save you some money as you won't need to buy such a device seperately. Below the external drive bays is are the five hard drive bays. These are located right next to the front 230 mm fan.

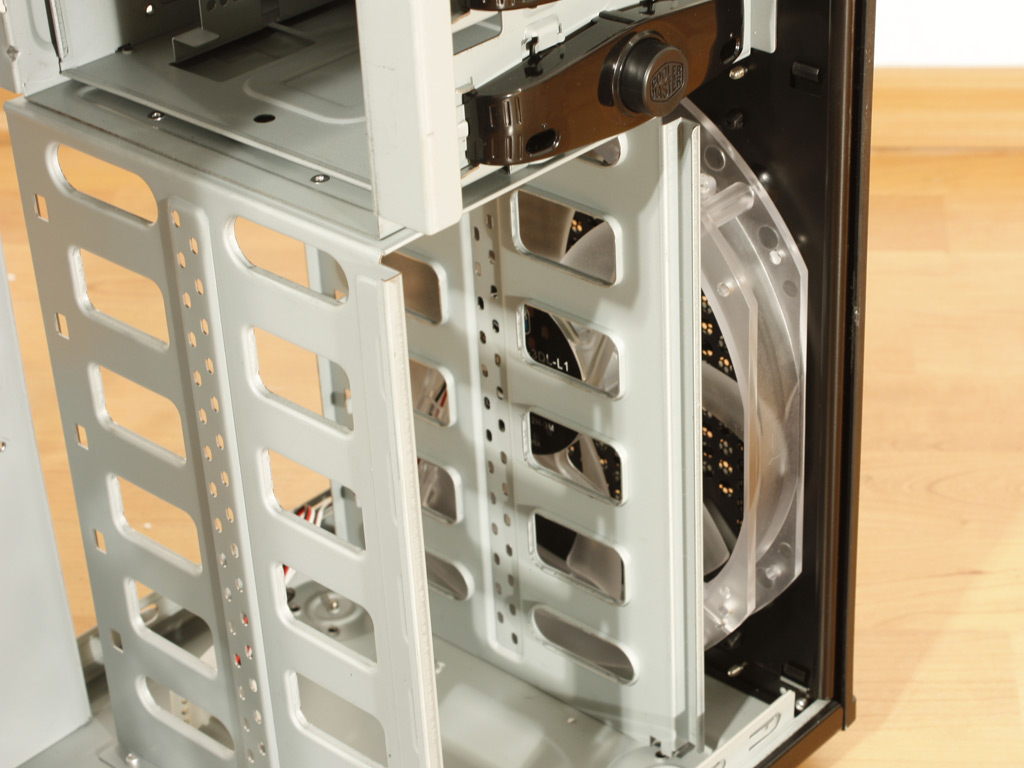
Each hard drive is to be placed in one of the supplied trays. Sure, Cooler Master could have crammed even more hard drives in the space given, but they have opted for unrestrictive air flow instead. After removing all five trays, the front fan can be clearly seen. It is the only one with embedded LEDs, which light up red - just like in the press photos.

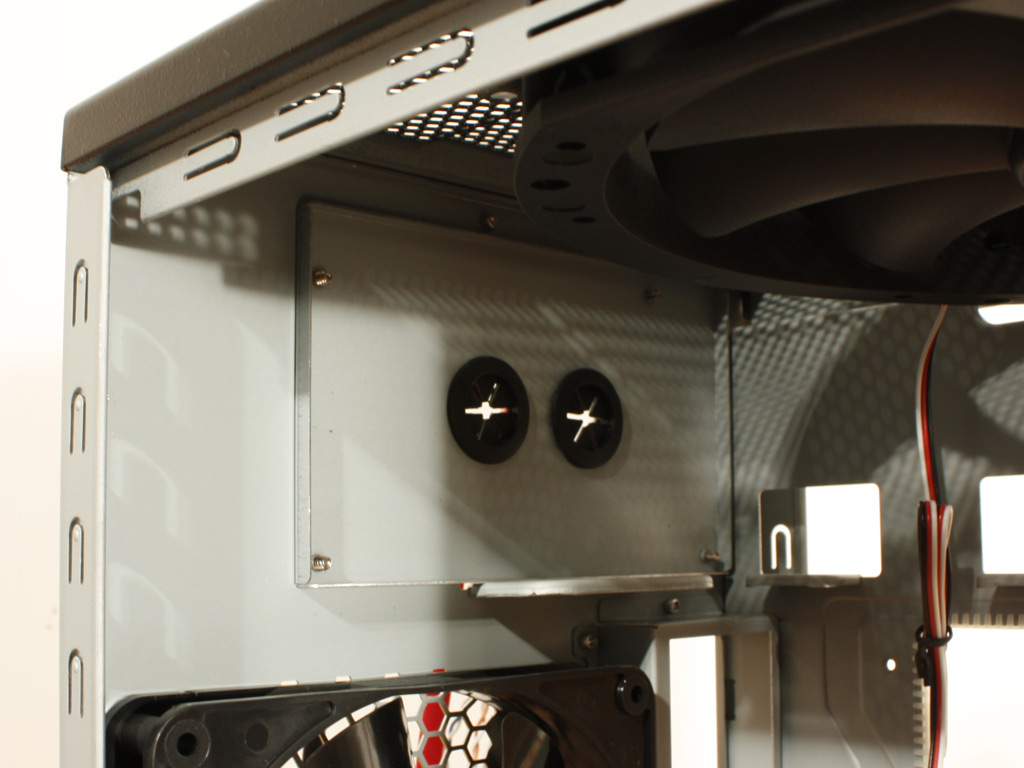
Moving around to the rear interior of the chassis, starting at the bottom, we have the primary PSU bay. Such a unit is placed on a metal square, with the fan facing downward. In case you do have a larger PSU, the square can be extended by pulling the rear part out a bit. If you do not use the bottom bay for a power supply, you can place additional 120 mm fans in this area. The mainboard expansion slots are held in place by plastic clips. I am not a big fan of such systems, but we will take a closer look at this one during assembly. Moving up, the top is taken by the usual rear fan & mainboard backplate right above the expansion slots. The very top holds the secondary power supply bay, which is covered by a full metal piece with two holes for water cooling tubes.
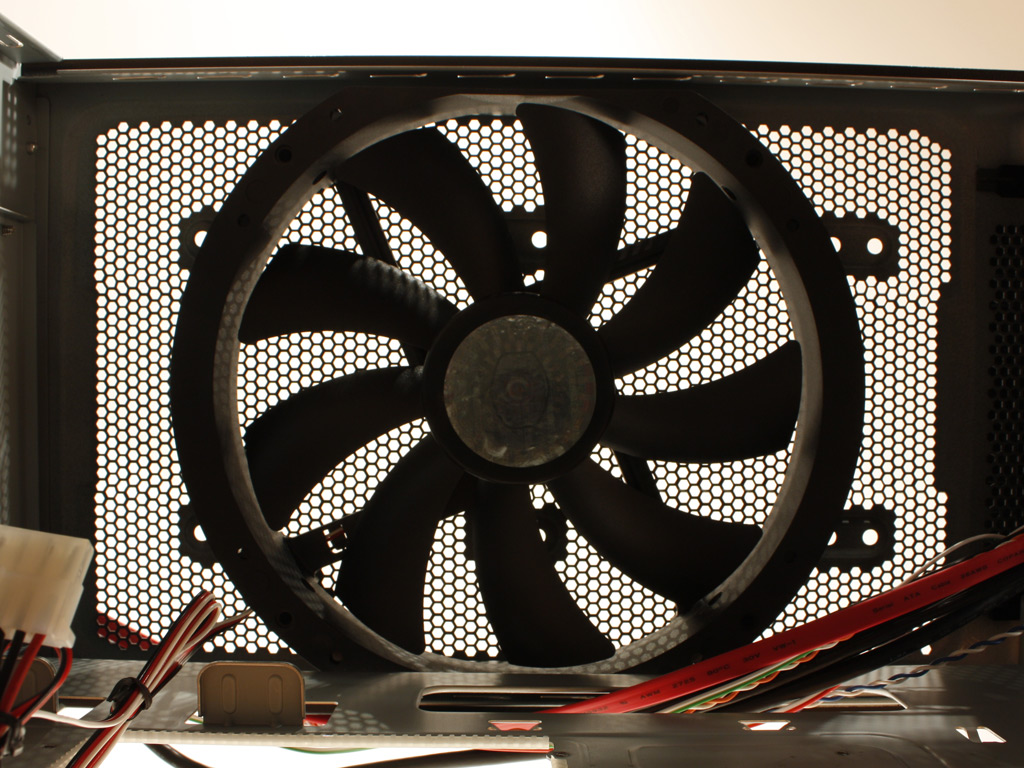
This last image is with the camera placed on the bottom of the HAF 932, facing upward and shows the 230 mm fan placed in the ceiling of the chassis.
Apr 23rd, 2025 22:48 EDT
change timezone
Latest GPU Drivers
New Forum Posts
- RX 9000 series GPU Owners Club (499)
- Help getting a mini pc (7)
- How do you calculate the cost of a chip? (1)
- Which is the best replacement for Microsoft Office? (22)
- 5070ti overclock...what are your settings? (16)
- New GPU 5070 Ti or better CPU Ryzen7 7800X3D ? (6)
- Are the 8 GB cards worth it? (105)
- To distill or not distill what say ye? (74)
- Companies should be called out for this (90)
- What are you playing? (23451)
Popular Reviews
- NVIDIA GeForce RTX 5060 Ti 8 GB Review - So Many Compromises
- ASUS GeForce RTX 5060 Ti TUF OC 16 GB Review
- ASRock X870E Taichi Lite Review
- Colorful iGame B860M Ultra V20 Review
- Upcoming Hardware Launches 2025 (Updated Apr 2025)
- Sapphire Radeon RX 9070 XT Pulse Review
- Sapphire Radeon RX 9070 XT Nitro+ Review - Beating NVIDIA
- NVIDIA GeForce RTX 5060 Ti PCI-Express x8 Scaling
- AMD Ryzen 7 9800X3D Review - The Best Gaming Processor
- ASUS GeForce RTX 5080 TUF OC Review
Controversial News Posts
- NVIDIA GeForce RTX 5060 Ti 16 GB SKU Likely Launching at $499, According to Supply Chain Leak (182)
- NVIDIA Sends MSRP Numbers to Partners: GeForce RTX 5060 Ti 8 GB at $379, RTX 5060 Ti 16 GB at $429 (127)
- NVIDIA Launches GeForce RTX 5060 Series, Beginning with RTX 5060 Ti This Week (115)
- Nintendo Confirms That Switch 2 Joy-Cons Will Not Utilize Hall Effect Stick Technology (105)
- Nintendo Switch 2 Launches June 5 at $449.99 with New Hardware and Games (99)
- Sony Increases the PS5 Pricing in EMEA and ANZ by Around 25 Percent (85)
- NVIDIA PhysX and Flow Made Fully Open-Source (77)
- Windows Notepad Gets Microsoft Copilot Integration (75)