 22
22
CORSAIR and EKWB Water Blocks Tested on GeForce RTX 2080
EK-Vector RTX RE RGB »CORSAIR Hydro XG7 RGB 20-Series
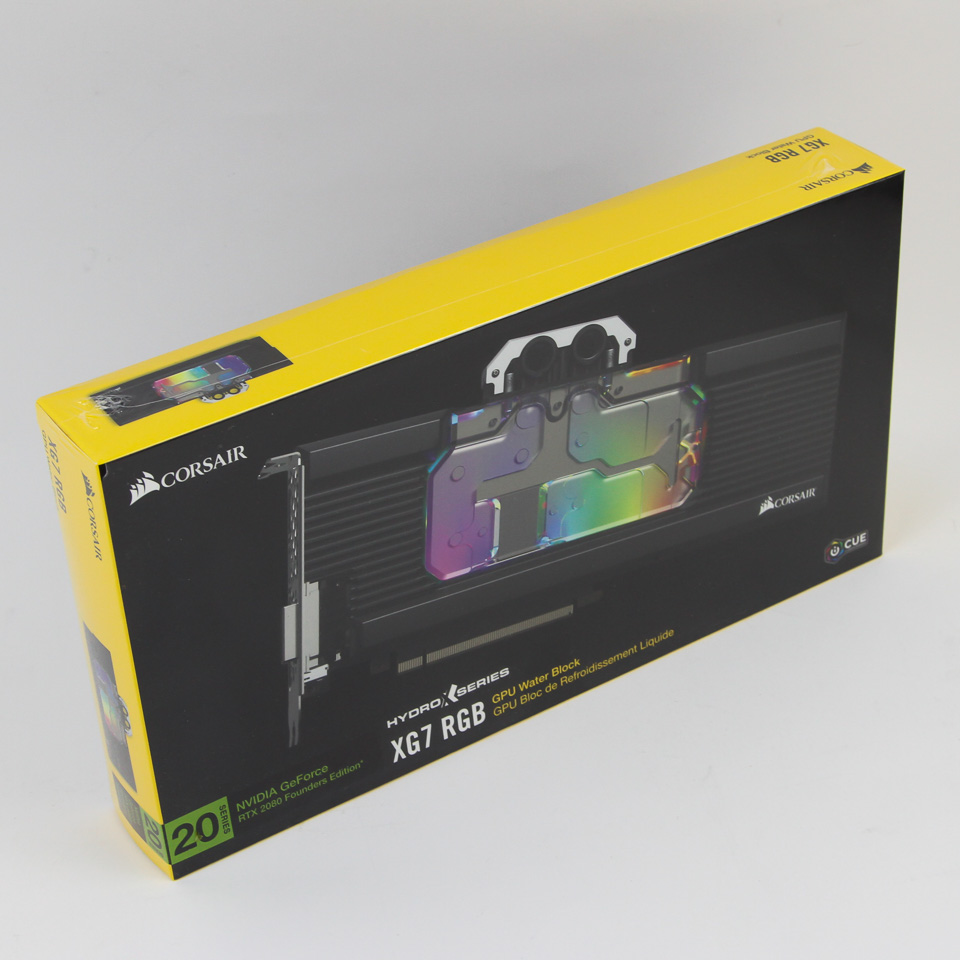


We did a complete review of the CORSAIR Hydro X Series XG7 RGB 10-Series GPU water block already, and typing those long product names will just make it worse each time. So I am going to take the liberty of shortening the Hydro X Series XG7 RGB 20-Series (2080 FE) to the Hydro XG7 RGB 20-Series in this article, since I am shortening the general contents as well. We see the same style of black-and-yellow product packaging for consistency. On the front is the company and product name, a printed render of the block with the LEDs in action, and the GPU compatibility to ensure no buyer's regret on that front. More renders, marketing features, and specifications greet us on the back and sides, and in multiple languages. The two-part packaging has an inner cardboard box that is more bare in design, with the CORSAIR logo on the front and the certification on the back.


Opening the box, we see the GPU block packaged snugly between a shaped piece of thick foam, and the accessories are all underneath to ensure the block is not hit by anything either. CORSAIR includes a handy quick-start guide (online copy here), again in multiple languages. Do go through the guide if this is your first time with a custom watercooling loop since CORSAIR has done a good job of keeping it user friendly. There are also two acetal BSP G1/4" threaded stop plugs, installation hardware involving 20 metal mounting screws, a metal locking nut, and a plastic plug tool to help install the stop plugs. The low-profile nature of the included stop plugs means there is not a lot of grip, but you may still want to try finger-tightening them first before resorting to the plug tool. As with the previous XG7 review, we see an included aluminium backplate, which is also full cover and more for aesthetics (and PCB protection from falling hazards) than cooling given it does not directly touch the PCB.

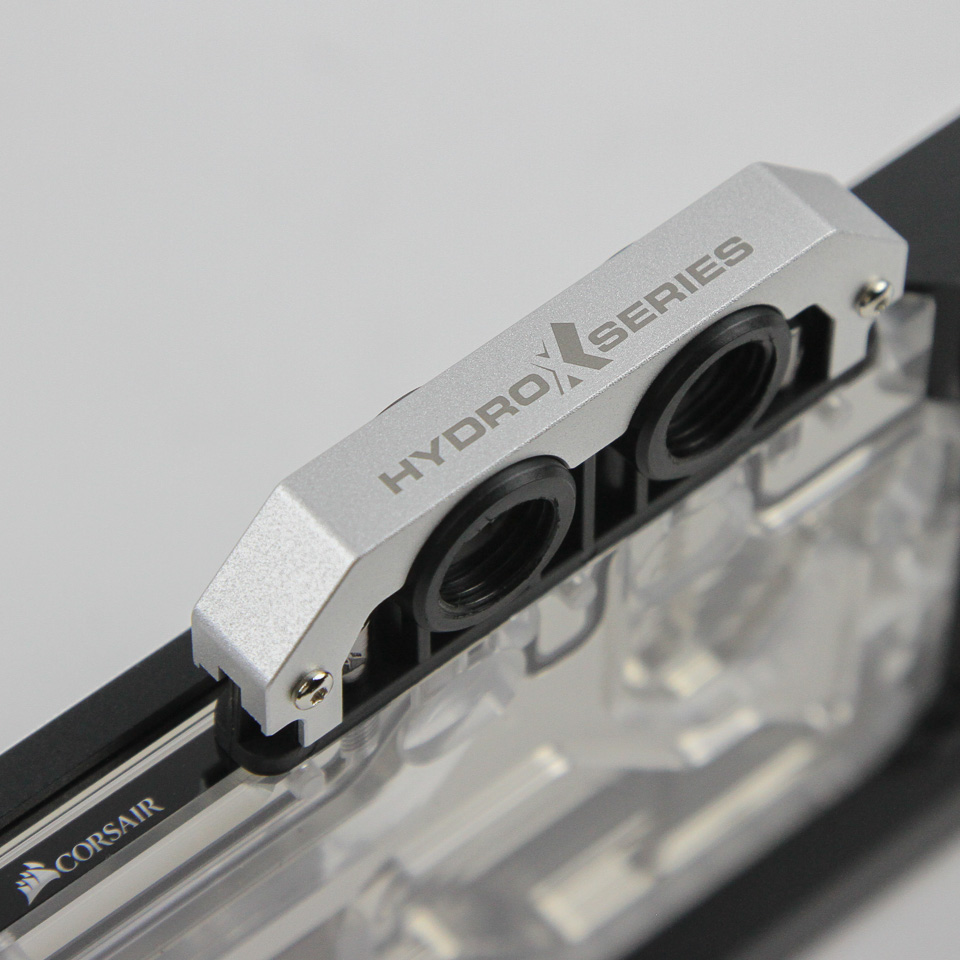
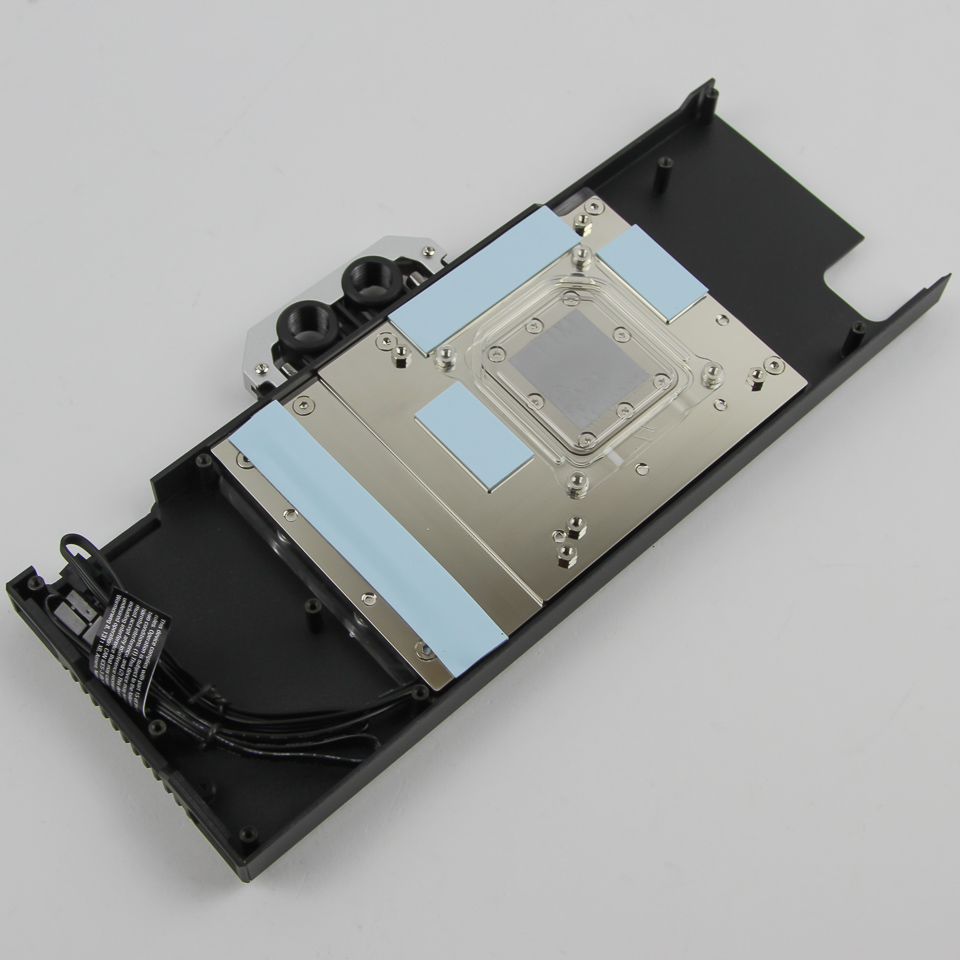
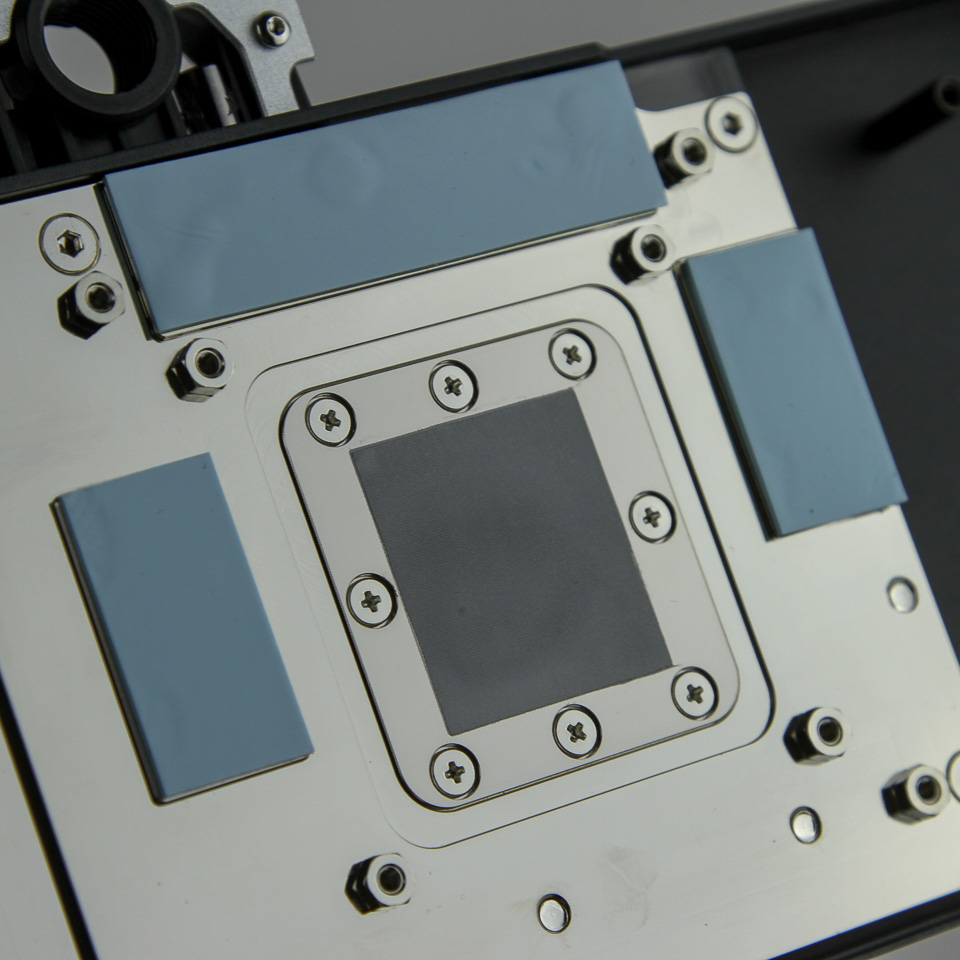

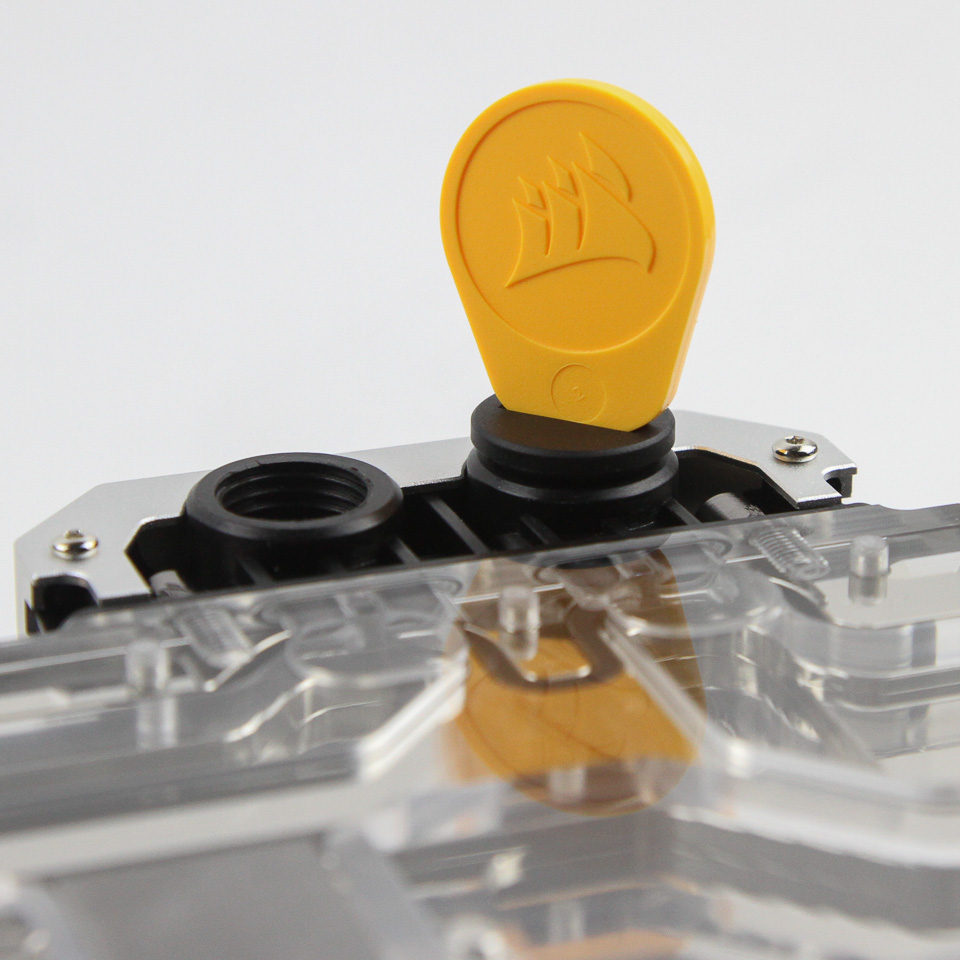
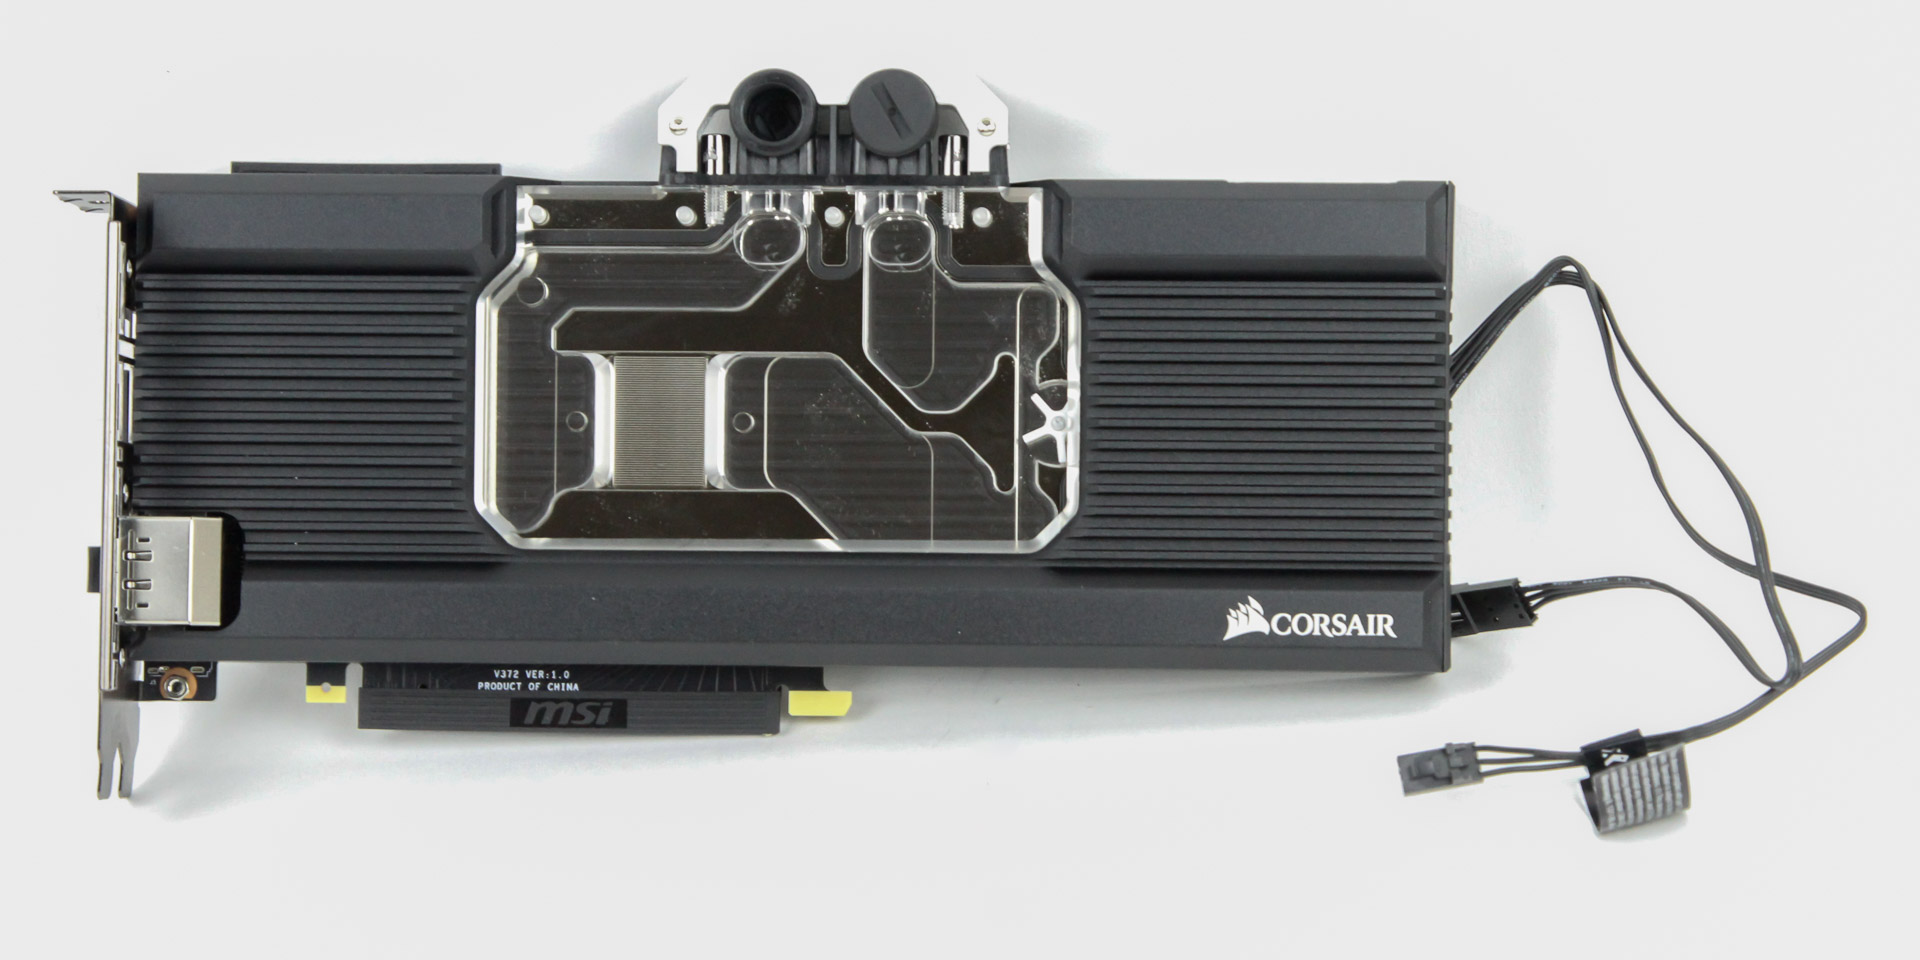
The form factor and design is clearly consistent across the board when it comes to CORSAIR's GPU block offerings, which is as it should be, with a look that is inspired by their popular Dominator Platinum memory on the I/O terminal. Four BSP G1/4" threaded ports are here, which is where the accessories come in as only two are needed for the block to be plumbed in. There is an aluminium cover plate around the acrylic top, and plenty of branding throughout. CORSAIR has gone with a serial flow route where the coolant ideally enters from the left and through the VRAM section before going through the microfins over the GPU core, rest of the VRAM, VRM section, a handily placed flow-indicator wheel, and up and out the other port on the I/O terminal. A nickel-plated copper cold plate is also present, and we see pre-applied thermal pads as well as thermal paste with a protective plastic cover, which simplifies installation considerably, and a small inset on the side allows the two RGB cables (one pass-through) to come through when installed without adversely affecting contact with the GPU. A coolant flow-indicator wheel has also been put along the pathway, as well as 16 addressable RGB LEDs controlled via iCUE for the lighting.
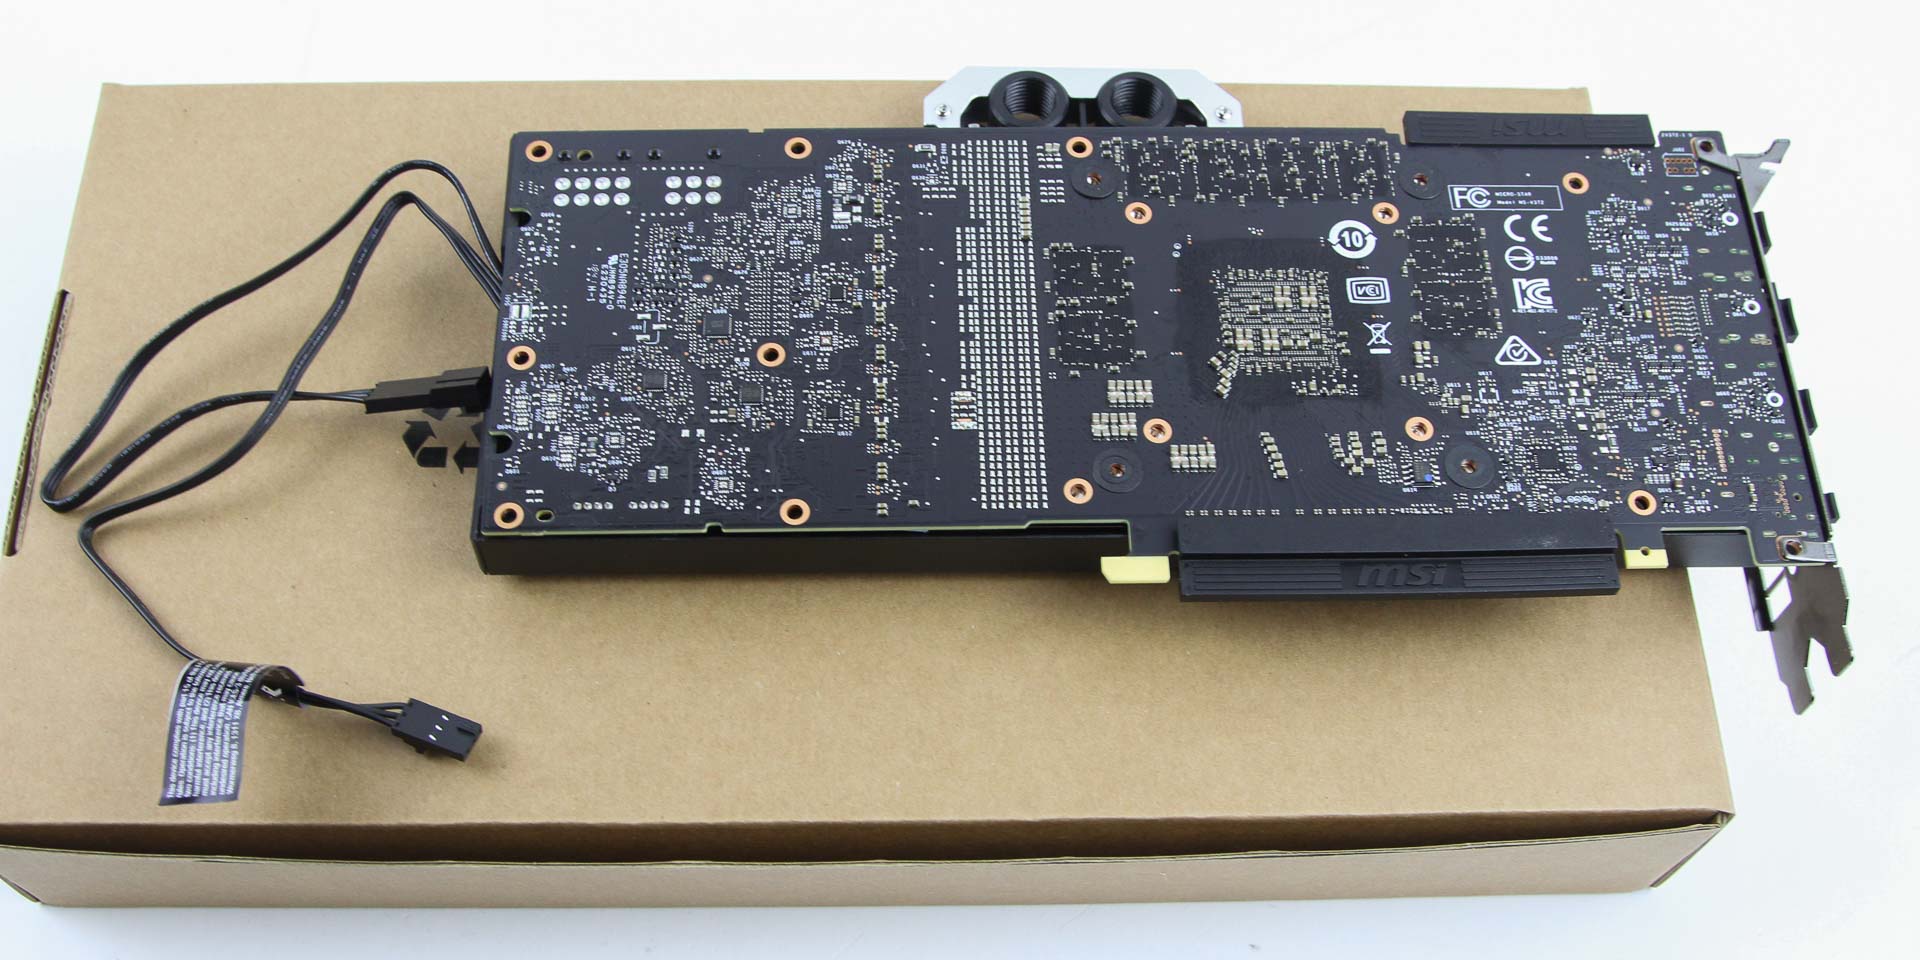


As with the Hydro XG7 RGB 10-Series, installation of the 20-series version is also a piece of cake. Unlike the 10-Series, there are different versions of the 20-Series based on whether you have an RTX 2070, RTX 2080, or RTX 2080 Ti/Titan RTX reference PCB card. I have an RTX 2080 here, so I have the 2080 FE version. Assuming the stock cooler has been removed, installation begins with cleaning of the PCB to remove remaining thermal pads and paste before placing the block and backplate, sandwiching the PCB as seen above. With that done, put the provided screws through the backplate on the back as outlined in the manual; the entire process takes less than five minutes. Make sure you route the RGB cables out the side as seen above, and connect the cables to a compatible controller/pass-through if you have other such iCUE-controllable devices.


Here is a look at some of the various lighting options, be it static or dynamic. I was impressed with the fairly true to color white these LEDs were able to reproduce, and the upward-facing LEDs with the light diffusion from the acrylic and redirection from the aluminium make for smooth lighting without harsh, discrete light sources when seen straight through or even at most angles inside a case. As with anything compatible with iCUE, the lighting can be configured to sync with other products.
Mar 10th, 2025 10:17 EDT
change timezone
Latest GPU Drivers
New Forum Posts
- RX 9070 availability (137)
- AMD RX 9070 XT & RX 9070 non-XT thread (OC, undervolt, benchmarks, ...) (1)
- What are you playing? (23126)
- TPU's Nostalgic Hardware Club (20077)
- I'm looking for a good tool to make the 3D scanning of my mini-pc using the photogrammetry and my Kinect 2. (44)
- Post Your TIMESPY, PCMARK10 & FIRESTRIKE SCORES! (2019) (270)
- AAF Optimus Modded Driver For Windows 10 & Windows 11 - Only for Realtek HDAUDIO Chips (373)
- RX 9000 series GPU Owners Club (39)
- I need a BIOS for the "Rx580 8gb" chip 215-0876406 (5)
- Ram downclocking after restart. (19)
Popular Reviews
- Sapphire Radeon RX 9070 XT Nitro+ Review - Beating NVIDIA
- XFX Radeon RX 9070 XT Mercury OC Magnetic Air Review
- ASUS Radeon RX 9070 TUF OC Review
- MSI MAG B850 Tomahawk Max Wi-Fi Review
- NVIDIA GeForce RTX 5080 Founders Edition Review
- NVIDIA GeForce RTX 5070 Founders Edition Review
- Corsair Vengeance RGB CUDIMM DDR5-8800 48 GB CL42 Review
- AMD Ryzen 7 9800X3D Review - The Best Gaming Processor
- ASUS GeForce RTX 5070 Ti TUF OC Review
- MSI GeForce RTX 5070 Ti Gaming Trio OC+ Review
Controversial News Posts
- NVIDIA GeForce RTX 50 Cards Spotted with Missing ROPs, NVIDIA Confirms the Issue, Multiple Vendors Affected (513)
- AMD Plans Aggressive Price Competition with Radeon RX 9000 Series (277)
- AMD Radeon RX 9070 and 9070 XT Listed On Amazon - One Buyer Snags a Unit (261)
- AMD RDNA 4 and Radeon RX 9070 Series Unveiled: $549 & $599 (260)
- AMD Mentions Sub-$700 Pricing for Radeon RX 9070 GPU Series, Looks Like NV Minus $50 Again (248)
- NVIDIA Investigates GeForce RTX 50 Series "Blackwell" Black Screen and BSOD Issues (244)
- AMD Radeon RX 9070 and 9070 XT Official Performance Metrics Leaked, +42% 4K Performance Over Radeon RX 7900 GRE (195)
- AMD Radeon RX 9070-series Pricing Leaks Courtesy of MicroCenter (158)