 14
14
Corsair Carbide 500R Review
Assembly & Finished Looks »A Closer Look - Inside


To gain access to the interior simply loosen the screws holding each side panel in place. While the interior has the exact same layout as the 400R, Corsair has changed a few things around, but more on that in a second. An adequate number of openings in the mainboard tray, along with a little L-shaped trench should make cable routing and hiding a breeze, while the large opening in the tray itself will give you access to the underside of the motherboard for easy CPU cooler exchange.
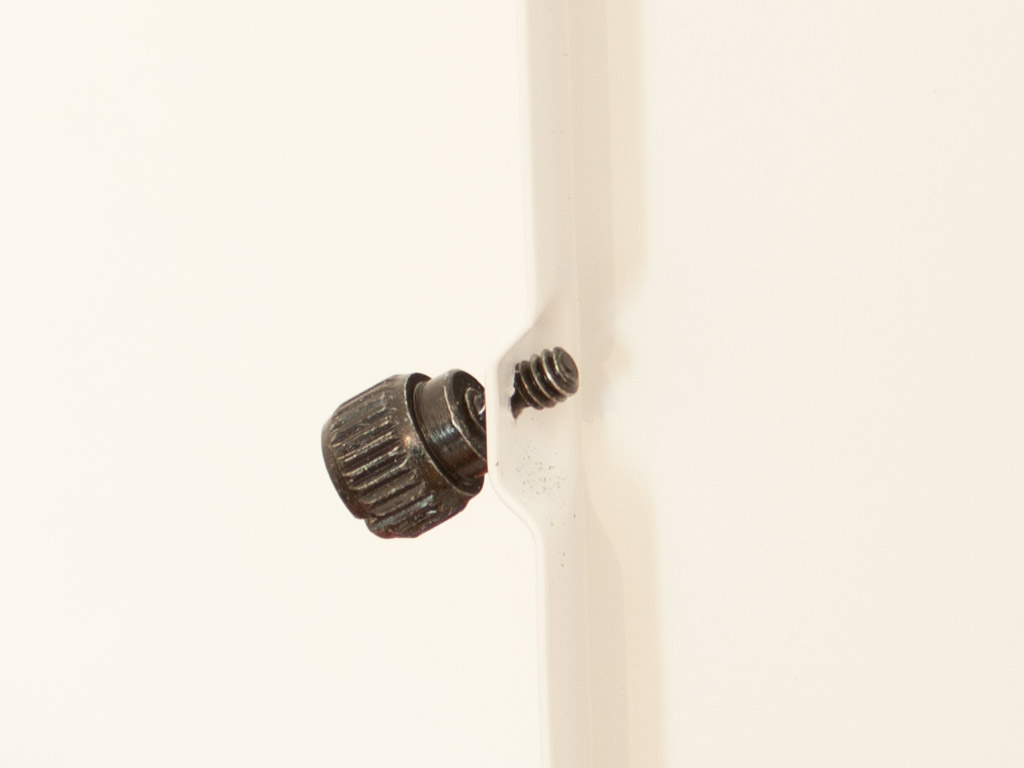
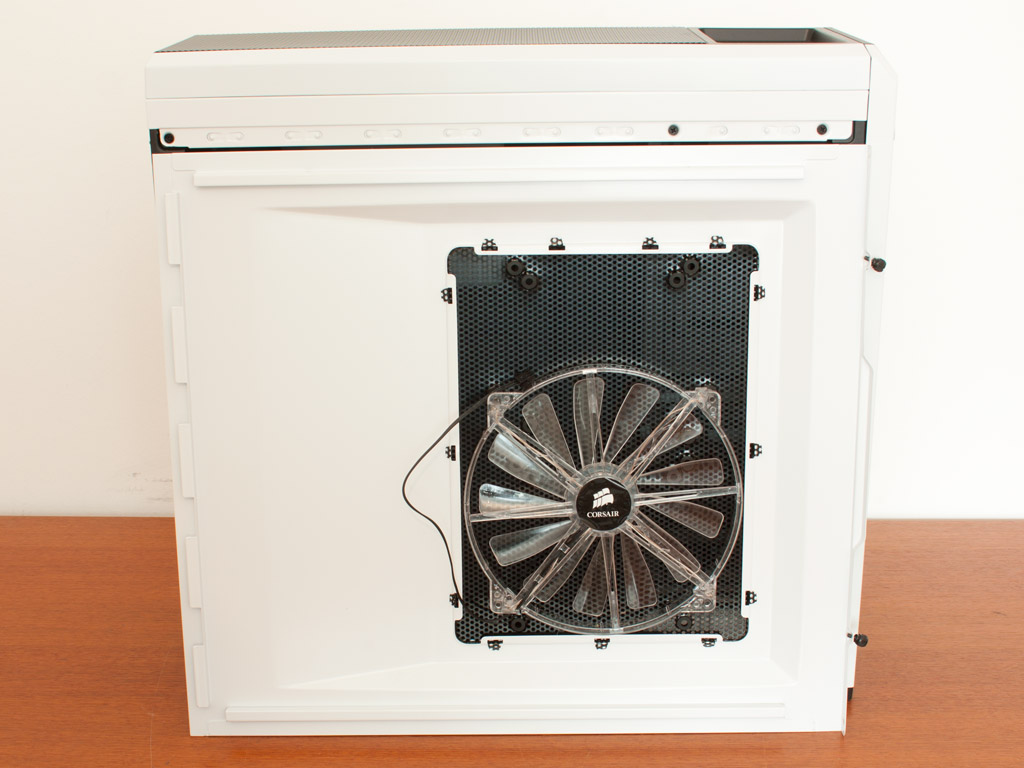
The side panel screws of the Carbide series cannot be removed completely. Such a simple system means that you will never loose these screws, while still retaining all the advantages of the thumb variants used. While the 400R did not have any active cooling installed on the side panel, the 500R ships with a single, clear 200 mm fan equipped with white LEDs. You may remove that one and install a pair of 120 or 140 mm units instead if you wish to do so.
Due to the similar tooling used, the Carbide 500R offers just as much space between the motherboard tray and side panel. However, since Corsair has changed the shape of the side panel slightly, there is still more room toward the front of the chassis when compared to the 400R.
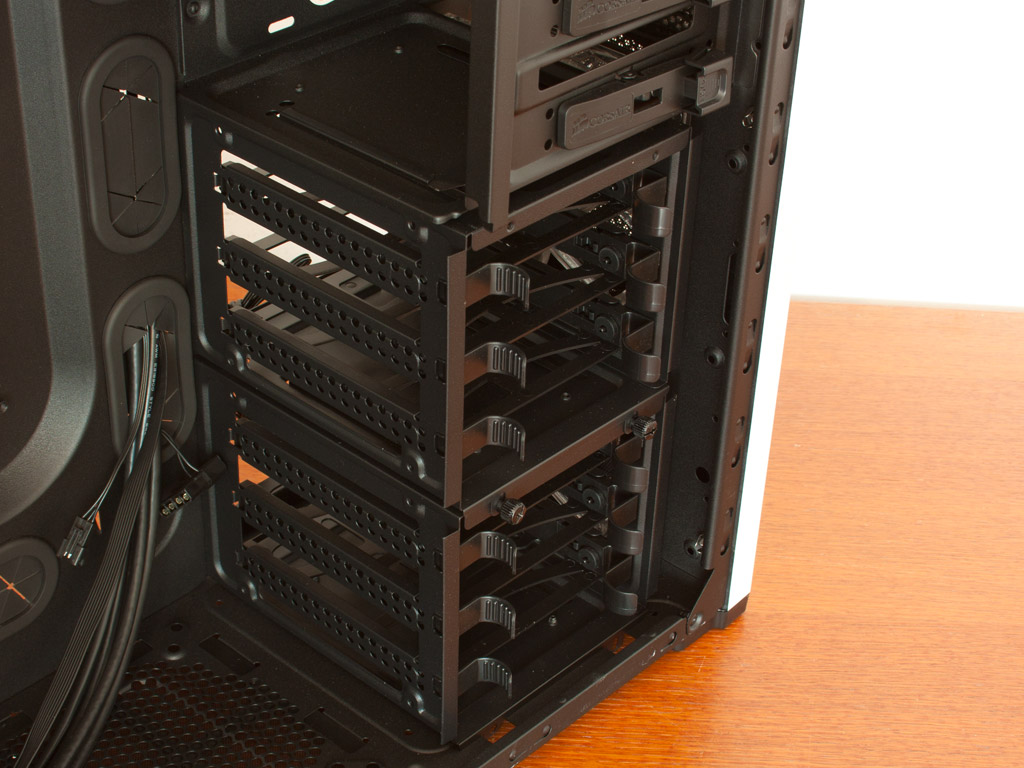
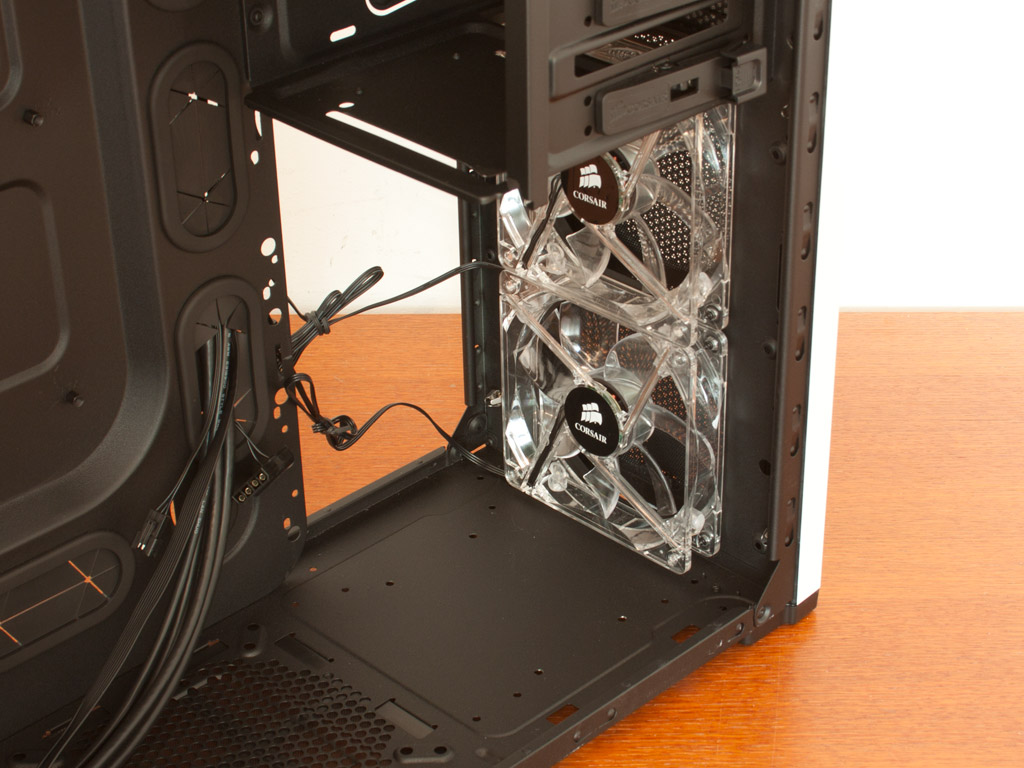
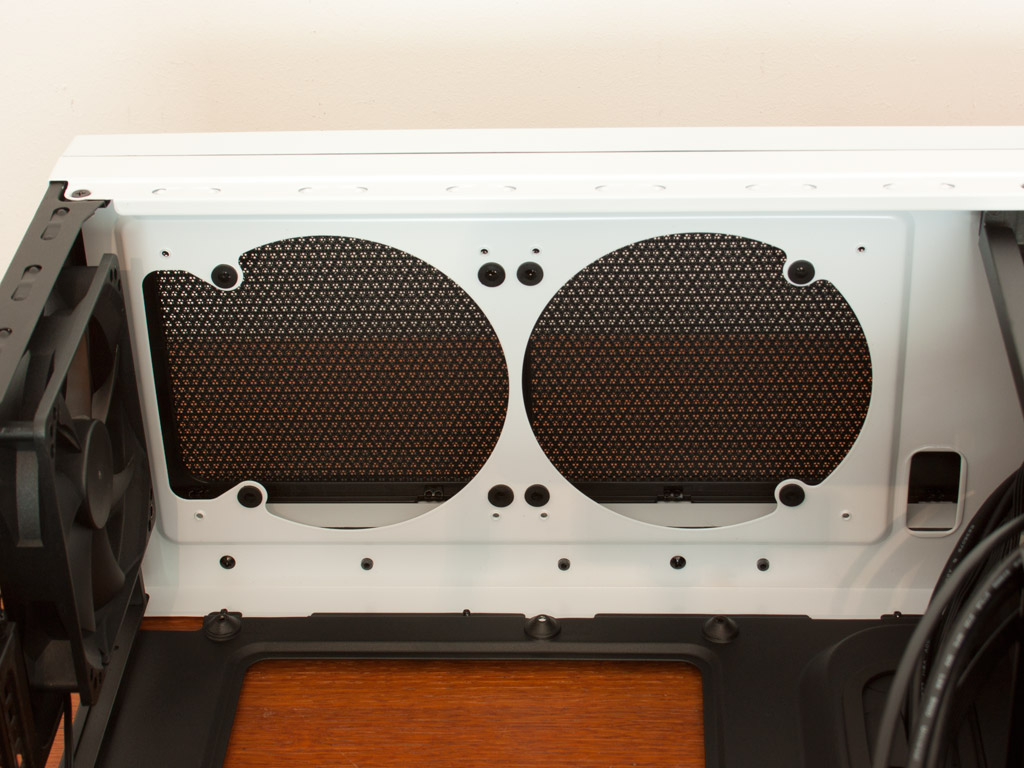
Taking a quick look at the hard drive bays, there are two cages which may each hold three drives. You may either just remove the top one by taking off a few thumb screws or go all out and clean the entire front out. To do so there are four thumb screws in the underside which hold the bottom cage in place. Two clear 120 mm fans are part of this area, bringing the total up to three fans so far. These ones also feature white LEDs.
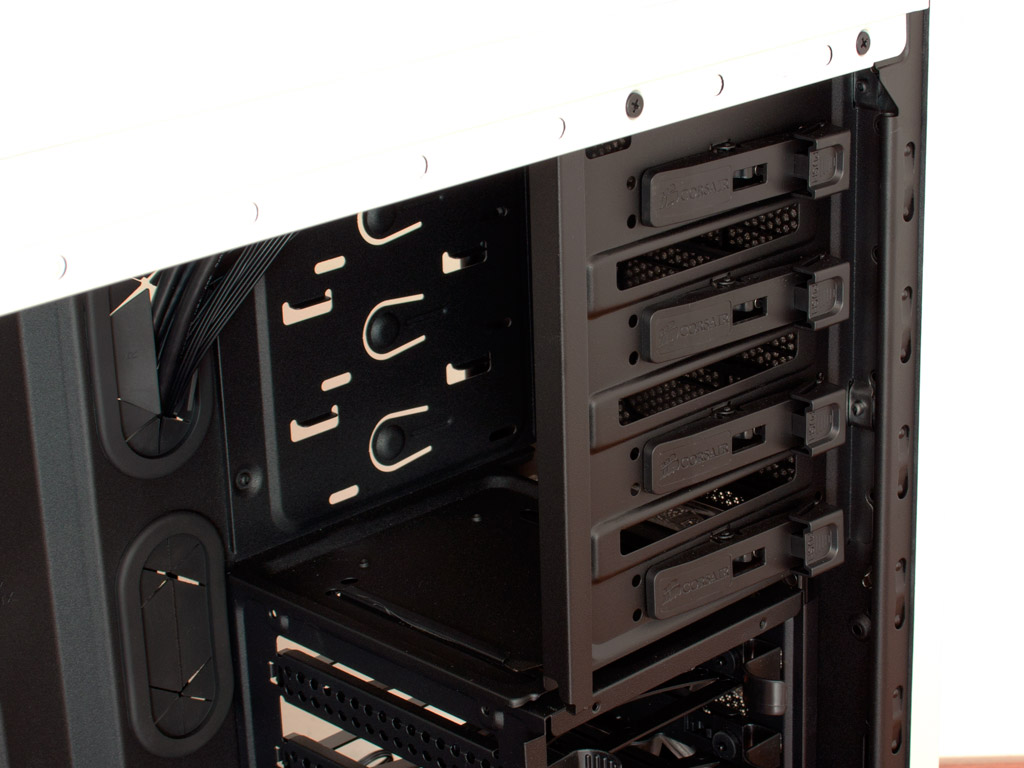
On top of that are the four external drive bays with the same screws-less system we have seen in other Corsair cases as well. it consists of solid plastic clips which work rather well.
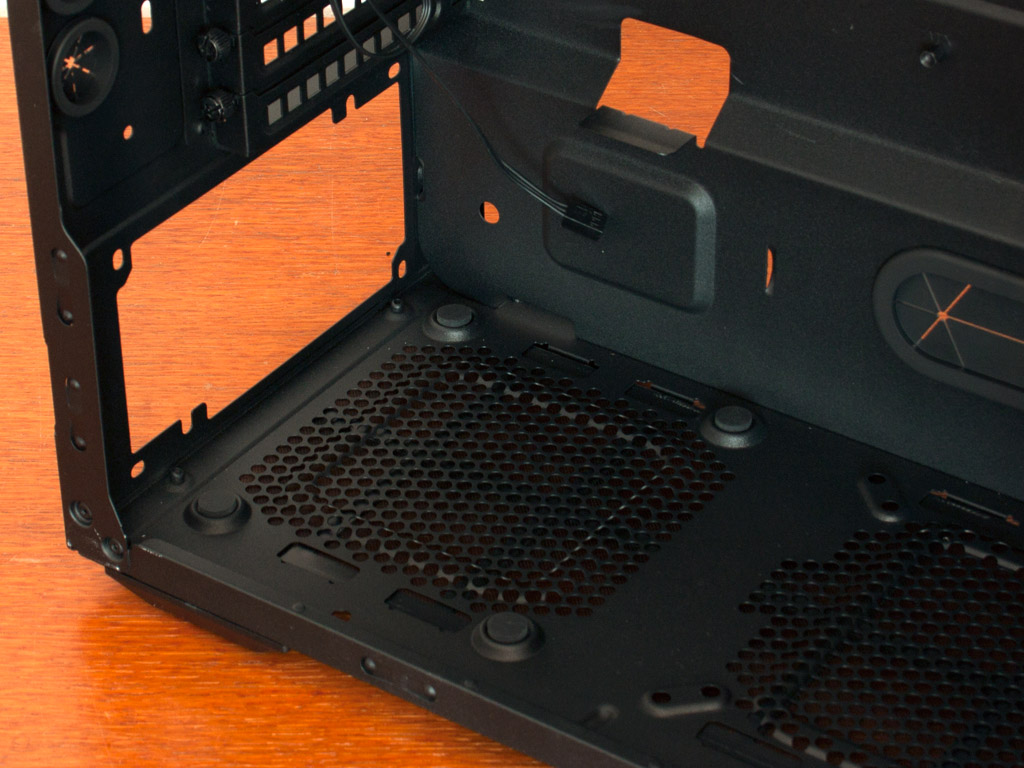
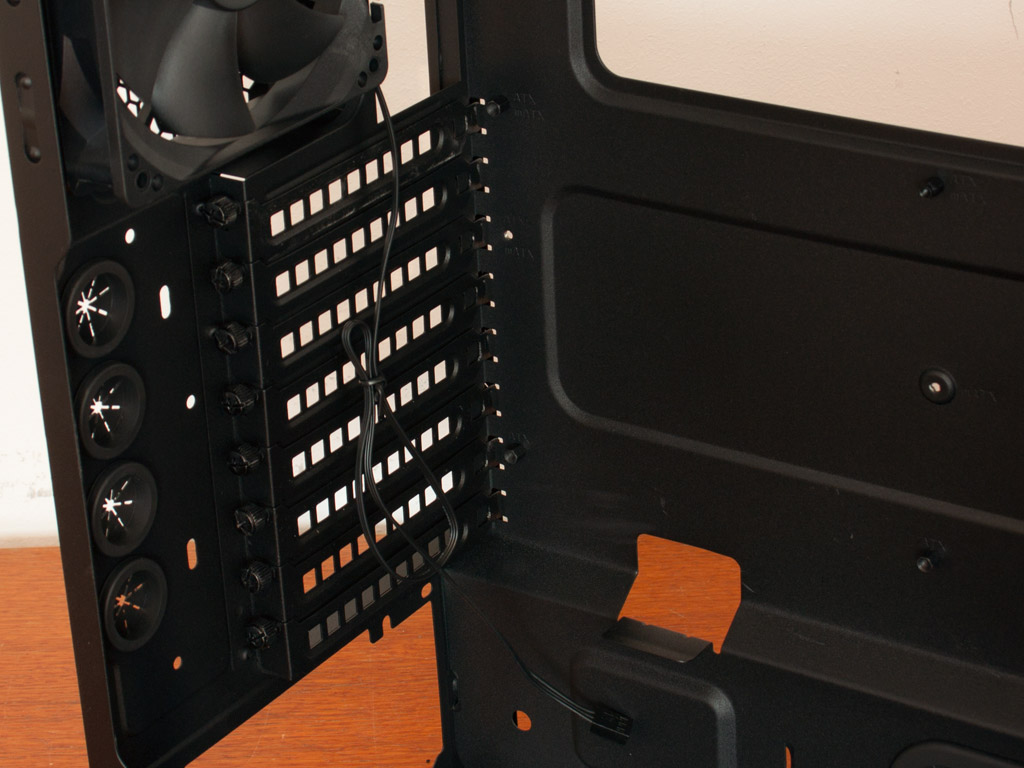
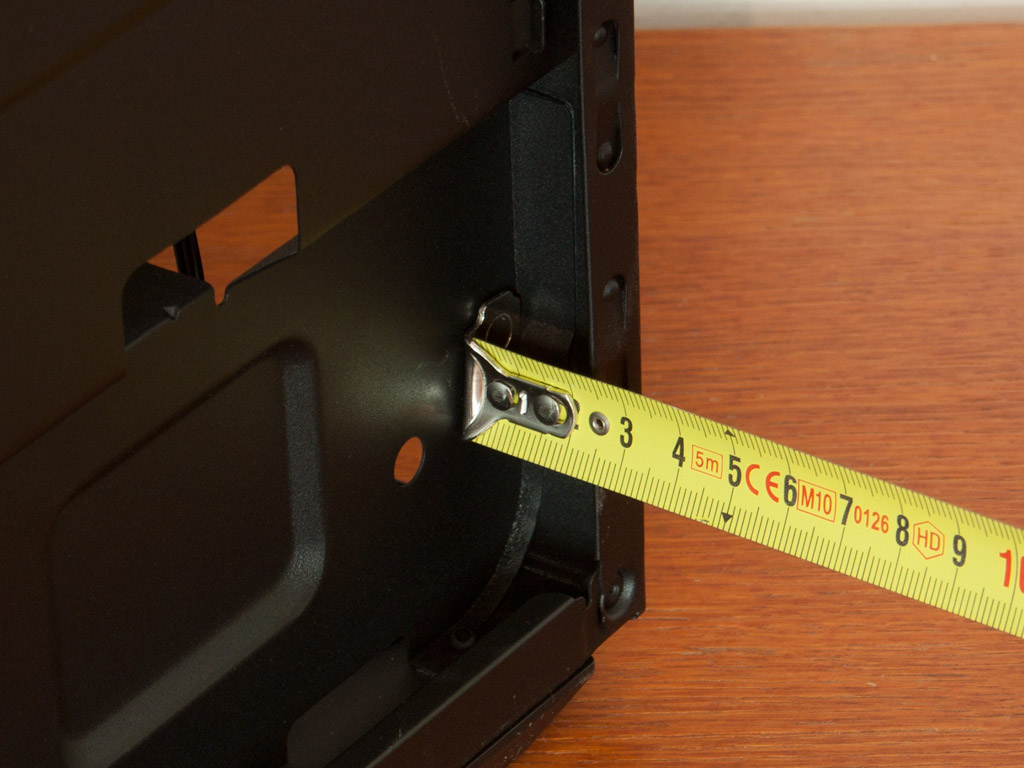
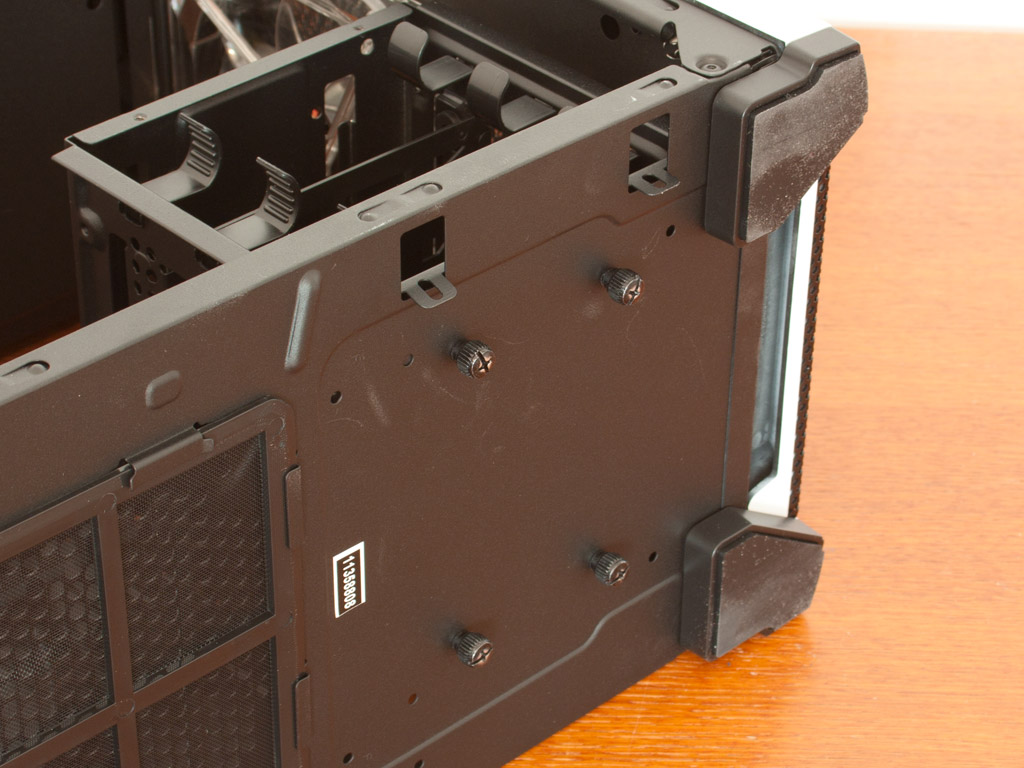
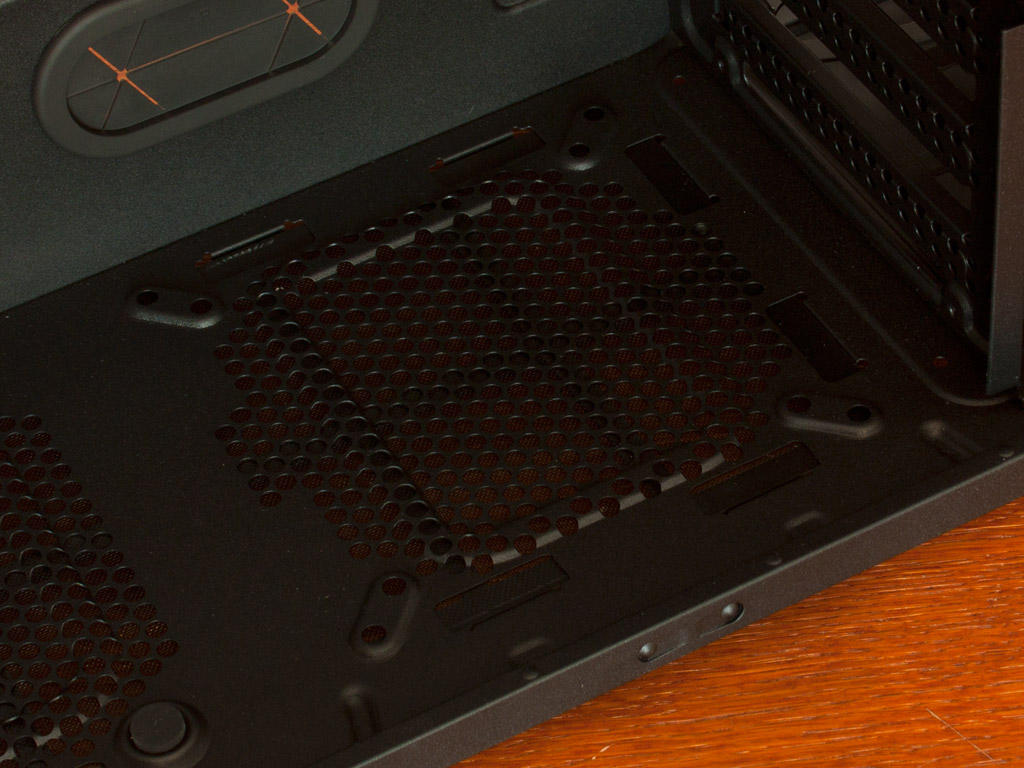
Turning our focus to the rear of the chassis, on the bottom you have the PSU bay with a large opening in the floor to allow fresh air to enter the unit. Above that are the eight mainboard expansion slots, each held in place with a single thumb screw and then there is the afore mentioned 120 mm exhaust fan with a 3 pin mainboard header and all black cable. In total the Carbide 500R ships with four fans right out of the box.
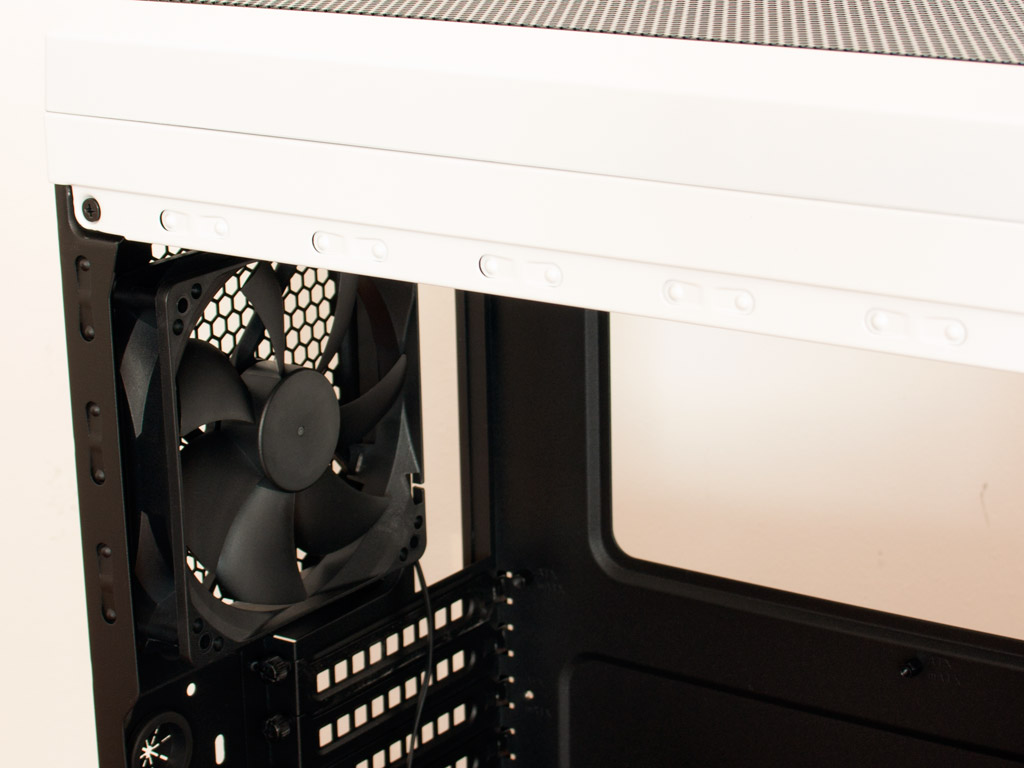
There is an additional vent in the bottom, allowing you to install one more 120 or 140 mm fan here. While most will not do so, it is still good to have the option available. In the top, the pair of spots is now shaped in such a way, that you should end up with more space when using a radiator, as the fans will be installed above the case ceiling, while the radiator is placed below it. This comes in handy when combining the Carbide 500R with the H100 water cooling unit from Corsair.
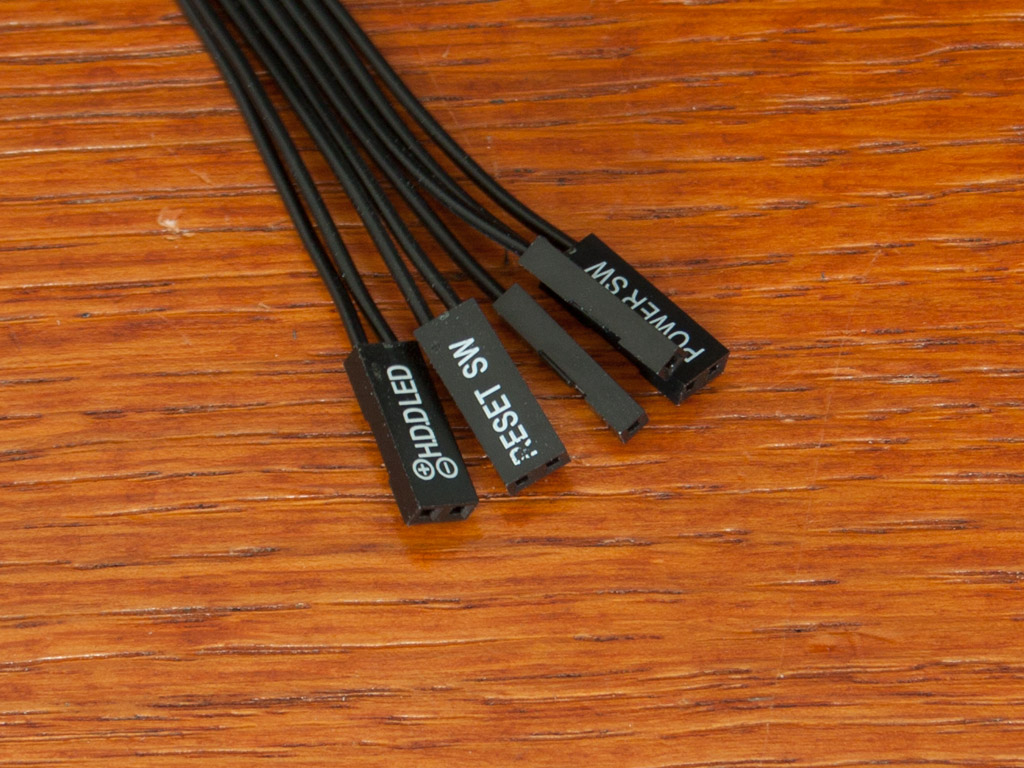
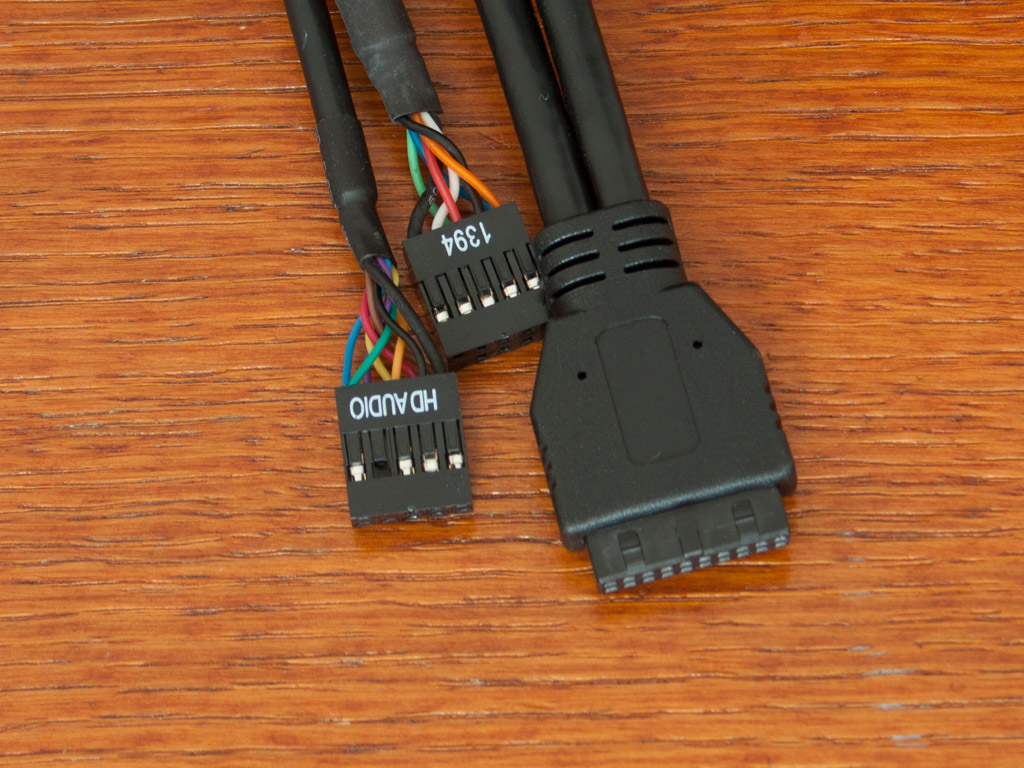
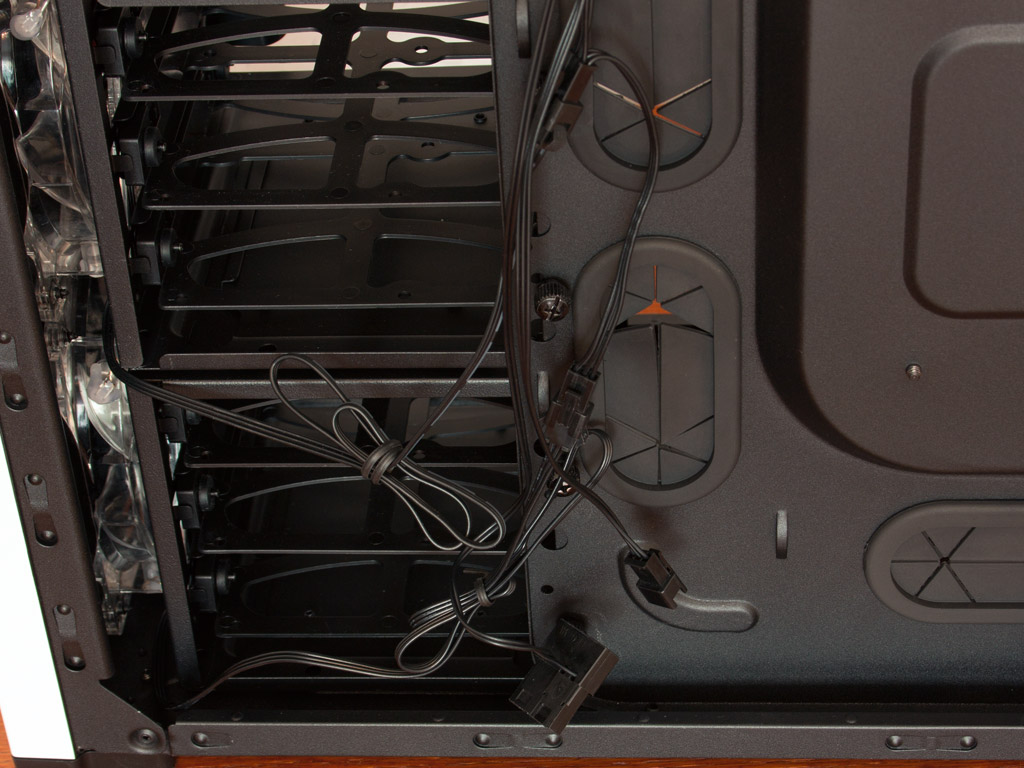
Before we dive into the assembly part of this review, let us take a quick look at the internal cables. Corsair has kept them all in black to go with the overall look of the chassis. Even the actual connector of the USB 3.0 header is black, unlike most other offerings, which still utilize at least a blue plug - even if the cable itself is black. The 500R also ships with the fan cables pre-routed so that you can control the lighting and speed with the switches in the front of the chassis.
Mar 20th, 2025 13:08 EDT
change timezone
Latest GPU Drivers
New Forum Posts
- Free Games Thread (4582)
- HalfLife2 RTX Demo Is out! (243)
- Can I stack thermal pads? (0)
- Can anyone else replicate this crash on the 9070? (0)
- Current Sales, Bundles, Giveaways (10314)
- SLI is really not Dead if you Have a SLI rig (89)
- Will Radeon 9070 XT be enough for 3840x1600 resolution? (39)
- AAF Optimus Modded Driver For Windows 10 & Windows 11 - Only for Realtek HDAUDIO Chips (379)
- Windows 10 Vs 11, Which one too choose? (2)
- Wherein lies the difference (6)
Popular Reviews
- ASRock Radeon RX 9070 XT Taichi OC Review - Excellent Cooling
- Corsair SF750 750 W Review
- Sapphire Radeon RX 9070 XT Nitro+ Review - Beating NVIDIA
- AMD Ryzen 9 9950X3D Review - Great for Gaming and Productivity
- be quiet! Pure Base 501 LX Review
- MSI GeForce RTX 5070 Gaming Trio OC Review
- XFX Radeon RX 9070 XT Mercury OC Magnetic Air Review
- ASUS Radeon RX 9070 TUF OC Review
- AVerMedia Core Go & Elite Go Review
- ASUS GeForce RTX 5090 TUF Review
Controversial News Posts
- NVIDIA GeForce RTX 50 Cards Spotted with Missing ROPs, NVIDIA Confirms the Issue, Multiple Vendors Affected (519)
- AMD RDNA 4 and Radeon RX 9070 Series Unveiled: $549 & $599 (260)
- AMD Mentions Sub-$700 Pricing for Radeon RX 9070 GPU Series, Looks Like NV Minus $50 Again (250)
- NVIDIA Investigates GeForce RTX 50 Series "Blackwell" Black Screen and BSOD Issues (244)
- AMD Radeon RX 9070 and 9070 XT Official Performance Metrics Leaked, +42% 4K Performance Over Radeon RX 7900 GRE (195)
- AMD Radeon RX 9070-series Pricing Leaks Courtesy of MicroCenter (158)
- MSI Doesn't Plan Radeon RX 9000 Series GPUs, Skips AMD RDNA 4 Generation Entirely (142)
- Microsoft Introduces Copilot for Gaming (123)