 2
2
Corsair Glaive RGB Pro Review
Sensor & Performance »Buttons, Scroll Wheel
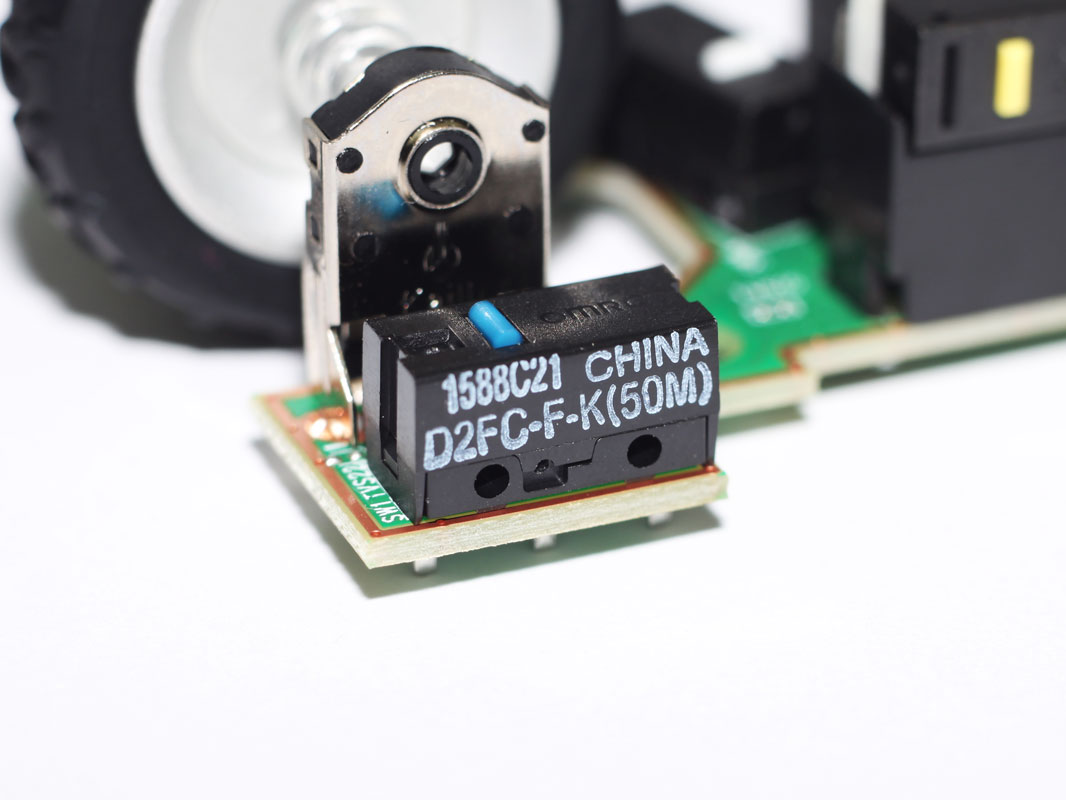
Main buttons have Omron D2FC-F-K switches underneath, which have a nominal lifespan of 50 million clicks. The buttons themselves feel fantastic; they are of medium tension and pretty much have no play or unnecessary pre-travel. They do have very slight and negligible over-travel after actuation and are tactile and nicely spammable, with a superb overall click feel.

Scrolling is nice and tactile and of medium resistance, which makes it suitable for heavy scrolling, but it's even better for precisely finding each notch. The encoder is a 11 mm tall black core Kailh model.
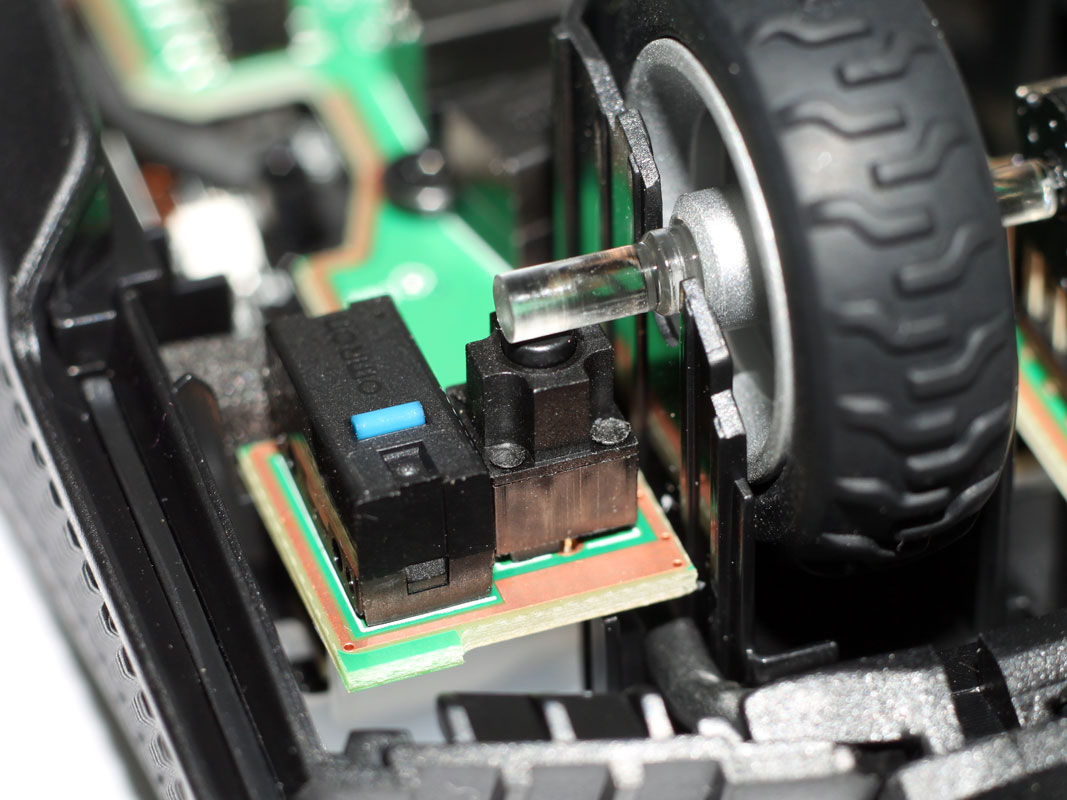
The middle mouse button is the only one on this rodent I don't like. It's very stiff, takes a lot of force to actuate, and doesn't feel too snappy either. It is operated by an elevated square switch without any branding.

The side buttons are the opposite—they are nicely spammable, tactile, and have a light to medium tension. They don't have any unnecessary travel and use flat yellow plunger Kailh models with a standard 3-legged layout.
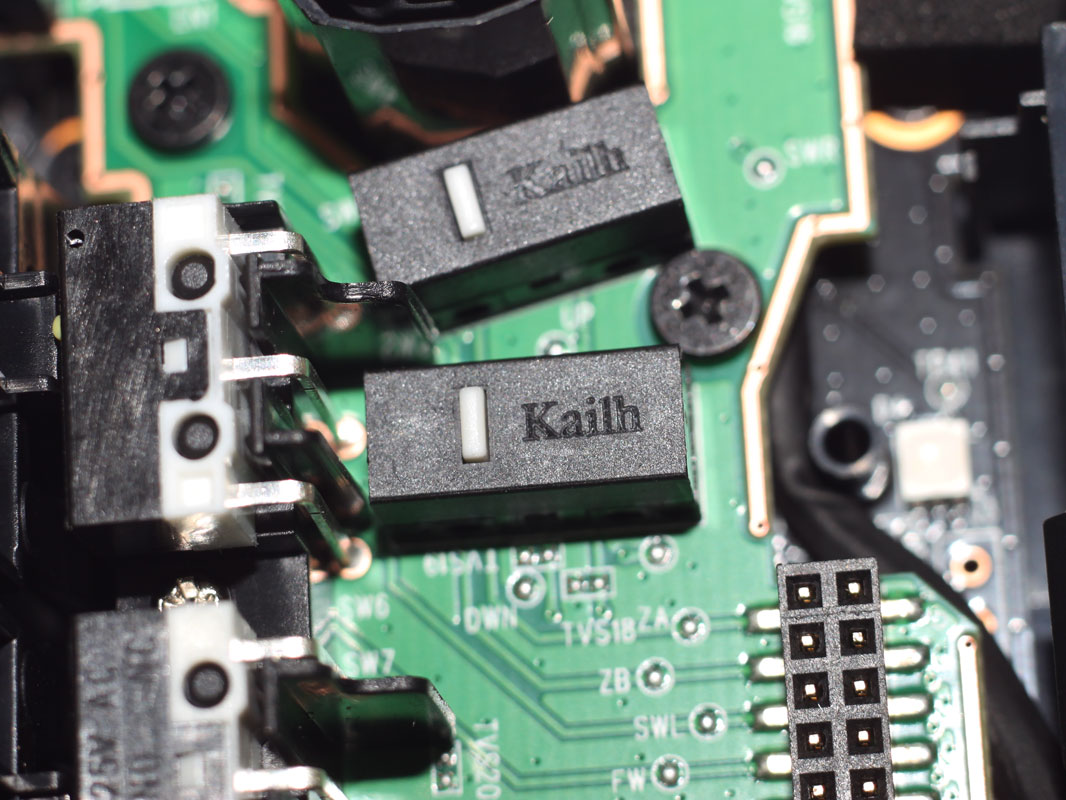
The CPI changers have similar specifications to the side buttons; they are very similar in terms of feel and actuation force. They use standard white plunger Kailh switches.
I also made a video in order to demonstrate how the buttons sound:
Mouse Feet
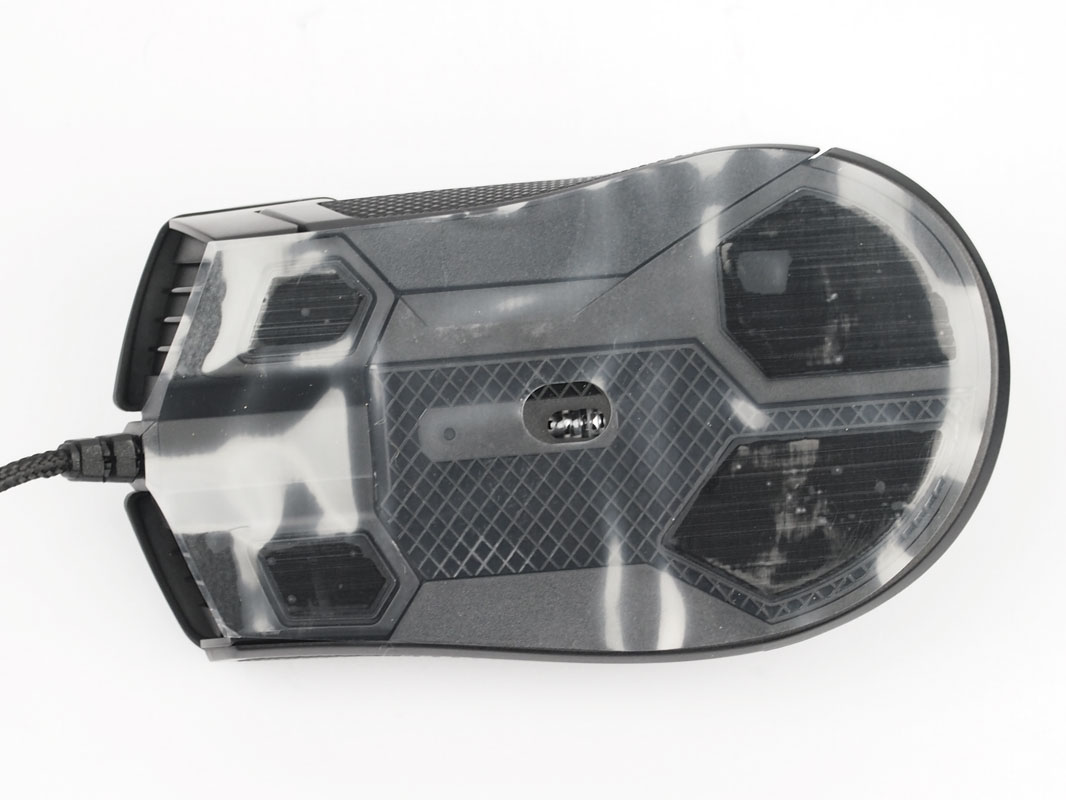

Mouse feet are noticeably better than average on the Glaive—after you remove their protective film, of course. They offer a smooth glide with low to medium friction and well-rounded contact edges. Unfortunately, no replacement feet are in the box, which is a bit of a letdown at this price point.
Cable

Just like with the previous few Corsair mice, the Glaive RGB Pro features the same horribly stiff, thick, and heavy braided cable. It generates a lot of resistance and drag on the mouse pad, so affixing it in place is definitely recommended (although I'd instantly swap to a more flexible cable after purchase, which usually voids the warranty). It's 1.8 meters long, and the connector follows the USB 2.0 standard.
Disassembling

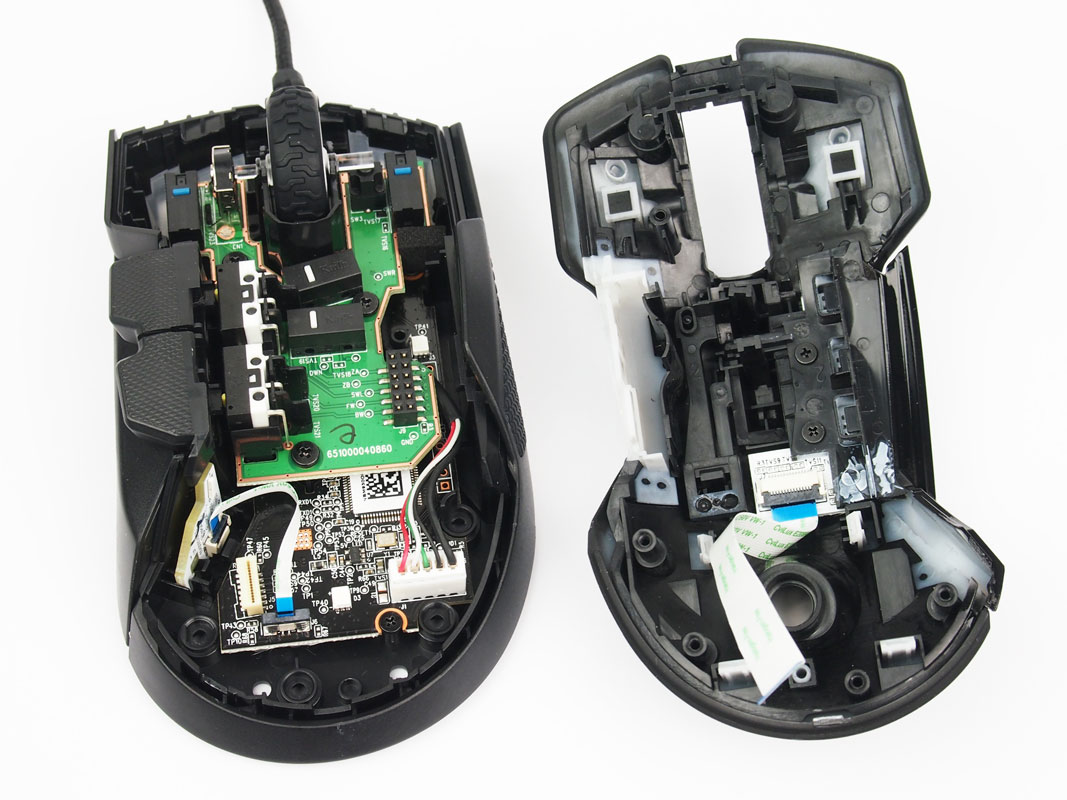
Disassembling this product doesn't take too much effort. You just need to remove five Philips-head screws from beneath the bottom mouse feet before simply popping the two main shells apart. However, be careful as there's an internal ribbon cable that connects the upper and lower PCBs that is quite easy to accidentally tear.
Mar 10th, 2025 15:01 EDT
change timezone
Latest GPU Drivers
New Forum Posts
- Company of Heroes 3 (1)
- What are you playing? (23131)
- I'm looking for a good tool to make the 3D scanning of my mini-pc using the photogrammetry and my Kinect 2. (49)
- AMD RX 9070 XT & RX 9070 non-XT thread (OC, undervolt, benchmarks, ...) (4)
- What's your latest tech purchase? (23272)
- Cryptocoin Value and Market Trend Discussion (1645)
- FlashMyBoard - Automated BIOS Update Tracking & Notification System (11)
- Nvidia's GPU market share hits 90% in Q4 2024 (gets closer to full monopoly) (772)
- I have latency batch file need some help with please (2)
- BIOS request 10DE:25A2 1043:13DC (9)
Popular Reviews
- Sapphire Radeon RX 9070 XT Nitro+ Review - Beating NVIDIA
- XFX Radeon RX 9070 XT Mercury OC Magnetic Air Review
- ASUS Radeon RX 9070 TUF OC Review
- MSI MAG B850 Tomahawk Max Wi-Fi Review
- NVIDIA GeForce RTX 5080 Founders Edition Review
- NVIDIA GeForce RTX 5070 Founders Edition Review
- Corsair Vengeance RGB CUDIMM DDR5-8800 48 GB CL42 Review
- AMD Ryzen 7 9800X3D Review - The Best Gaming Processor
- ASUS GeForce RTX 5070 Ti TUF OC Review
- MSI GeForce RTX 5070 Ti Gaming Trio OC+ Review
Controversial News Posts
- NVIDIA GeForce RTX 50 Cards Spotted with Missing ROPs, NVIDIA Confirms the Issue, Multiple Vendors Affected (513)
- AMD Plans Aggressive Price Competition with Radeon RX 9000 Series (277)
- AMD Radeon RX 9070 and 9070 XT Listed On Amazon - One Buyer Snags a Unit (261)
- AMD RDNA 4 and Radeon RX 9070 Series Unveiled: $549 & $599 (260)
- AMD Mentions Sub-$700 Pricing for Radeon RX 9070 GPU Series, Looks Like NV Minus $50 Again (248)
- NVIDIA Investigates GeForce RTX 50 Series "Blackwell" Black Screen and BSOD Issues (244)
- AMD Radeon RX 9070 and 9070 XT Official Performance Metrics Leaked, +42% 4K Performance Over Radeon RX 7900 GRE (195)
- AMD Radeon RX 9070-series Pricing Leaks Courtesy of MicroCenter (158)