 4
4
Dell Inspiron 15 3000 (w/SSD Upgrade) Review
General Performance »A look Inside


To get inside the Dell Inspiron 15 3000 requires a bit of effort, but is still relatively straightforward. Start by removing the battery and the single screw that holds the optical drive in place. With the screw removed, you can then slide the drive out via a small opening in the battery compartment.
For those wanting a more in-depth guide for disassembly, here is the PDF ofDell's service manual for this model.


Next, you will need to remove the keyboard, which requires releasing five tabs along the top. While not difficult, it will require a bit of patience. Once the five tabs have been released, you can pull the keyboard away from the trackpad to release the remaining tabs. Before pulling the keyboard away, make sure to disconnect the cable gently. At this point, you can disconnect the optical drive cable and remove the five M2L5 screws.
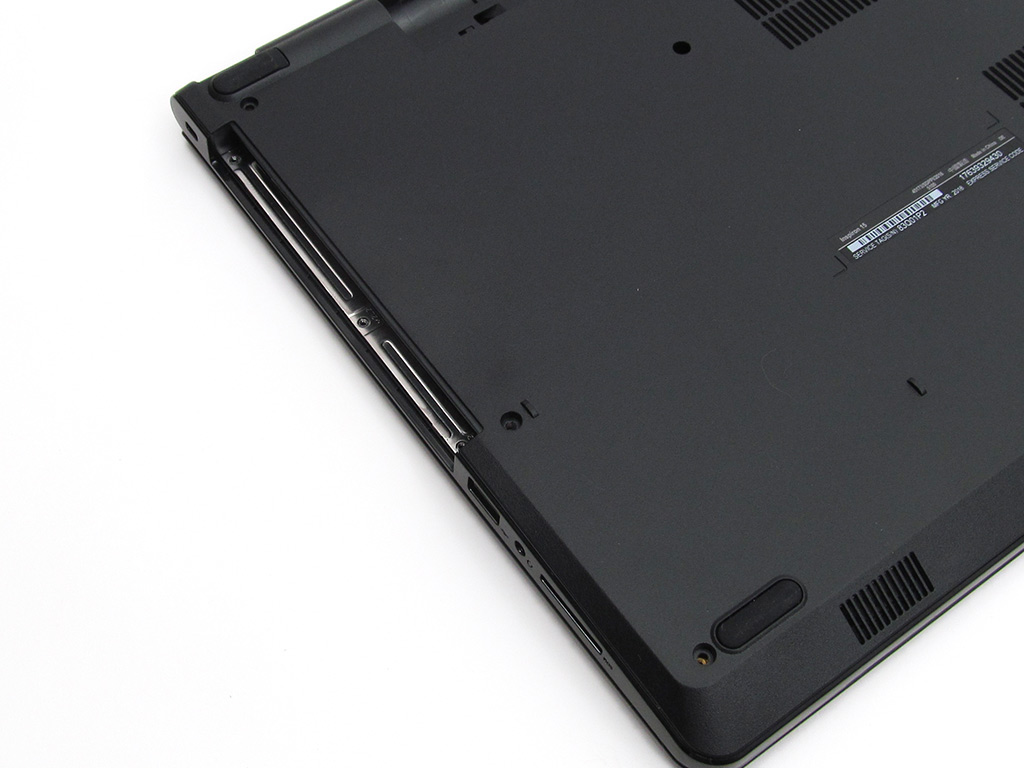

With those screws removed, you can now flip the system over and remove the remaining screws on the backside. Do not forget the screws in the battery compartment and the three along the edge in the optical drive bay. With all screws removed, you need to pull the plastic bottom off gently. The biggest issue is getting it started. However, once it beings to pull free, it should be rather easy. Just take your time and go slow. It's also worth noting the hinge in the top left as the plastic will sometimes catch on said hinge; again, patience is key. Take a breath and gently work the shell loose. With that done, you can now upgrade your storage or system memory.


The Inspiron 15 3576 I have here comes with a 1 TB Toshiba 5400 RPM HDD and single 8 GB DDR4 SODIMM from Kingston rated at 2400 MHz.
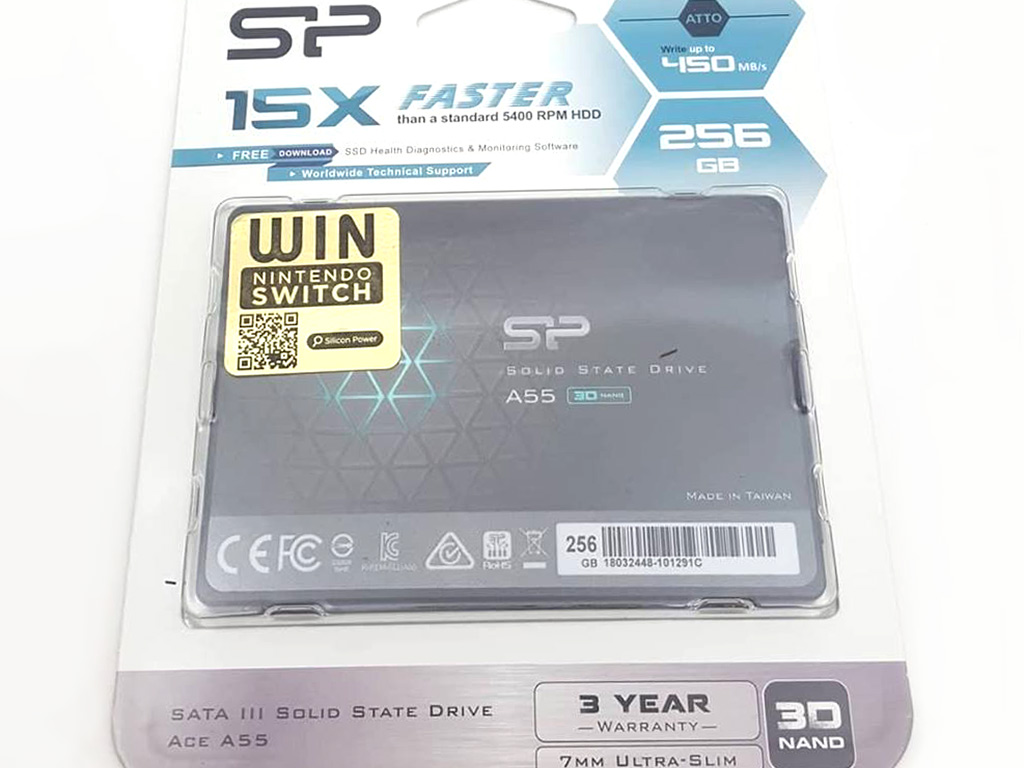
To make the system more usable, I took the liberty of upgrading the 1 TB 5400 RPM HDD to an SP Ace A55 256 GB TLC SATA III SSD. Normally, I would have gone with an M.2 drive; however, this particular system does not have an M.2 slot. To facilitate the installation of Windows 10 since the system has yet to be turned on, I used Macrium Reflect to clone the original OS on the HDD to the SSD without issue.
Mar 9th, 2025 11:26 EDT
change timezone
Latest GPU Drivers
New Forum Posts
- Nvidia's GPU market share hits 90% in Q4 2024 (gets closer to full monopoly) (716)
- Can't figure out if it is the PSU's problem for whine during PC shutting down (3)
- Post Your TIMESPY, PCMARK10 & FIRESTRIKE SCORES! (2019) (269)
- I'm looking for a good tool to make the 3D scanning of my mini-pc using the photogrammetry and my Kinect 2. (22)
- AAF Optimus Modded Driver For Windows 10 & Windows 11 - Only for Realtek HDAUDIO Chips (372)
- NVIDIA RTX owners only - your opinion on DLSS Image quality (465)
- Cooling problems persist on LGA1700 (38)
- 400W Power Spike on RTX 2070s 8-pin Connector (3)
- GameTechBench GPU benchmark is already out! (312)
- 5,0 +8 Gigabyte Aorus AP1200PM 80+ Platinum Modular. With LCD screen. (1)
Popular Reviews
- Sapphire Radeon RX 9070 XT Nitro+ Review - Beating NVIDIA
- ASUS Radeon RX 9070 TUF OC Review
- XFX Radeon RX 9070 XT Mercury OC Magnetic Air Review
- NVIDIA GeForce RTX 5070 Founders Edition Review
- Corsair Vengeance RGB CUDIMM DDR5-8800 48 GB CL42 Review
- MSI MAG B850 Tomahawk Max Wi-Fi Review
- AMD Ryzen 7 9800X3D Review - The Best Gaming Processor
- AMD Radeon RX 9070 Series Technical Deep Dive
- ASUS GeForce RTX 5070 Ti TUF OC Review
- MSI GeForce RTX 5070 Ti Ventus 3X OC Review
Controversial News Posts
- NVIDIA GeForce RTX 50 Cards Spotted with Missing ROPs, NVIDIA Confirms the Issue, Multiple Vendors Affected (513)
- AMD Plans Aggressive Price Competition with Radeon RX 9000 Series (277)
- AMD Radeon RX 9070 and 9070 XT Listed On Amazon - One Buyer Snags a Unit (261)
- AMD RDNA 4 and Radeon RX 9070 Series Unveiled: $549 & $599 (255)
- AMD Mentions Sub-$700 Pricing for Radeon RX 9070 GPU Series, Looks Like NV Minus $50 Again (248)
- NVIDIA Investigates GeForce RTX 50 Series "Blackwell" Black Screen and BSOD Issues (244)
- AMD Radeon RX 9070 and 9070 XT Official Performance Metrics Leaked, +42% 4K Performance Over Radeon RX 7900 GRE (195)
- AMD Radeon RX 9070-series Pricing Leaks Courtesy of MicroCenter (158)