 5
5
EK-Classic RTX 3080/3090 D-RGB GPU Block + Backplate Review
Liquid Flow Restriction »Installation
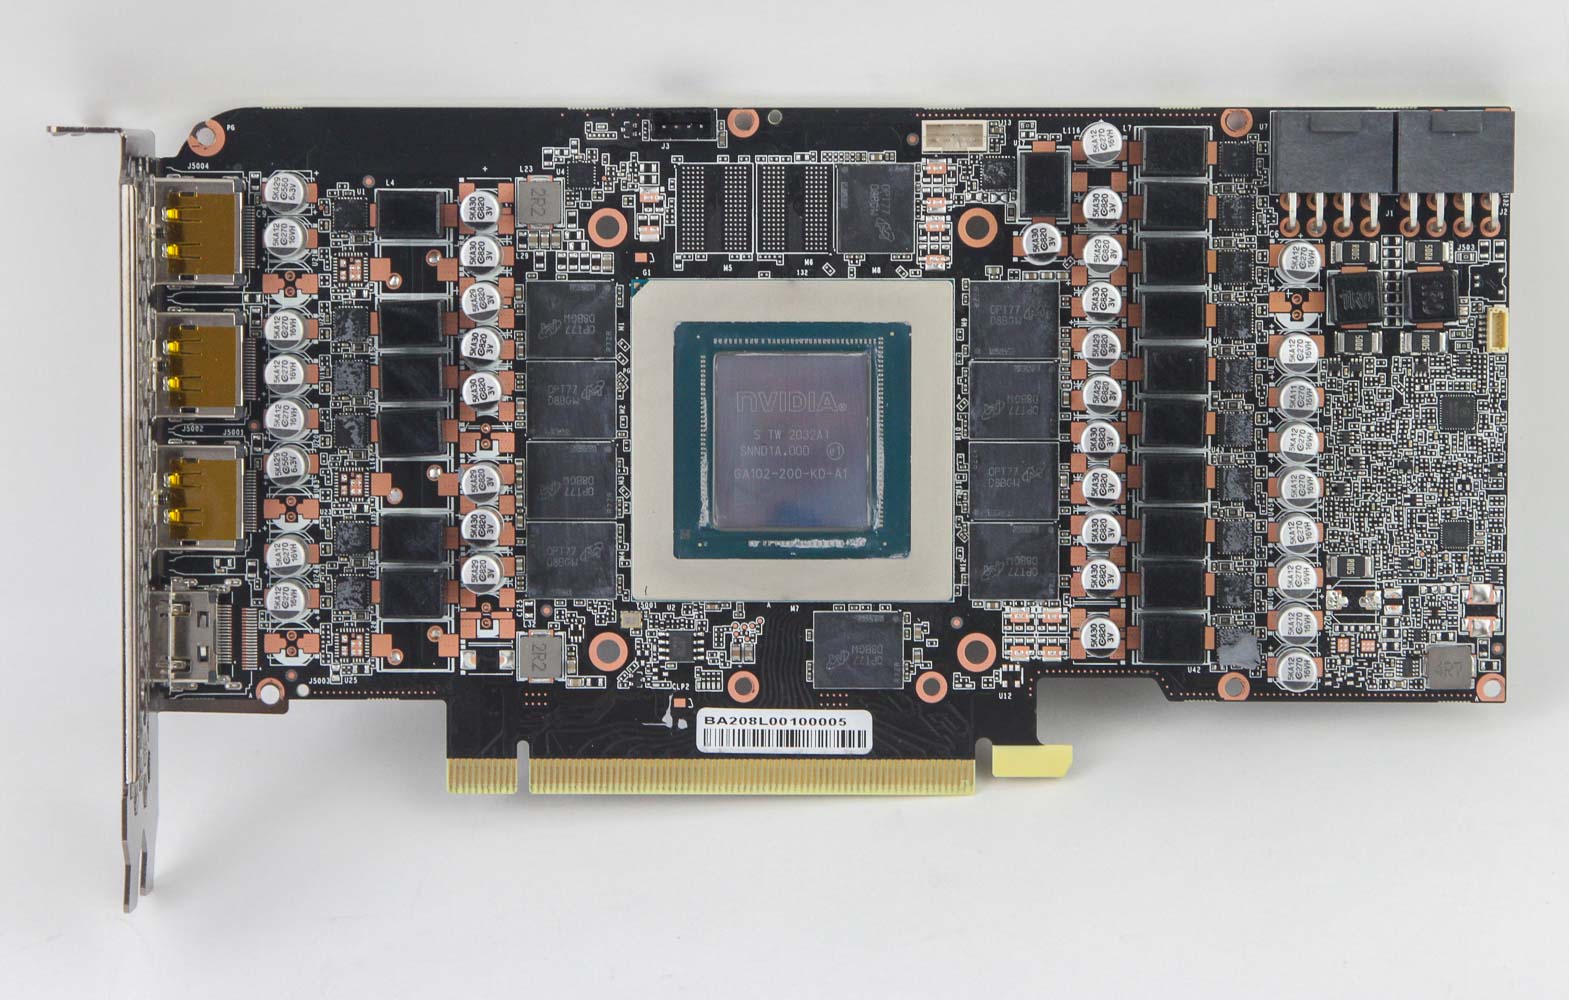
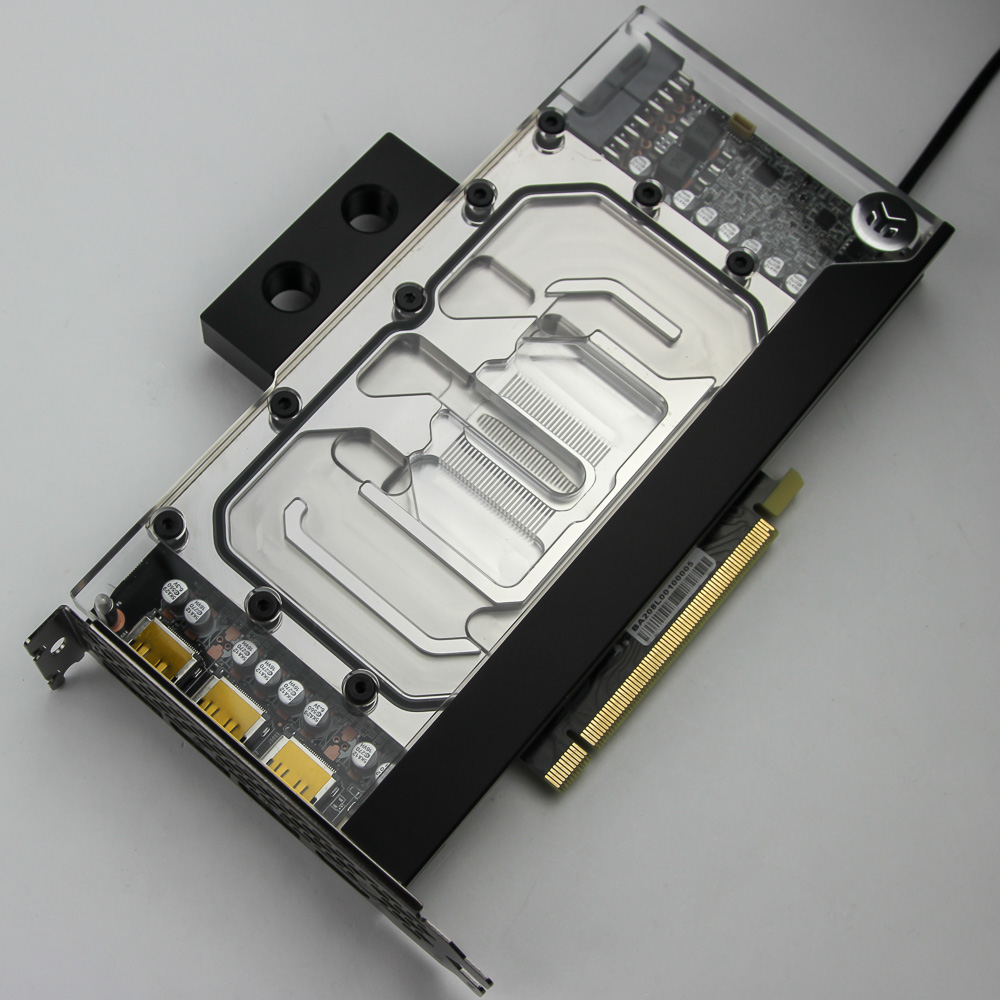
Behold the unicorn that is the working RTX 3080 PCB! I was originally conflicted on whether to go with the Founders Edition, which has led to some clever and different GPU blocks because of the unique PCB design, or the reference PCB used by several NVIDIA AICs and for which there is more support from block makers. In the end, the latter logically won out, so here we are. The Founders Edition also is not supported by the EK-Classic line, so this review would not even exist in that world.

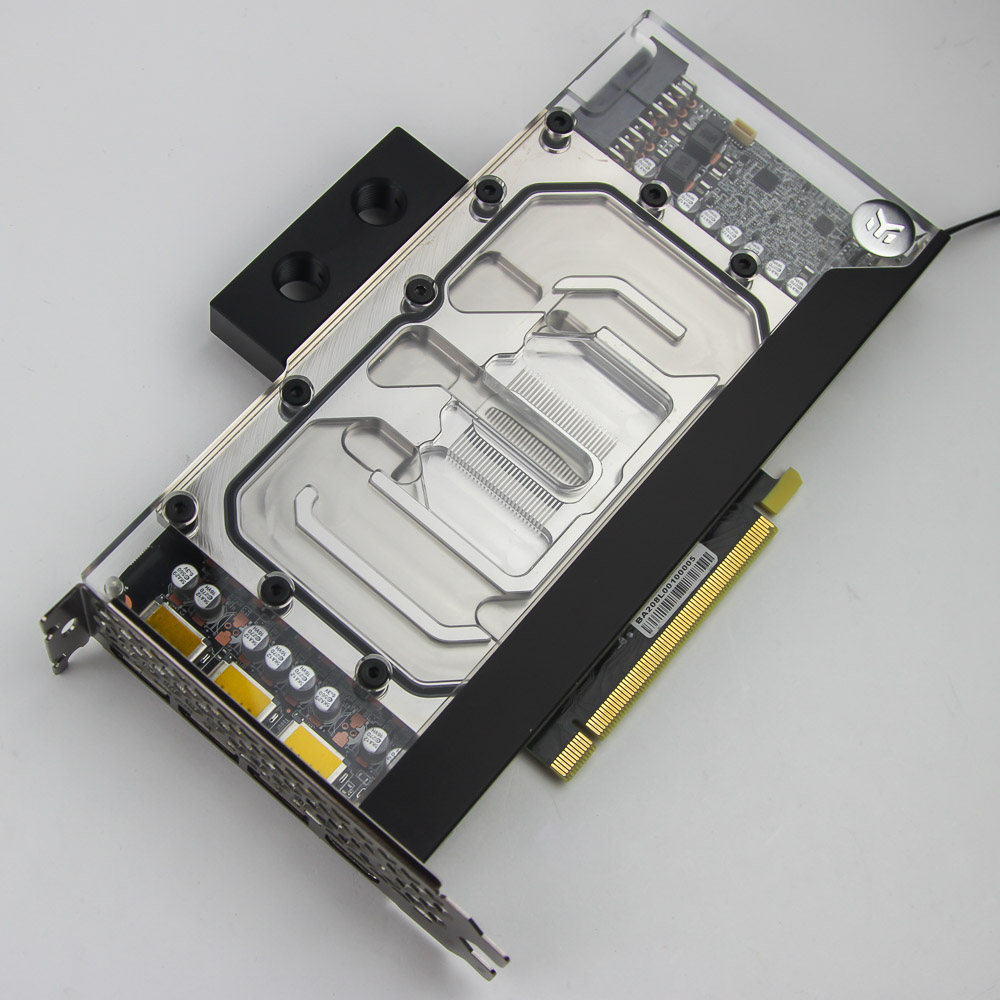
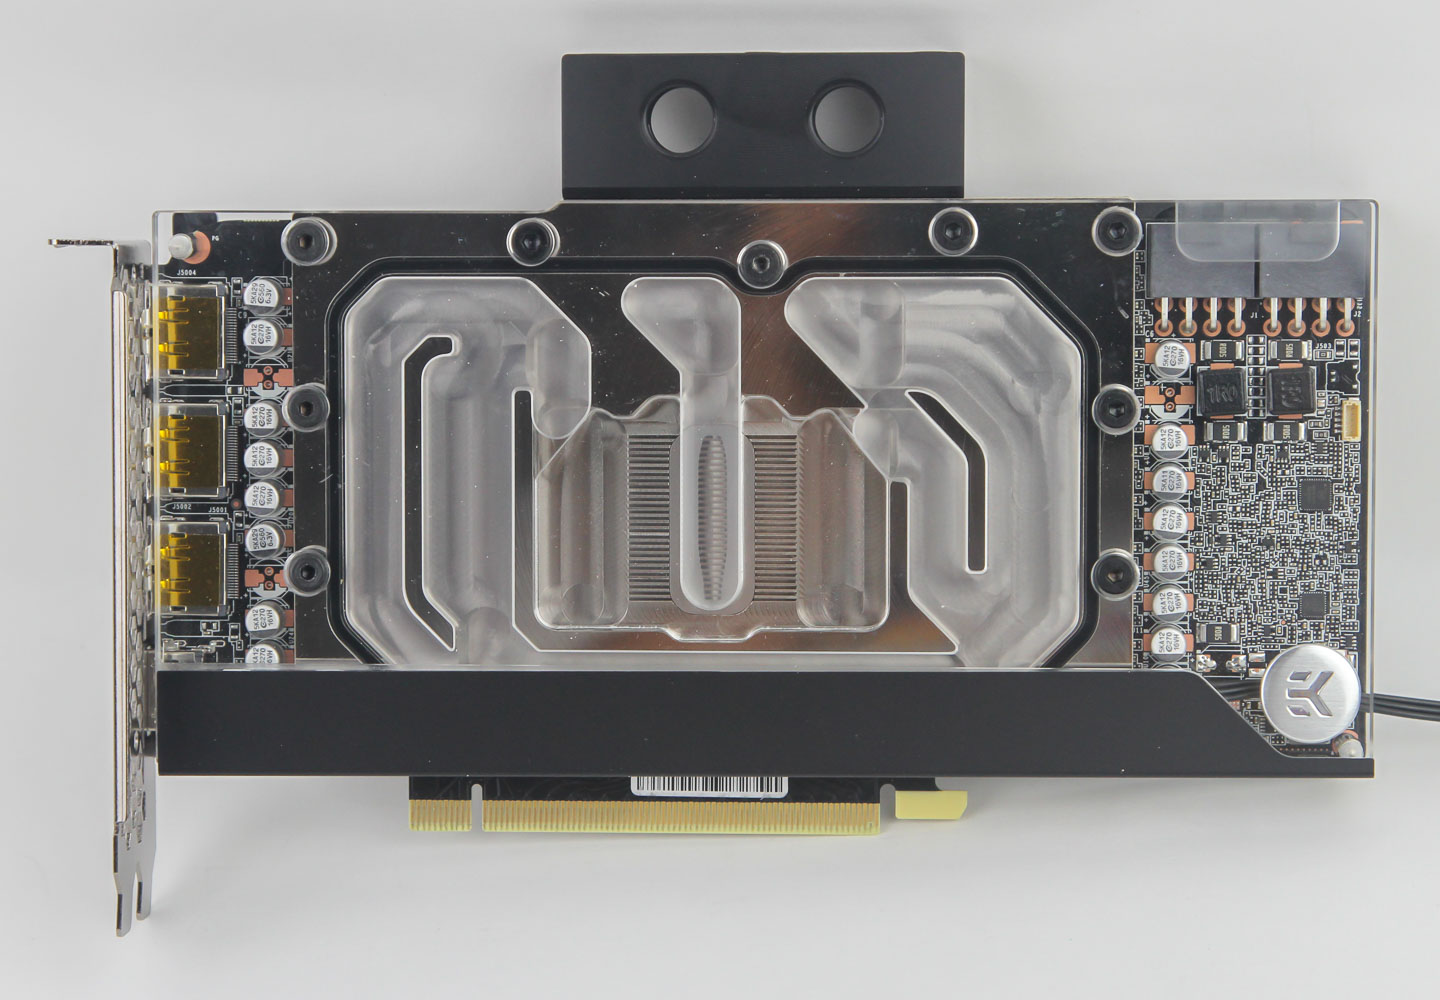
Installation of the GPU block is slightly more involved in the mise en place stage since you need to measure, cut, and apply thermal pads on all the relevant sections of the PCB as listed in the online manual. For the sake of this demonstration, I will not include any picture of the cutting to size and application since I have to be extra careful when applying the thermal pads for actual testing, as I otherwise would have a smaller space to work in and photo gear around. This is also why I am not showing the application of thermal paste, which I prefer to pre-spread over the GPU die. Lay the block with the cold plate facing up on a box and then place the PCB over the block such that the I/O bracket hangs off the edge of the box and does not interfere with the PCB touching the block. The other advantage of this method is that you can line the holes up better for the installation, which does mean you need to press down on the thermal pads slightly lest they fall off due to gravity.
Once done, start with the four screws and washers going around the GPU core itself. Do these in a diagonal manner, swapping between sets of two as with a CPU block, and don't tighten them all the way as you may have to slightly wiggle the PCB to better align all the holes for installation. With that done, move outwards until all 12 screws are in before securing them. This is a precise installation since you can screw them all the way into the standoffs on the block itself. It is not tool-less, however. You need a Phillips screwdriver since the screws have a Phillips head rather than the H2.5 head for the Allen key.
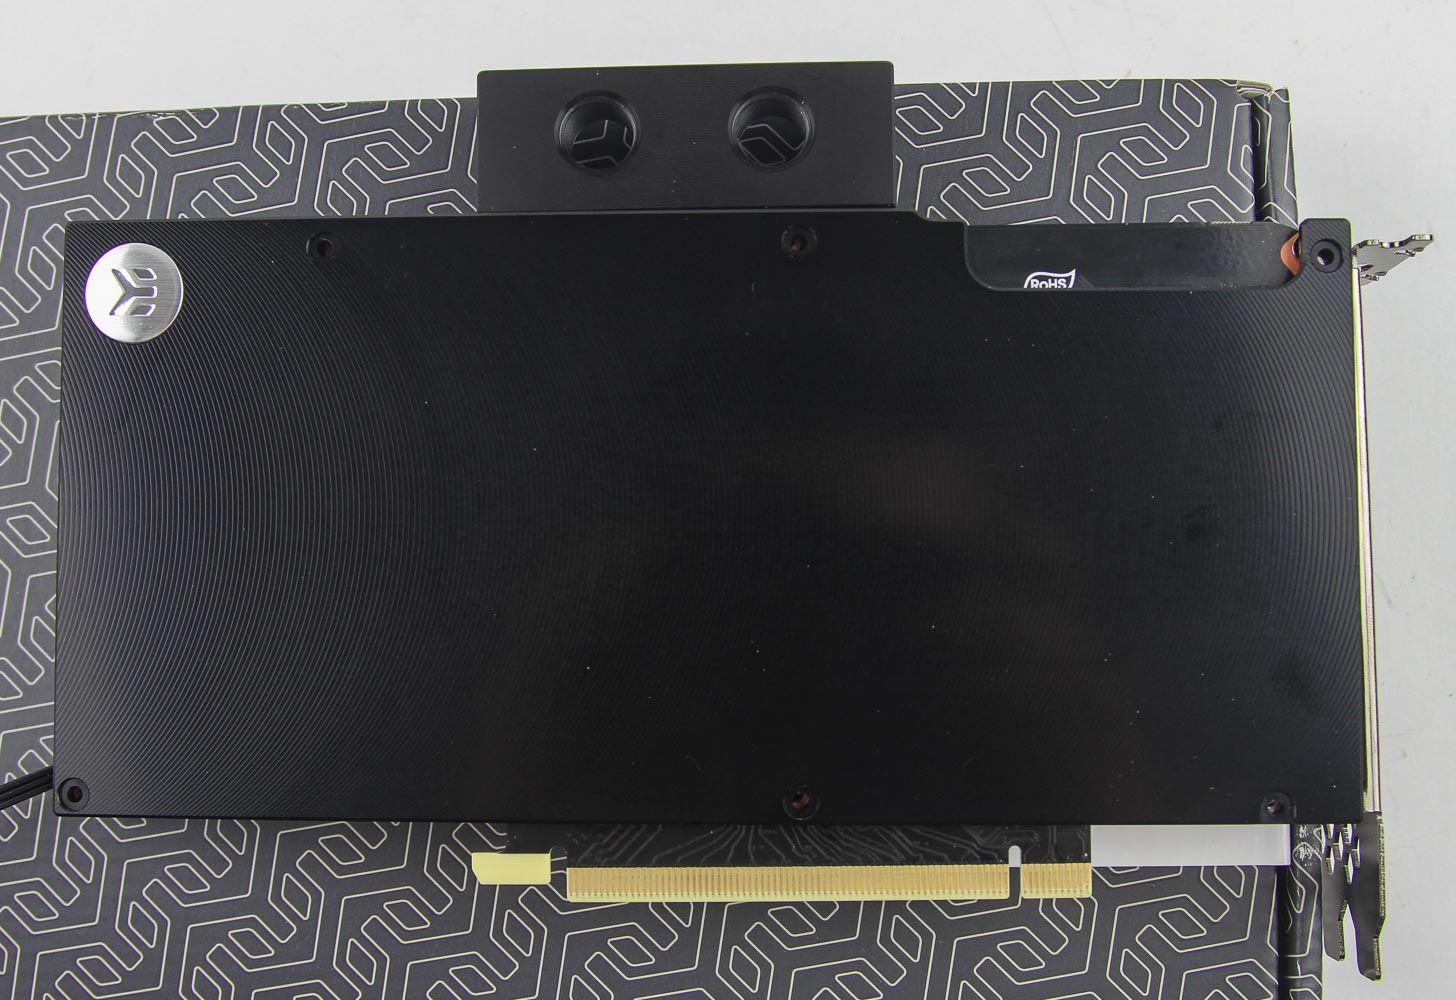
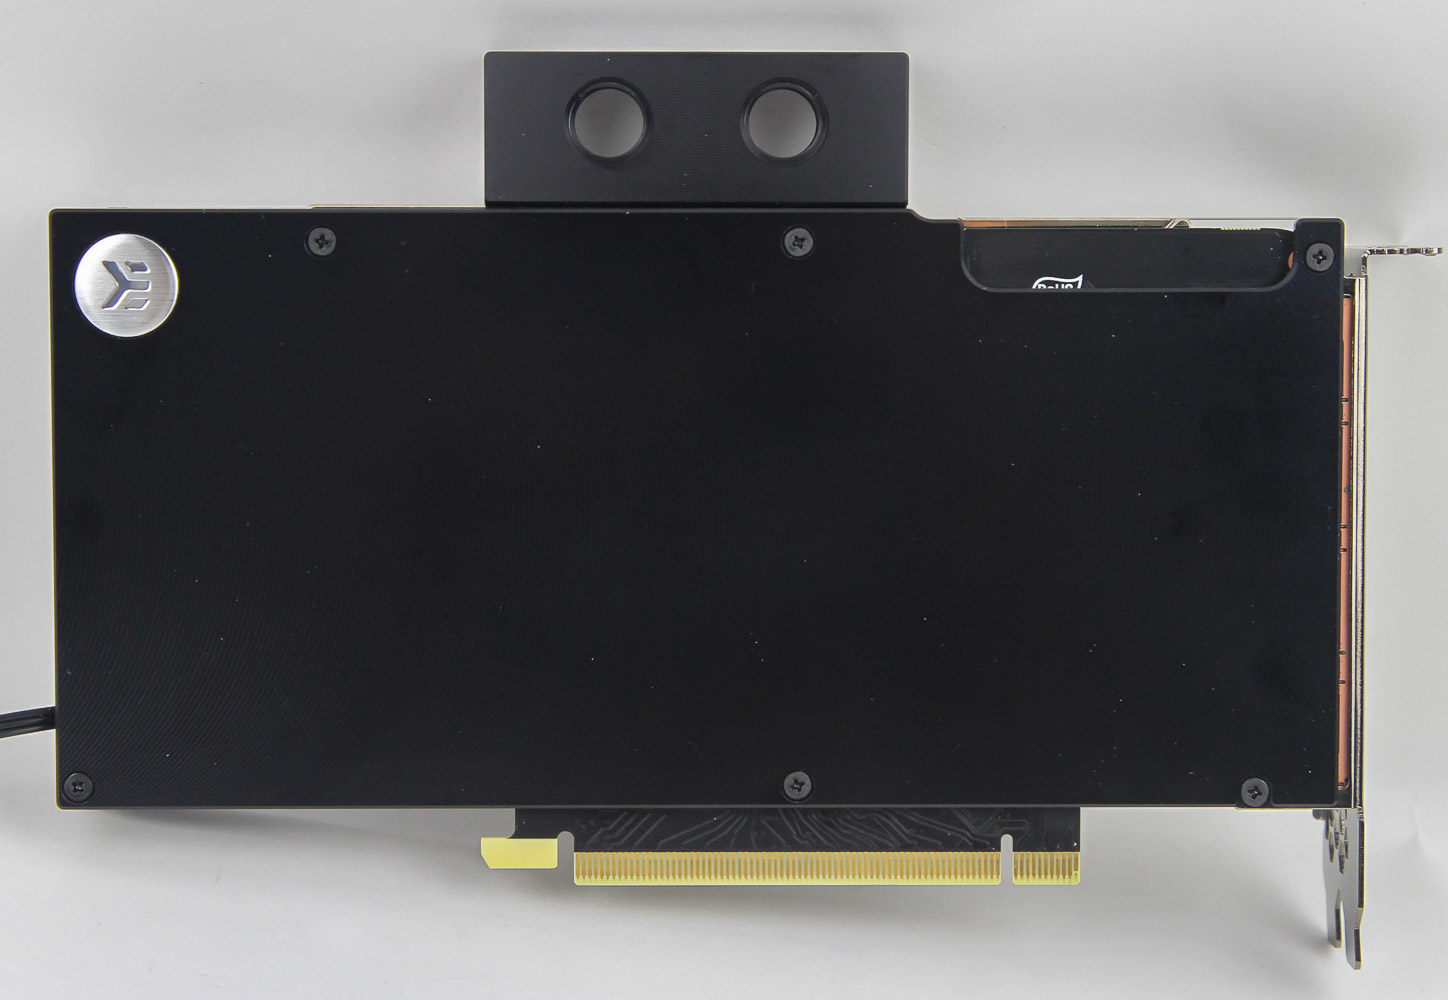
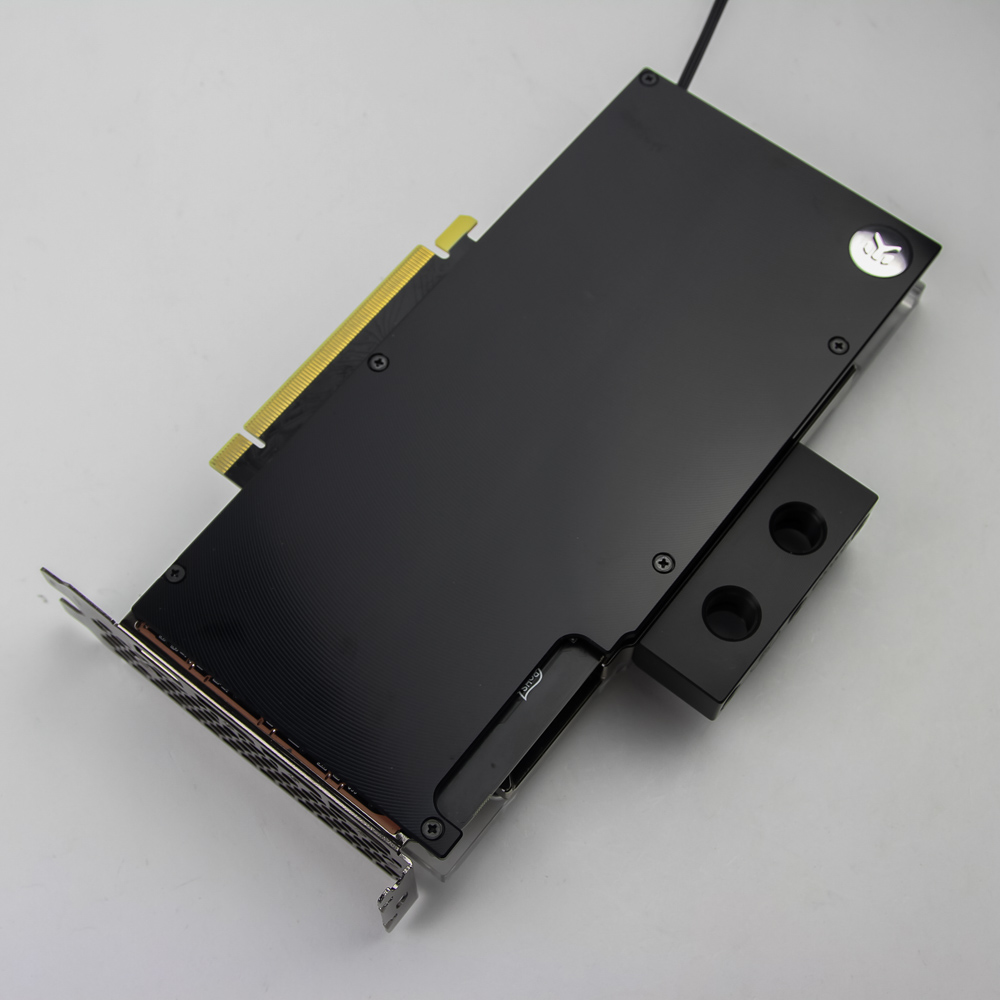
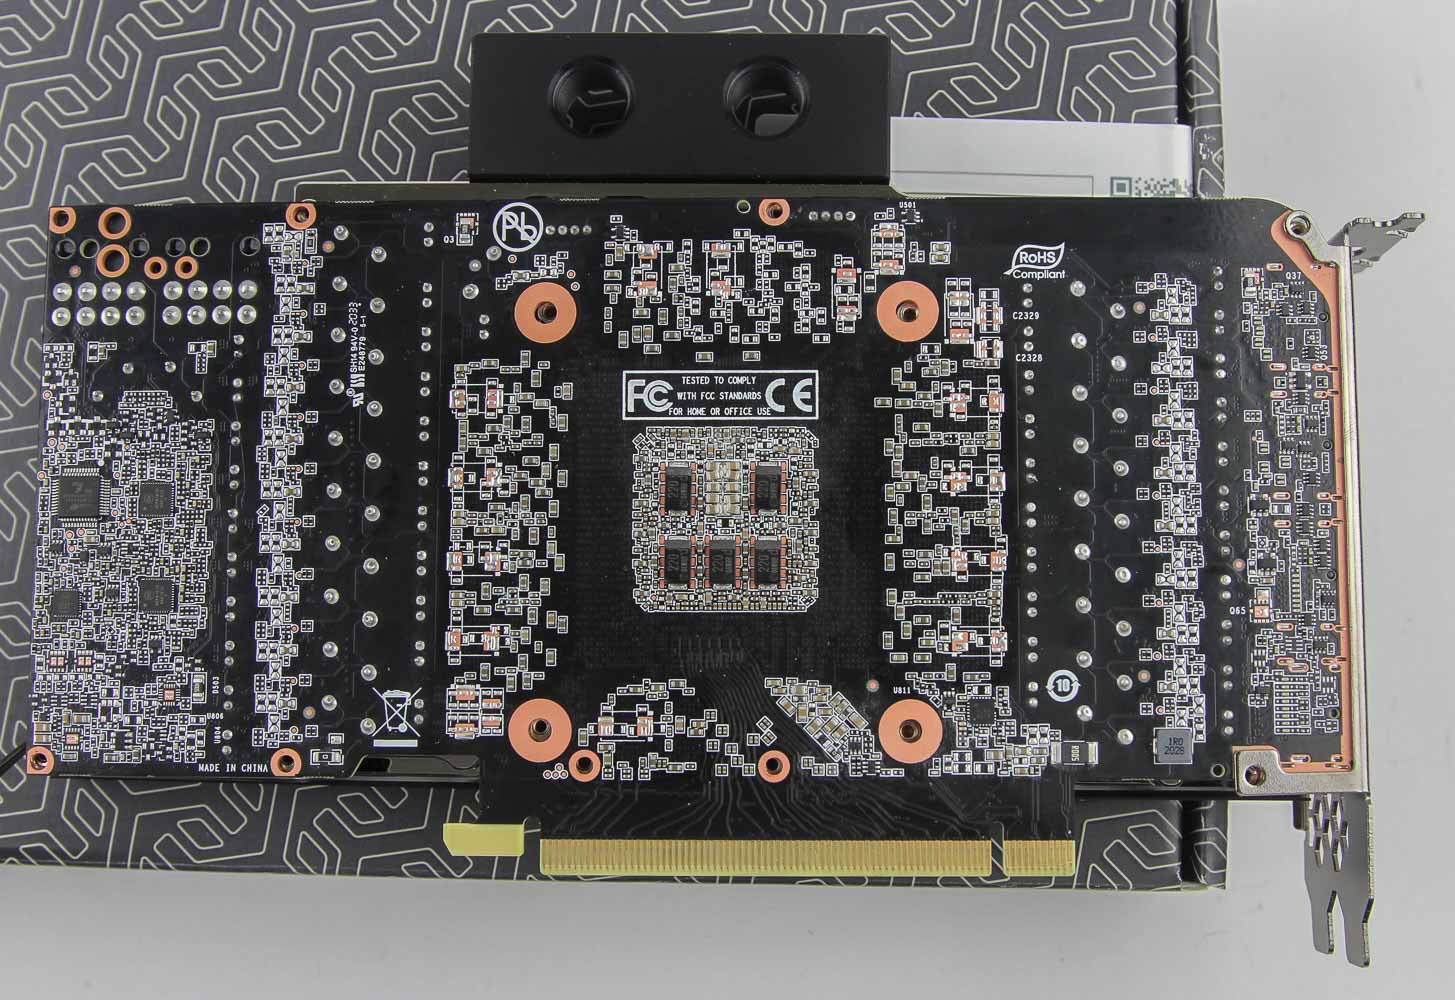
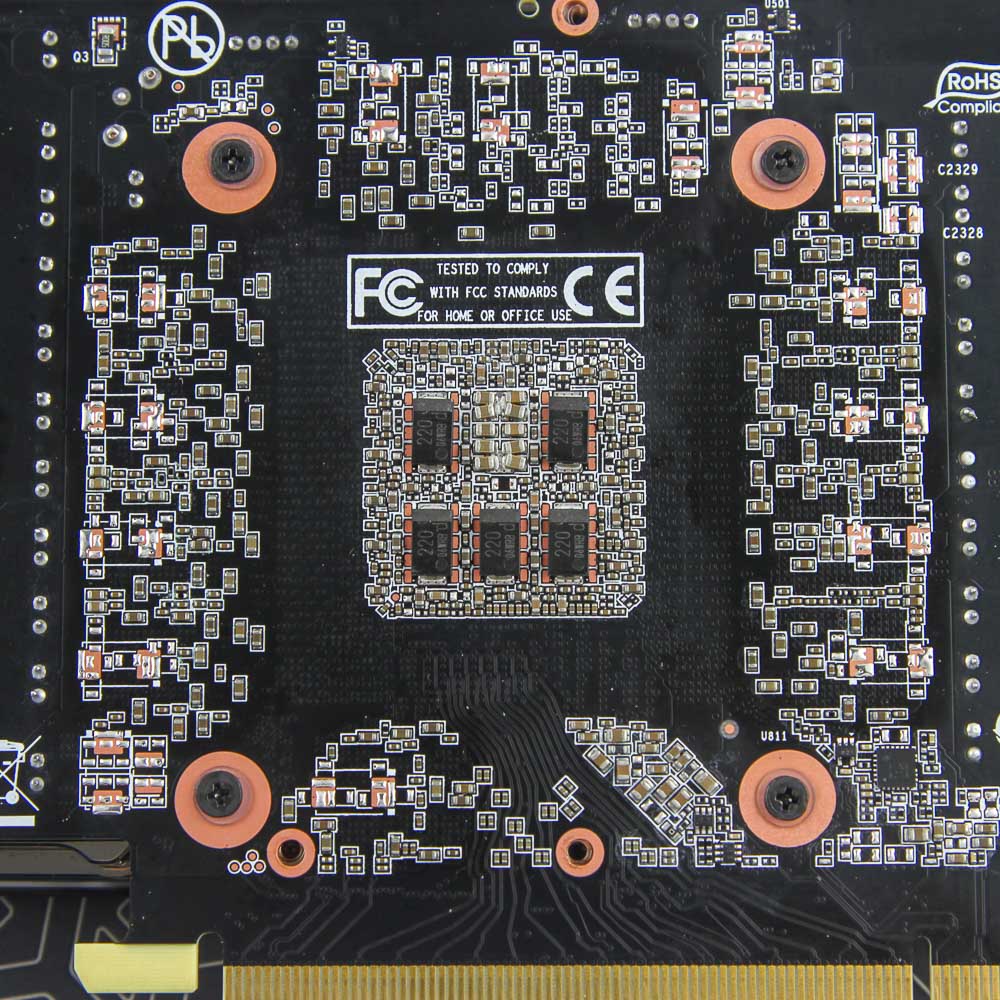
If you have purchased the optional backplate, you will have to remove six screws and use the longer screws that come with the backplate. This also involves using provided thermal pads, which with the RTX 3080 is the thicker set to account for the lack of VRAM modules on the back of the PCB. The screws match the black backplate, and are flush with the surface of the backplate as well. Once installed, the set looks quite nice and yet different from the analogous EK-Quantum Vector set. Once again, photographing this without any reflections is tough, but it is a shiny piece of bling that also cools the RTX 3080. The backplate is a rectangle through and through and doesn't have the lip of the Quantum Vector backplate, which went over the side to effectively make it seem like a continuous layer.
Lighting
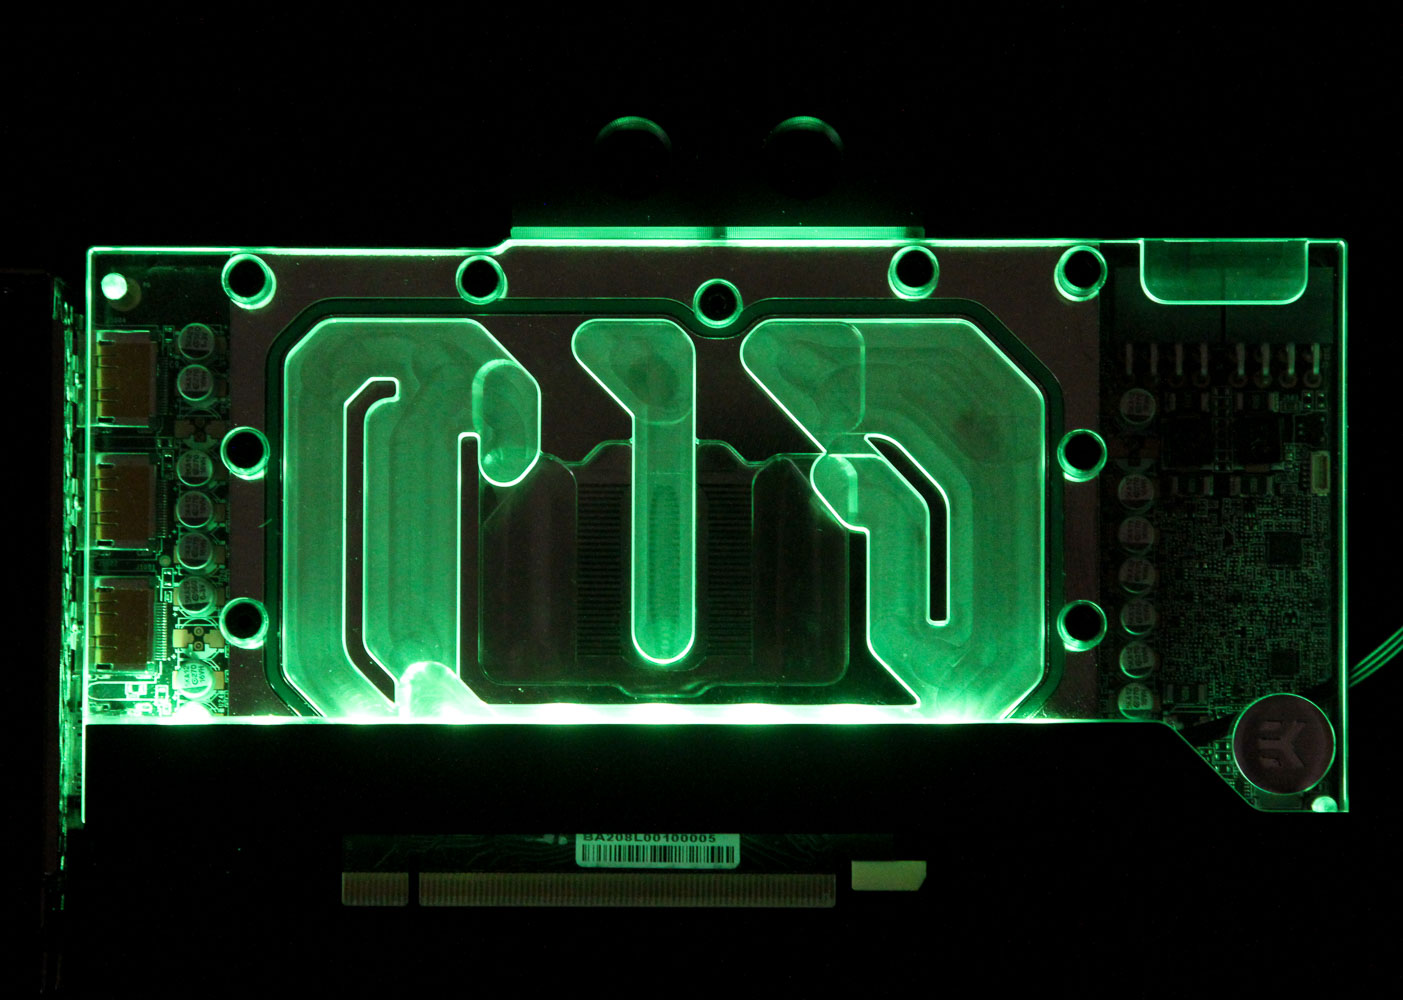
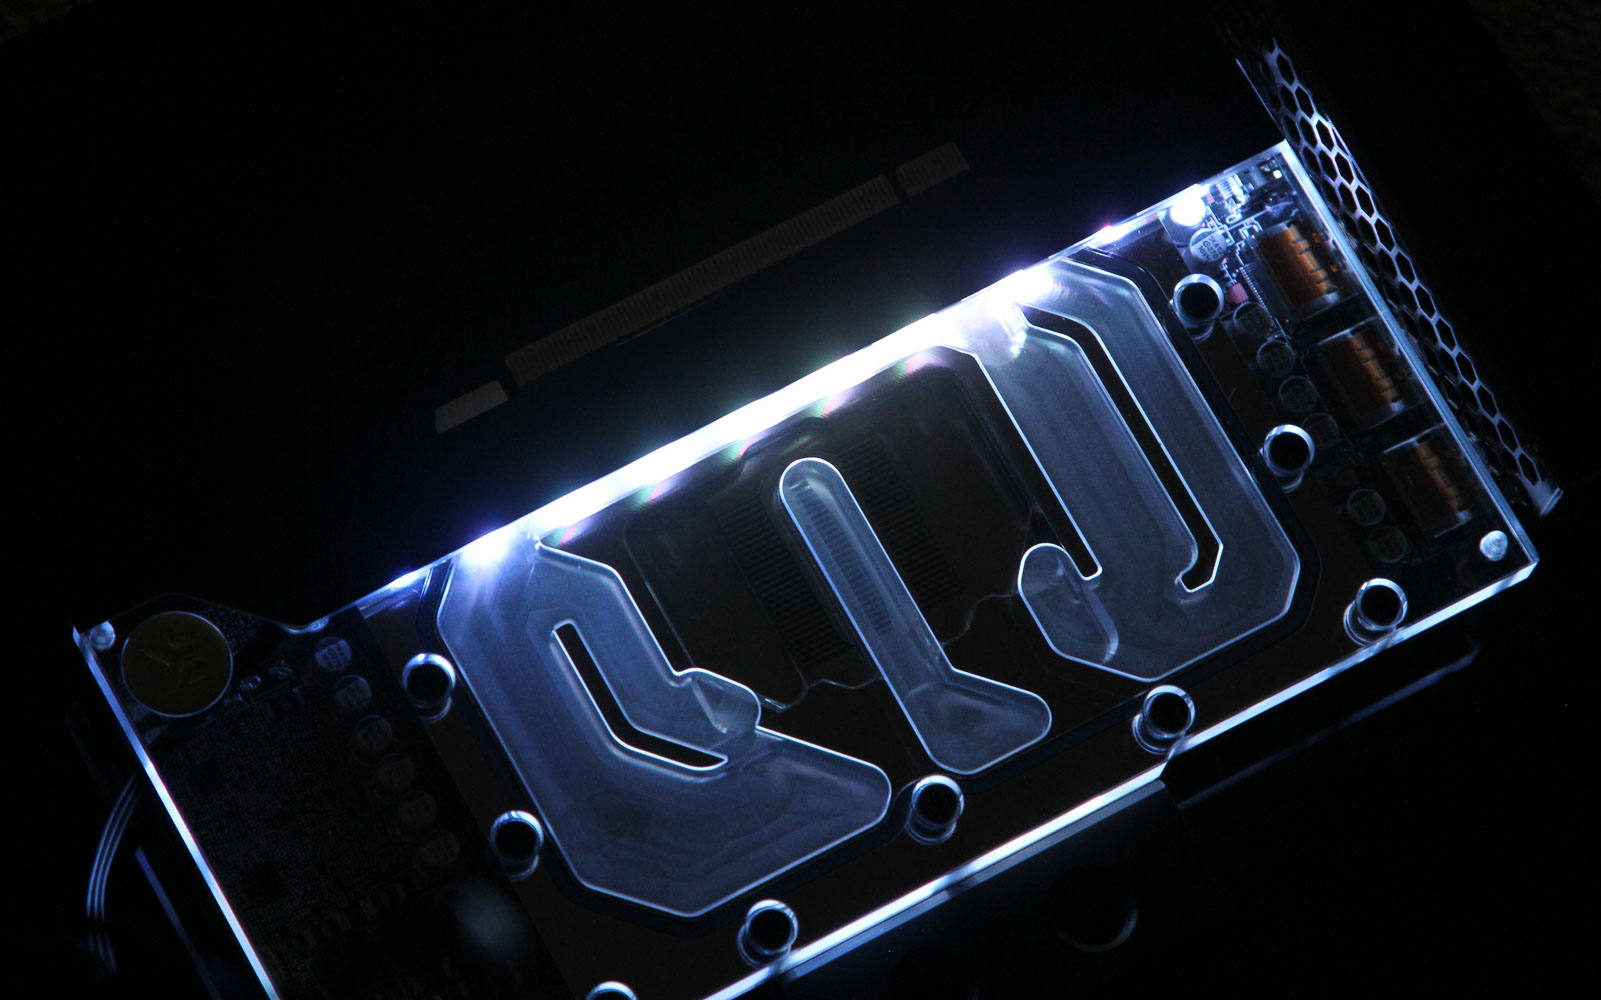
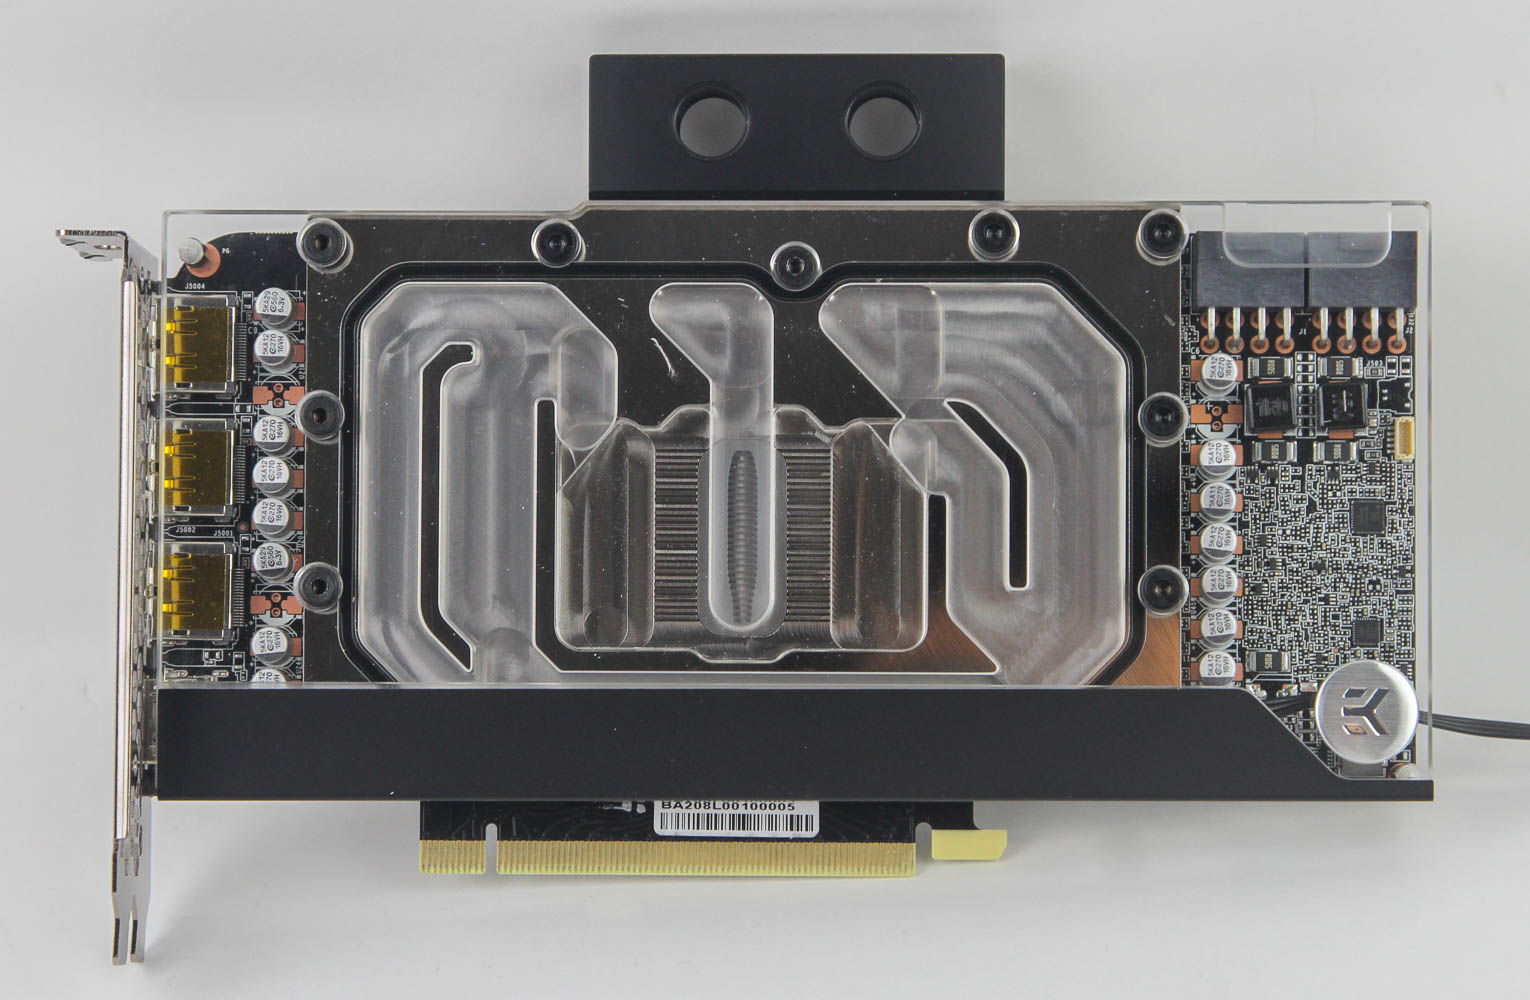
With vertically mounted GPUs becoming more popular than ever before, the front of the GPU block is all the more relevant for customizing a DIY watercooling loop to match your aesthetics. The plexi top allows for a look at the coolant flowing through, which also has the functional benefit of ensuring no trapped air bubbles in the coolant flow path. There are also ten integrated, individually addressable RGB LEDs that can be powered and controlled via a standard 3-pin D-RGB header, which means you can have the block lit up as seen above. Lighting is certainly brighter than on the EK-Quantum Vectors with half the number of LEDs there for whatever reason, although we see that the intensity is highest at the bottom where the LEDs are located, which dwindles as you go up.
Feb 3rd, 2025 17:01 EST
change timezone
Latest GPU Drivers
New Forum Posts
- Dear AMD, NVIDIA, INTEL and others, we need cheap (192-bit to 384-bit), high VRAM, consumer, GPUs to locally self-host/inference AI/LLMs (4)
- bust interface issue can't enable PCIe 3.0 x16 (13)
- RTX 5080 - premature review - it sucks (310)
- GT 1030 knocked off component (2)
- Please let me know if the UPS that I want to buy is good or not for my PC. (125)
- Dlss4 + 4090 = lower max oc than with dlss3 (60)
- Wow YouTube is a Hog (41)
- RTX 5090 ridiculous price! (142)
- Will you buy a RTX 5090? (400)
- RTX5000 Series Owners Club (27)
Popular Reviews
- Spider-Man 2 Performance Benchmark Review - 35 GPUs Tested
- NVIDIA GeForce RTX 5080 Founders Edition Review
- MSI GeForce RTX 5080 Vanguard SOC Review
- ASUS GeForce RTX 5080 Astral OC Review
- Gigabyte GeForce RTX 5080 Gaming OC Review
- MSI GeForce RTX 5080 Suprim SOC Review
- NVIDIA DLSS 4 Transformer Review - Better Image Quality for Everyone
- Corsair Frame 4000D Review
- ASUS GeForce RTX 5090 Astral OC Review - Astronomical Premium
- Palit GeForce RTX 5080 GameRock OC Review
Controversial News Posts
- NVIDIA 2025 International CES Keynote: Liveblog (470)
- AMD Debuts Radeon RX 9070 XT and RX 9070 Powered by RDNA 4, and FSR 4 (349)
- AMD Radeon 9070 XT Rumored to Outpace RTX 5070 Ti by Almost 15% (265)
- AMD is Taking Time with Radeon RX 9000 to Optimize Software and FSR 4 (256)
- AMD Denies Radeon RX 9070 XT $899 USD Starting Price Point Rumors (239)
- Edward Snowden Lashes Out at NVIDIA Over GeForce RTX 50 Pricing And Value (233)
- AMD Radeon RX 9070 XT & RX 9070 Custom Models In Stock at European Stores (226)
- New Leak Reveals NVIDIA RTX 5080 Is Slower Than RTX 4090 (215)