 2
2
Genius SlimStar 8008 Review
Disassembly »Closer Examination

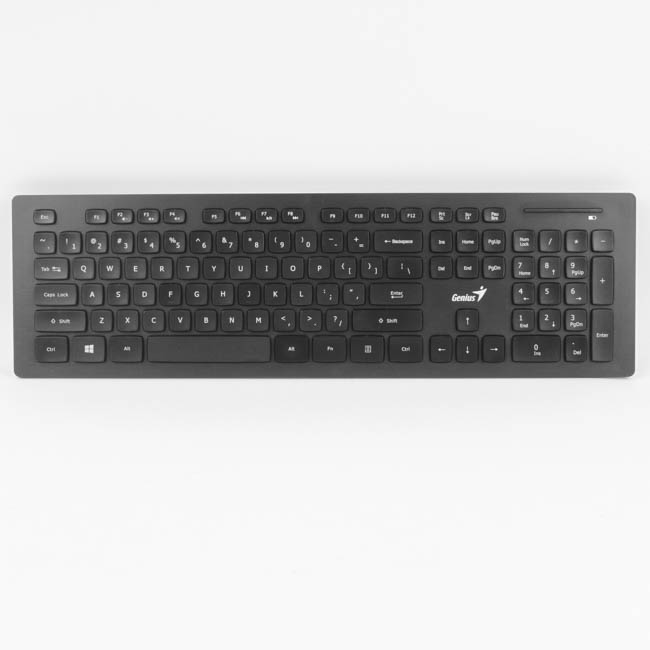
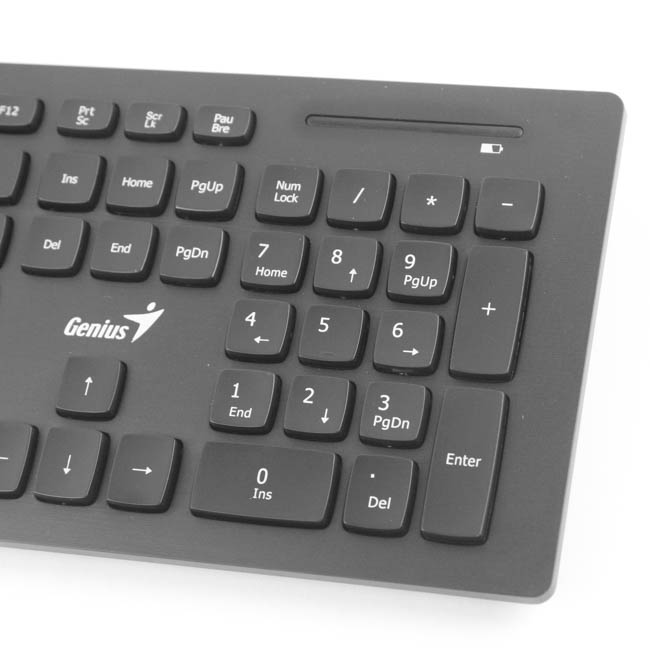

The Genius SlimStar 8008 keyboard also came in a plastic wrap similar to the mouse, which keeps it clean for when you take it out of the box for the first time. This is a very light keyboard, in addition to its low-profile nature, to where you can comfortably use it on your lap in the living room if you so desire or even use it on a desk as intended without it becoming uncomfortable. Unfortunately, the keyboard also flexes when uneven pressure is applied to where if you press down hard on a key in the middle, you will notice the keyboard flexing in operation as well. It is a full size keyboard with 104 keys in a modified US ANSI layout, which you can tell by the varying sizes of the keys in the alphanumeric section and for the modifier keys in particular. The monochrome color scheme here is predominantly black, but there is a white logo above the arrow-key cluster, and there are no indicator LEDs. In fact, there is no lighting anywhere at all aside from a status bar with LEDs in the top-right corner to indicate pairing as well as the battery's charge, which does come in handy. The bezels are on the larger side of things, especially considering the otherwise petite nature of the keyboard on the height axis, so Genius could definitely have trimmed it down on most sides here to increase its portability factor.
Given the lack of any backlighting, the legends on the keycaps do not need to be printed in a specific location anymore, and we see single legends in the center on the top, with those keycaps with secondary legends using a diagonal distribution of the primary and secondary legends throughout the keyboard. That said, Genius did not make the best use of the surface area since a small font size is used, leaving a lot of empty space that could instead have helped with increased visibility. The font's typeface is fairly clean, and the keyboard as a whole will fit into a variety of environments well.

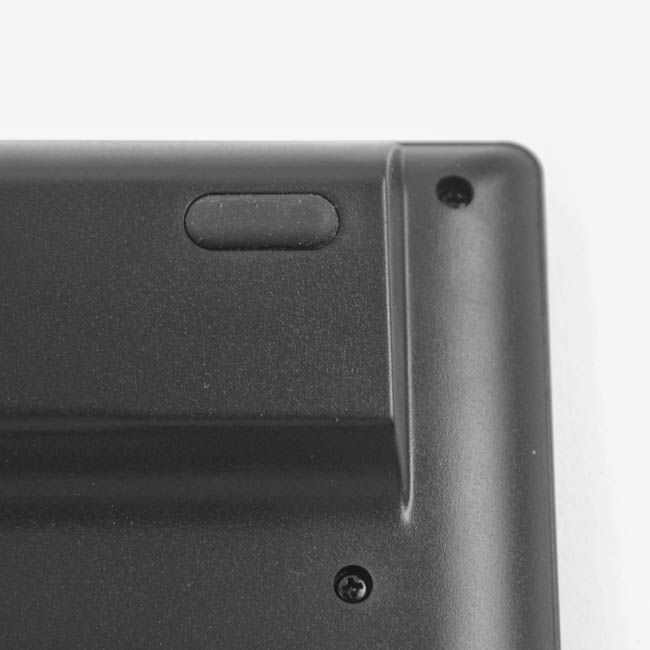

Flipping the keyboard around, we see the usual certification sticker in the middle, and there is also a QC pass sticker in orange underneath. There are also five rubber pads at the edges to provide some much-needed friction for this light keyboard on the surface it is being used on, while also preventing some scratches to its underbody. There are no case feet to control keyboard elevation, and, rather, Genius has built in a specific elevation already at the top that also acts as a spacer for the batteries to go into. We can also see here the battery cover that clips into place, removal of which reveals the battery compartment for two AAA-sized batteries, and the polarities of the batteries are also marked to make sure you know exactly which way to insert them.


From the side, we get a better look at the profile of the keyboard and the aforementioned angled elevation Genius incorporated out of the box. The keycaps are otherwise lower in profile and can't be removed easily. The flat keycaps are admittedly not to everyone's liking, so be aware of this before making a purchasing decision. You can either pry them out from the front or disassemble the keyboard and push them out through the back to get a better look at them. The latter is what I ended up doing since I disassembled the keyboard regardless, and here, we can see the fairly thick (average wall thickness of 1.17 mm) ABS plastic keycaps with pad printed legends. The legends appear to have a UV-treatment; however, all it will do is delay their eventual wearing out, and there is no easy replacement either. To be fair, the entire combo costs about the same, if not less, than a good set of replacement keycaps, so I am not worried about this by as much as I would be with other keyboards. We can also see the membrane switches with the keycaps removed, a better look at which will be available on the next page.
Mar 10th, 2025 12:10 EDT
change timezone
Latest GPU Drivers
New Forum Posts
- Surface laptop 5 TPL Speed Shift ignored? (1)
- What's your latest tech purchase? (23268)
- newegg ATX 3.1 PSU on Clearance and Free Fan (0)
- Looking for silent 9070 (XT) (9)
- RX 9070 availability (155)
- Zen6 is almost here ? (43)
- AMD RX 9070 XT & RX 9070 non-XT thread (OC, undervolt, benchmarks, ...) (1)
- AAF Optimus Modded Driver For Windows 10 & Windows 11 - Only for Realtek HDAUDIO Chips (374)
- Gaming PC instabiliity (10)
- 2022-X58/1366 PIN Motherboards NVME M.2 SSD BIOS MOD Collection (902)
Popular Reviews
- Sapphire Radeon RX 9070 XT Nitro+ Review - Beating NVIDIA
- XFX Radeon RX 9070 XT Mercury OC Magnetic Air Review
- ASUS Radeon RX 9070 TUF OC Review
- MSI MAG B850 Tomahawk Max Wi-Fi Review
- NVIDIA GeForce RTX 5080 Founders Edition Review
- NVIDIA GeForce RTX 5070 Founders Edition Review
- Corsair Vengeance RGB CUDIMM DDR5-8800 48 GB CL42 Review
- AMD Ryzen 7 9800X3D Review - The Best Gaming Processor
- ASUS GeForce RTX 5070 Ti TUF OC Review
- MSI GeForce RTX 5070 Ti Gaming Trio OC+ Review
Controversial News Posts
- NVIDIA GeForce RTX 50 Cards Spotted with Missing ROPs, NVIDIA Confirms the Issue, Multiple Vendors Affected (513)
- AMD Plans Aggressive Price Competition with Radeon RX 9000 Series (277)
- AMD Radeon RX 9070 and 9070 XT Listed On Amazon - One Buyer Snags a Unit (261)
- AMD RDNA 4 and Radeon RX 9070 Series Unveiled: $549 & $599 (260)
- AMD Mentions Sub-$700 Pricing for Radeon RX 9070 GPU Series, Looks Like NV Minus $50 Again (248)
- NVIDIA Investigates GeForce RTX 50 Series "Blackwell" Black Screen and BSOD Issues (244)
- AMD Radeon RX 9070 and 9070 XT Official Performance Metrics Leaked, +42% 4K Performance Over Radeon RX 7900 GRE (195)
- AMD Radeon RX 9070-series Pricing Leaks Courtesy of MicroCenter (158)