 0
0
Gigabyte X870 Aorus Elite WiFi 7 Review
VRM Overview »Component Analysis
This being X870 and not X870E we don't have two separate chipsets to cram onto the PCB and cool so the heatsink is relatively modest, freeing up space over the rest of the PCB and undoubtedly lowering costs too compared to some of the more elaborate and complicated X870E boards we've seen.
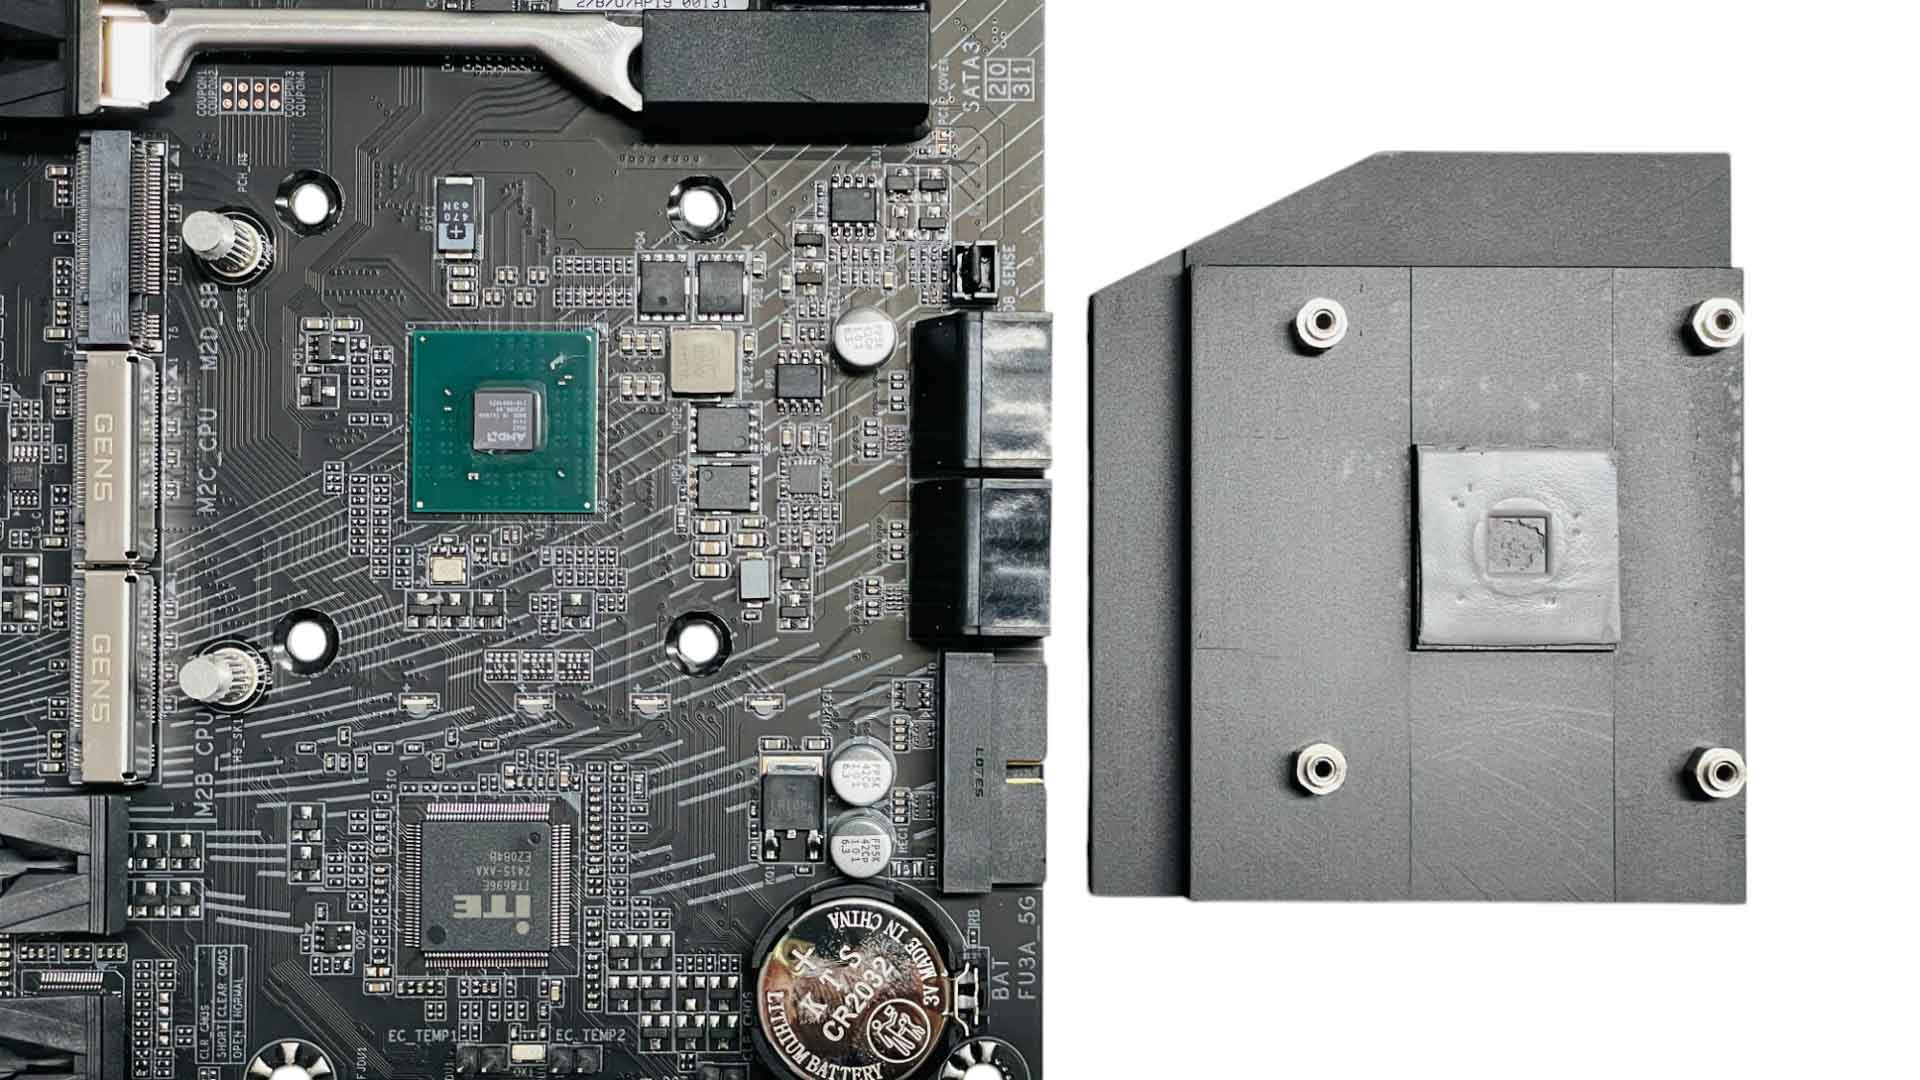
A block diagram probably helps to show how the lanes are configured and why two of the three PCIe Gen 5 M.2 ports end up stealing lanes from your graphics card. It's also worth noting that the PCIe Gen 4 x16 port shares bandwidth with the PCIe Gen 4 M.2 port, with the former being disabled if you use an SSD in there. This is when upgrading to X870E can solve at least this one small issue as that version of this board is able to run a PCIe Gen 4 SSD in this M.2 port and still use the PCIe Gen 4 x16, while also offering x4 mode rather than x2 mode for its remaining PCIe Gen 3 x16 slot.
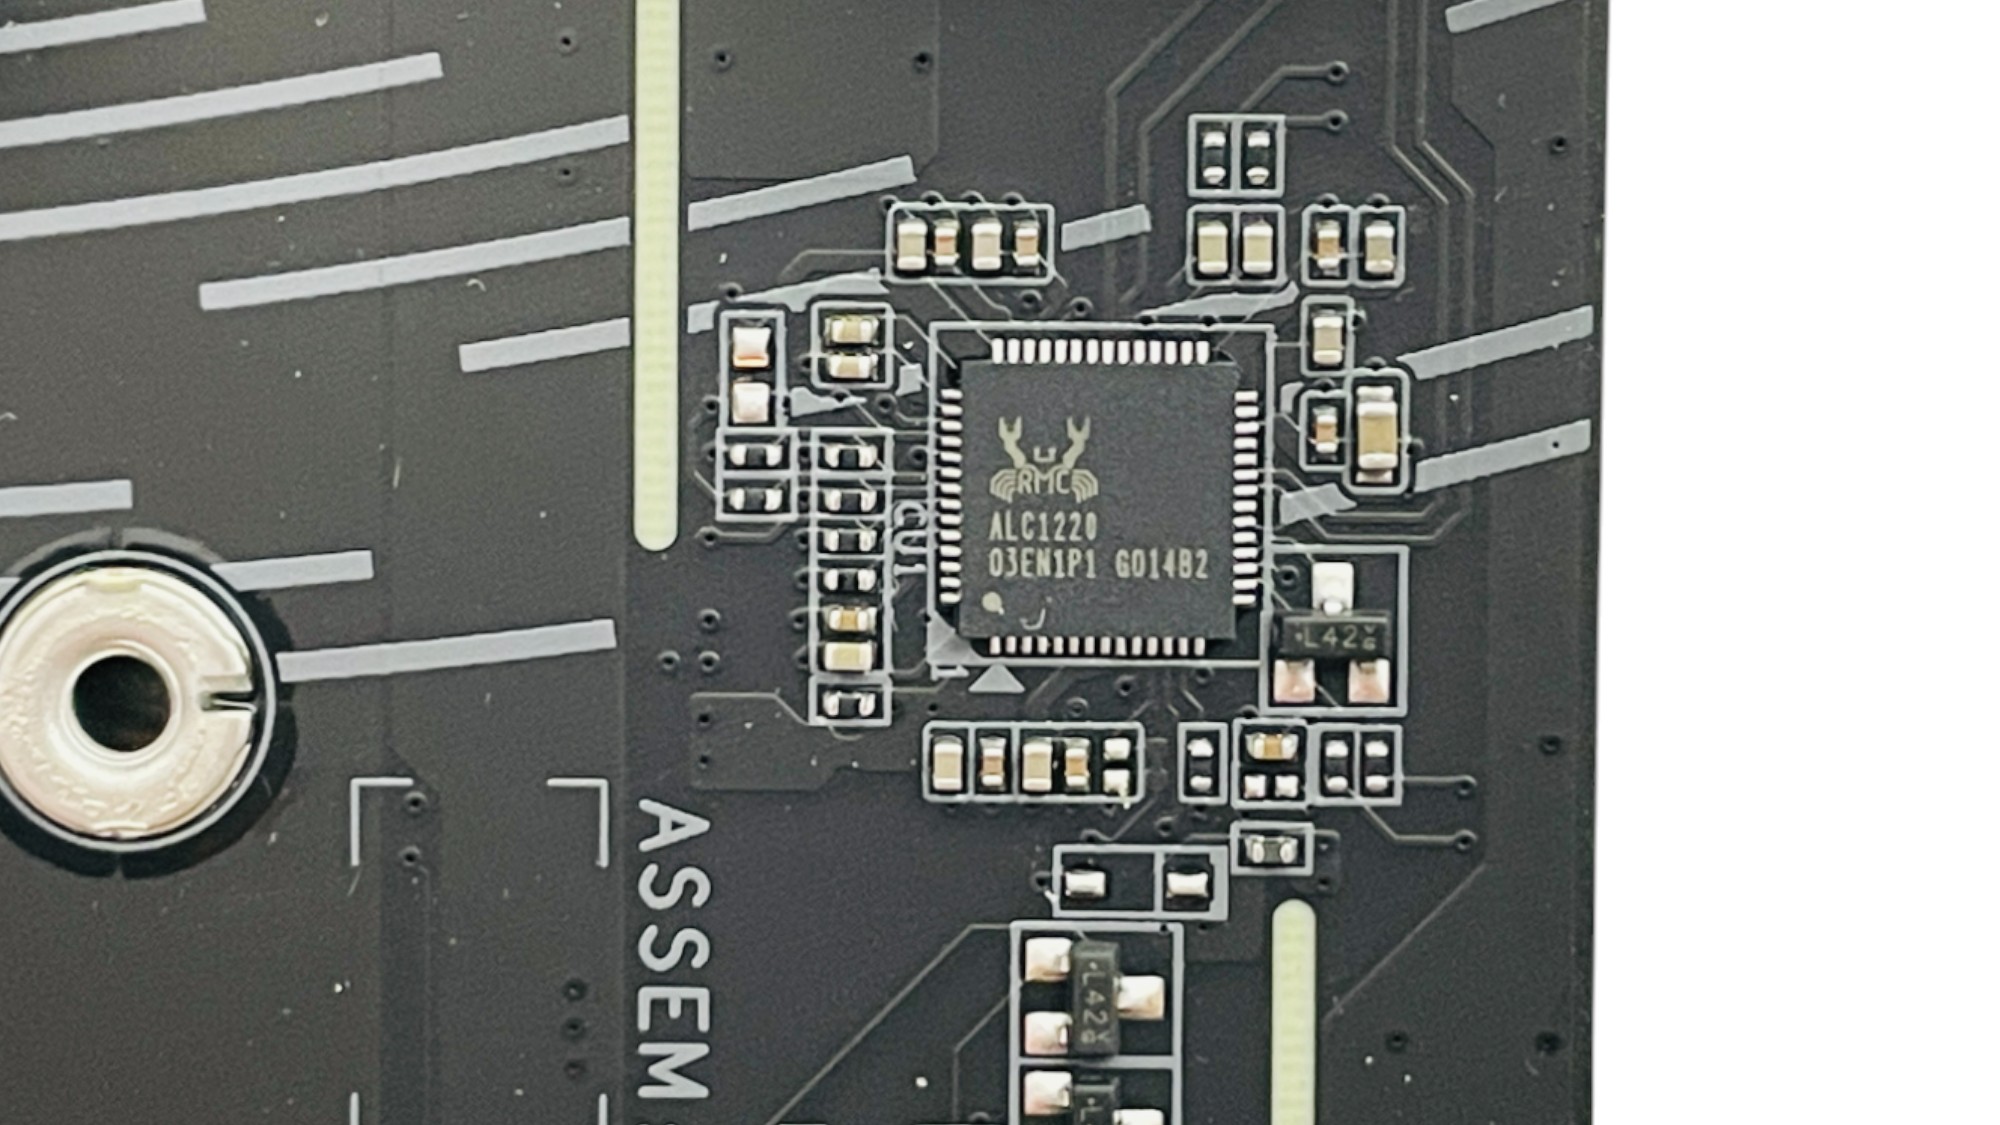

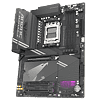
The Realtek ALC1220 audio codec is nestled in its usual spot at the edge of the PCB amongst isolated audio circuitry. As is pretty common these days, there are only two 3.5 mm jacks on the I/O panel so you'll need to use your case's front panel audio ports to hook up anything more elaborate than stereo speakers unless you go another route. Audiophiles might also be interested in DSD audio playback being supported. Ethernet is provided by Realtek's RTL8125D 2.5 Gbps controller.
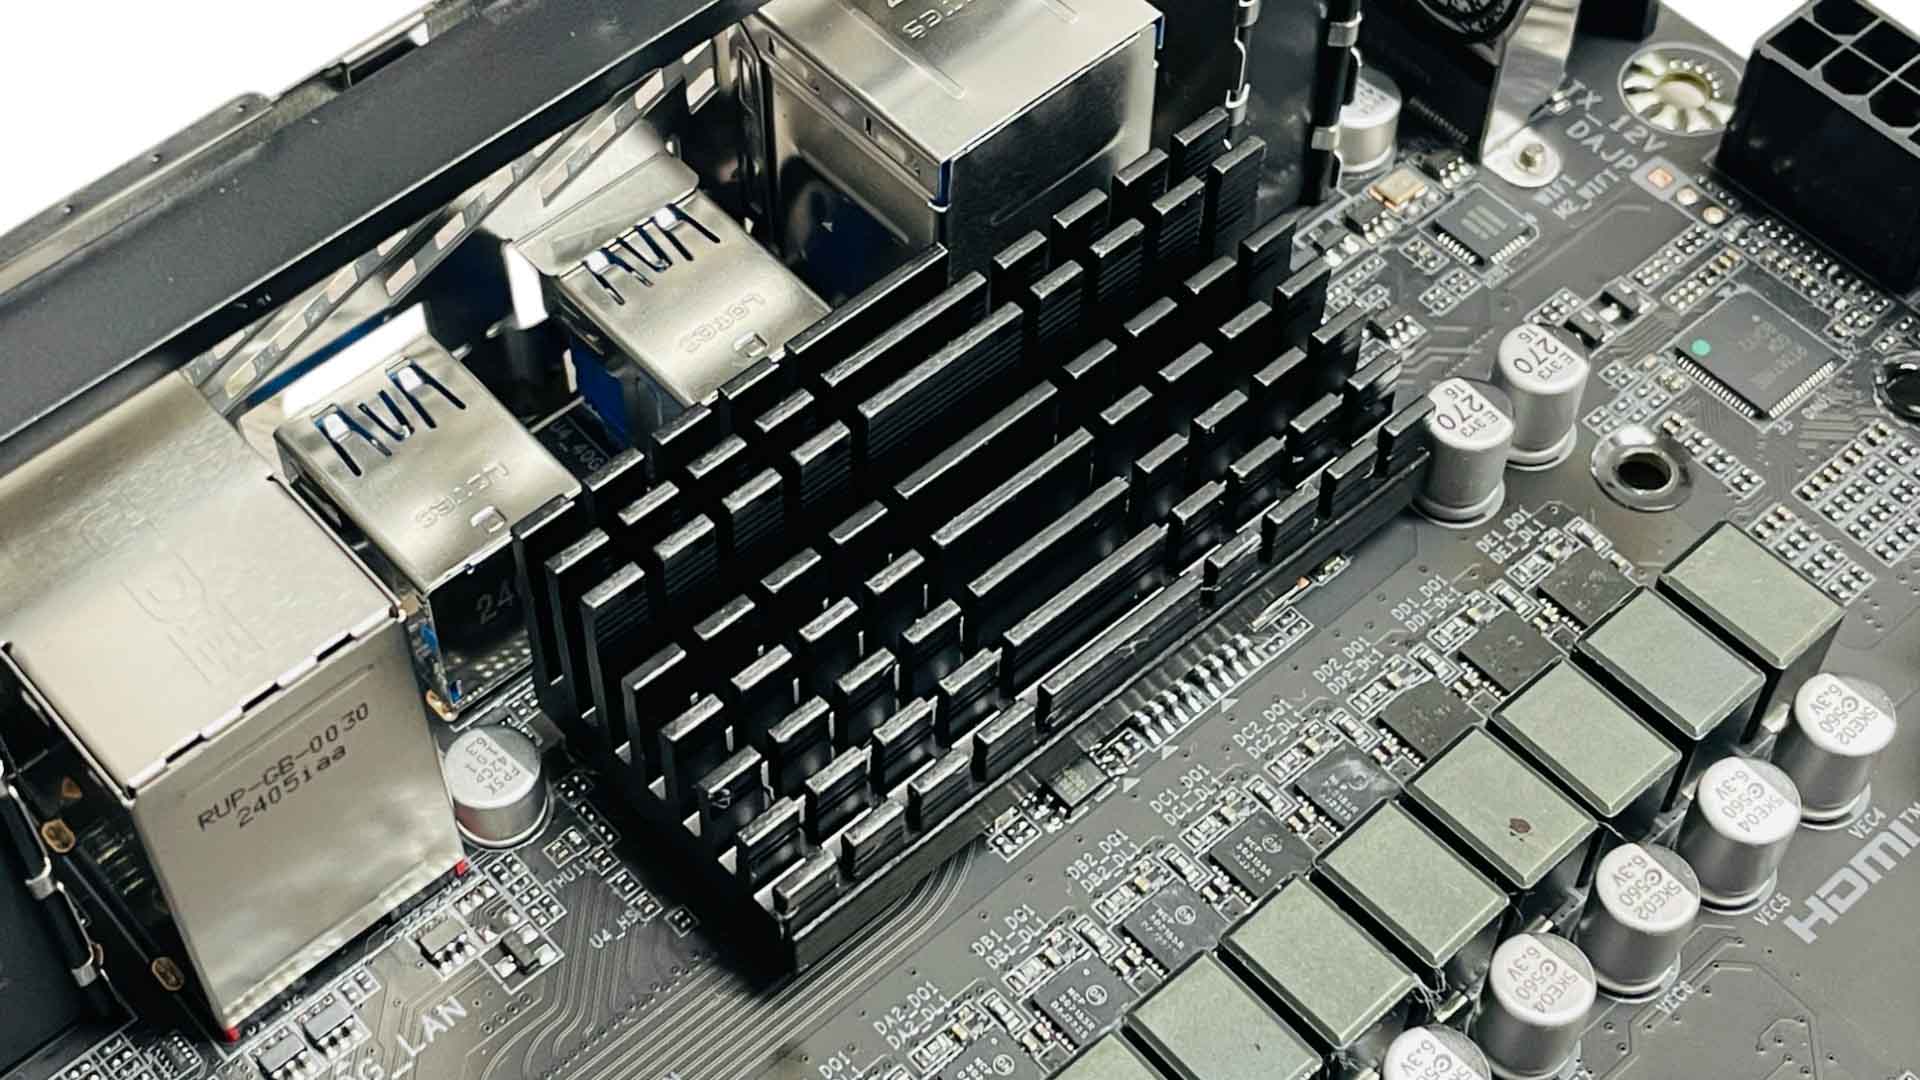
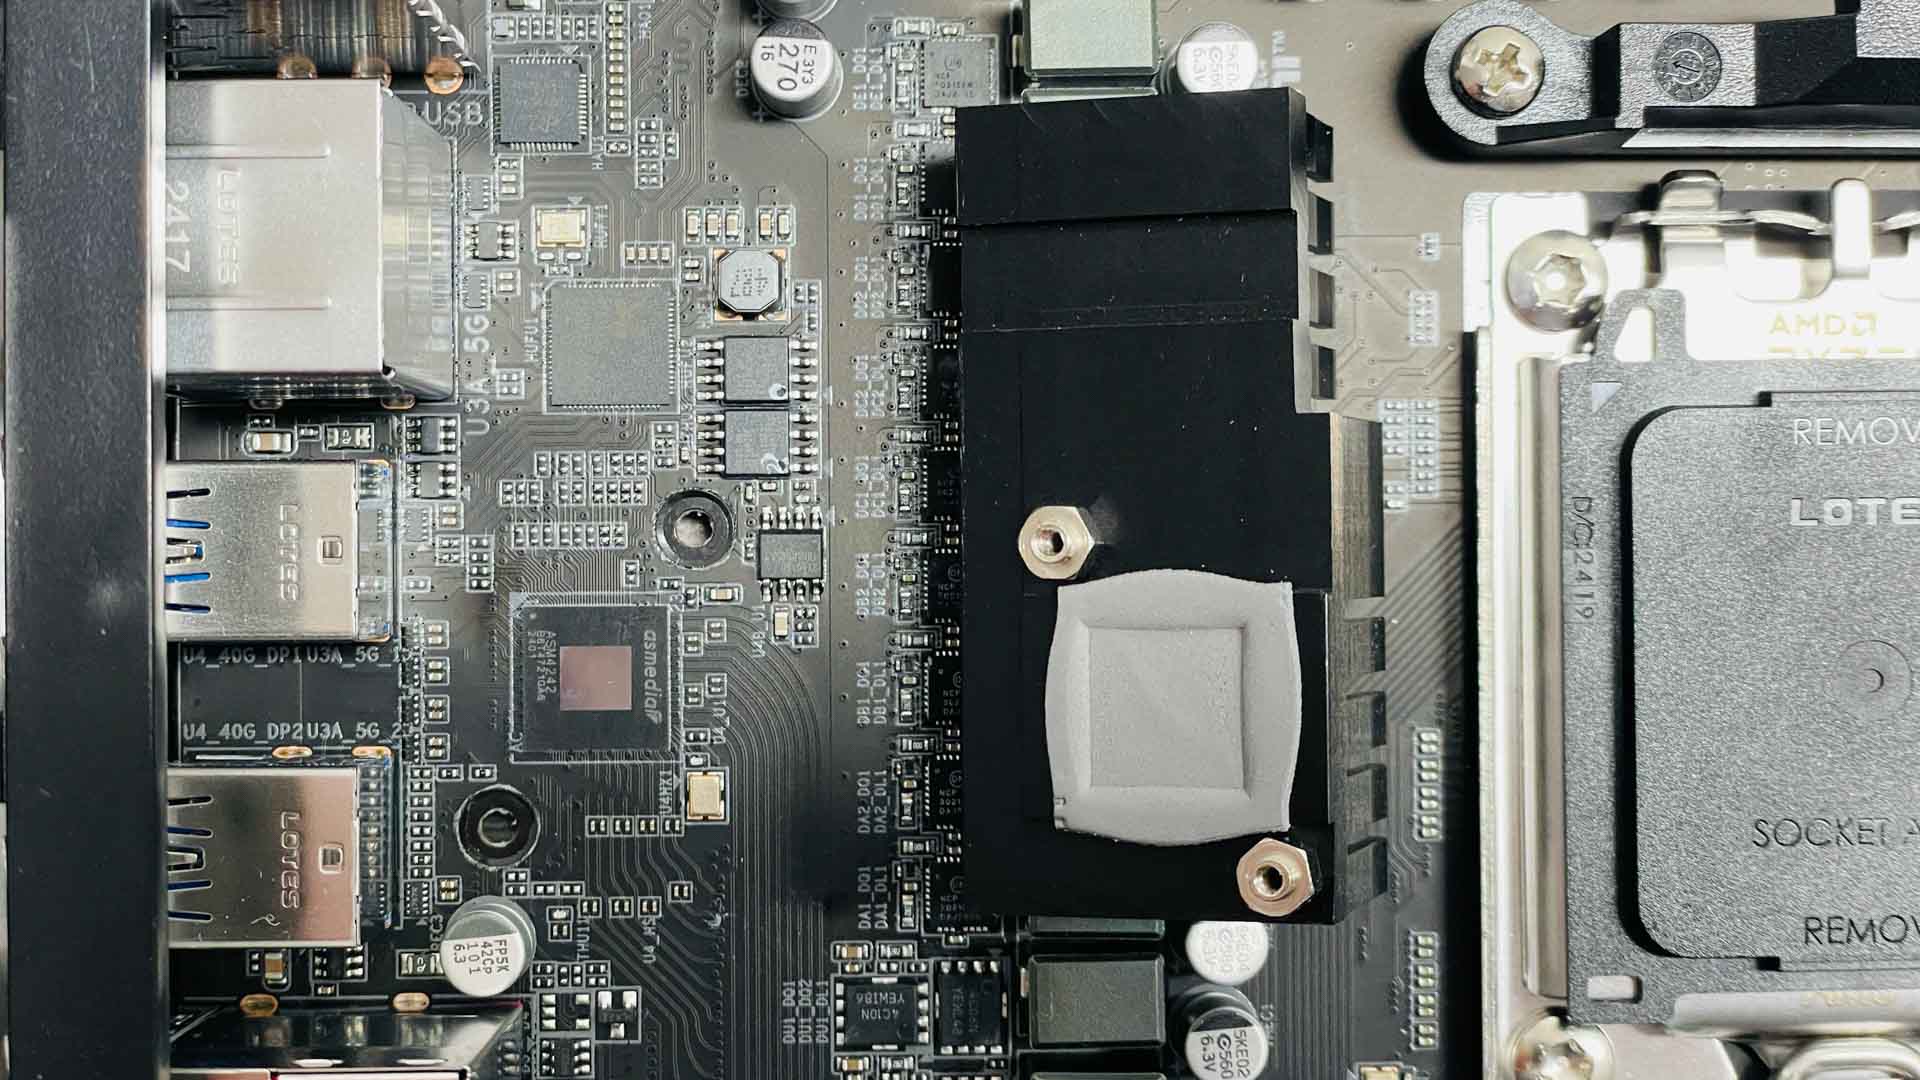
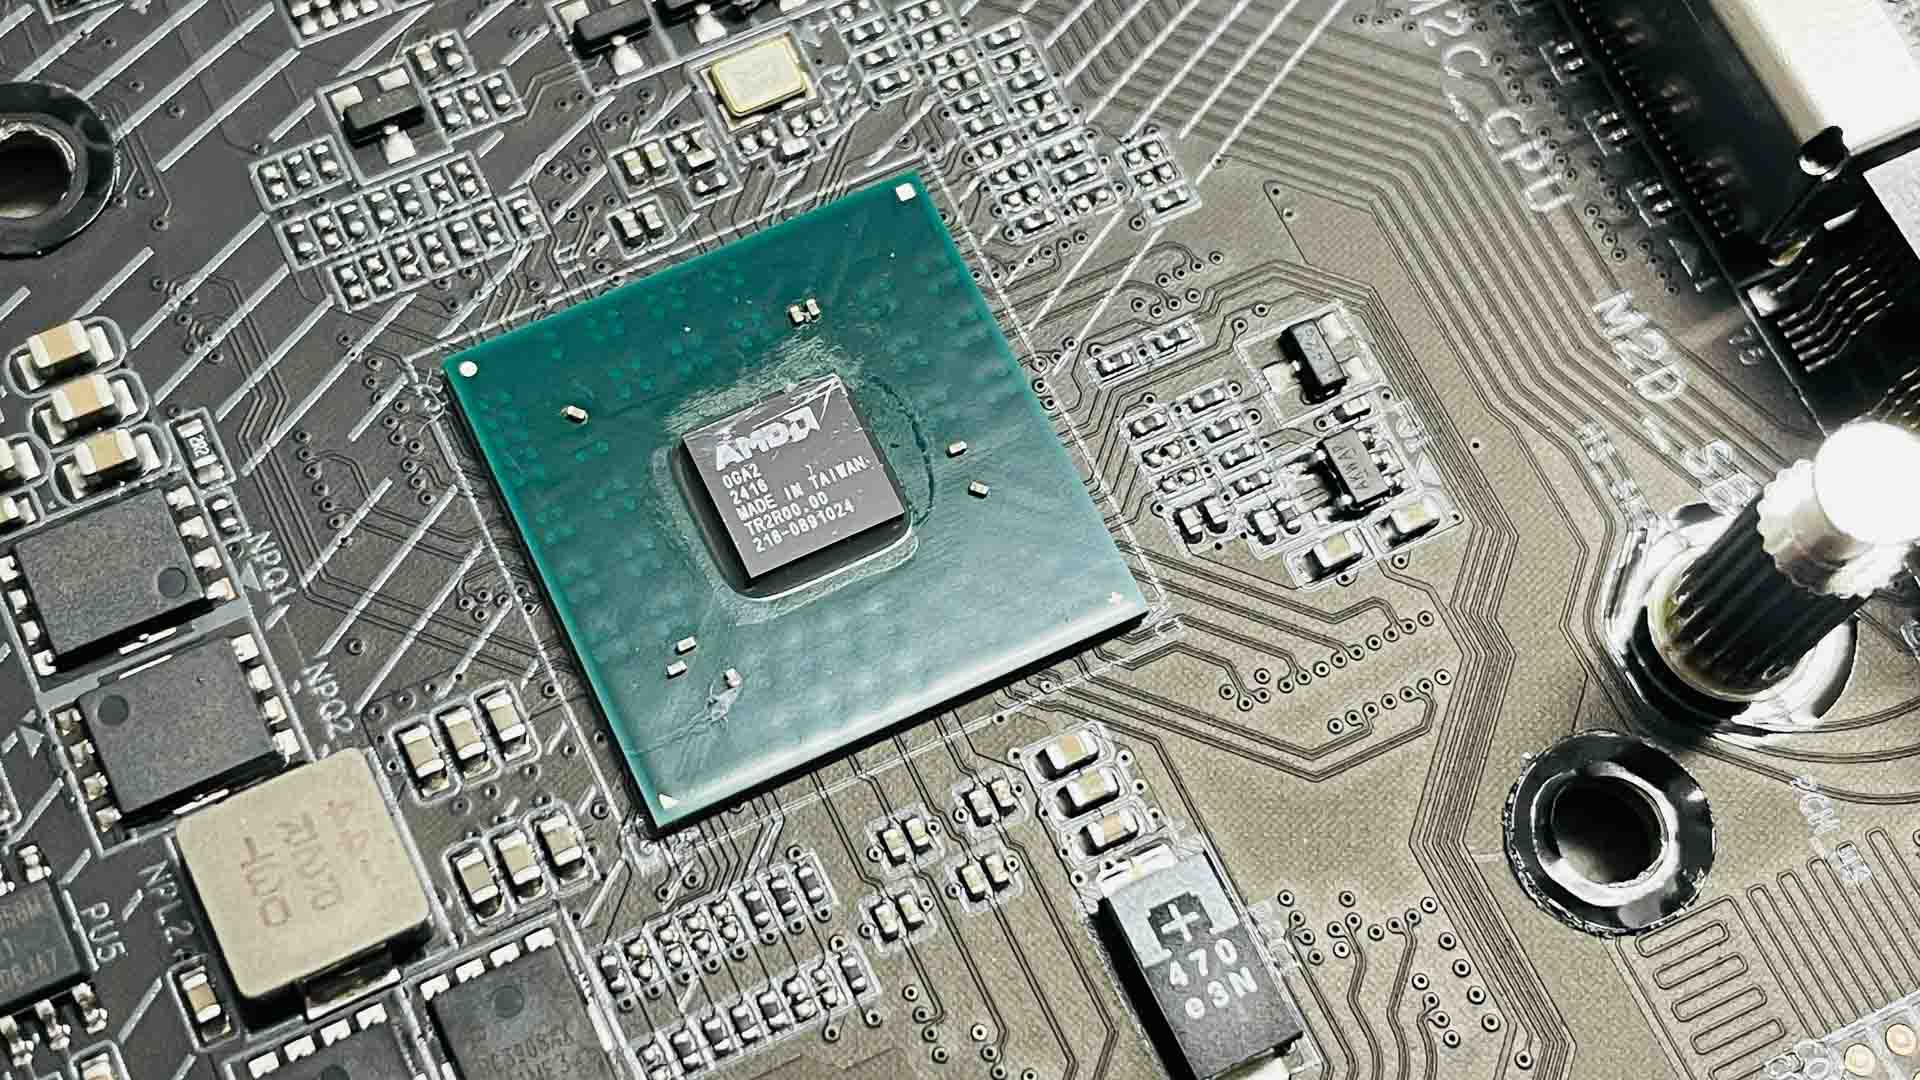
USB4 controllers have been found in various states of cooling from not at all, through to having their own large heatsink or even being part of the VRM cooling system. Here it gets its own heatsink, which also has small vents cut into the I/O shield to aid ventilation. The heatsink only cools the USB4 controller, using a thermal pad with the heatsink sitting under the larger VRM heatsink.
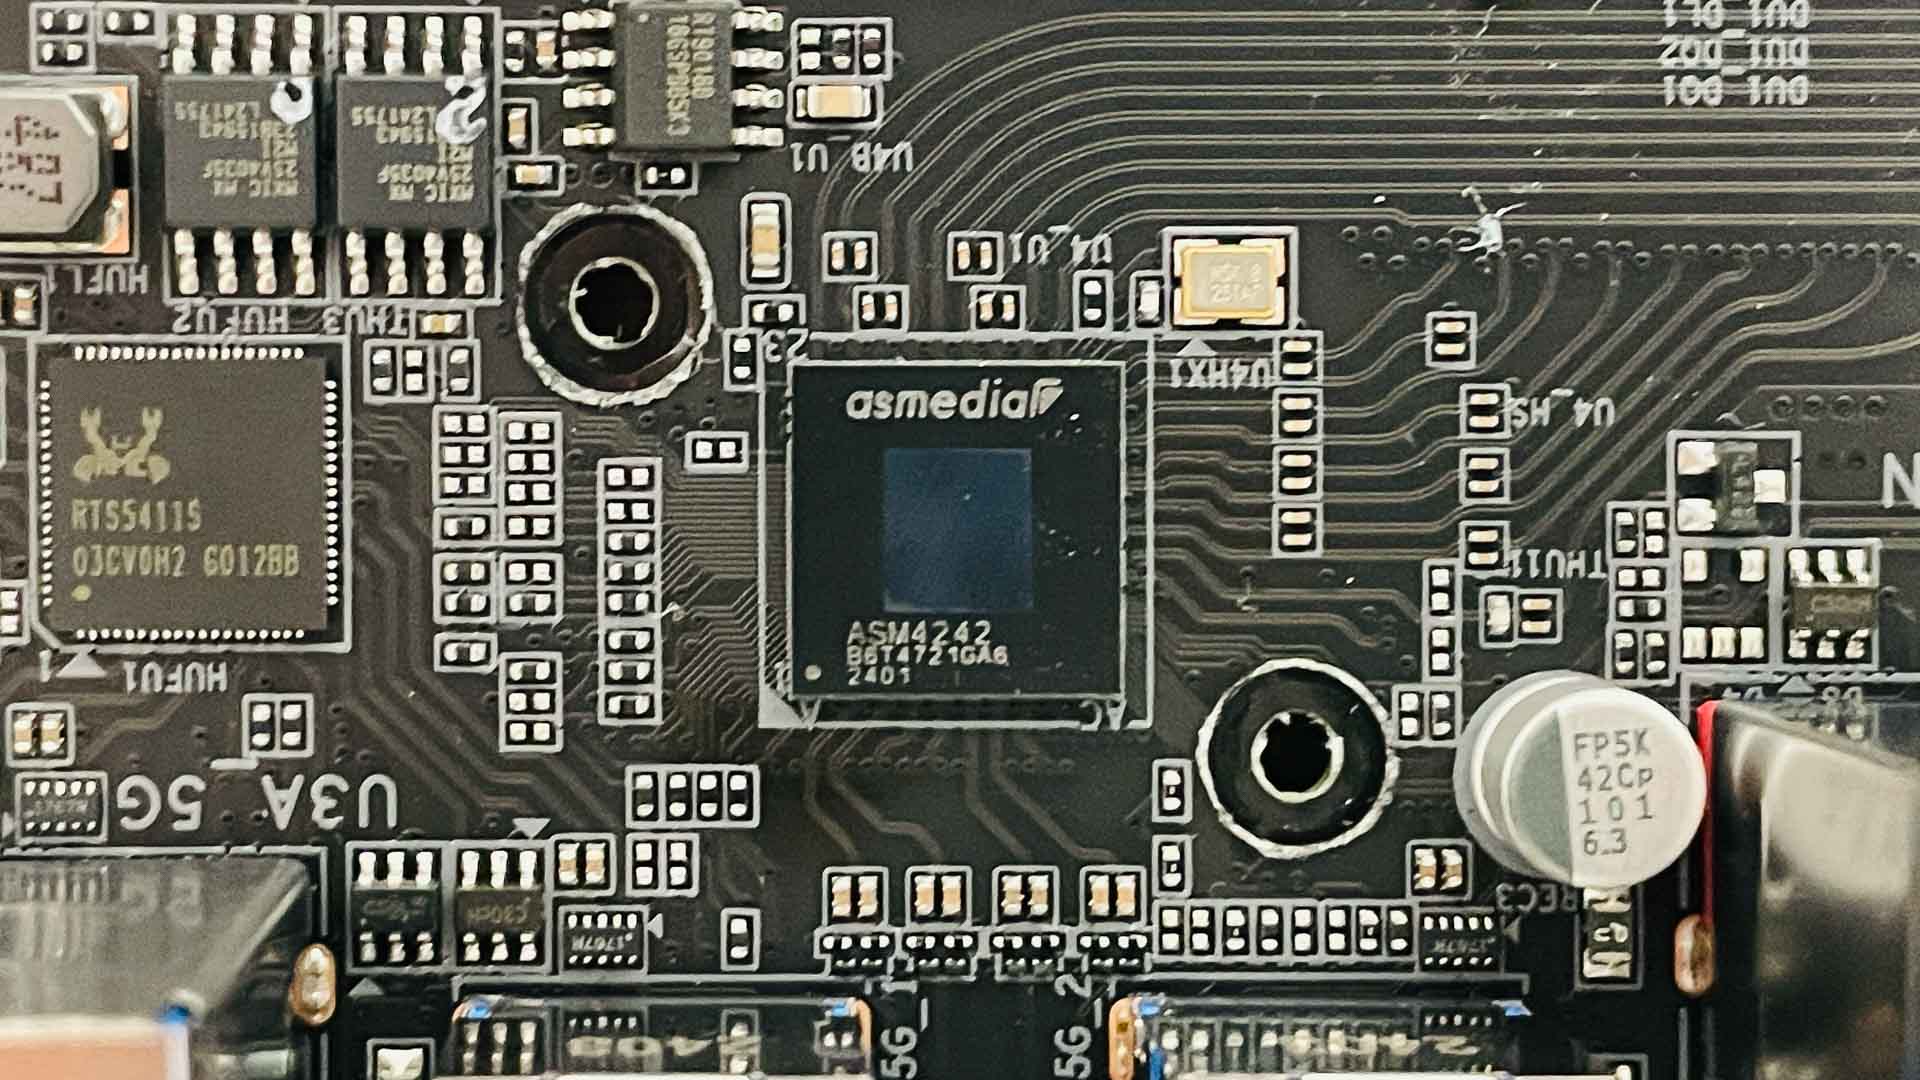
As usual the USB4 controller is ASMedia's ASM4242, which has been used at least as far back as original X670 motherboards in Socket AM5's launch two and a half years ago. It's also worth mentioning that the ASM4242 attained full Thunderbolt 4 certification last year.
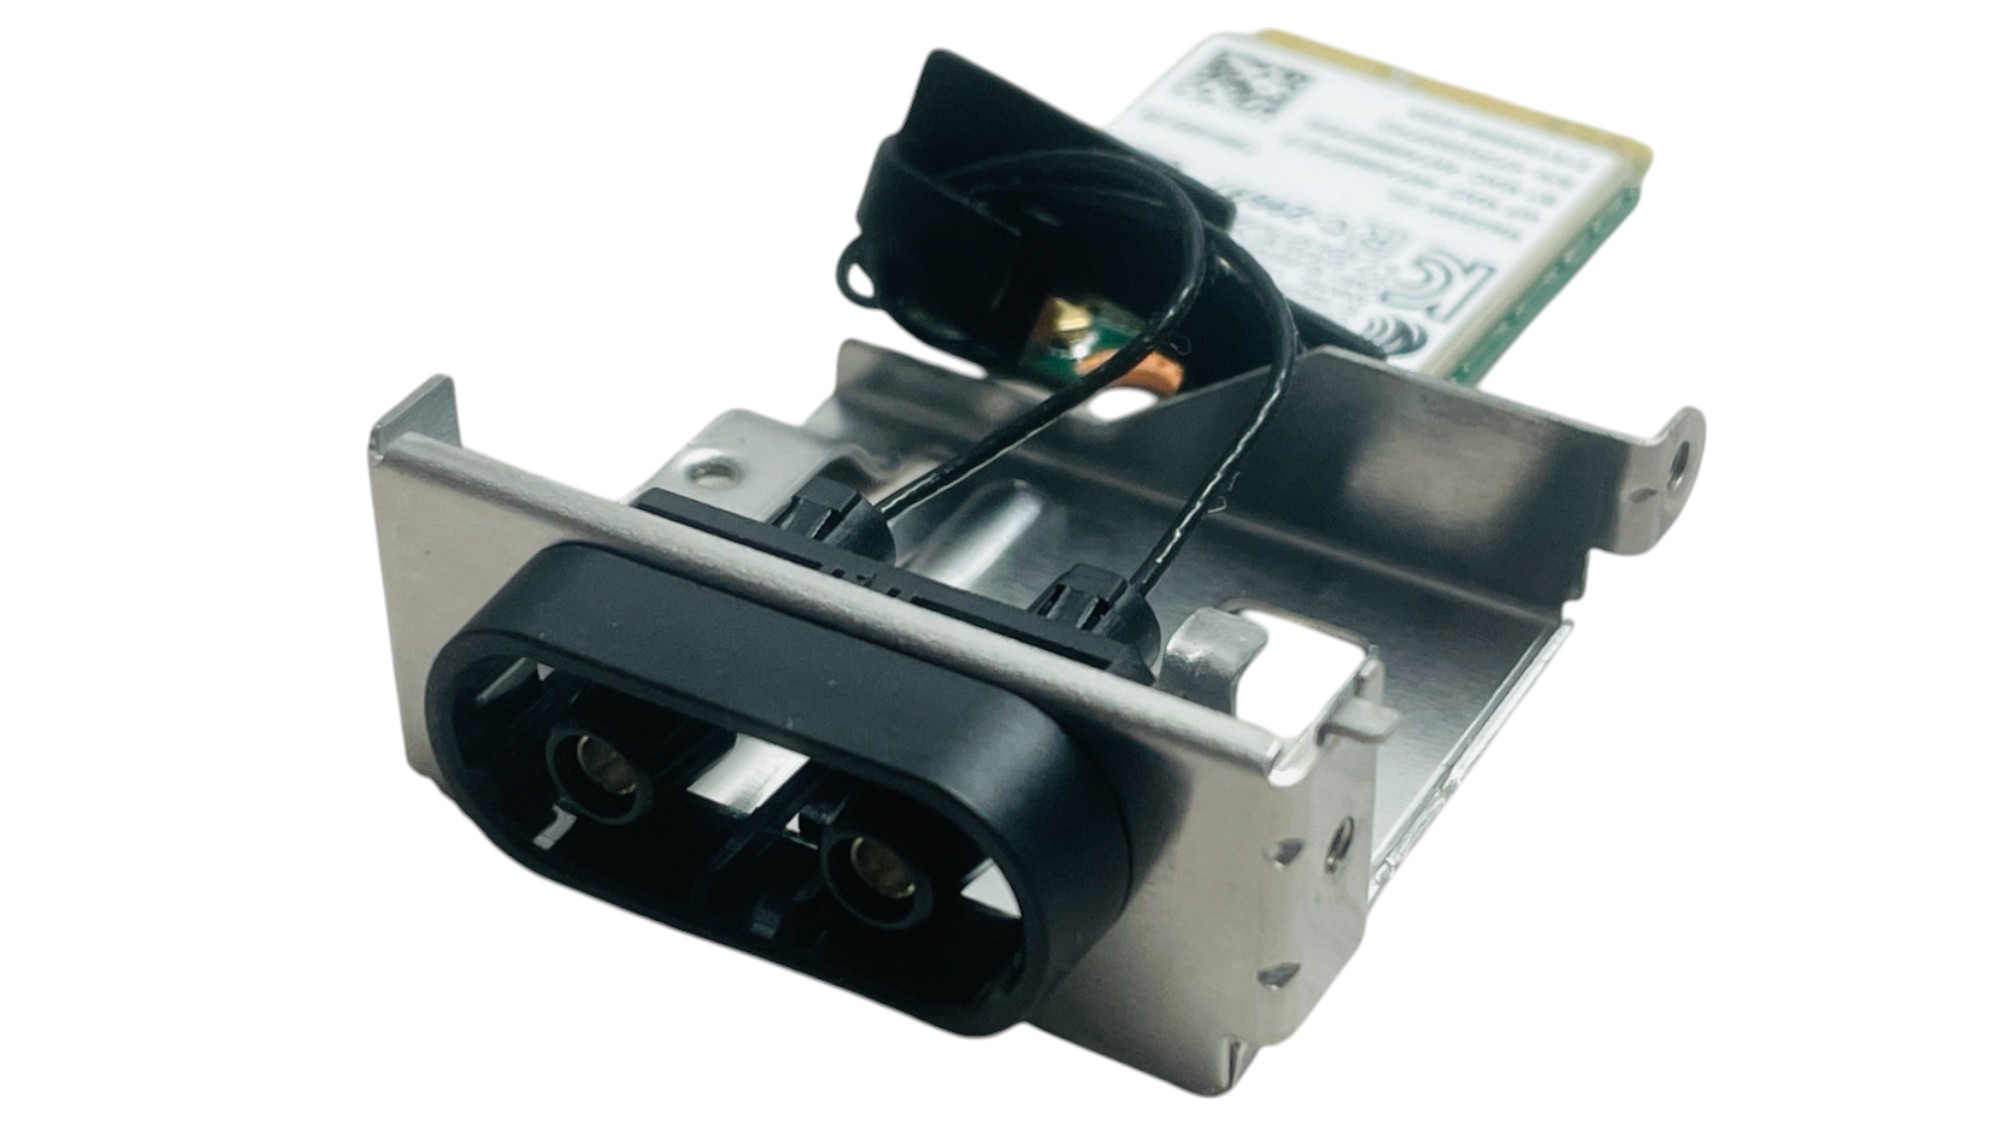
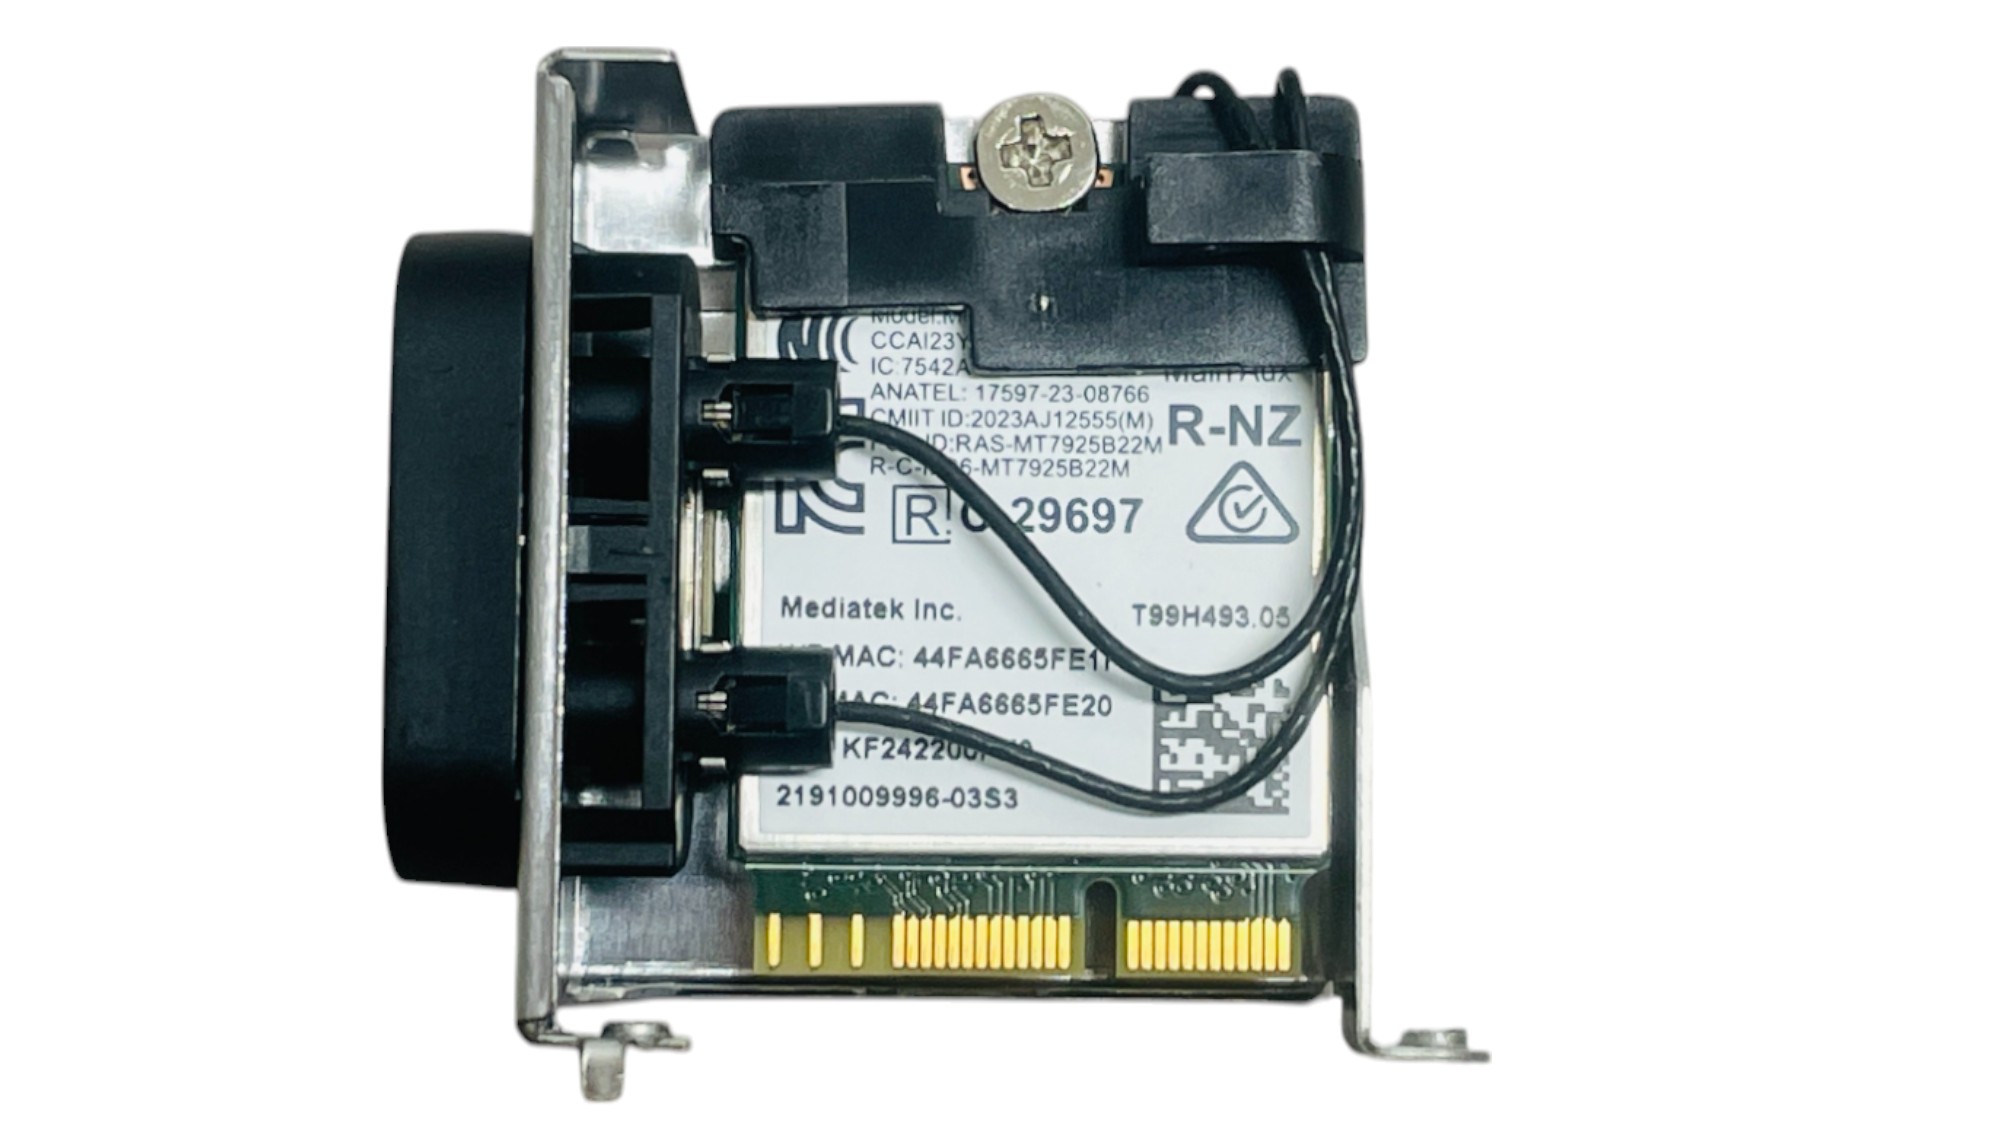
The MediaTek MT7925B22M Wi-Fi 7 module is located under the I/O shroud, which is essentially a large VRM heatsink. If you need to get at it, it's easily removed, although you do need to remove one of the screws that secures the I/O shield to be able to pop it out of its M.2 slot. The WI-FI EZ-Plug can be seen here along with two short antenna cables running off to the Wi-Fi module. The antenna is a single piece design that simple slots into this connector. The competition either has a similar design or more usually has two separate push-fit connectors. Rather than caking the antenna connectors in glue as we've seen elsewhere this month, Gigabyte has simply used a plastic clip to hold them in place, and it would be simple to swap this module out for another if you need to.
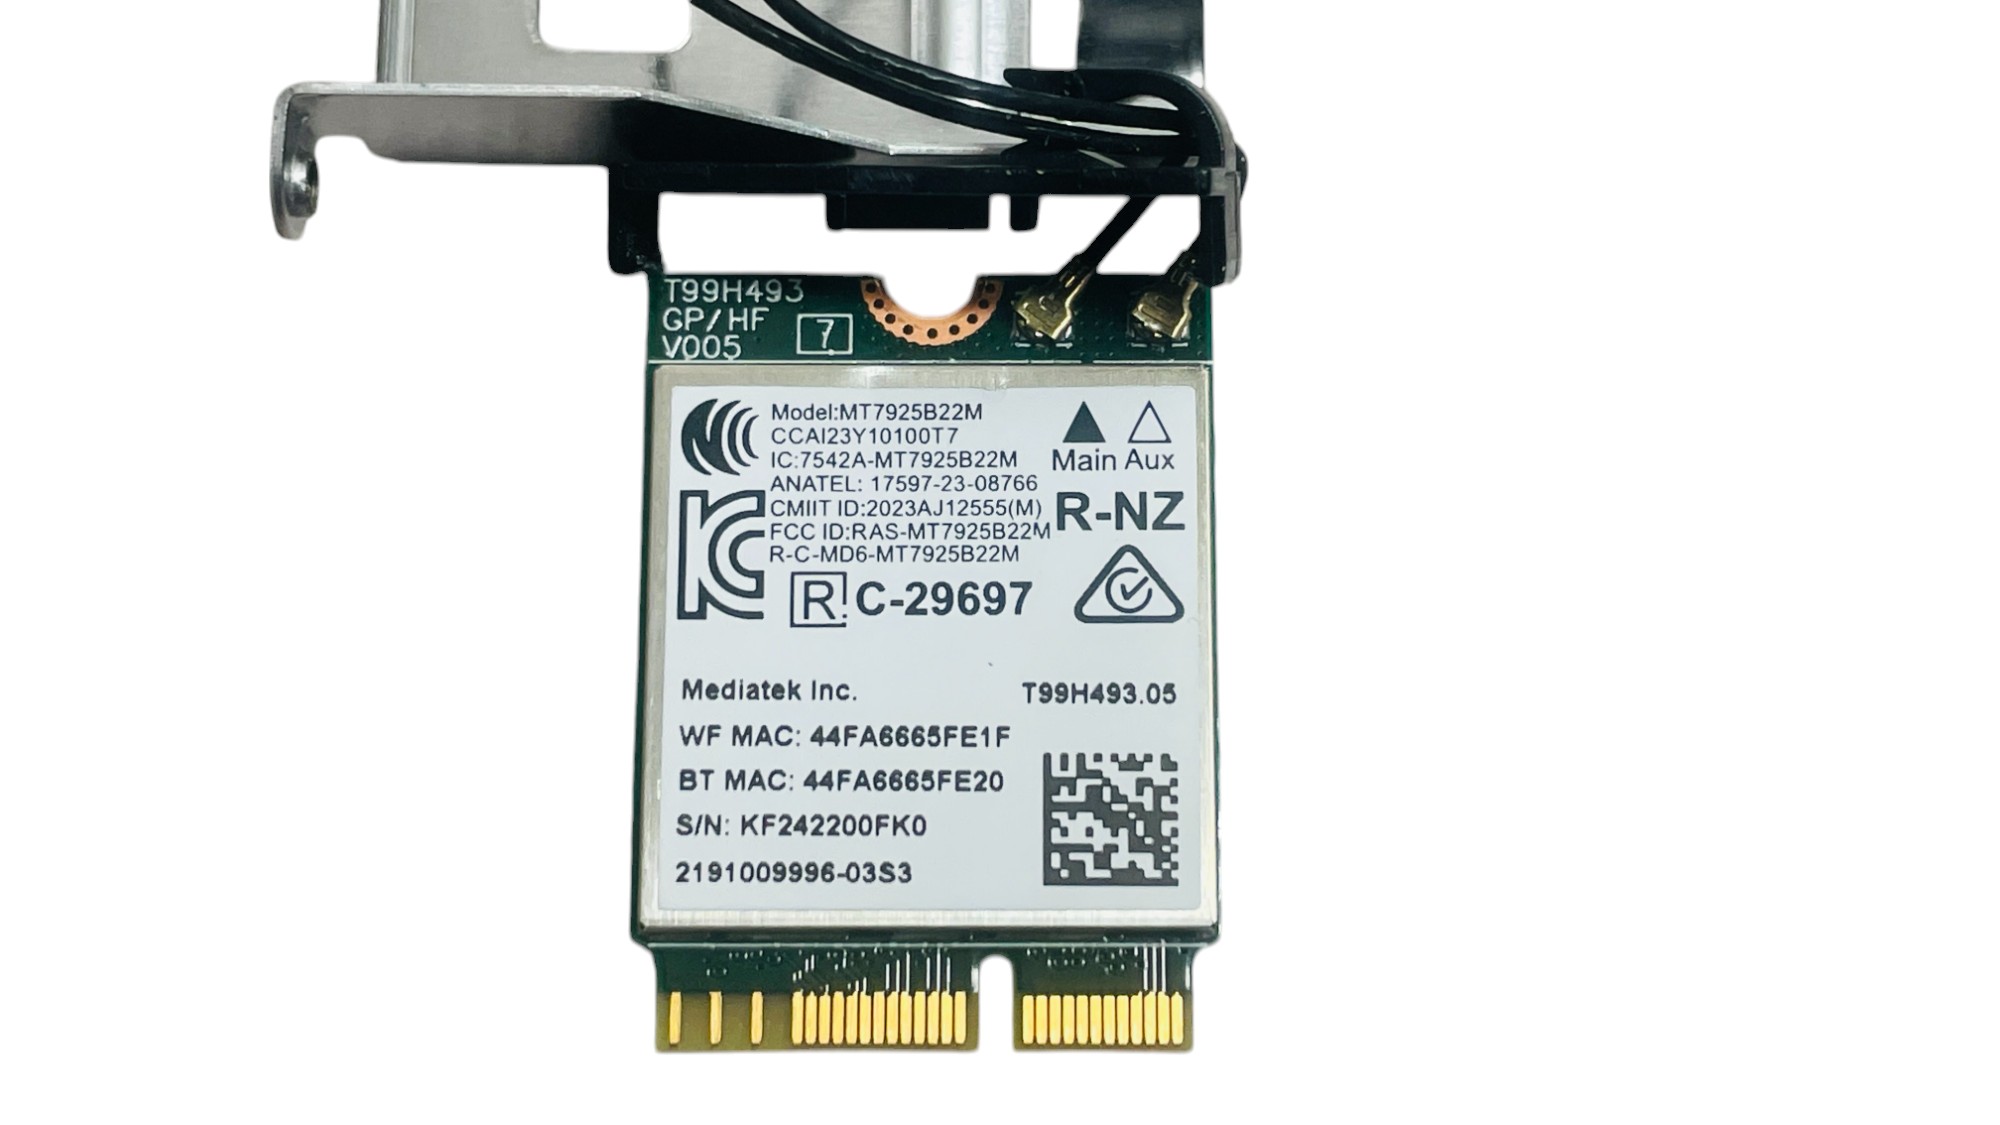
Whether you prefer to use a different module or if you're fault-finding a weak Wi-Fi signal—which happened across this review at one point—and want to check the connectors, you just need to remove the module, unscrew and remove the plastic clip and this will reveal the antenna connectors allowing you to remove it.
Feb 26th, 2025 15:41 EST
change timezone
Latest GPU Drivers
New Forum Posts
- 3D Printer Club (434)
- What are you playing? (23039)
- AM3 build, uses in 2025 (7)
- intel Arc A770 incorrect TMUs / Shader count (0)
- What's your latest tech purchase? (23212)
- Post your Steam Game Library Categories (12)
- Samsung 870 EVO - Beware, certain batches prone to failure! (1247)
- [REQUEST] Palit RTX 5080 GameRock OC ver. bios (0)
- RTX 4090 Founders Edition Rev. 2 bios uploaded (0)
- TPU's GPU Database Portal & Updates (389)
Popular Reviews
- Corsair Xeneon 34WQHD240-C Review - Pretty In White
- ASUS GeForce RTX 5070 Ti TUF OC Review
- Corsair Virtuoso MAX Wireless Review
- MSI GeForce RTX 5070 Ti Ventus 3X OC Review
- MSI GeForce RTX 5070 Ti Vanguard SOC Review
- MSI GeForce RTX 5070 Ti Gaming Trio OC+ Review
- Gigabyte X870 Aorus Elite WiFi 7 Review
- darkFlash DY470 Review
- AMD Ryzen 7 9800X3D Review - The Best Gaming Processor
- Gigabyte GeForce RTX 5090 Gaming OC Review
Controversial News Posts
- NVIDIA GeForce RTX 50 Cards Spotted with Missing ROPs, NVIDIA Confirms the Issue, Multiple Vendors Affected (495)
- AMD Radeon 9070 XT Rumored to Outpace RTX 5070 Ti by Almost 15% (304)
- AMD Plans Aggressive Price Competition with Radeon RX 9000 Series (274)
- AMD Radeon RX 9070 and 9070 XT Listed On Amazon - One Buyer Snags a Unit (247)
- NVIDIA Investigates GeForce RTX 50 Series "Blackwell" Black Screen and BSOD Issues (244)
- Edward Snowden Lashes Out at NVIDIA Over GeForce RTX 50 Pricing And Value (241)
- AMD Denies Radeon RX 9070 XT $899 USD Starting Price Point Rumors (239)
- AMD Mentions Sub-$700 Pricing for Radeon RX 9070 GPU Series, Looks Like NV Minus $50 Again (190)