 0
0
Hexgears Impulse Keyboard Review
Software & Performance »Disassembly
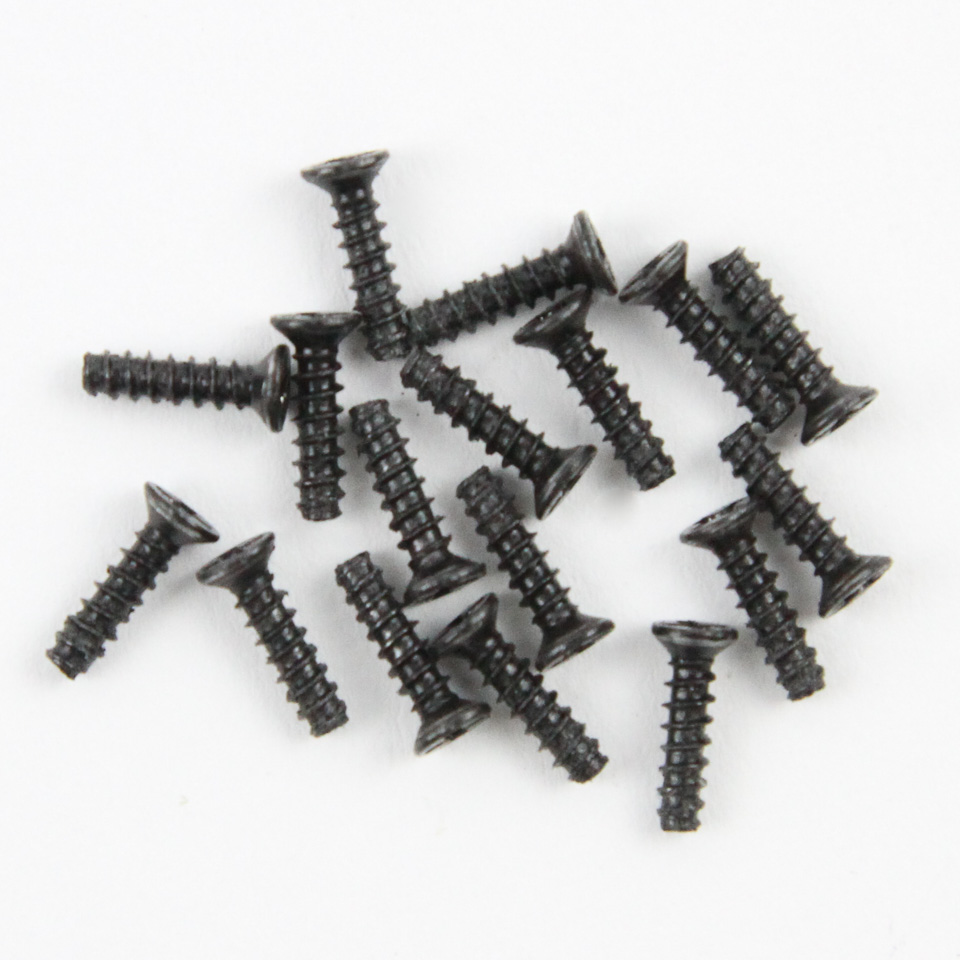
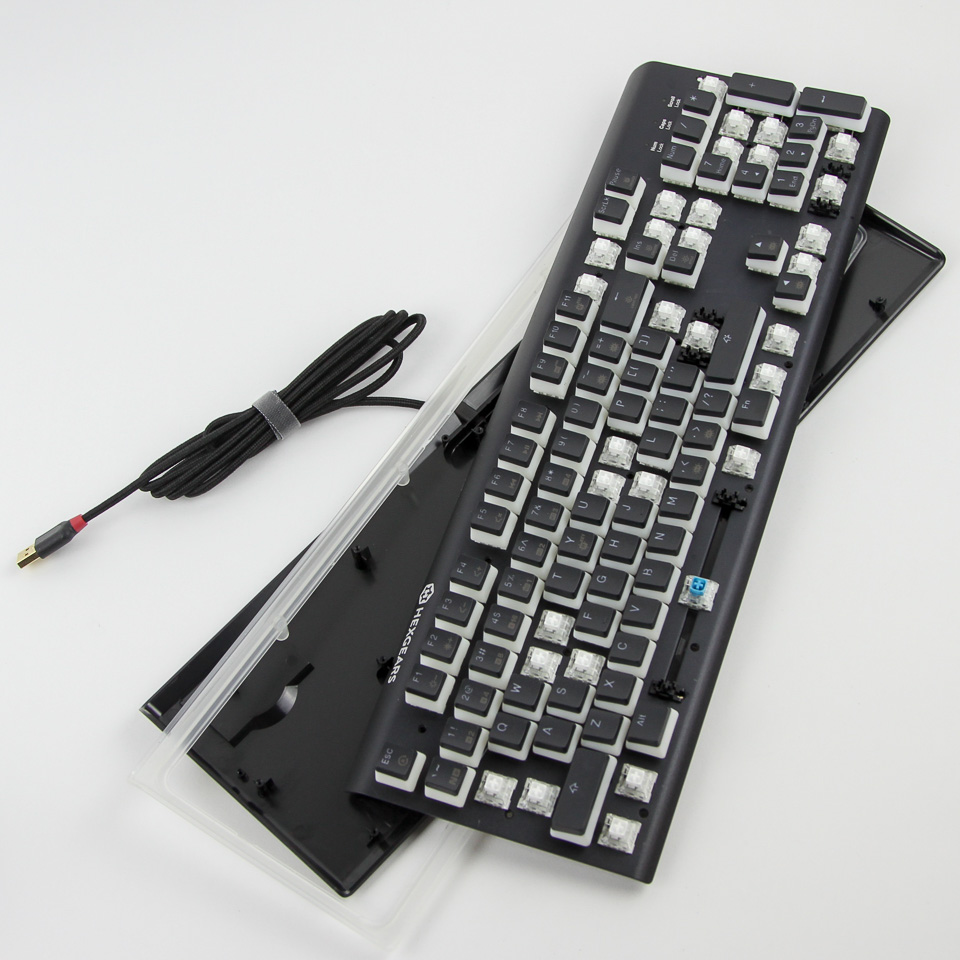
Disassembly of the Hexgears Impulse is on the easier side of things with 17 Phillips head countersunk screws on the front that keep the keyboard together. The screws are underneath specific keycaps that need to be removed, as seen above, and there are no hidden screws, which is nice to see. There are three main pieces here, including the plastic bottom and the frosted plastic side frame, and the metal frame/PCB piece which still has an internal USB cable connecting it to the cable that is a part of the plastic bottom panel. Dislodge the connector and all three pieces can be separated completely.
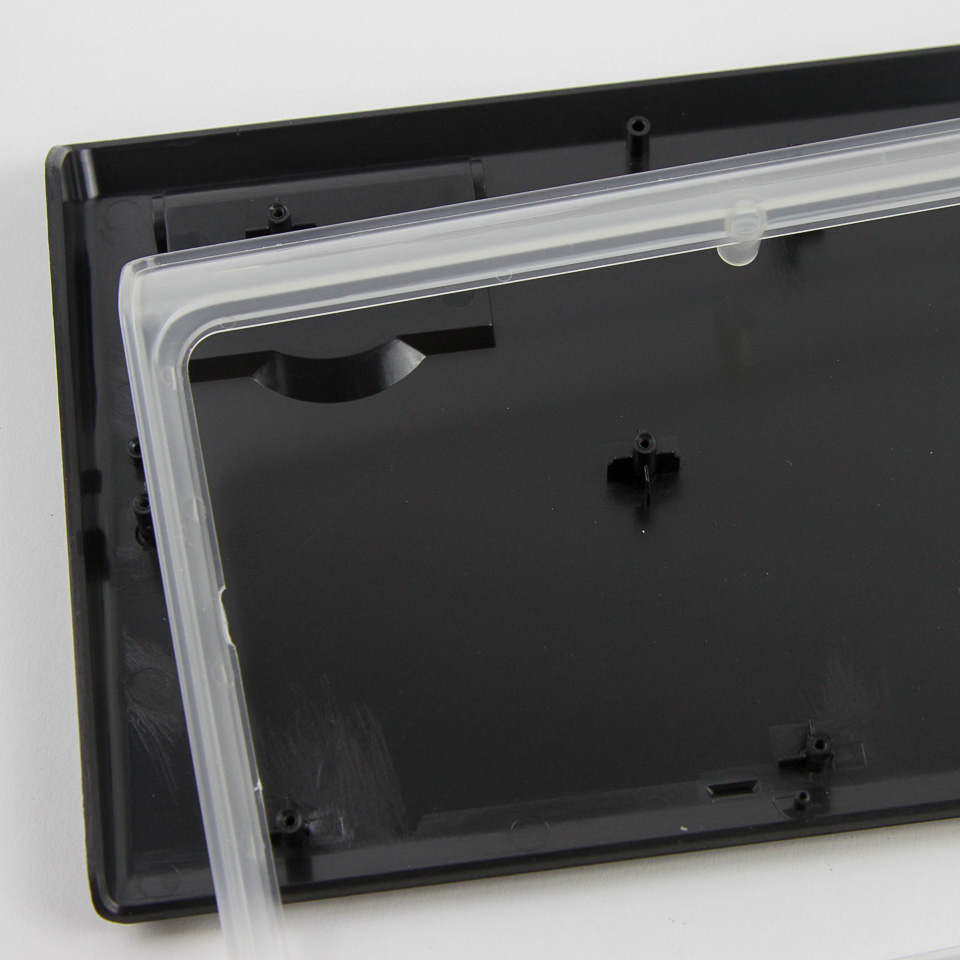
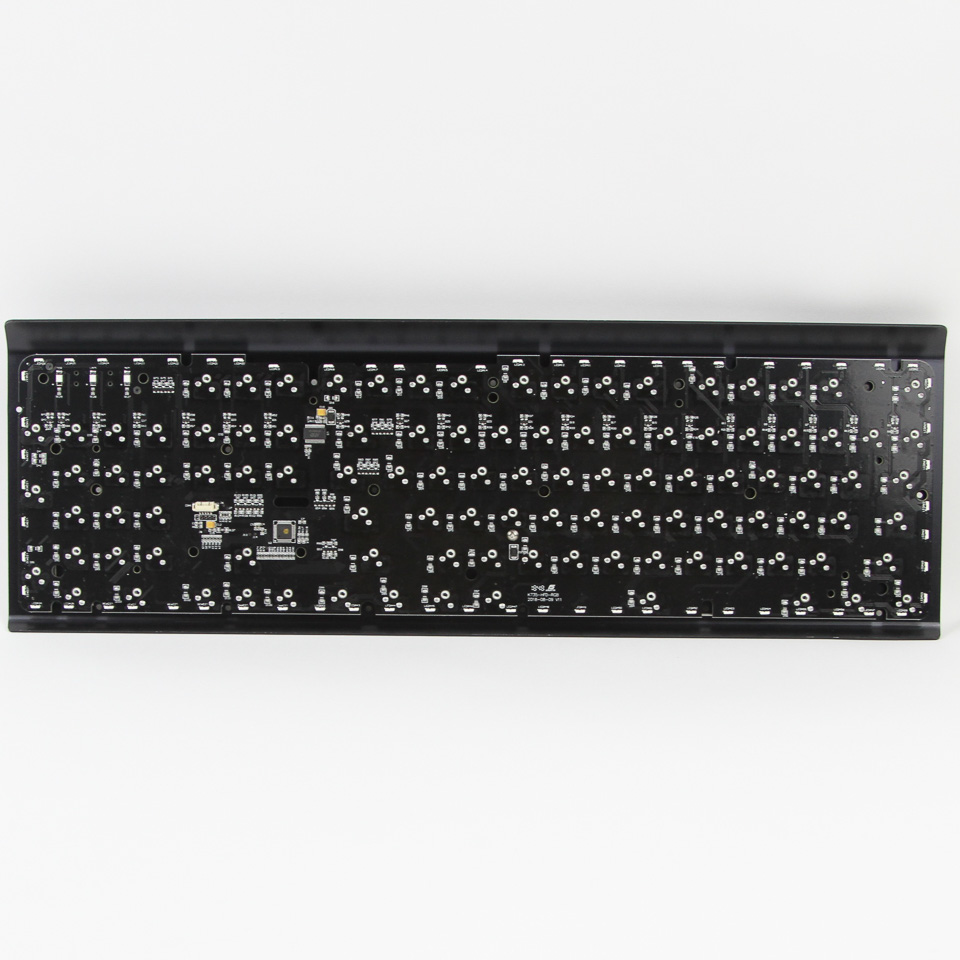
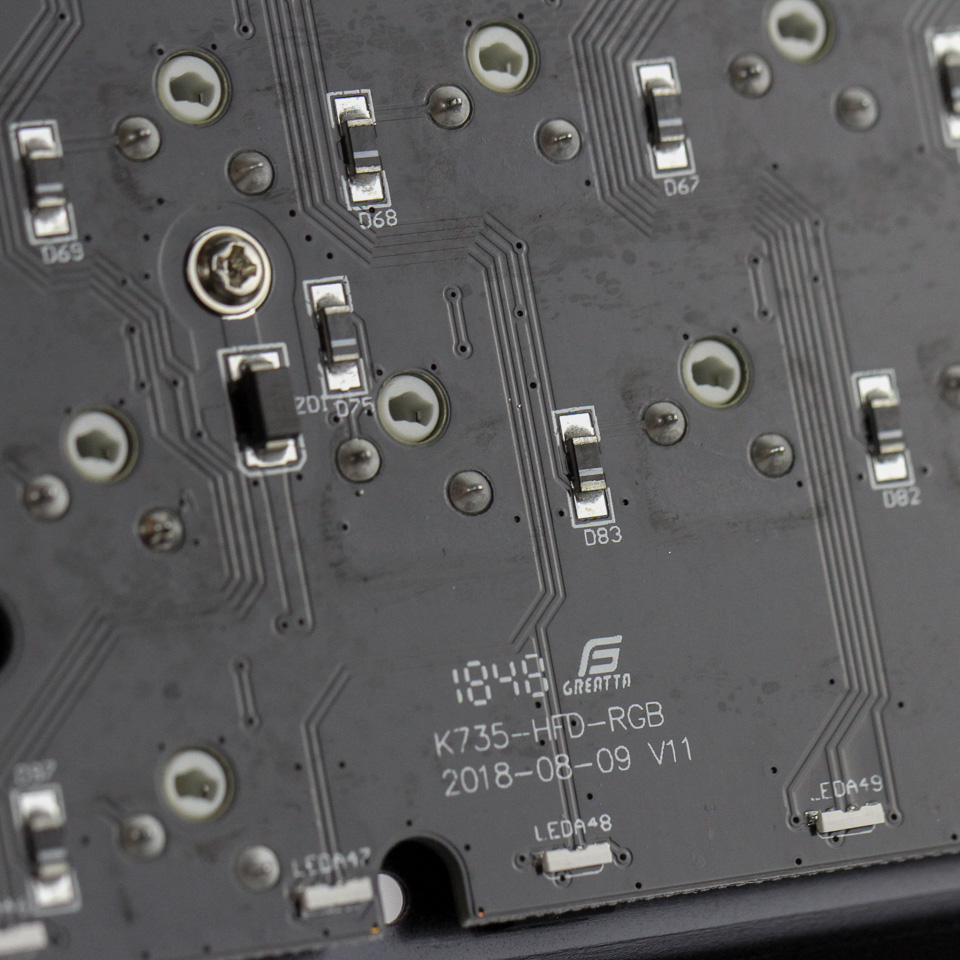
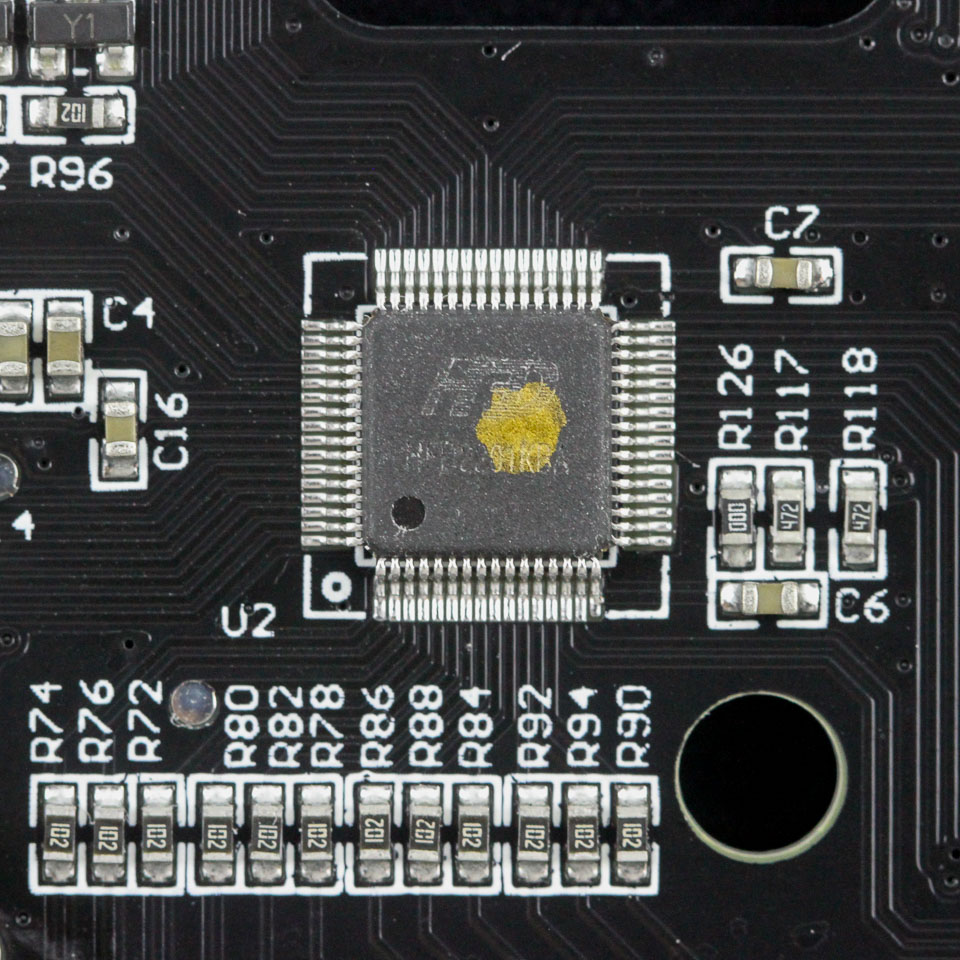
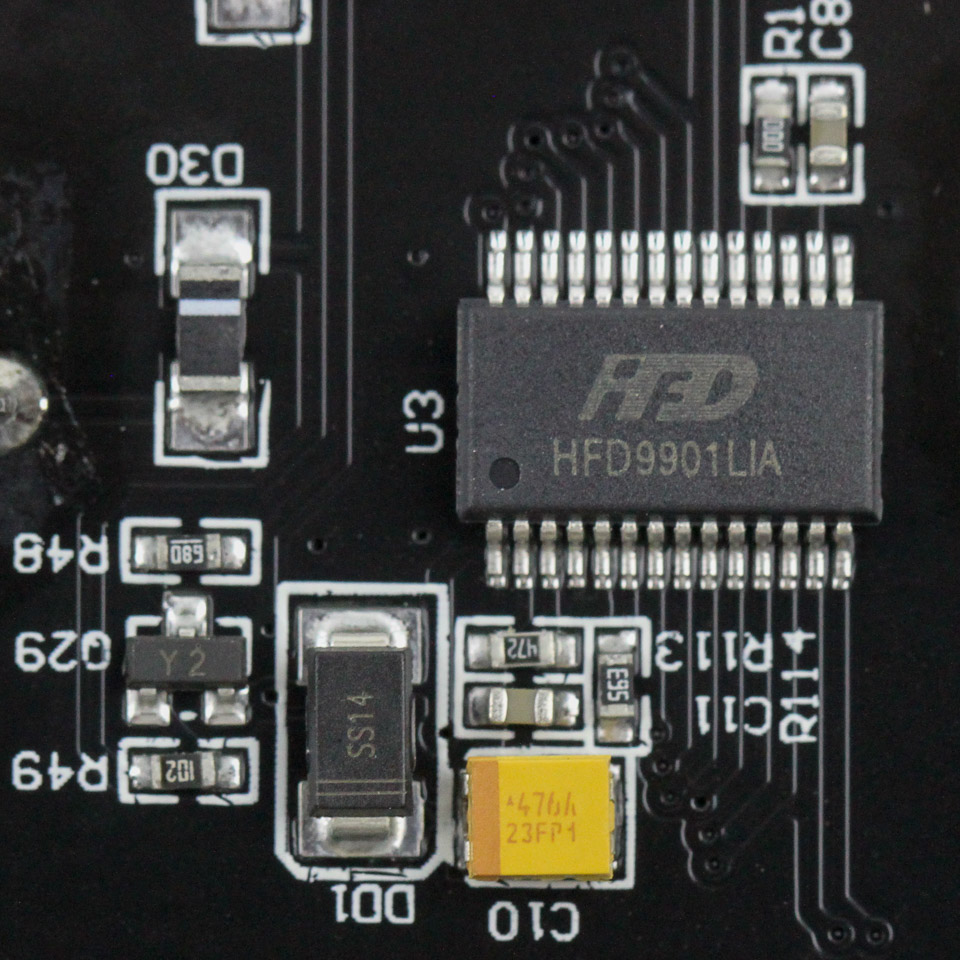
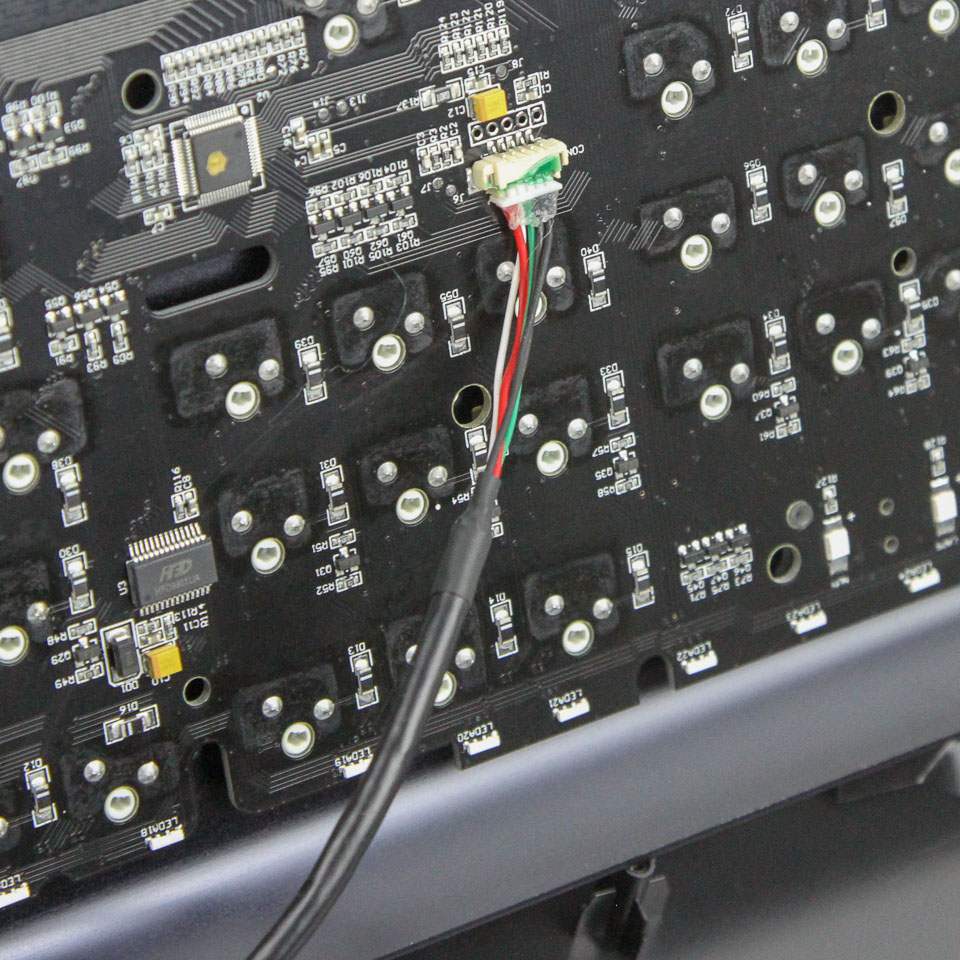
The frosted white plastic frame goes all around the keyboard and is a fundamental part of the keyboard aesthetic that is not very visible from the front with a top-down view. It is especially relevant when the keyboard is connected since the PCB has several extra RGB LEDs (including on the Impulse monochrome) on the sides that go through this frame for uniform side lighting in addition to the backlighting that comes from one LED (white or RGB depending on the keyboard version) per switch. The PCB itself is black, and the switches are soldered through the metal plate neatly, along with the rest of the components. The PCB design appears to have been finalized in late 2018, and the keyboard is powered via an HFD1101KBA 64-bit USB microcontroller, as well as a dedicated HFD9901LIA LED driver. There is no real information available online about these, but they do the job just fine. All components, including the switches, LEDs, and capacitors, are soldered to a multi-layered PCB.
Before we move on, be advised that disassembly may void the warranty and that TechPowerUp is not liable for any damages incurred if you decide to go ahead and do so anyway.
Feb 28th, 2025 00:08 EST
change timezone
Latest GPU Drivers
New Forum Posts
- It's happening again, melting 12v high pwr connectors (950)
- Authenticode fails for GPU-Z 2.63.0 (11)
- RX 7900 XT Cant flash XTX bios. (9)
- The BIOS for the new ASUS DUAL-RX6600-8G. (2)
- Nvidia dropped 32-bit CUDA support with the 5000 series, not just 32-bit PhysX (4)
- Opinions on the drive config for new build please (29)
- DELL ALIENWARE AW2523HF COIL WHINE NOISE. (2)
- Brilliant Utility (0)
- Proposal to abolish votes on the Case Mod Gallery page (12)
- Nvidia's GPU market share hits 90% in Q4 2024 (gets closer to full monopoly) (680)
Popular Reviews
- Montech HyperFlow Silent 360 Review
- ASUS GeForce RTX 5070 Ti TUF OC Review
- Gigabyte X870 Aorus Elite WiFi 7 Review
- Corsair Xeneon 34WQHD240-C Review - Pretty In White
- AMD Ryzen 7 9800X3D Review - The Best Gaming Processor
- MSI GeForce RTX 5070 Ti Ventus 3X OC Review
- MSI GeForce RTX 5070 Ti Vanguard SOC Review
- Corsair Virtuoso MAX Wireless Review
- Montech TITAN PLA 1000 W Review
- be quiet! Pure Base 501 DX Review
Controversial News Posts
- NVIDIA GeForce RTX 50 Cards Spotted with Missing ROPs, NVIDIA Confirms the Issue, Multiple Vendors Affected (498)
- AMD Radeon 9070 XT Rumored to Outpace RTX 5070 Ti by Almost 15% (304)
- AMD Plans Aggressive Price Competition with Radeon RX 9000 Series (274)
- AMD Radeon RX 9070 and 9070 XT Listed On Amazon - One Buyer Snags a Unit (255)
- NVIDIA Investigates GeForce RTX 50 Series "Blackwell" Black Screen and BSOD Issues (244)
- Edward Snowden Lashes Out at NVIDIA Over GeForce RTX 50 Pricing And Value (241)
- AMD Denies Radeon RX 9070 XT $899 USD Starting Price Point Rumors (239)
- AMD Mentions Sub-$700 Pricing for Radeon RX 9070 GPU Series, Looks Like NV Minus $50 Again (228)