 3
3
HighSpeed PC 'Top Deck' Tech Station large Review
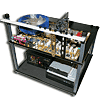
Installing Hardware & Finished Look »Assembly


The assembly constitutes of two major steps. First you get the two shelves ready and then connect these together with the included stands.
We tried to follow the steps in the manual as much as possible to give you an idea as to what you will have to go through. First, the focus is placed on the bottom shelf and the four rubber feet. These are secured with screws which stick out the other side. This is by no means a mistake, but serves a pupose. The four pillars are secured on these screws later on. Placing the feet on the shelf actually concludes the work on the lower part of the Tech Station.
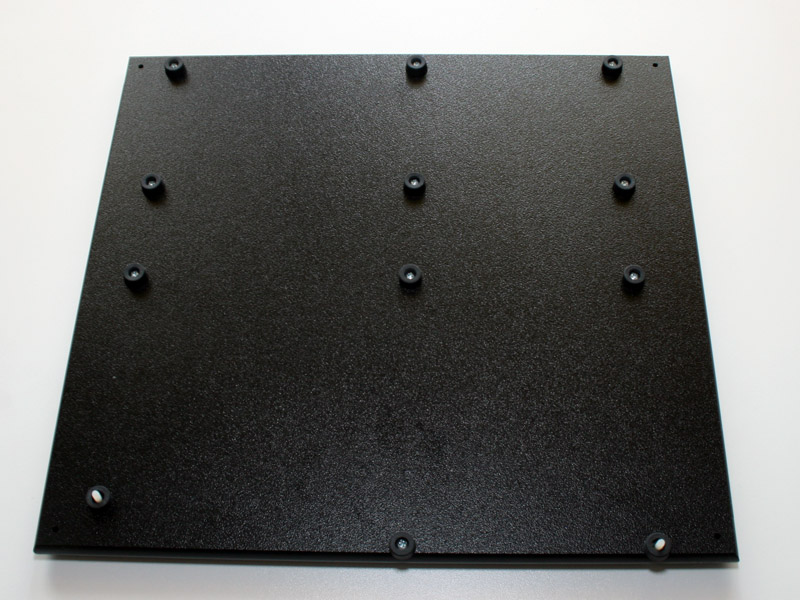

The upper shelf requires a bit more work. Each mainboard stand needs to be screwed in. There are a lot more than you may need and as you can see, the size of the shelf is large enough to hold eATX boards as well. There are two specific, plastic standoffs to further secure a mainboard on the shelf itself. The hard drive rails need to be installed on the underside of the upper shelf. This is done by securing four screws with spacers, creating a simple rail to slide the hard drive on. There is sufficient space for up to two hard drives.
There is a fifth screw with a standoff, which serves as a stop for the hard drives. With this, there is no way for a drive to fall out the other side by mistake. There are four right angle metal pieces included. These have a hole on each end. One to secure them to the upper shelf, the other to screw in the included 12 cm fan. This also concludes all the preperation of the two shelves.

The shelves are simply connected using the included stands. The next step is screwing in the two shorter parts on the upper shelf for the PCI bracket. The general shape is much like a normal case, with thumb screws to secure AGP, PCIe or PCI cards.
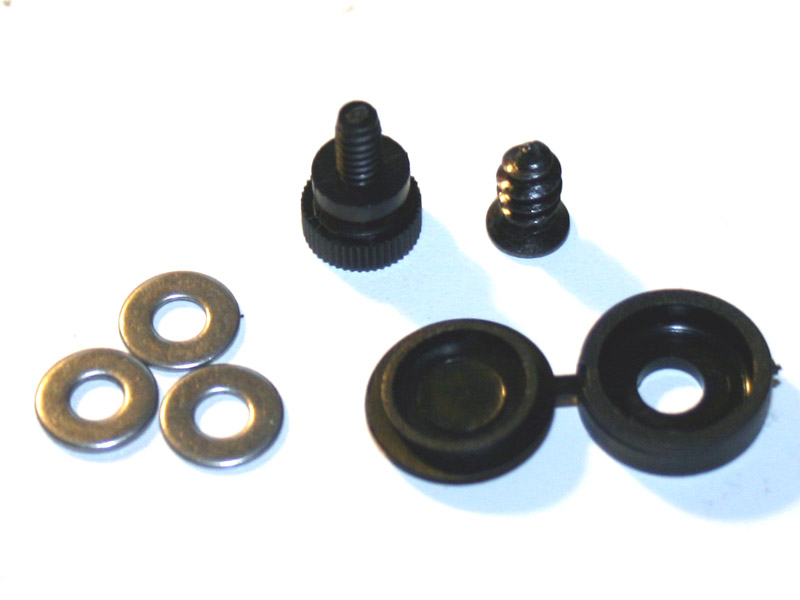
After finishing the assembly of the Top Deck Tech Station, I was left with a few spare parts. The reason for the additional fan screw can be explained. The fan can be secured by up to two screws. It will blow across the top and underside of the upper shelf in such a configuration. I chose to let the fan hanging down to blow across the underside of the shelf.
Feb 24th, 2025 04:03 EST
change timezone
Latest GPU Drivers
New Forum Posts
- RDNA4 Prediction Time Part Deux!!! (33)
- TPU's Nostalgic Hardware Club (19993)
- The TPU UK Clubhouse (25768)
- Why is coil whine still a nuisance? (27)
- Post your Speedtest.net Speeds! (2346)
- Nvidia's GPU market share hits 90% in Q4 2024 (gets closer to full monopoly) (531)
- Authenticode fails for GPU-Z 2.63.0 (1)
- RTX 5090 - Incorrect GPU-Z Clocks, when Overclocking with the Curve Tuner (8)
- [Intel AX1xx/AX2xx/AX4xx/AX16xx/BE2xx/BE17xx] Intel Modded Wi-Fi Driver with Intel® Killer™ Features (275)
- Gigabyte AORUS RTX5080 Missing 16 ROP's (32)
Popular Reviews
- ASUS GeForce RTX 5070 Ti TUF OC Review
- MSI GeForce RTX 5070 Ti Ventus 3X OC Review
- darkFlash DY470 Review
- MSI GeForce RTX 5070 Ti Vanguard SOC Review
- MSI GeForce RTX 5070 Ti Gaming Trio OC+ Review
- Galax GeForce RTX 5070 Ti 1-Click OC White Review
- Palit GeForce RTX 5070 Ti GameRock OC Review
- Fantech Aria II Pro Review
- Gigabyte GeForce RTX 5090 Gaming OC Review
- AMD Ryzen 7 9800X3D Review - The Best Gaming Processor
Controversial News Posts
- NVIDIA GeForce RTX 5090 Spotted with Missing ROPs, NVIDIA Confirms the Issue, Multiple Vendors Affected, RTX 5070 Ti, Too (455)
- AMD Radeon 9070 XT Rumored to Outpace RTX 5070 Ti by Almost 15% (304)
- AMD Plans Aggressive Price Competition with Radeon RX 9000 Series (271)
- AMD Radeon RX 9070 and 9070 XT Listed On Amazon - One Buyer Snags a Unit (247)
- Edward Snowden Lashes Out at NVIDIA Over GeForce RTX 50 Pricing And Value (241)
- AMD Denies Radeon RX 9070 XT $899 USD Starting Price Point Rumors (239)
- NVIDIA Investigates GeForce RTX 50 Series "Blackwell" Black Screen and BSOD Issues (233)
- New Leak Reveals NVIDIA RTX 5080 Is Slower Than RTX 4090 (215)