 1
1
iKBC CD108 BT Keyboard Review
Performance »Disassembly
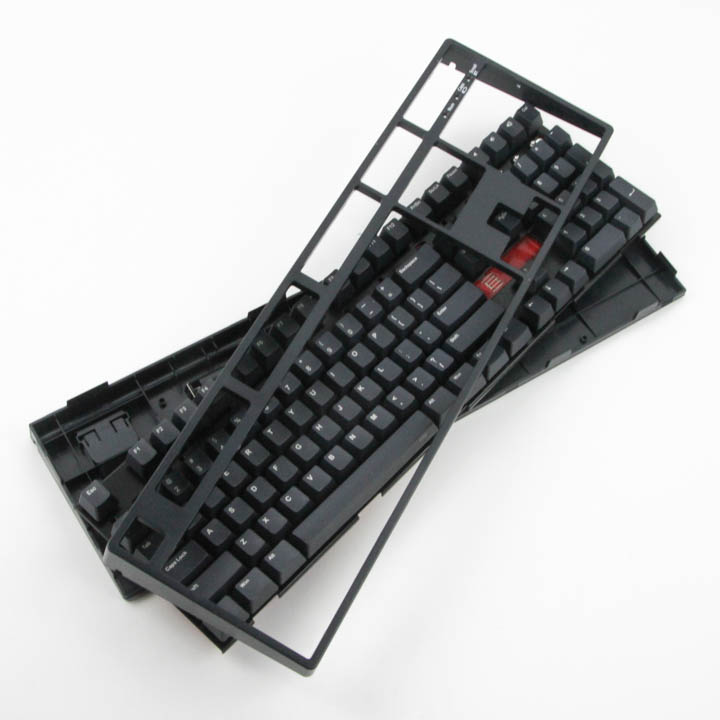


The iKBC CD108 BT uses a two-piece plastic case, which usually means there are no screws holding it together. This is indeed the case here as well, and you need to pry the two pieces apart carefully by using a thin, flat tool. There are interlocking plastic tabs all around the edges, and once done, you should be able to separate and fully remove the top case panel. Looking at this piece from the underside confirms it to be made out of ABS plastic, and this is another of the cost-savings measure keyboards take (as opposed to, say, a metal case). The bottom case panel is still connected to the rest of the keyboard via two cables as seen above, and they need to be removed before you can separate them completely.
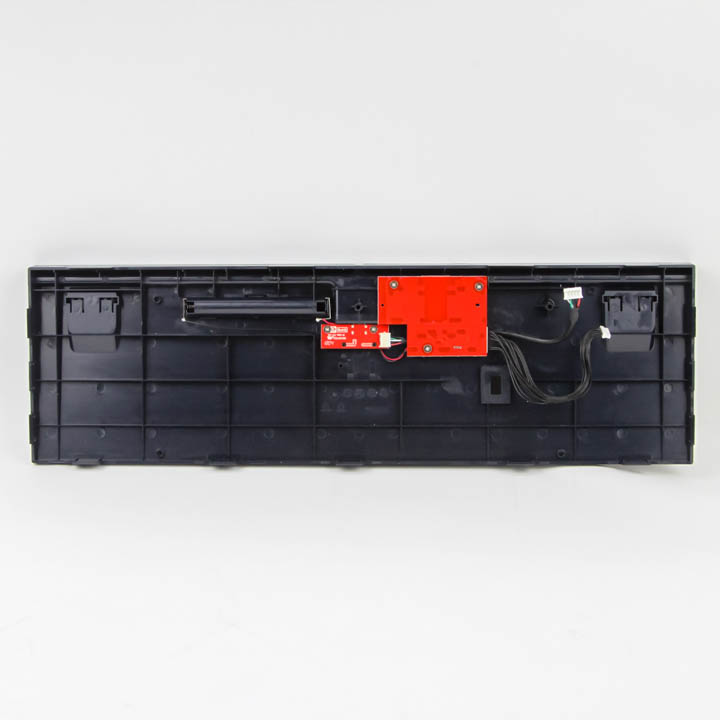


Unlike most keyboards, the bottom case panel houses some daughter PCBs in the ABS plastic. Indeed, we have one for the female USB Type-C connector that is connected to an internal USB header on the primary PCB, and this is often the case with keyboards that have a removable cable. The other daughter PCB is for powering the keyboard itself, wherein we see two wires soldered to the terminal ends on the battery compartment, leading to a Bluetooth module (Broadcom IC for Bluetooth 3.0) that appears to be soldered underneath a metal shield/heatsink. The on/off switch we saw under a slider cover before is also seen here. Soldering of the single wires from the battery compartment does look fragile visually, although I am not sure what a better solution would be given I ran into no issues during the testing period, which involved a lot of moving and even the occasional drop of the keyboard.
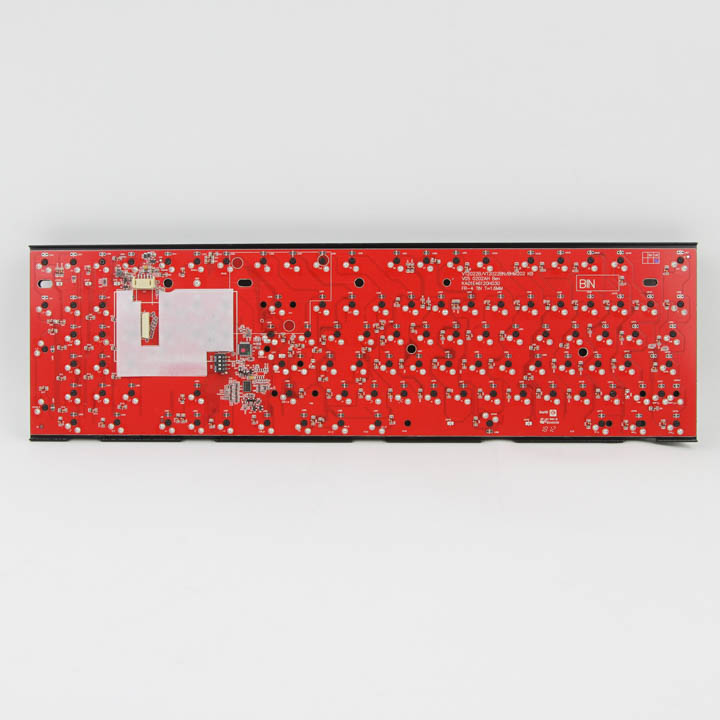

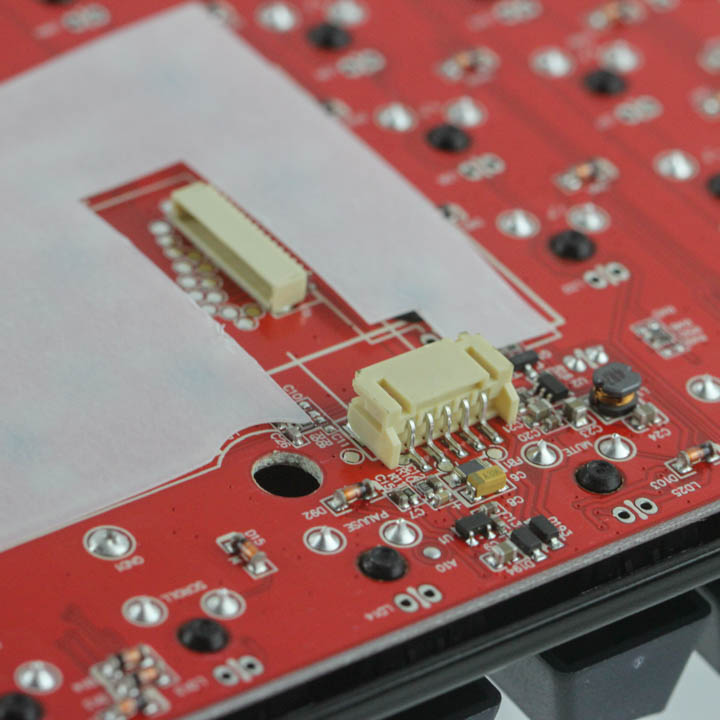
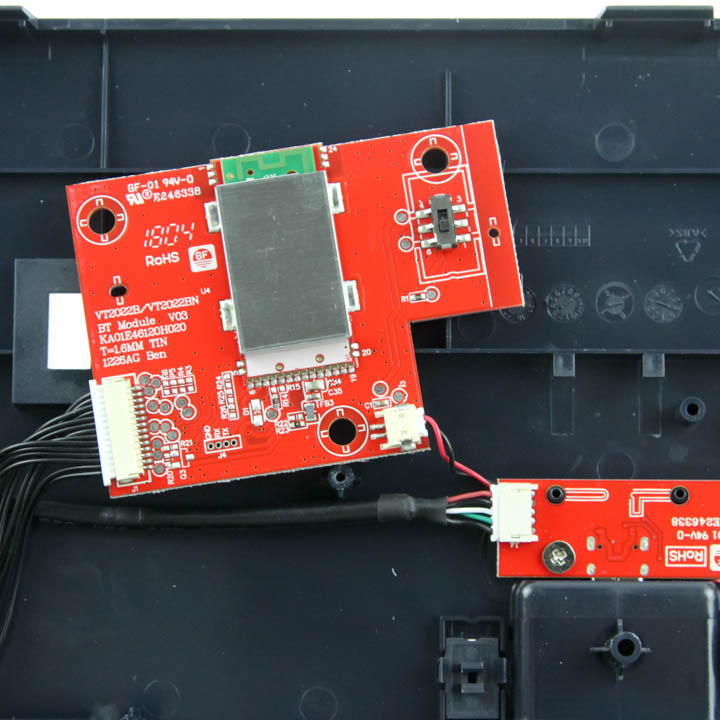
The primary PCB, also red in color, is on the middle piece that also has a stainless steel plate for structural rigidity. The switches are thus soldered through the plate and on to the PCB, as is usually the case. We see more confirmation of this being a PCB designed with Bluetooth operation in mind, and the solder quality here is exceptional throughout and very likely machine assembled. There is an electrical insulating shield near the internal I/O, which is to prevent the metal piece on the power daughter PCB from shorting the rest of the keyboard.
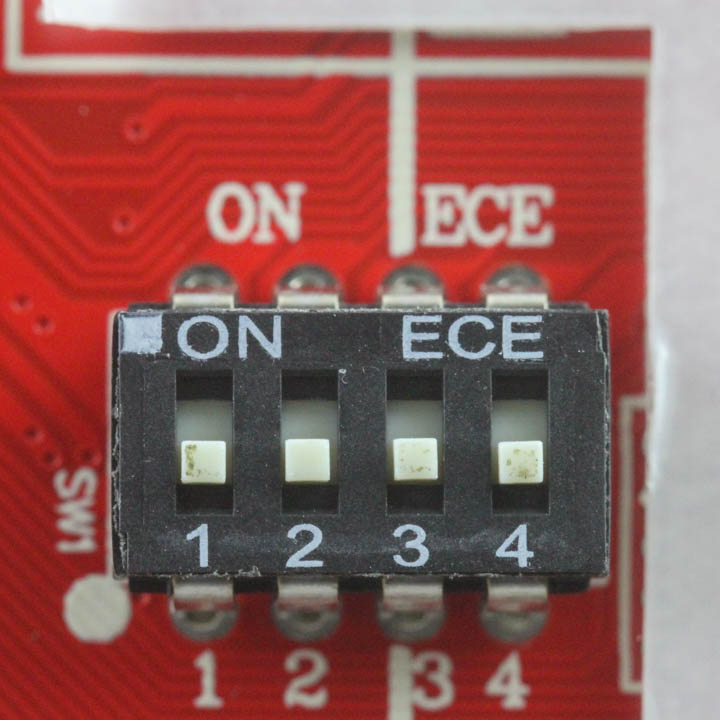
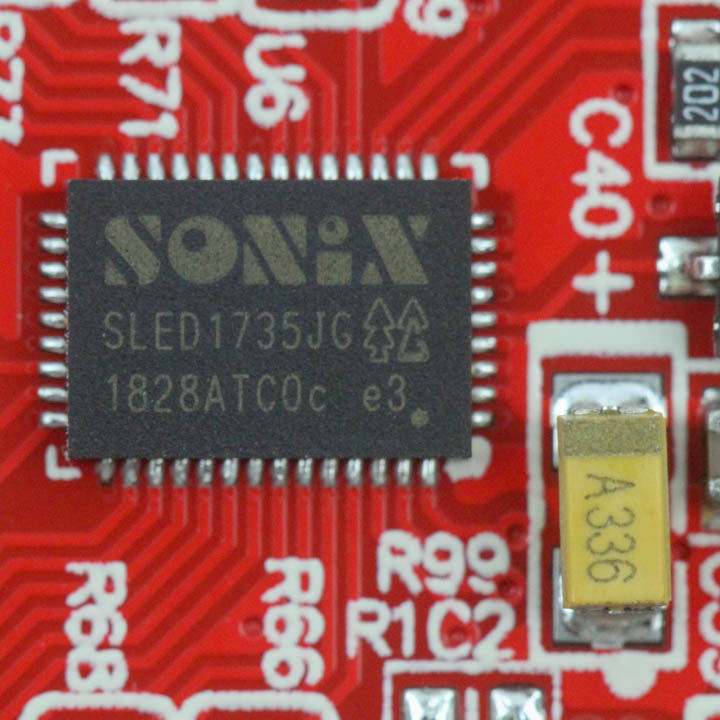
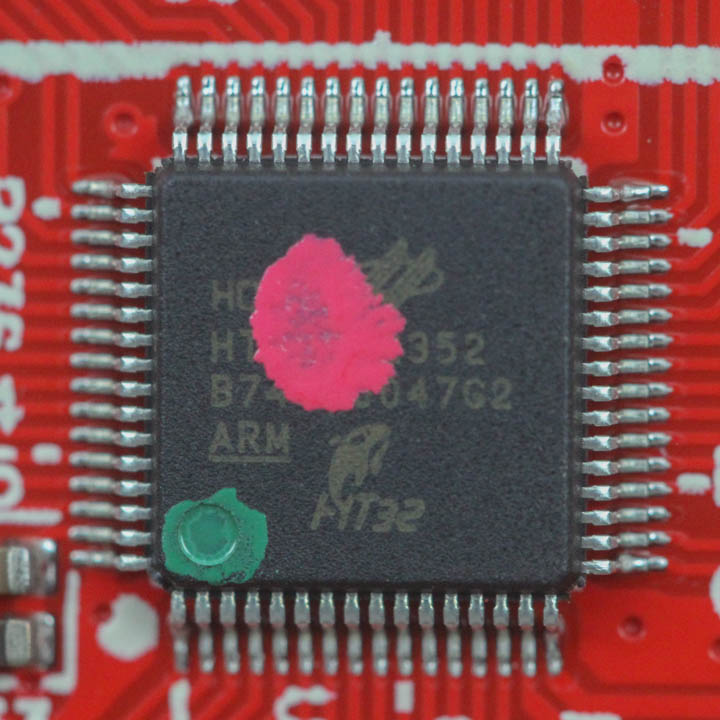
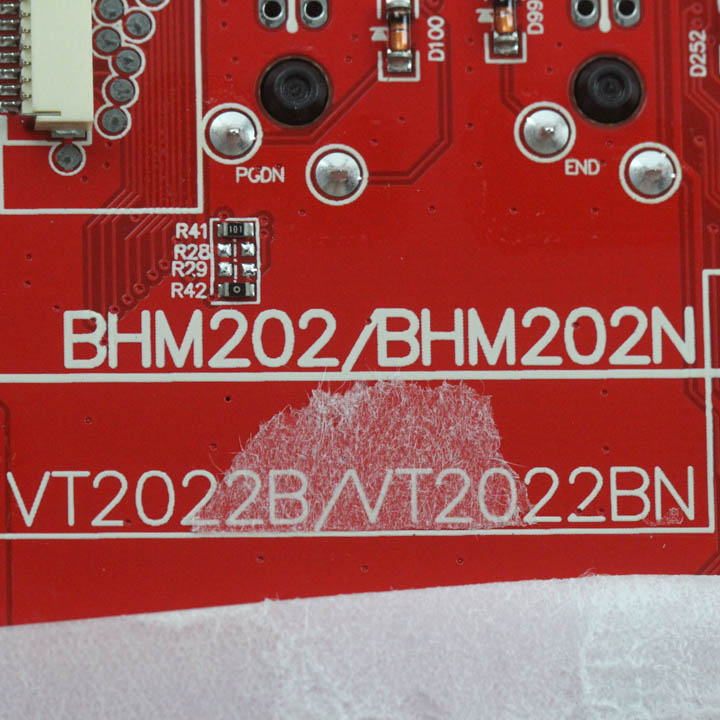
With the case removed, we get a better look at the components on the PCB, including the aforementioned set of four dip switches. Alongside these is a Sonix SLED1735 LED driver with connections to every switch already, and this driver can support up to 75 RGB LEDs or 256 single-color LEDs. This is why I kept bringing up the possibility of user-installed backlighting, and there is even lighting control pre-configured on the Holtek ARM-based microcontroller. All the components are soldered on to a multi-layered PCB.
Before we take a look at the driver, be advised that disassembly will void the warranty and that TechPowerUp is not liable for any damages incurred if you decided to go ahead and do so anyway.
Feb 11th, 2025 16:32 EST
change timezone
Latest GPU Drivers
New Forum Posts
- Do I need to spend extra money on my MOBO? (28)
- Monitor Battle! Help me choose between two contenders (20)
- It's happening again, melting 12v high pwr connectors (220)
- How to move from one Boinc Crunching Team to another? (4)
- I need tips what could be a problem with gigabyte 3060 ti eagle v2 (7)
- Proposed new Power Connector (18)
- Asteroid 2024 YR4 reaches level 3 on the Torino Scale (88)
- Folding Pie and Milestones!! (9371)
- Rare GPUs / Unreleased GPUs (2028)
- Get a new motherboard now even though I won't be using it for some years? (51)
Popular Reviews
- Civilization VII Performance Benchmark Review - 35 GPUs Tested
- Kingdom Come Deliverance II Performance Benchmark Review - 35 GPUs Tested
- ASRock Phantom Gaming B850I Lightning Wi-Fi Review
- Team Group T-Force XTREEM DDR5-7200 48GB CL34 Review
- Spider-Man 2 Performance Benchmark Review - 35 GPUs Tested
- NVIDIA GeForce RTX 5080 Founders Edition Review
- AMD Ryzen 7 9800X3D Review - The Best Gaming Processor
- DAREU A980 Pro Max Review
- Kingdom Come: Deliverance 2 Handheld Performance Review
- Corsair Frame 4000D Review
Controversial News Posts
- AMD Radeon 9070 XT Rumored to Outpace RTX 5070 Ti by Almost 15% (287)
- AMD is Taking Time with Radeon RX 9000 to Optimize Software and FSR 4 (256)
- AMD Denies Radeon RX 9070 XT $899 USD Starting Price Point Rumors (239)
- Edward Snowden Lashes Out at NVIDIA Over GeForce RTX 50 Pricing And Value (239)
- AMD Radeon RX 9070 XT & RX 9070 Custom Models In Stock at European Stores (226)
- New Leak Reveals NVIDIA RTX 5080 Is Slower Than RTX 4090 (215)
- AMD's Radeon RX 9070 Launch Faces Pricing Hurdles (175)
- AMD Radeon RX 9070 XT Tested in Cyberpunk 2077 and Black Myth: Wukong (169)