 12
12
MSI MEG Prospect 700R Review
Assembly & Finished Looks »A Closer Look - Inside
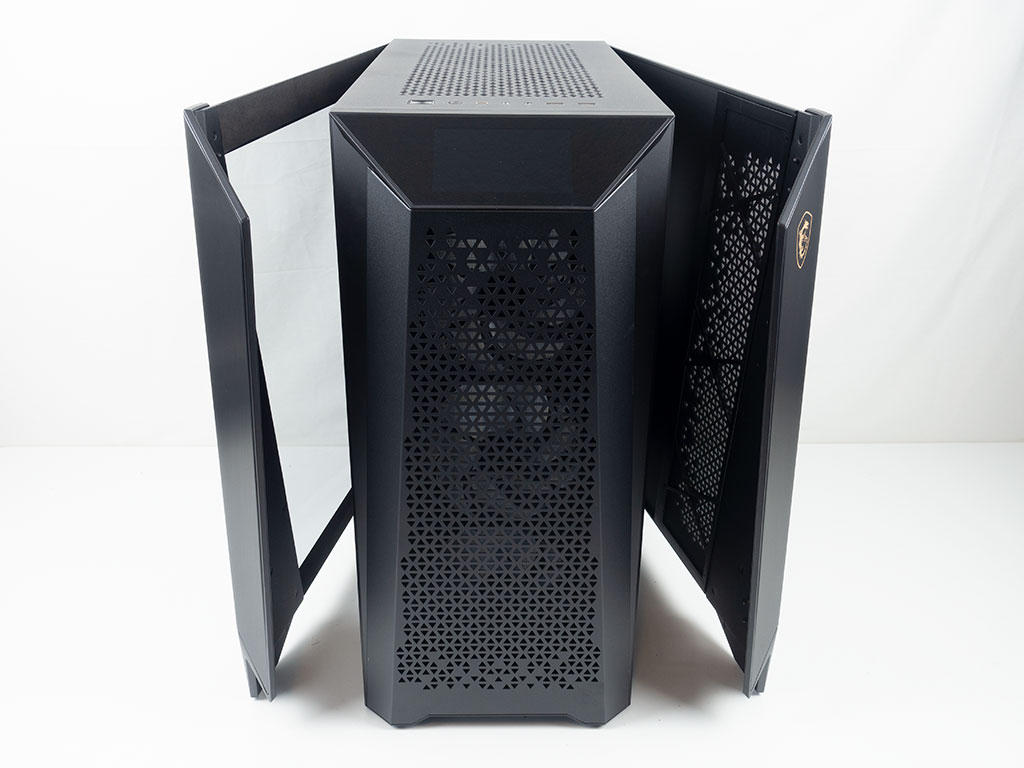
To gain access to the interior of the chassis, you may just open the panels up. Magnets hold each side in place adequately, so that you won't have to worry about them flipping open when moving the MEG Prospect 700R around. Naturally, each of these can be easily taken off the hinge pins and MSI goes as far as lubricating them, which is a pretty rarely done detail.
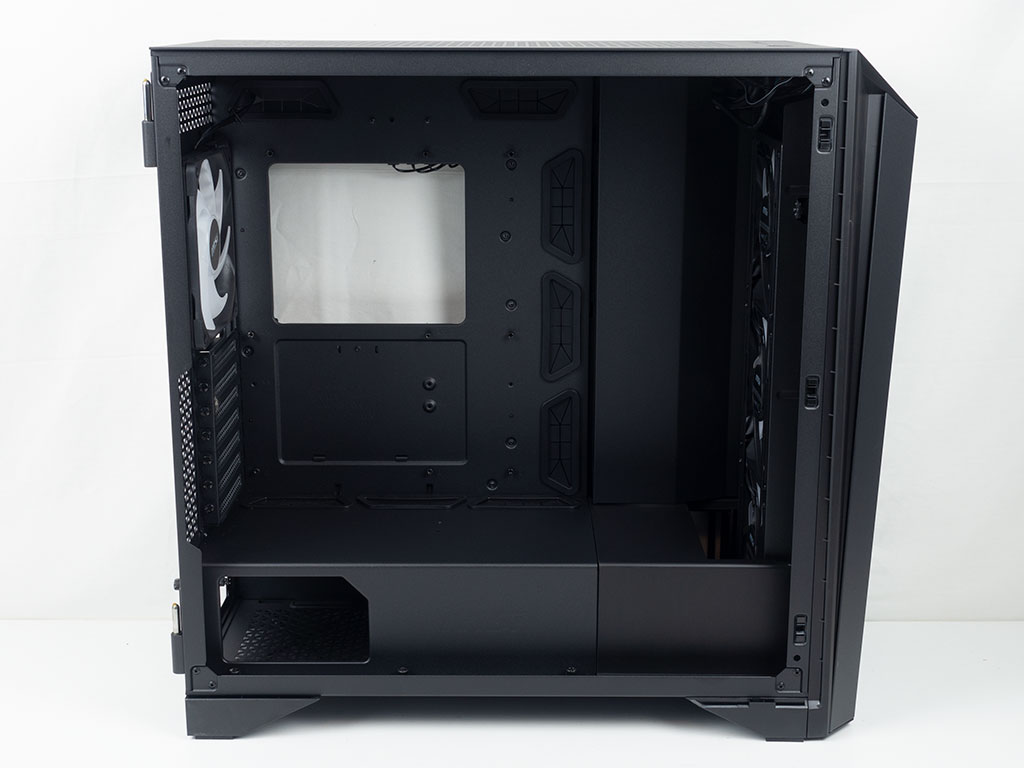


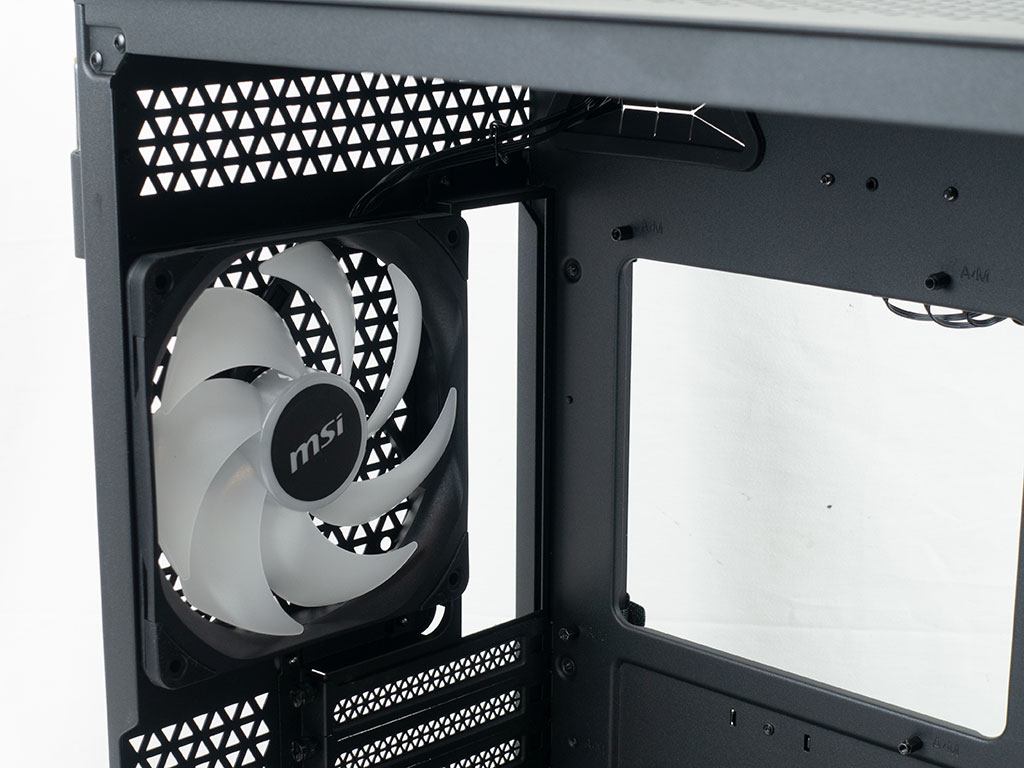
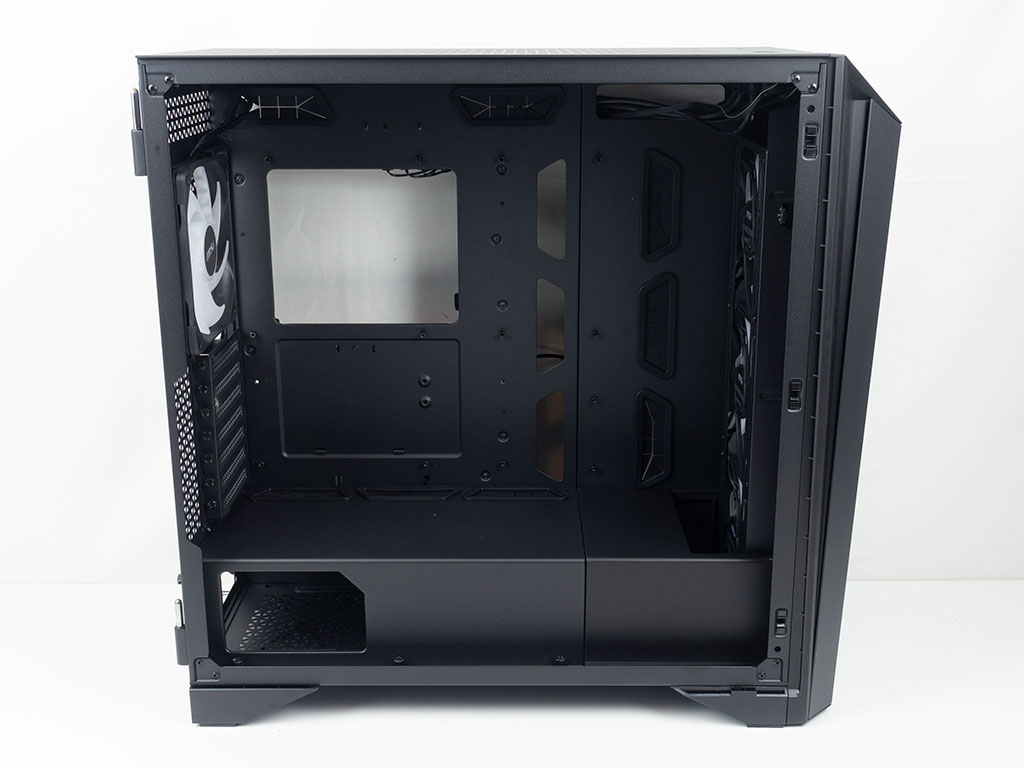
Looking at the interior of the chassis, it looks pretty traditional for the most part. In essence it is a wide mid-tower case which has been made deeper to accomodate the side intake and E-ATX compatibility. The shroud consists of two parts, with the rear two thirds being metal and the front third a plastic cover. You may remove the shroud if you like, but there is really no tangible reason to do so for all but the most extravagant builds. MSI has placed grommets on all major openings which means that your final build should be nice and clean, but a separate opening for the GPU power lead would have been a welcome addition. Out of the box, the front area of the motherboard tray is a cable duct which you may remove in case you opt for fans on the side.

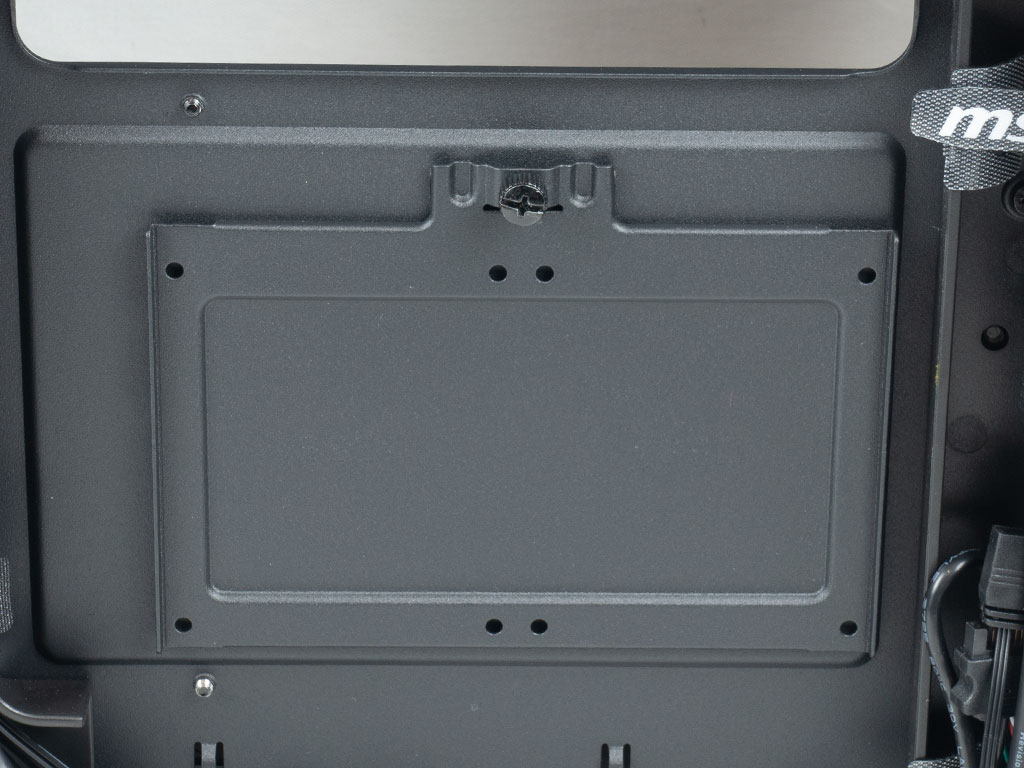
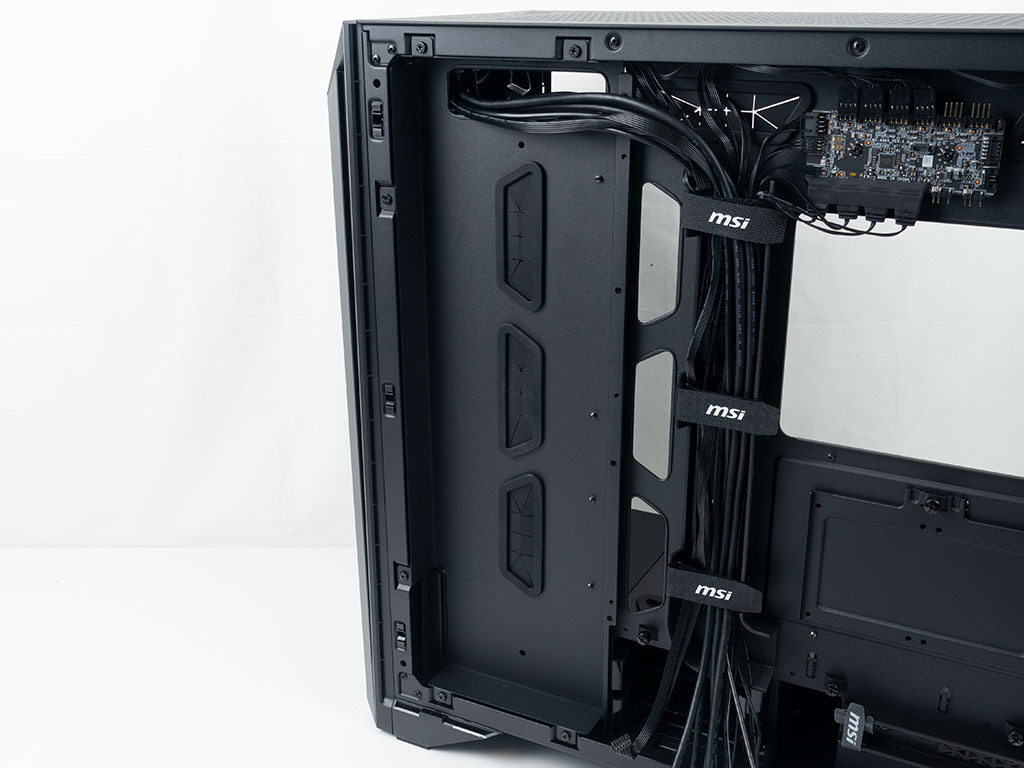
On the backside of the motherboard, things look really clean as MSI has pre-routed the wiring. While it will likely not be perfect for every build, all you will need to do is tweak it a little bit for a really nice result. The mounting element for the fans stretches across the full height of the case, but MSI markets it with a capability of up to 3x 120 mm fans, without having to remove the plastic shroud aspect of the case. However, at full height it is spacious enough to allow for a case specific, EK based distro plate to be installed for example. To the right of that, just underneath the opening for the CPU cooler mounting plate you will find a single metal tray for up to two 2.5" drives. It is held in place by a captive thumb screw so removing it when wanting to add storage should be easy enough.
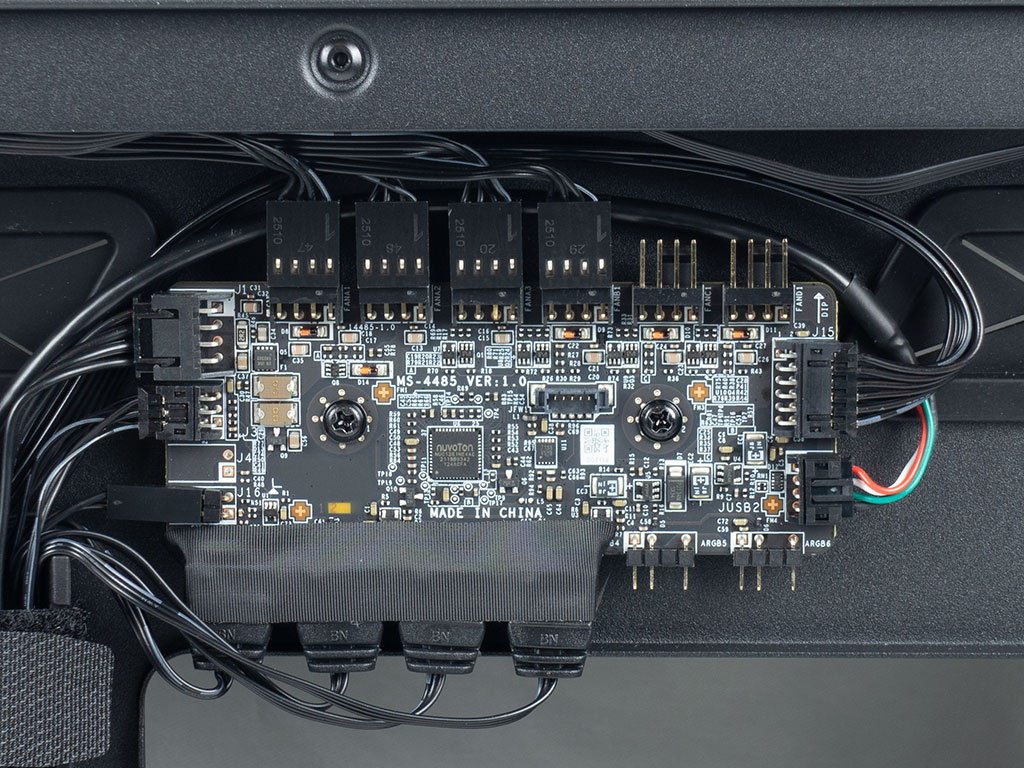
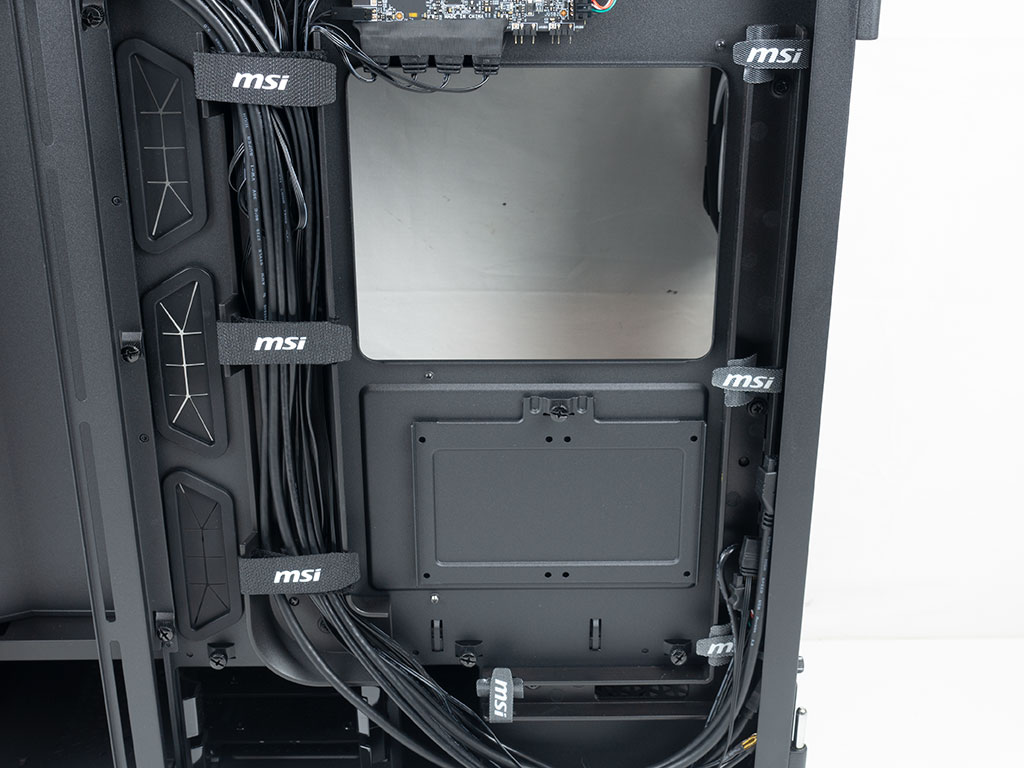
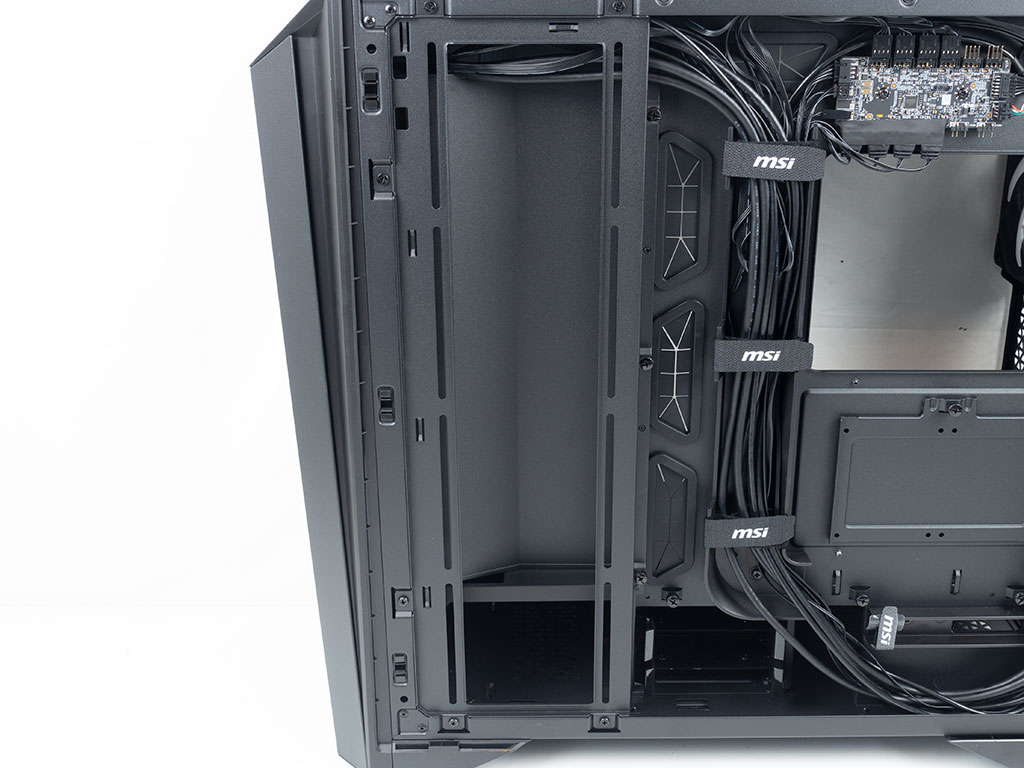
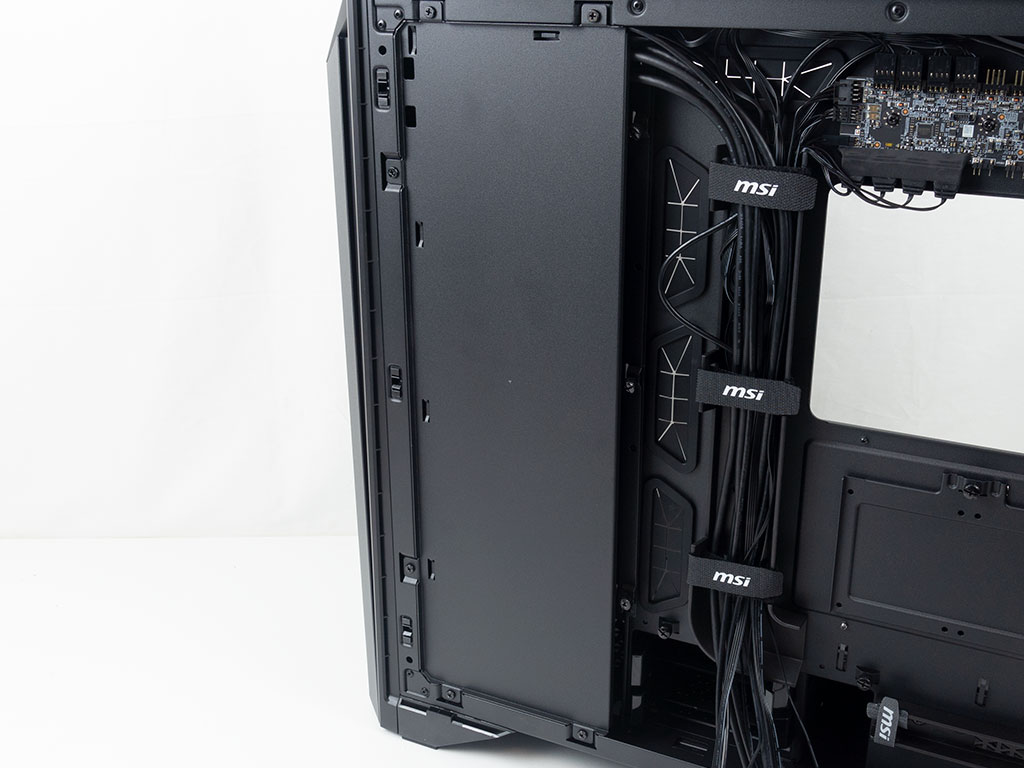
Even though the MSI MEG Prospect 700R ships with a color display in the front, its ARGB and PWM brains are found at the top of this side of the chassis, consisting of a pre-wired PCB that can connect up to six devices of each type. As you can see, there are several wires on top of that on either side of the PCB. These are SATA power and USB on one and PWM as well as ARGB control on the other. The pre-routed cables of the chassis are kept as clean as possible using plastic trenches that run down either side of the motherboard. The plastic on them flexes a bit, so one should not really pull the seven Velcro strips super tight when a lot of wires are bunched up. While the trenches are a nice touch, one may subjectively prefer to just use the stronger metal of the motherboard tray instead. Beside the Velcro ties and trenches, you won't find a lot of extra hooks to secure cables to, as such, the MEG Prospect 700R dictates how you should do your cable management for the most part.
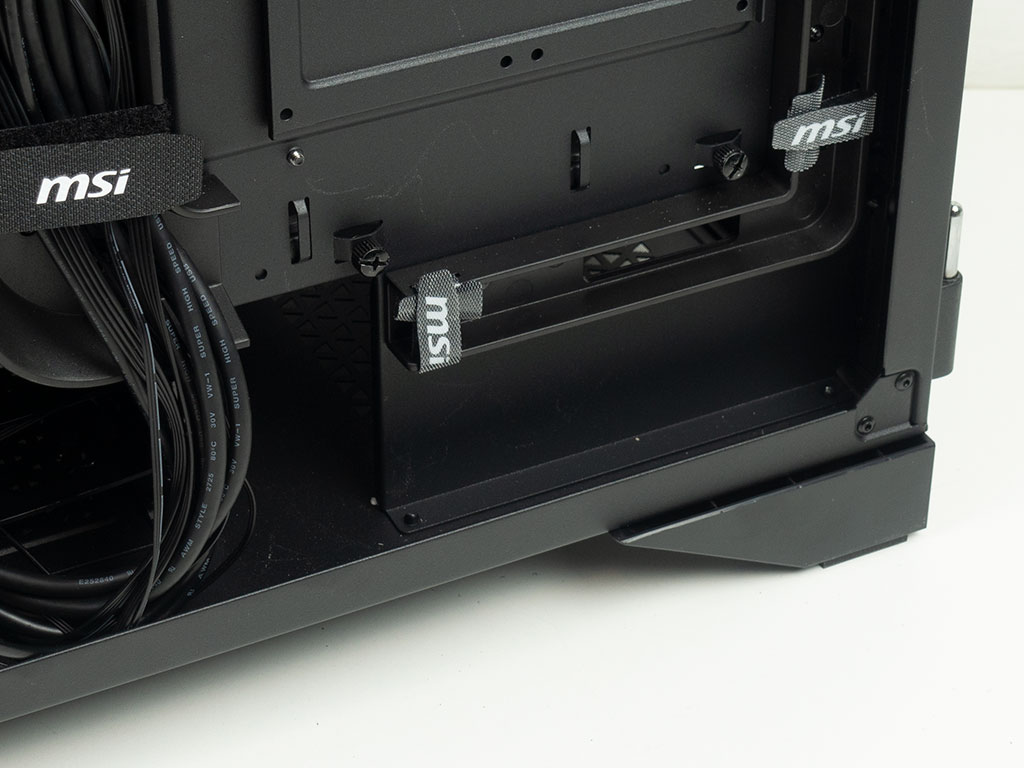

Interestingly enough, to accommodate the bottom element of the cable trench, MSI has extended the motherboard tray to the bottom of the chassis at the back, which will hide your PSU and limit your access to it once installed. This aspect could have been designed slightly better to allow for less structural surface area and a wider opening for you to reach in and grab any power supply wiring. This may also be the reason the metal part of the PSU shroud is removable, as that gives you the possibility for unobstructed wiring access, even if removing the shroud itself is a bit of work as well - especially with a fully built system. Above that, there are the seven expansion slots with thumbscrews holding each cover in place as well as that 140 mm exhaust fan in the rear. Thanks to the width and height of the chassis, you will have plenty of space even with thick vertical GPUs or a ceiling mounted liquid cooling component.
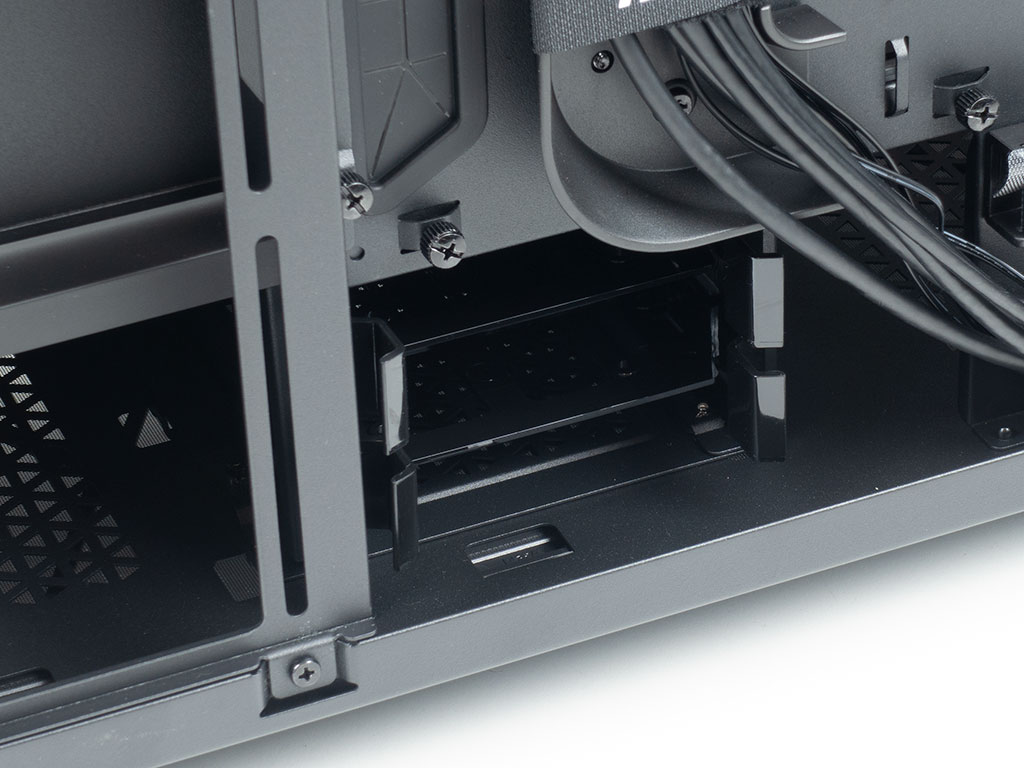
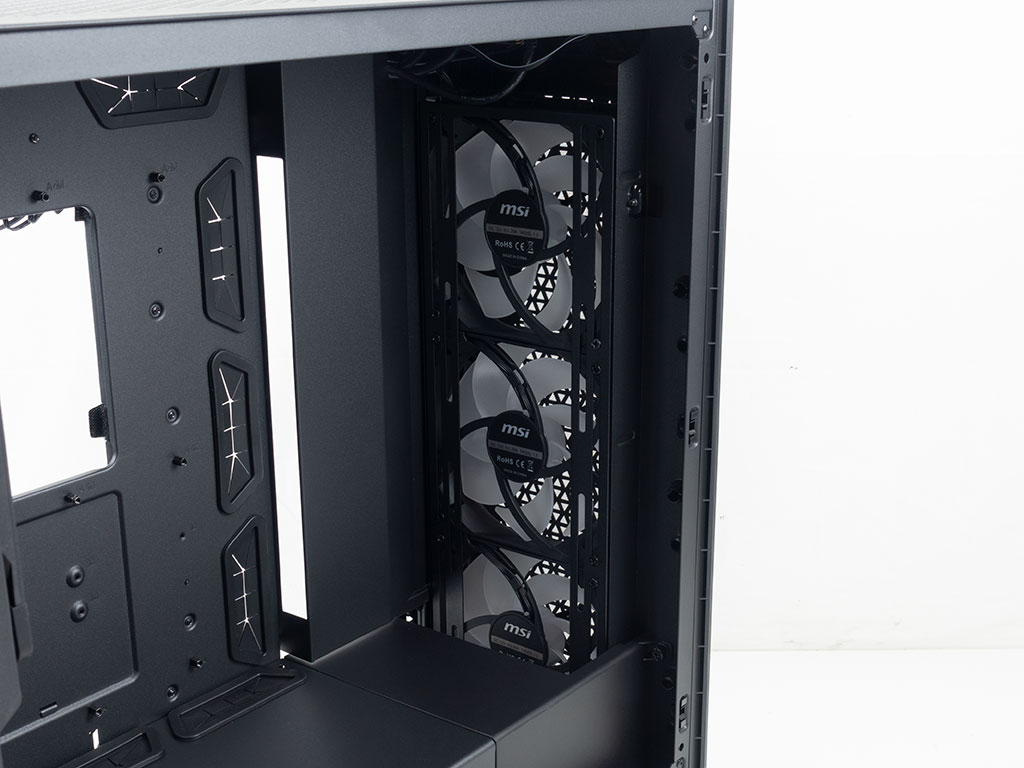
Towards the front, there isn't anything at the bottom of the chassis underneath the plastic shroud. This area is dedicated for any potential cooling. The hard drive cage sits fairly central at the floor of the MSI MEG Prospect 700R and cannot be moved. It provides room for two 2.5 or 3.5" drives, which brings the total storage expansion slots to four. While this is sufficient, MSI could have potentially used the additional plates that can be placed at the side towards the front of the chassis to allow for more storage. Also, if you look loosely at the gap to the right of the hard drive cage, it becomes apparent how tight it is. Accordingly, for everything past the initial assembly, you will end up forced to pull off the PSU shroud to add more wiring. Above that, the three 140 mm intake fans seem to provide enough for even a 420 mm radiator, but MSI only advertises a max size of 360 here, so take that assumption with a grain of salt.
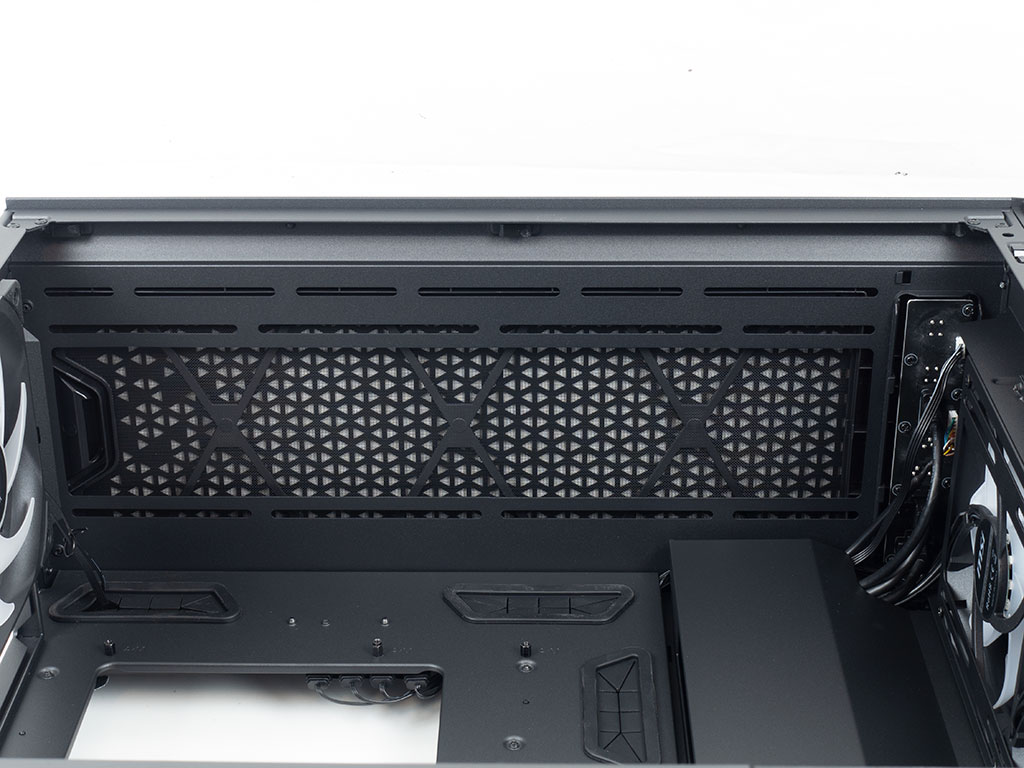
Looking at the ceiling, you an clearly see the fine mesh filter with its X-shaped support structure. There are two grommet covered openings and the mounting holes for the fans or radiator are offset if you consider the 140 mm ones, so there is a bit of space allowing you to route wiring even after all those components are in place.

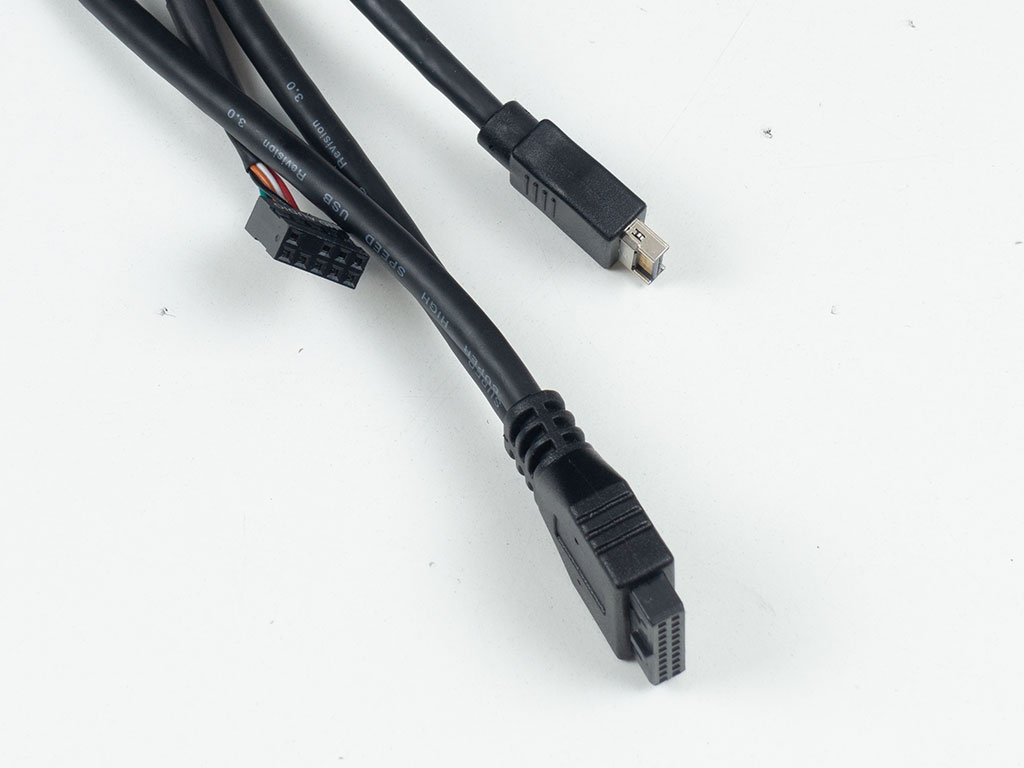
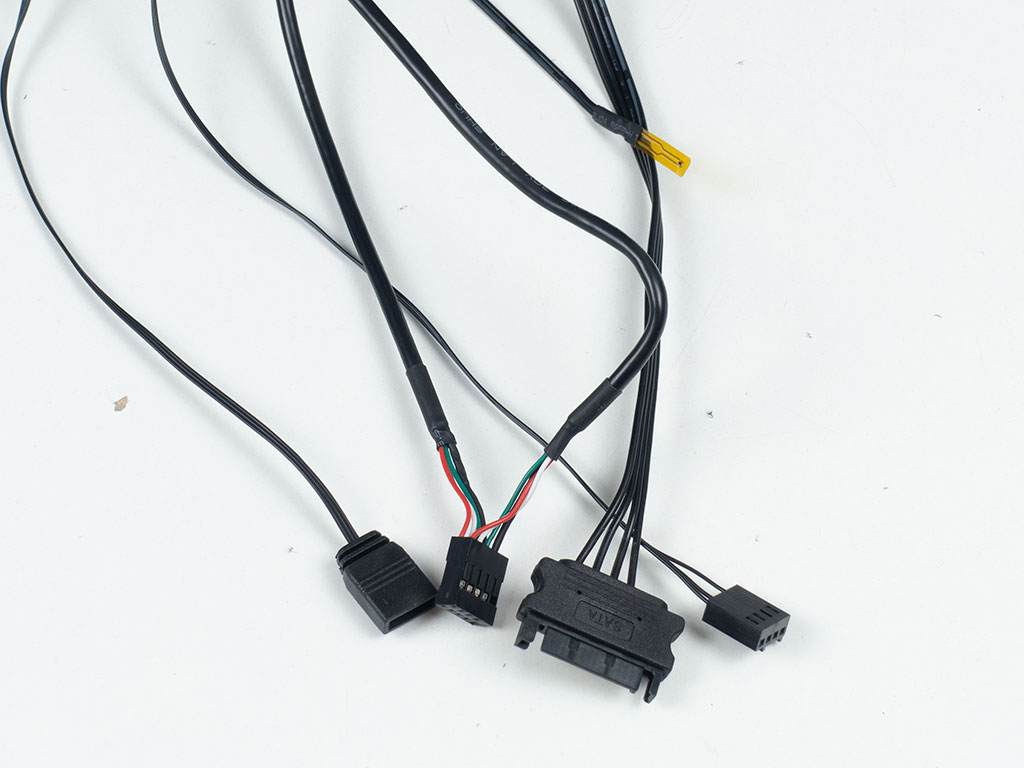
All the wiring with the MEG Prospect 700R is of the default variety when it comes to IO and case leads. The LCD and PCB combination utilizes USB 2.0, which splits into two leads going to each unit separately. On top of that you will find the aforementioned PWM and ARGB motherboard leads as well as its SATA power plug. The whole setup also includes a single temperature diode, so that you can place it wherever you like. While the initial thought is that it would be ideal to have more than one, those who want to keep an eye on their CPU and GPU temperatures can do by installing the MSI Center software to display it on screen.
Before diving into the assembly experience with the chassis, there are the two covers that you may place next to the motherboard tray. The simpler of the two is a completely solid panel to block the air flow from this side of the enclosure, which makes sense if you want a focused air flow from the front to rear of the MEG Prospect 700R. It would have been really cool, if this plate had the possibility to screw on a few extra hard drives with their connectors pointing toward the rear of the chassis, just to make proper use of all that extra mounting space. Those opting for an E-ATX board need to install the expansion plate and move the grommets over to it. It does take a little extra work to route the IO wiring through the opening at the top as well. With this layout, you get the extra mounting points for those full-width E-ATX motherboards while retaining all the same cable management, which is a nice touch.
Mar 10th, 2025 15:02 EDT
change timezone
Latest GPU Drivers
New Forum Posts
- Company of Heroes 3 (1)
- What are you playing? (23131)
- I'm looking for a good tool to make the 3D scanning of my mini-pc using the photogrammetry and my Kinect 2. (49)
- AMD RX 9070 XT & RX 9070 non-XT thread (OC, undervolt, benchmarks, ...) (4)
- What's your latest tech purchase? (23272)
- Cryptocoin Value and Market Trend Discussion (1645)
- FlashMyBoard - Automated BIOS Update Tracking & Notification System (11)
- Nvidia's GPU market share hits 90% in Q4 2024 (gets closer to full monopoly) (772)
- I have latency batch file need some help with please (2)
- BIOS request 10DE:25A2 1043:13DC (9)
Popular Reviews
- Sapphire Radeon RX 9070 XT Nitro+ Review - Beating NVIDIA
- XFX Radeon RX 9070 XT Mercury OC Magnetic Air Review
- ASUS Radeon RX 9070 TUF OC Review
- MSI MAG B850 Tomahawk Max Wi-Fi Review
- NVIDIA GeForce RTX 5080 Founders Edition Review
- NVIDIA GeForce RTX 5070 Founders Edition Review
- Corsair Vengeance RGB CUDIMM DDR5-8800 48 GB CL42 Review
- AMD Ryzen 7 9800X3D Review - The Best Gaming Processor
- ASUS GeForce RTX 5070 Ti TUF OC Review
- MSI GeForce RTX 5070 Ti Gaming Trio OC+ Review
Controversial News Posts
- NVIDIA GeForce RTX 50 Cards Spotted with Missing ROPs, NVIDIA Confirms the Issue, Multiple Vendors Affected (513)
- AMD Plans Aggressive Price Competition with Radeon RX 9000 Series (277)
- AMD Radeon RX 9070 and 9070 XT Listed On Amazon - One Buyer Snags a Unit (261)
- AMD RDNA 4 and Radeon RX 9070 Series Unveiled: $549 & $599 (260)
- AMD Mentions Sub-$700 Pricing for Radeon RX 9070 GPU Series, Looks Like NV Minus $50 Again (248)
- NVIDIA Investigates GeForce RTX 50 Series "Blackwell" Black Screen and BSOD Issues (244)
- AMD Radeon RX 9070 and 9070 XT Official Performance Metrics Leaked, +42% 4K Performance Over Radeon RX 7900 GRE (195)
- AMD Radeon RX 9070-series Pricing Leaks Courtesy of MicroCenter (158)