 4
4
NETGEAR Nighthawk Pro Gaming XR500 Router Review
Disassembly »Closer Look
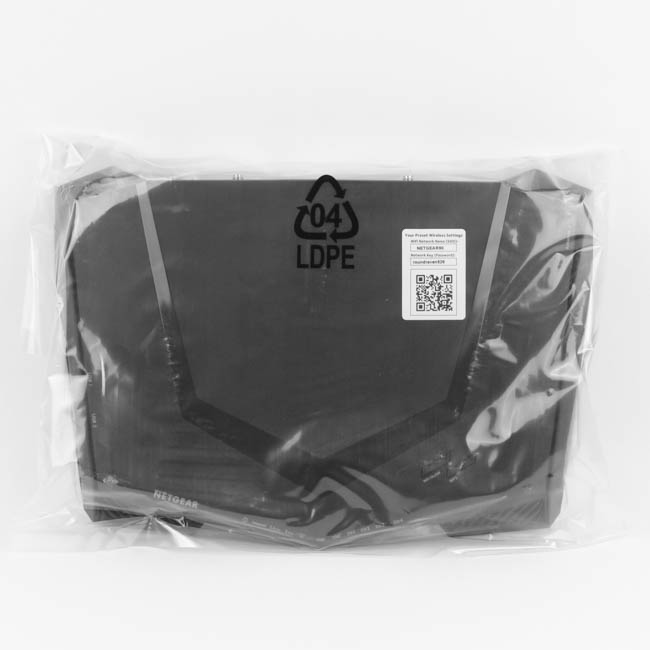
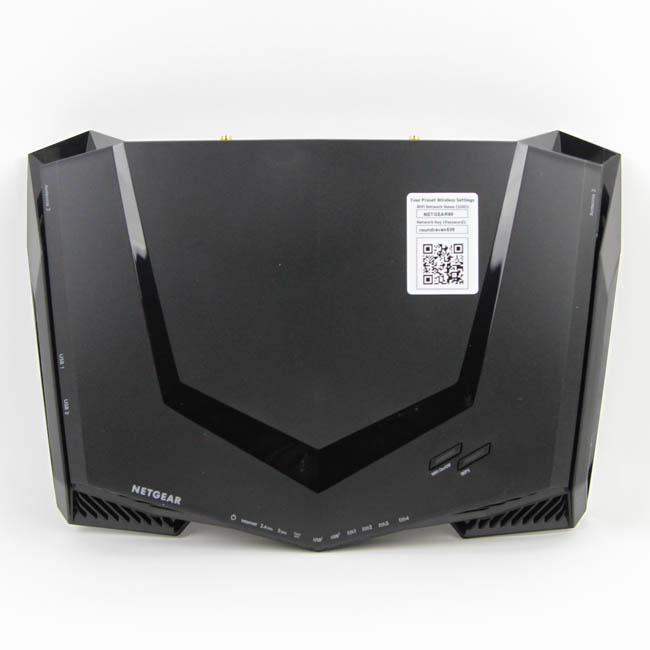
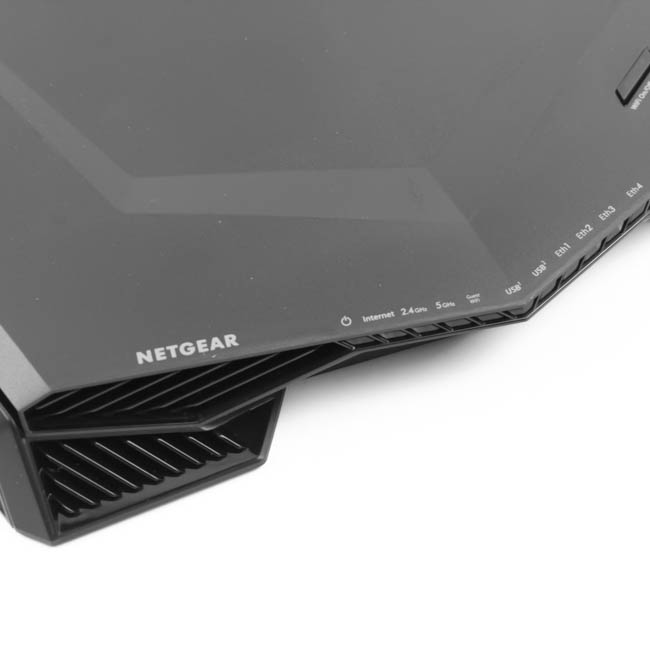
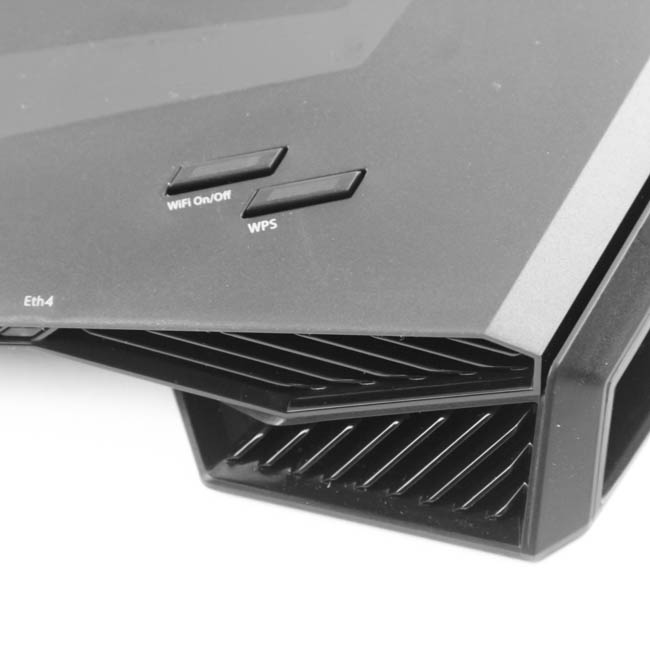
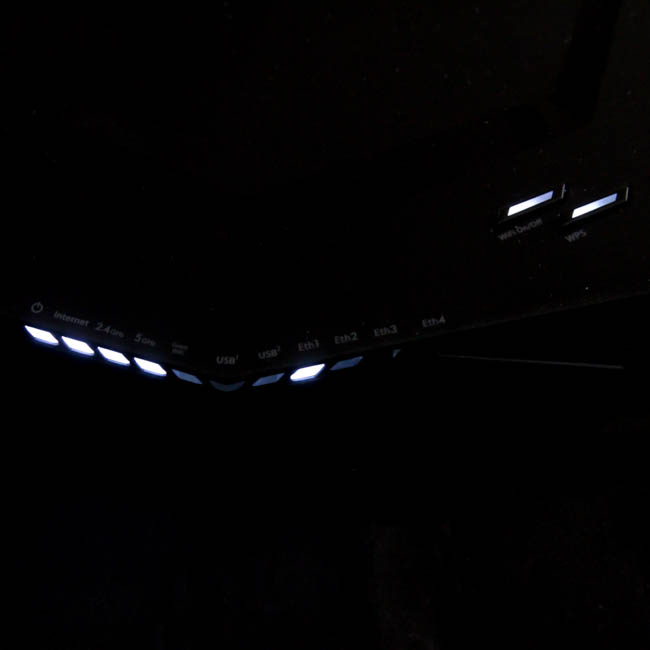
As we saw before, the Nighthawk XR500 router comes wrapped in plastic, which keeps it pristine and free of dust out of the box. This is appreciated all the more once you see that the router has a long line of piano-gloss black on top, which is a dust magnet. Thankfully, it is just as easy to wipe off, and the vast majority of the exposed surface has a matte black plastic finish. From the top, we see the NETGEAR logo on the bottom left, next to which are labels for the various indicator LEDs we saw before. There are two buttons on the bottom right you can use to turn Wi-Fi on/off for when you simply want to use this as a switch, and also use WPS to quickly connect a compatible device to the configured Wi-Fi network. On the front, at each corner, appear to be heatsink fins, but they are not. Indeed, they are cutouts in the two-piece plastic case that are mostly for aesthetics, though these do enable passive inward airflow that moves out the back. There is also a sticker on top with the factory login credentials that can easily be peeled off when no longer needed.
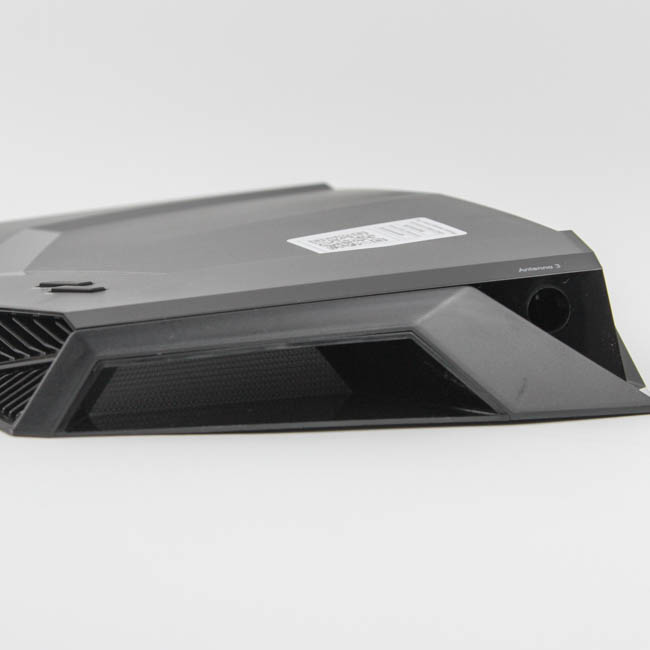
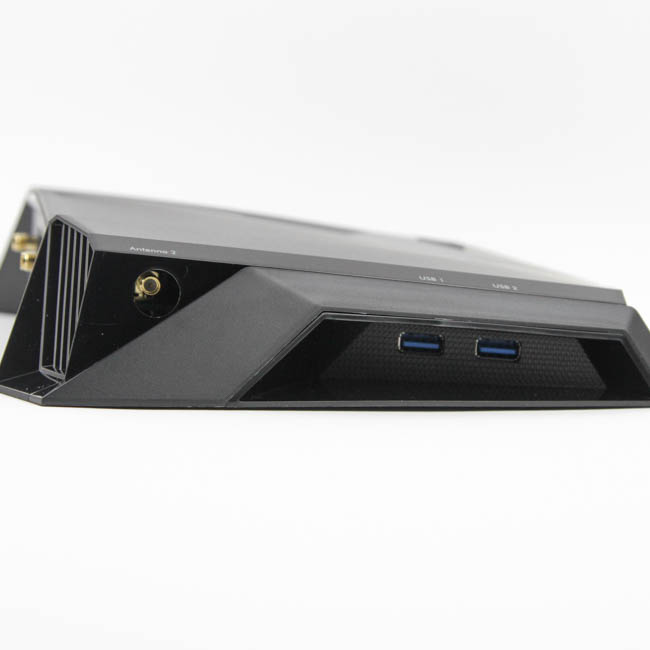
Taking a look from the side, we see more of the glossy plastic, but underneath a terrace of the matte plastic cover. On one side is an opening for an antenna, marked "Antenna 3", with the other side having a similar threaded opening for antenna 2 along with two USB 3.1 Gen 1 (USB 3.0) ports. These USB ports have NETGEAR's ReadyShare support that allows wireless access to printers and storage alike.
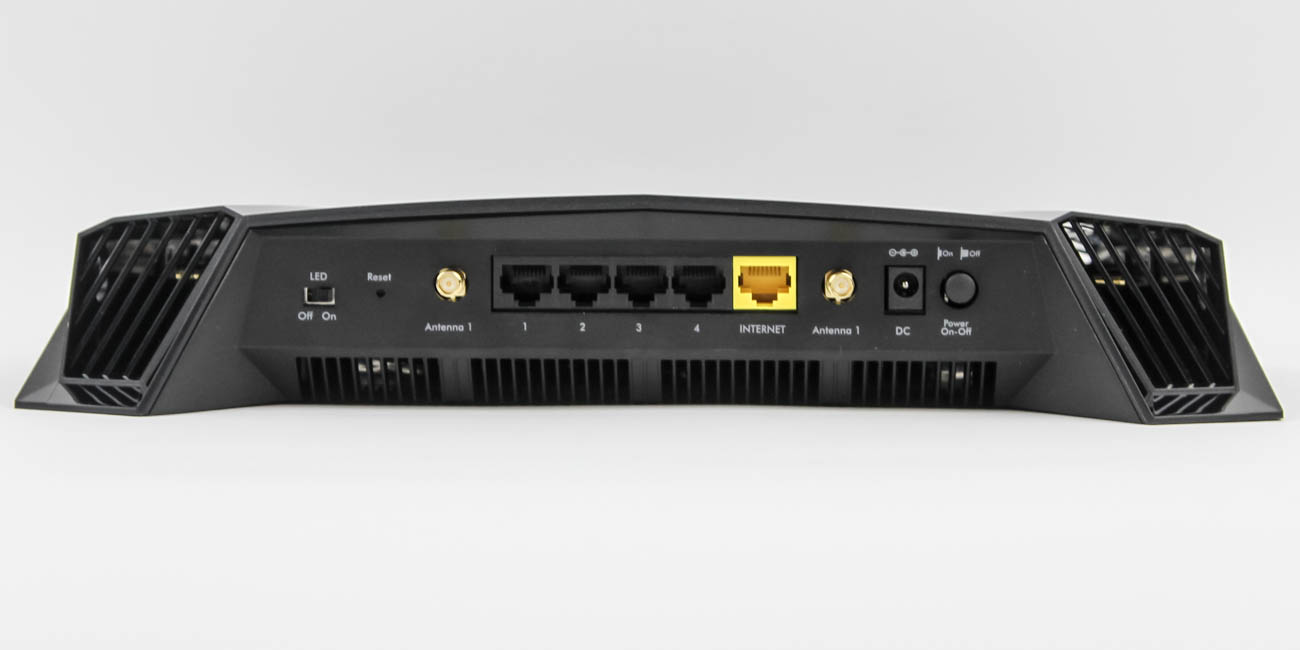
On the back is where most of the action is, and this includes a dedicated button to toggle the LEDs on the front—thanks for allowing this, NETGEAR! A reset pinhole is next to it, as seen traveling from left to right, followed by four Gigabit LAN ports and a WAN port that connects to your modem. The last two antennas, marked Antenna 1, screw in on either side of these Ethernet ports, and the section is rounded off via the power input and a dedicated power toggle for the router. Notice that there are more openings here too, and once again, these will aid with passive airflow at best as there is no fan inside.
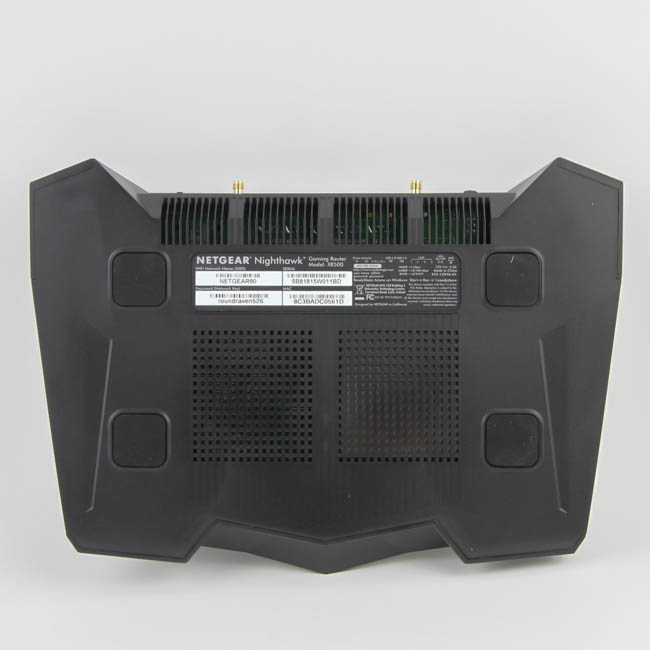
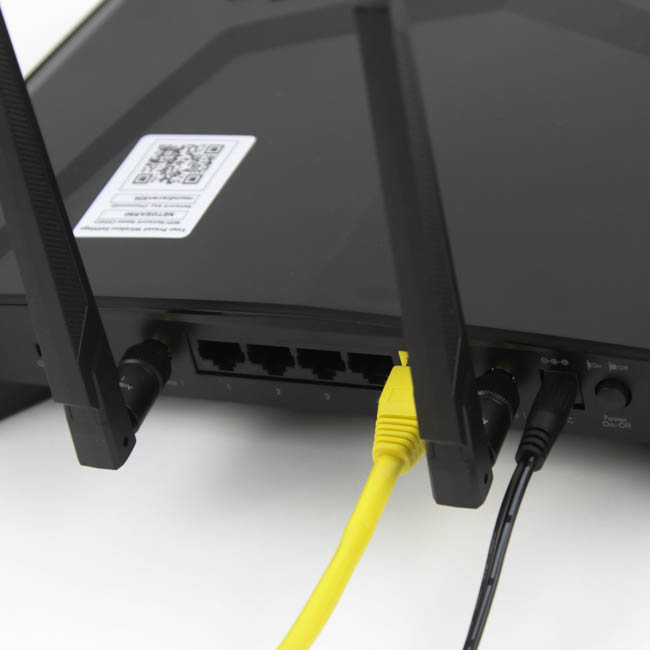
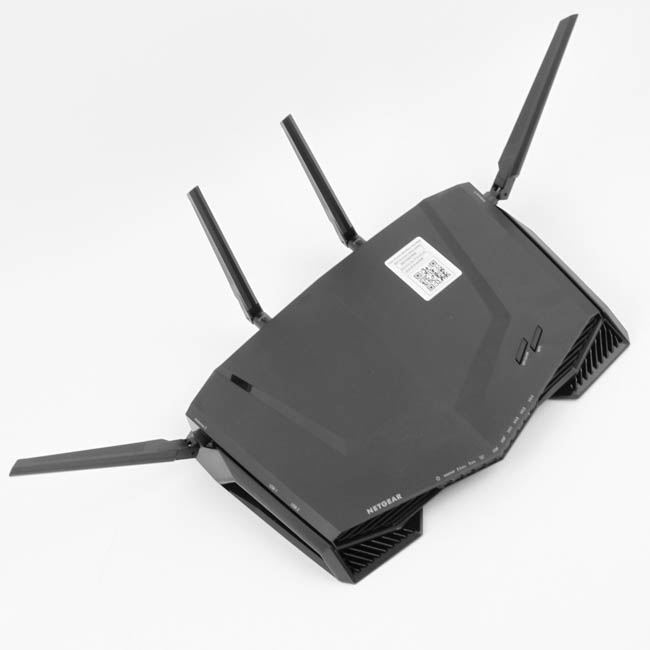
On the underside are more openings, including two large ones directly where core components are located. A certification sticker is found here, which also contains the factory login information just in case you missed it from before. There are four large rubber pads to help raise the router off the surface it is placed on, and these also prevent it from sliding off said surface. The final two pictures above show the minimum number of cables connected to the router, along with how NETGEAR recommends all four antennas be screwed in and configured for optimal Wi-Fi coverage from the Nighthawk XR500. Feel free to move the antennas around depending on where it is placed relative to your connected devices.
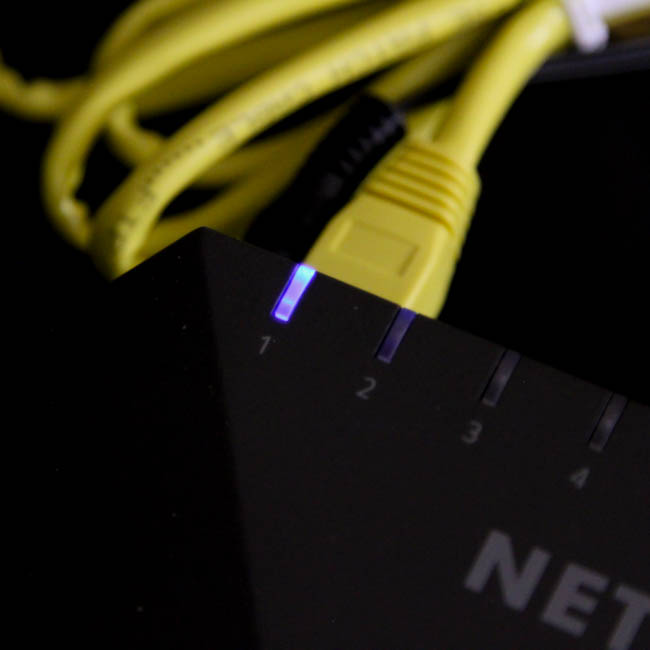
Here is a look at the router with the bare minimum in wiring (power and WAN cable from the modem) connected. Note also the status indicator LEDs that are visually helpful in quickly determining which ports are connected and also whether Wi-Fi is working or not. As mentioned above, you can always turn off all the LEDs if this is distracting.
Mar 17th, 2025 09:40 EDT
change timezone
Latest GPU Drivers
New Forum Posts
- HP say: Oops, we did it again ! (22)
- AMD RX 9070 XT & RX 9070 non-XT thread (OC, undervolt, benchmarks, ...) (43)
- Is RX 9070 VRAM temperature regular value or hotspot? (3)
- how to update vga bios for my 5080? (5)
- What's your latest tech purchase? (23341)
- Fan speed locked high - EVGA 2060 sc (4)
- Microcenter GPU Stock status (37)
- UPLOAD BIOS PNY XLR8 RTX 4080 VERTO EPIC-X [Non-OC] and Flash BIOS OC Edition (3)
- PCI 4.0 16x slot reported as a PCI 5.0 8x with the AMD 9070 XT Reaper GPU (34)
- Recommended PhysX card for 5xxx series? [Is vRAM relevant?] (189)
Popular Reviews
- AMD Ryzen 9 9950X3D Review - Great for Gaming and Productivity
- Sapphire Radeon RX 9070 XT Nitro+ Review - Beating NVIDIA
- ASUS GeForce RTX 5090 TUF Review
- MSI GeForce RTX 5070 Gaming Trio OC Review
- VAXEE Zygen NP-01S V2 Wireless Review
- Gigabyte X870E Aorus Pro Review
- XFX Radeon RX 9070 XT Mercury OC Magnetic Air Review
- Kioxia Exceria Plus G4 2 TB Review - Energy-Efficient PCIe Gen 5
- ASUS Radeon RX 9070 TUF OC Review
- Dough Spectrum Black 32 Review
Controversial News Posts
- NVIDIA GeForce RTX 50 Cards Spotted with Missing ROPs, NVIDIA Confirms the Issue, Multiple Vendors Affected (518)
- AMD RDNA 4 and Radeon RX 9070 Series Unveiled: $549 & $599 (260)
- AMD Mentions Sub-$700 Pricing for Radeon RX 9070 GPU Series, Looks Like NV Minus $50 Again (250)
- NVIDIA Investigates GeForce RTX 50 Series "Blackwell" Black Screen and BSOD Issues (244)
- AMD Radeon RX 9070 and 9070 XT Official Performance Metrics Leaked, +42% 4K Performance Over Radeon RX 7900 GRE (195)
- AMD Radeon RX 9070-series Pricing Leaks Courtesy of MicroCenter (158)
- AMD Radeon RX 9070 XT Reportedly Outperforms RTX 5080 Through Undervolting (118)
- Microsoft Introduces Copilot for Gaming (117)