 615
615
NVIDIA GeForce RTX 5080 Founders Edition Review
Circuit Board Analysis »Disassembly and Teardown
Taking the GeForce RTX 5080 Founders Edition apart is exactly the same process as on the RTX 5090. Now that I've done it several times it's much easier, also there is no liquid metal to worry about. For all the details, check out our RTX 5090 Teardown, this one will be a bit more straightforward with fewer photos.While NVIDIA did not try to make disassembly extra difficult, it's still a complex multistep process. Make sure you have the right tools, prefer plastic tools over metal tools where possible, to avoid scratching the PCB or components.
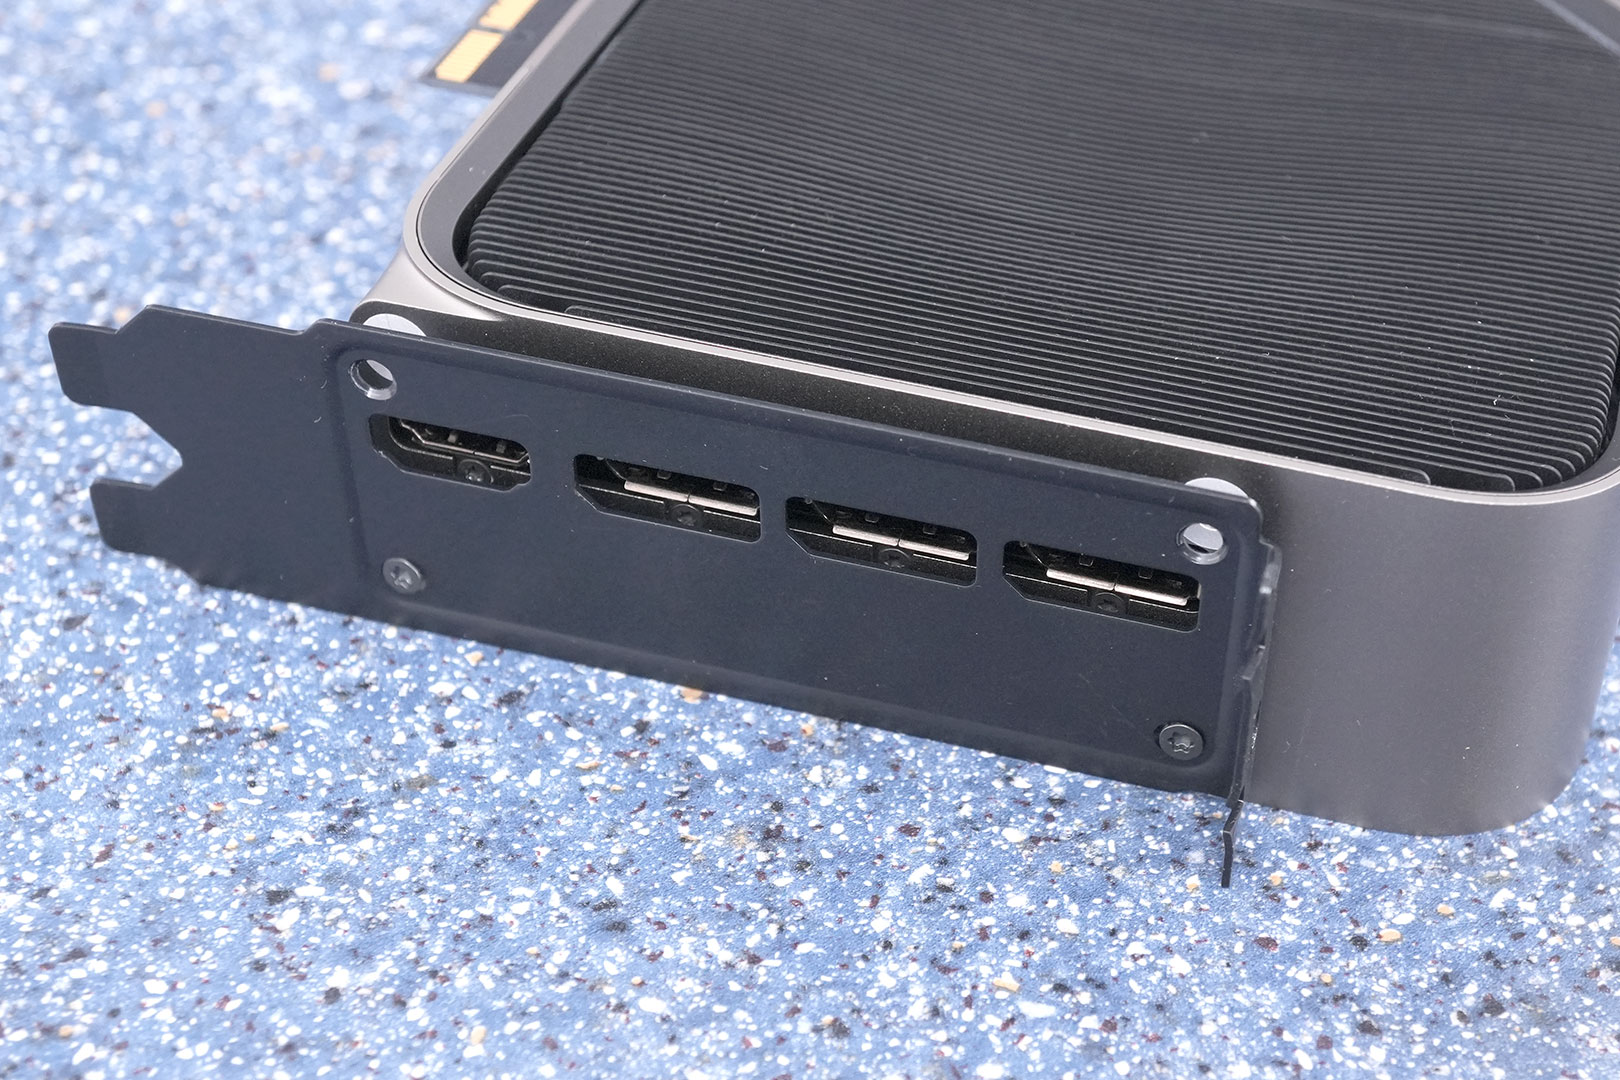
First, remove the four screws holding the slot cover in place.
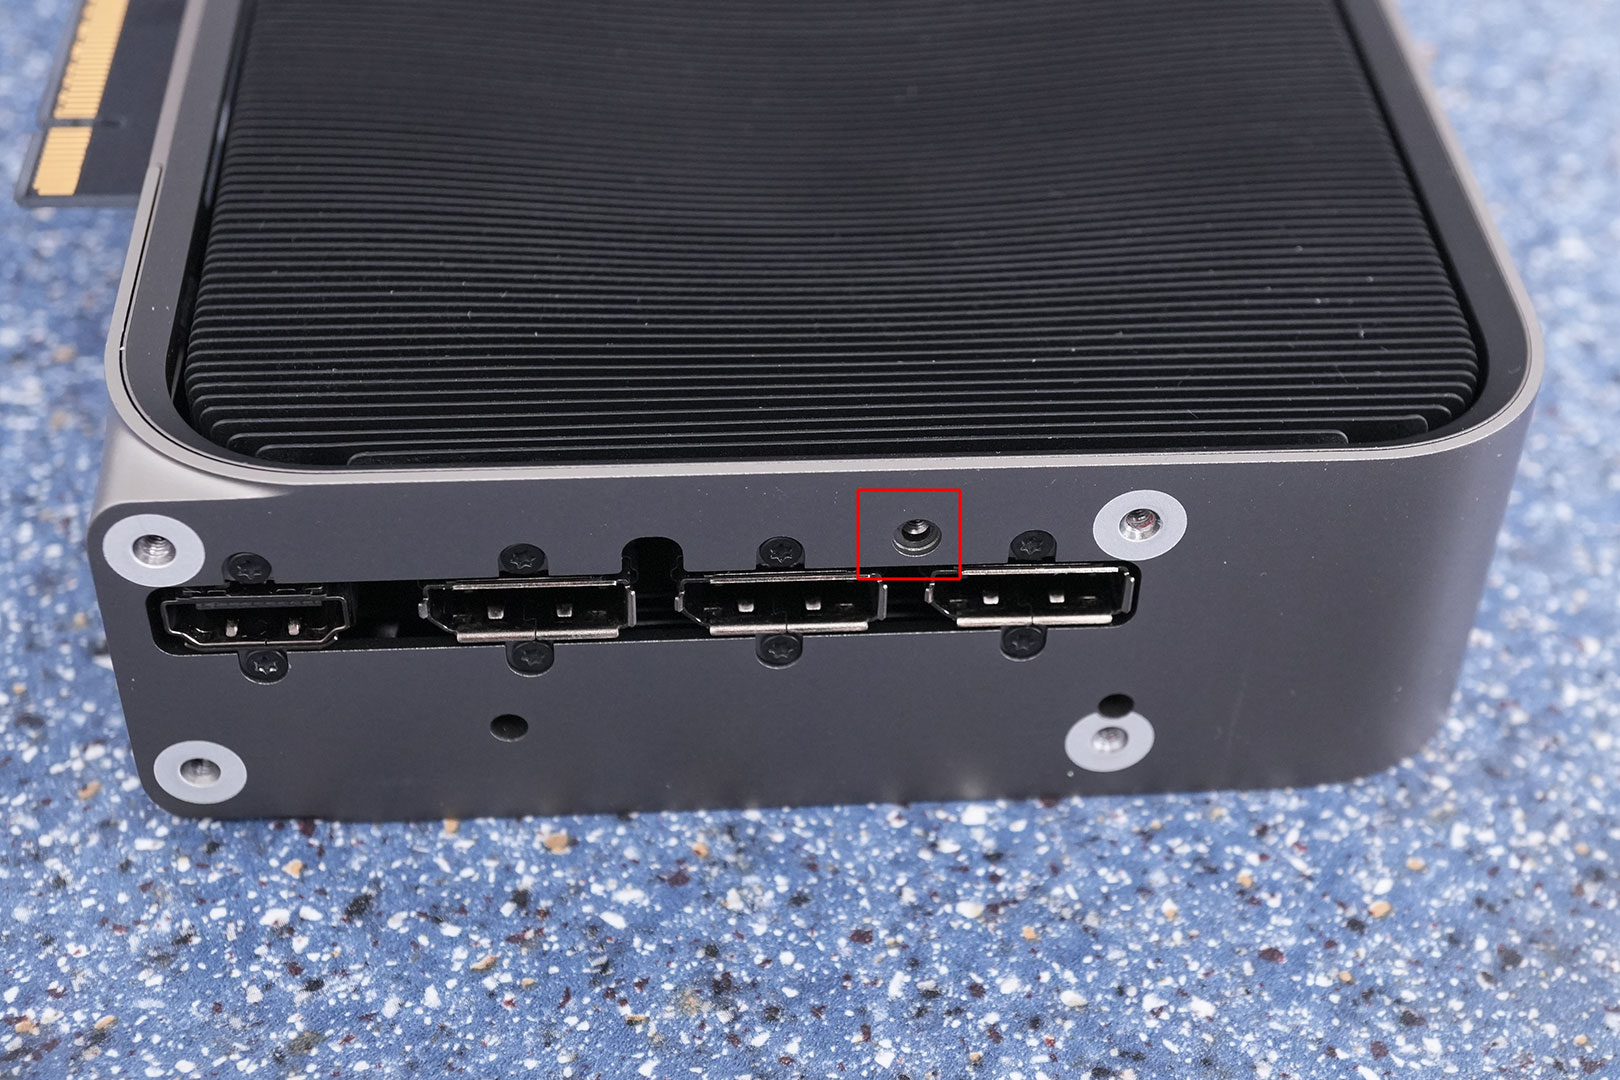
Now remove the screw marked in red. Just this one screw, the others can stay in.
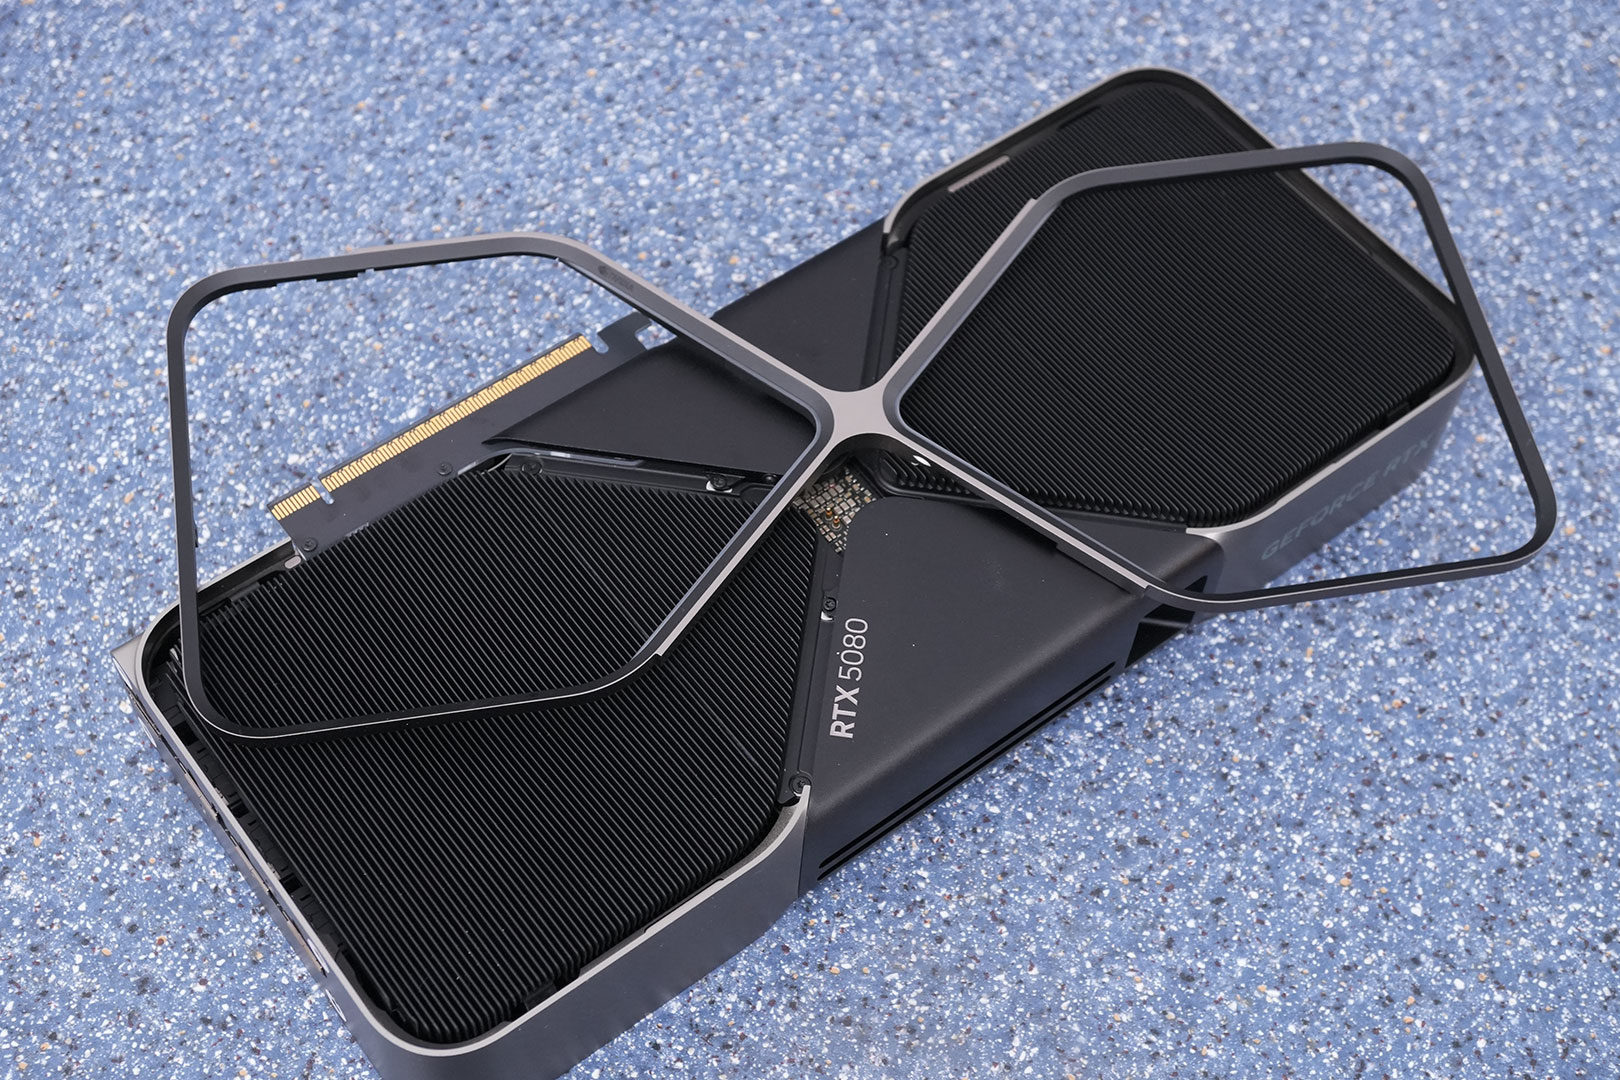
Gently lift the frame, starting from the PCIe slot, it's attached magnetically along the card.
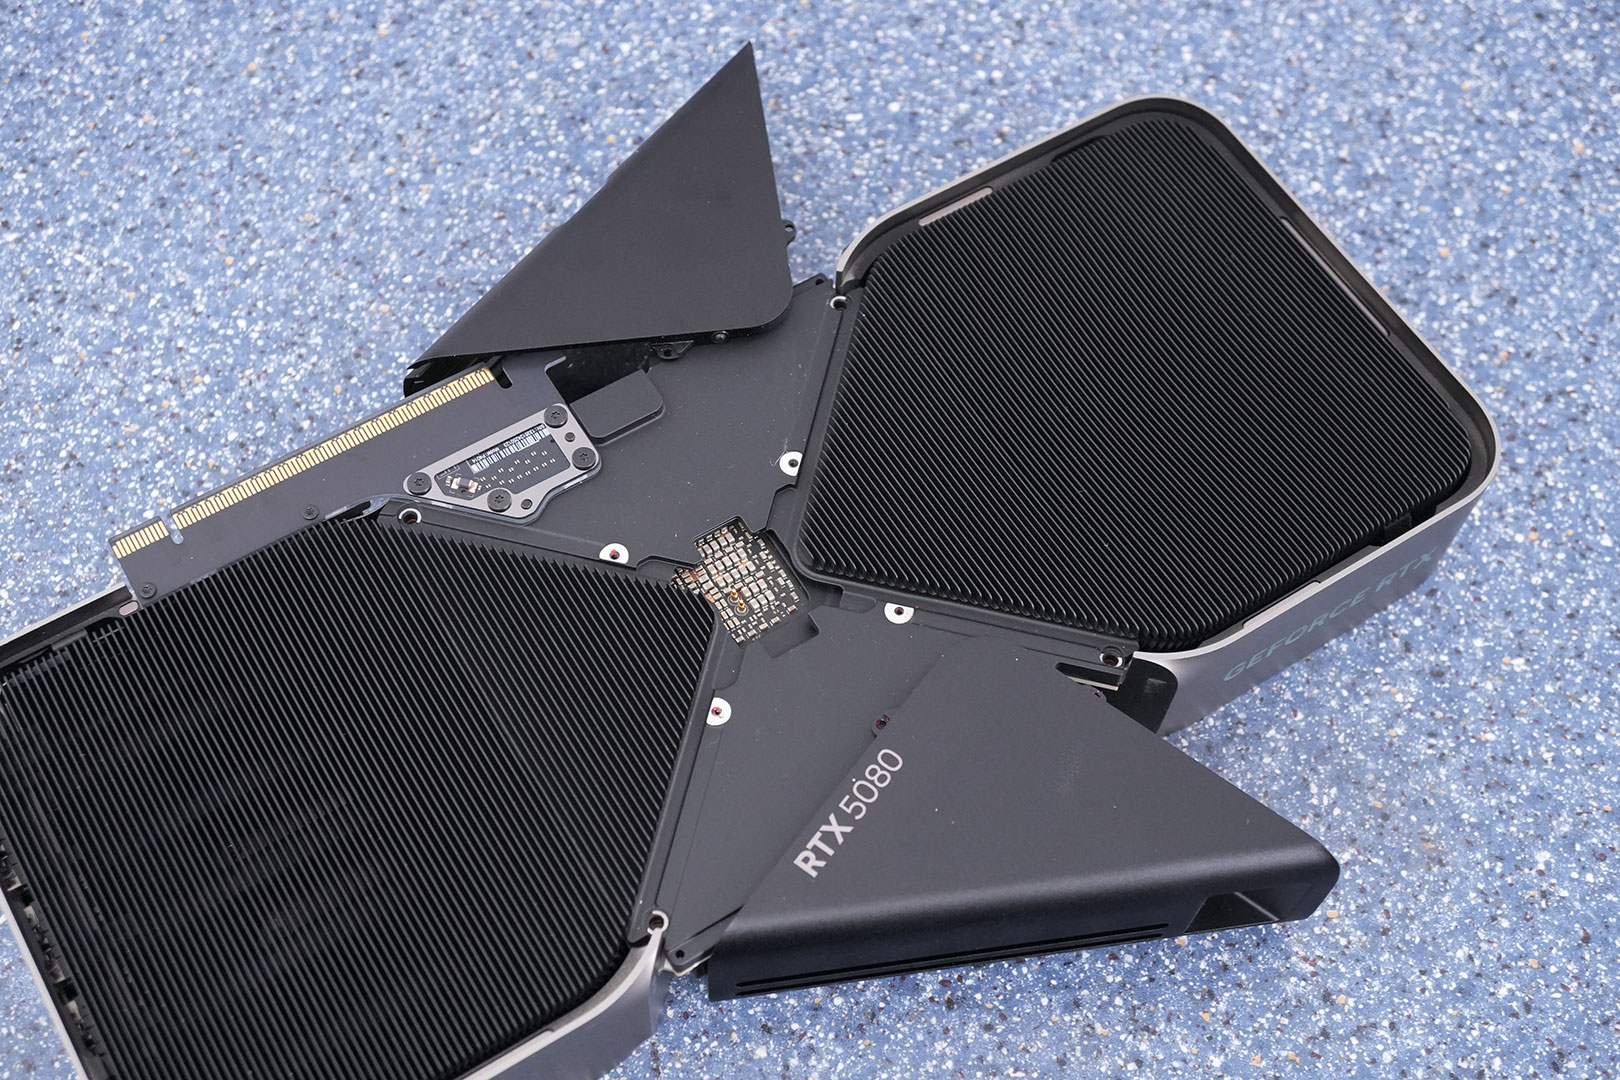
Slide the two triangle-shaped covers sideways—they have machined grooves to move in—no force required.
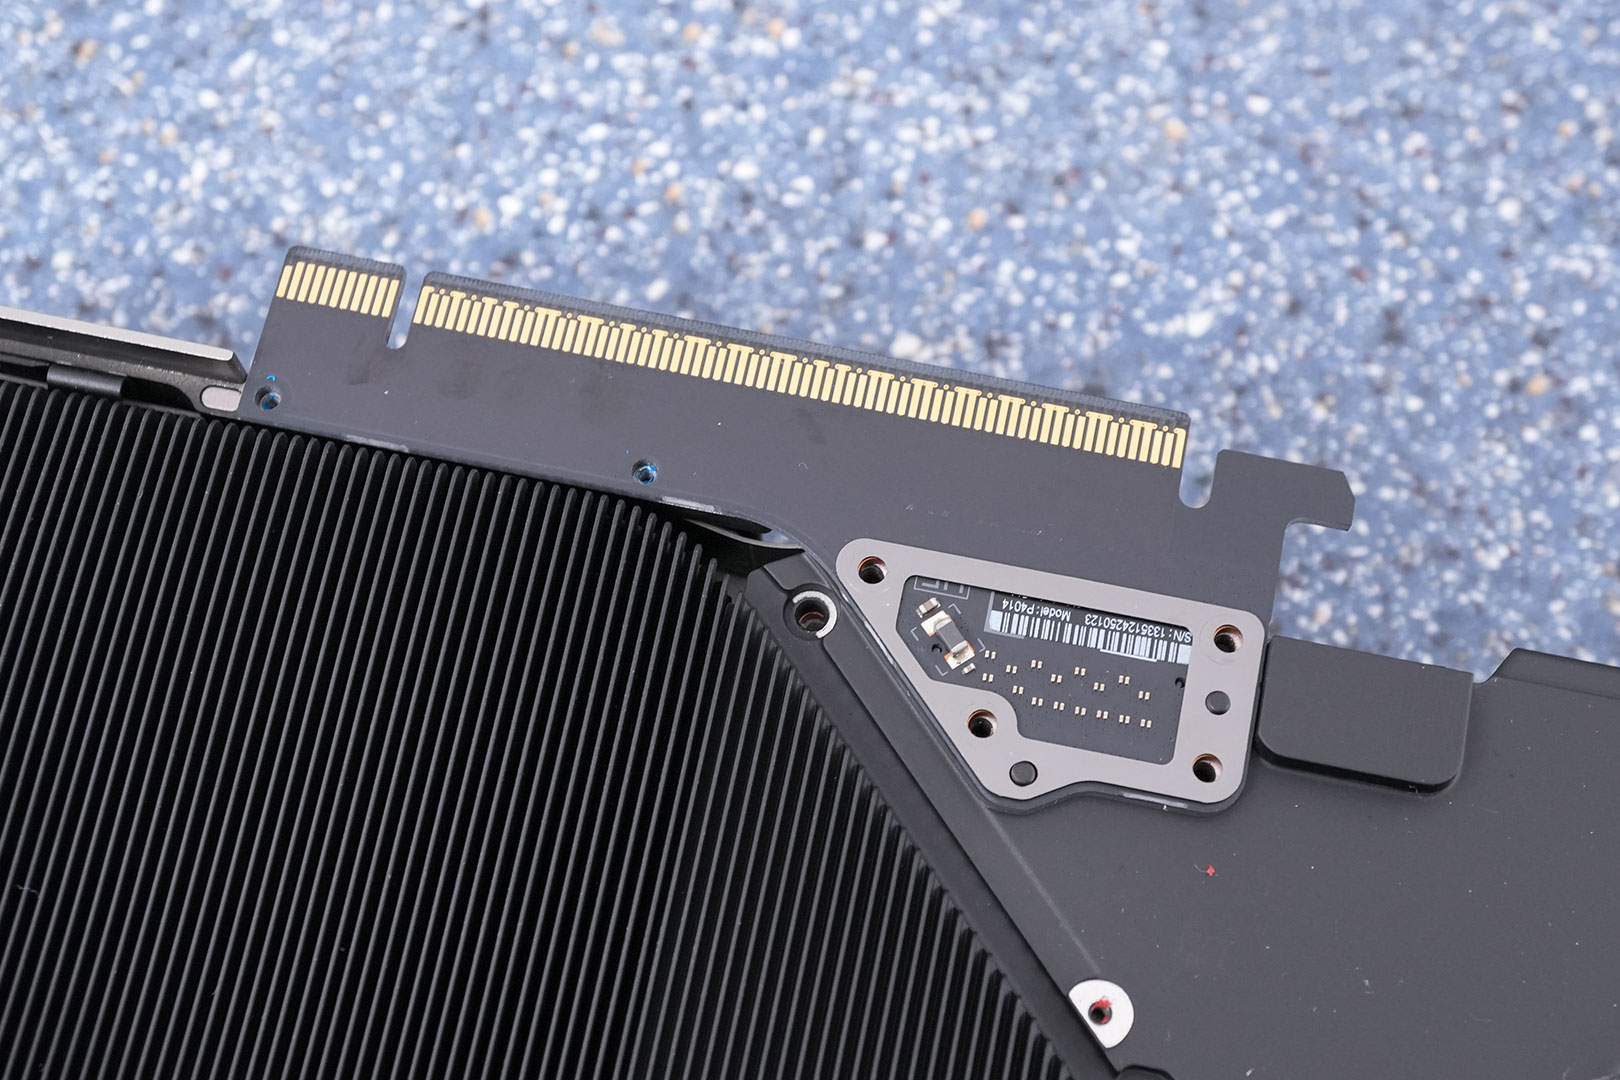
Remove the six screws holding the PCIe PCB in place and lift the PCB up.
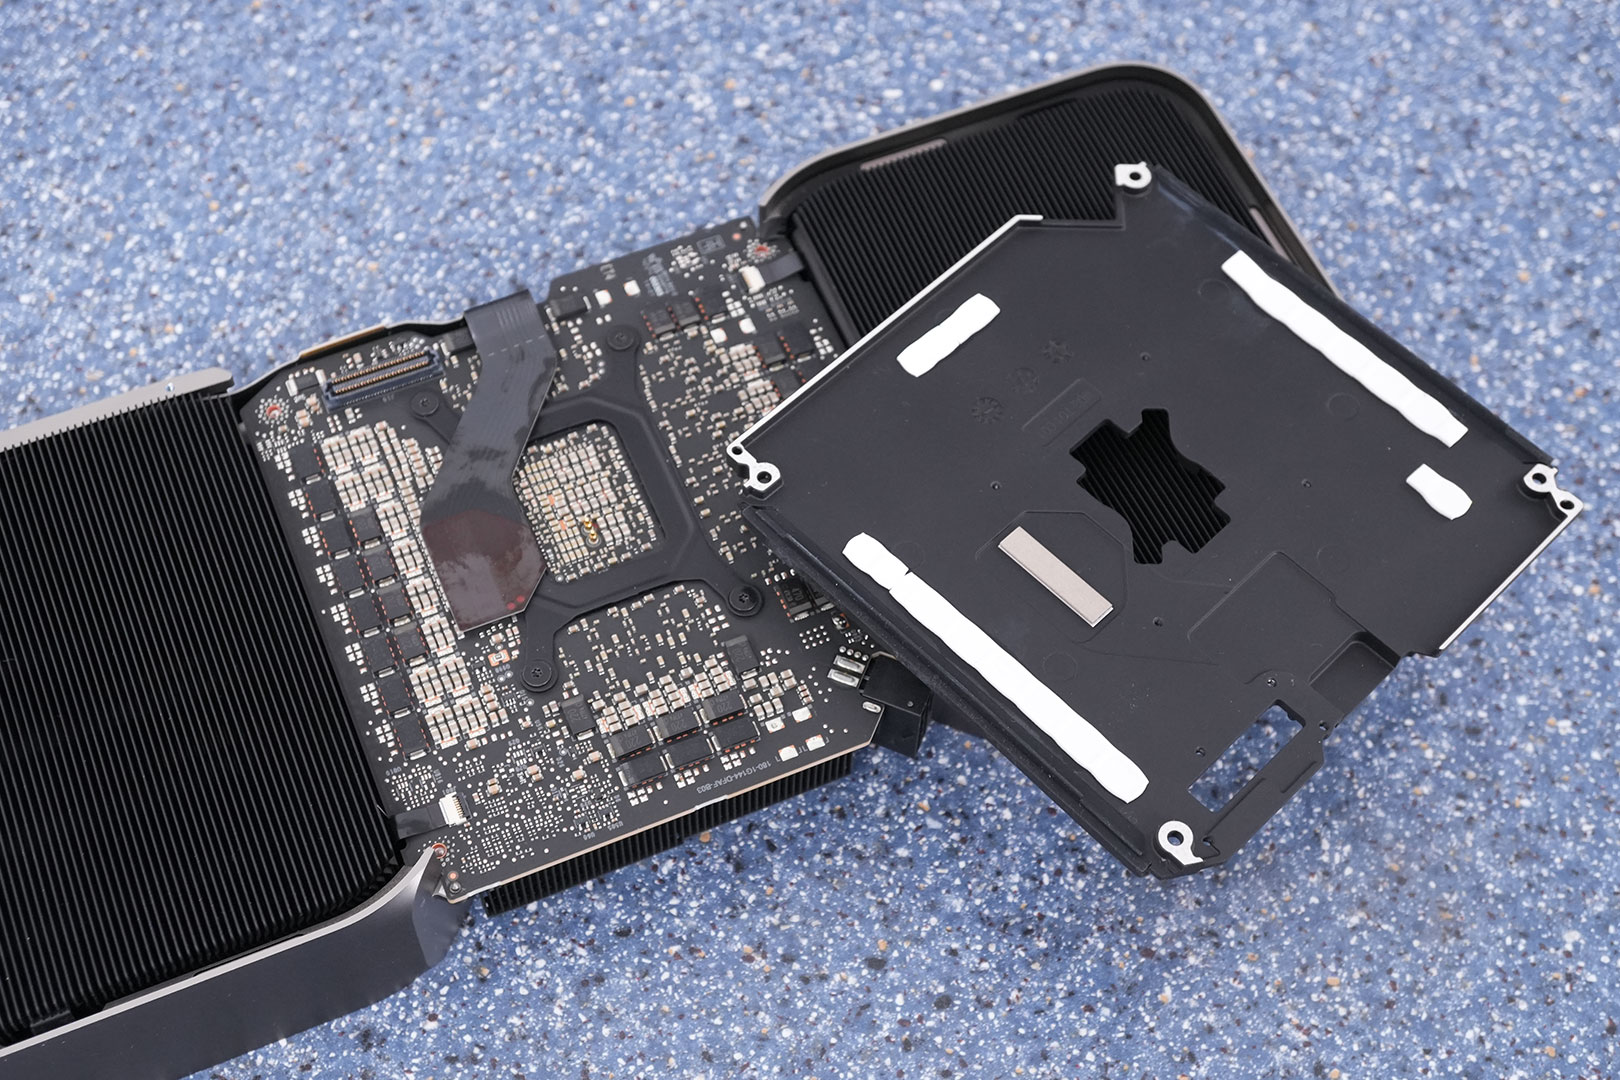
Now you can remove the "backplate."
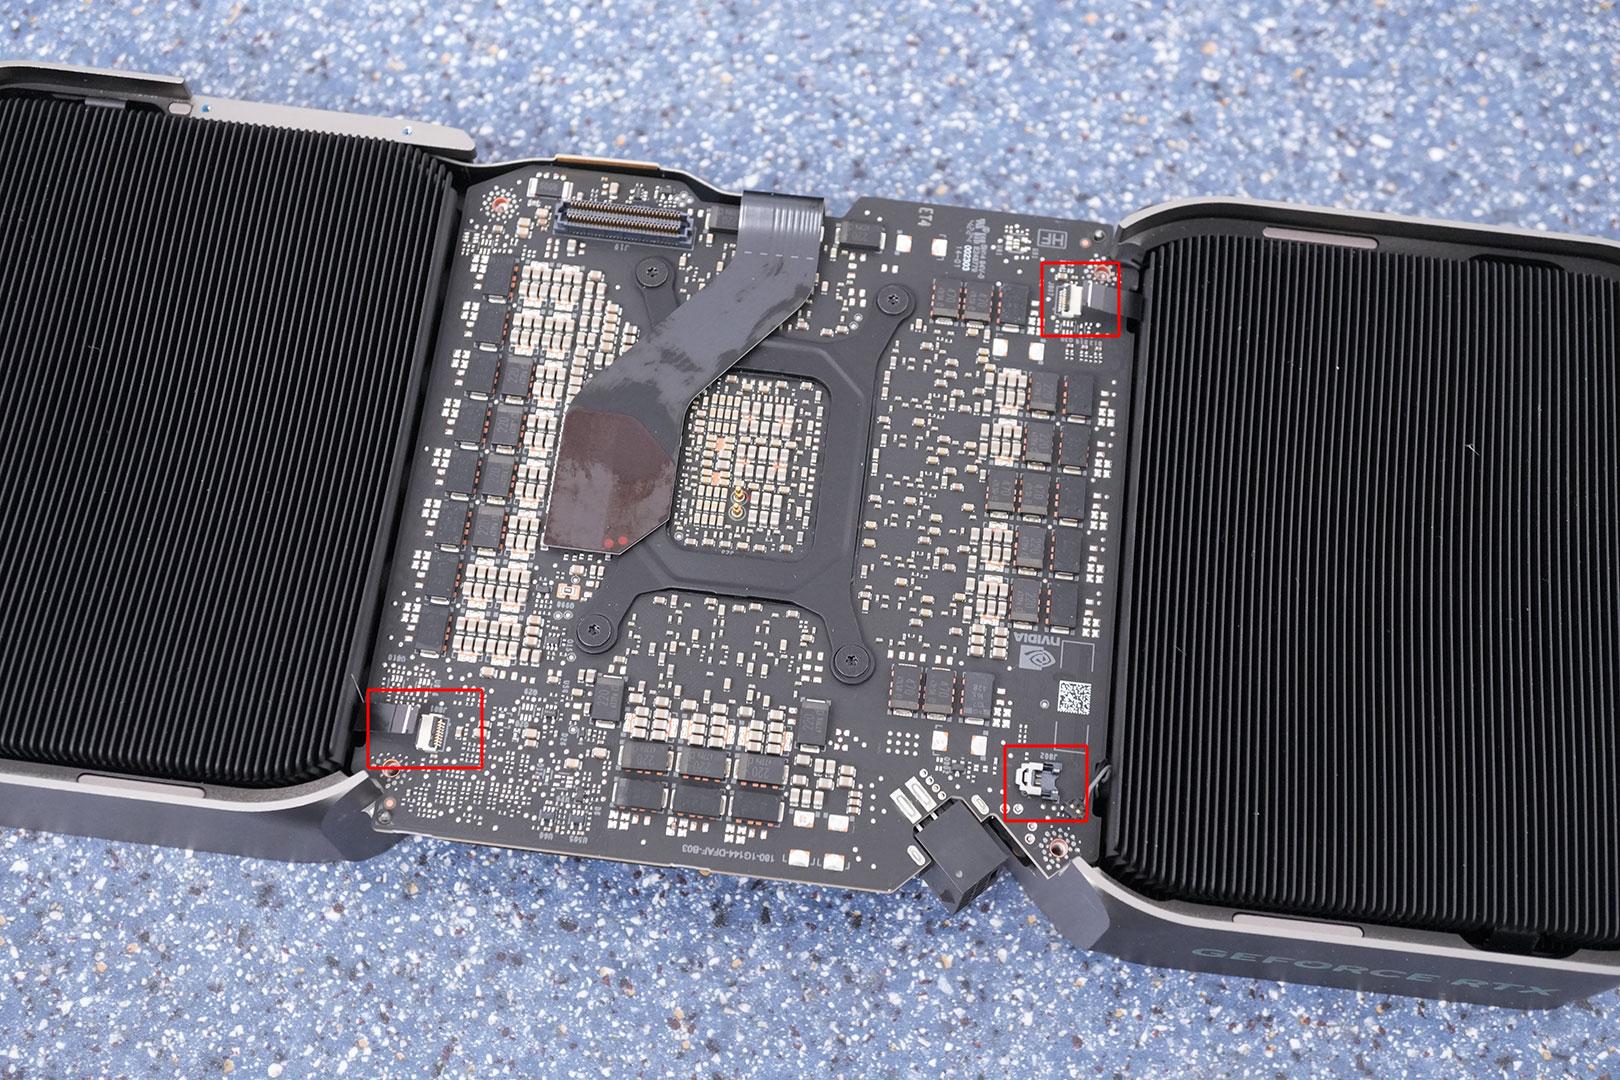
Remove these cables.
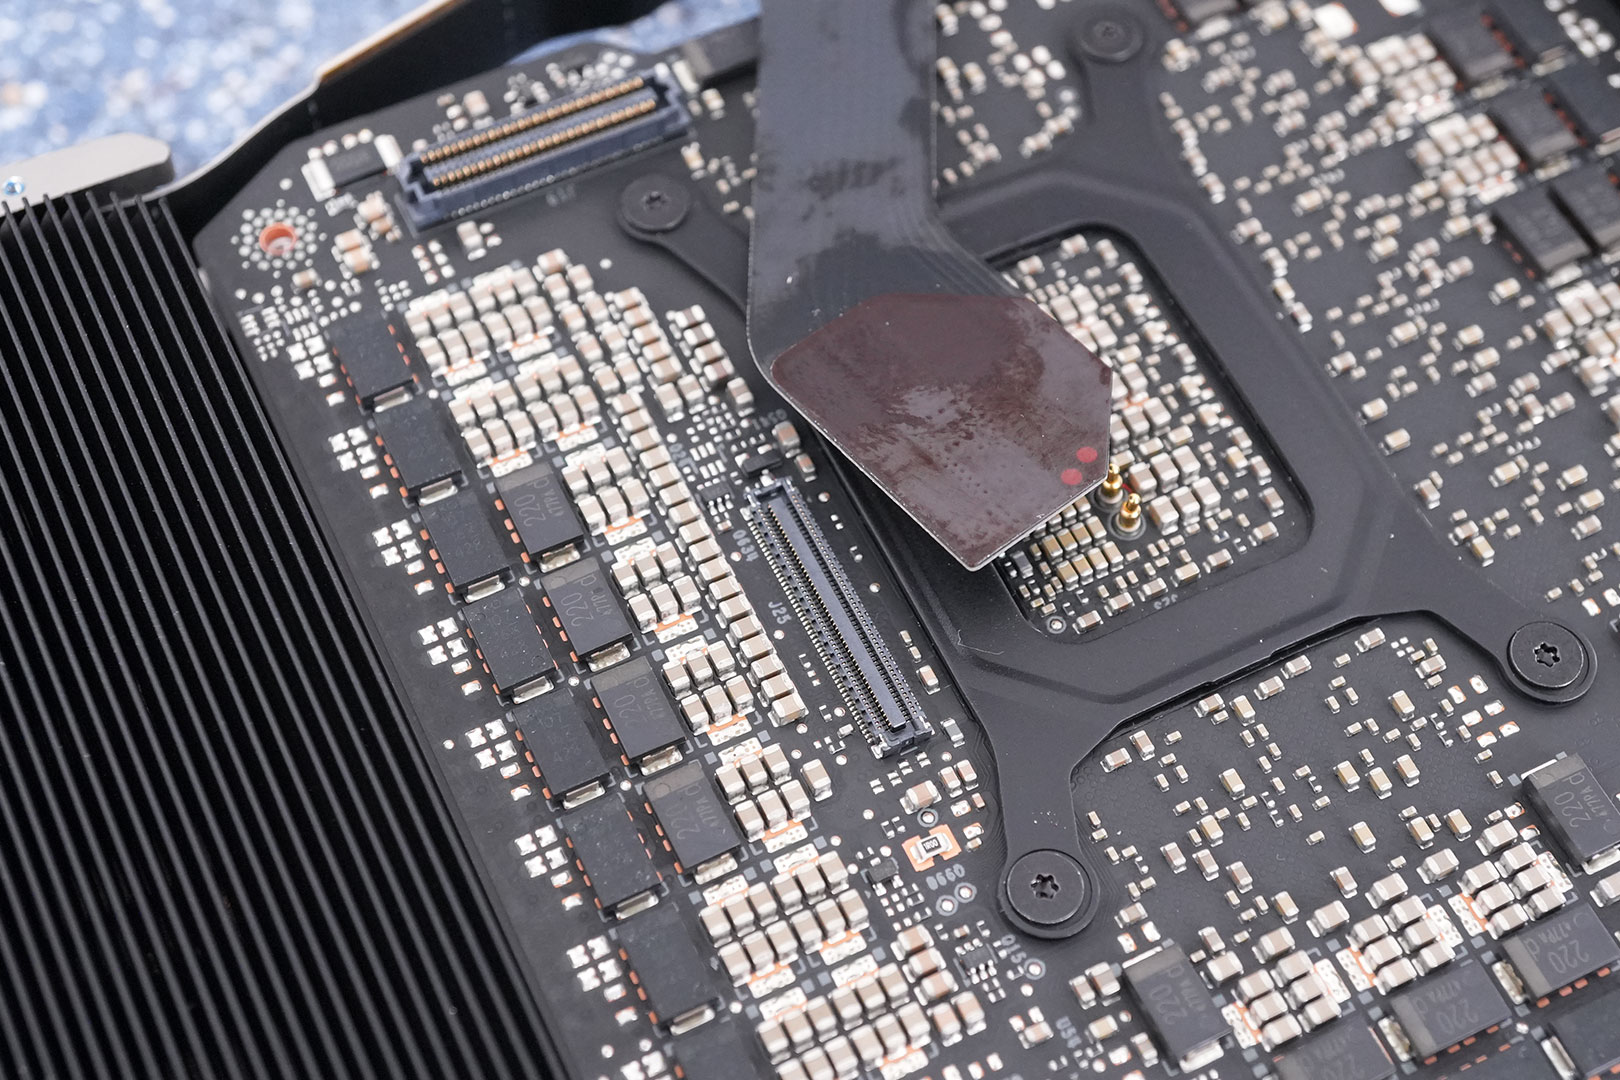
Remove the flat cable for the display IO. I used a plastic prying tool sitting on top of the metal GPU bracket, to avoid damaging any components on the PCB.

Now you can lift the PCB up. While I needed very little force on the RTX 5090, possibly due to the liquid metal providing very little suction force, on the RTX 5080 this was much more difficult because of the phase change thermal interface material, this performs slightly worse than traditional thermal paste, but offers much greater longevity. Wiggle, be patient, get the three small cables out of the way so they don't get damaged when the PCB suddenly goes (tape them to the black metal cooler)
May 5th, 2025 07:22 EDT
change timezone
Latest GPU Drivers
New Forum Posts
- Request for advice [Big Build] (56)
- Windows 12 (167)
- Forza Motorsport discussion thread (228)
- Vertical mice in gaming (15)
- Hundreds of WHEA-17 Hardware Errors per minute? (1)
- Can't find BIOS for RX580 2048SP (8)
- gigabyte rtx 3070 fans are either at 0 rpm or at max rpm (GV-N3070GAMING OC-8GD) (0)
- RX 9000 series GPU Owners Club (643)
- It's happening again, melting 12v high pwr connectors (1054)
- Are the 8 GB cards worth it? (862)
Popular Reviews
- ASUS ROG Maximus Z890 Hero Review
- ASUS Radeon RX 9070 XT TUF OC Review
- Clair Obscur: Expedition 33 Performance Benchmark Review - 33 GPUs Tested
- Montech HS02 PRO Review
- NVIDIA GeForce RTX 5060 Ti 8 GB Review - So Many Compromises
- Seasonic Vertex GX 850 W Review
- Upcoming Hardware Launches 2025 (Updated Apr 2025)
- ASUS GeForce RTX 5090 Astral Liquid OC Review - The Most Expensive GPU I've Ever Tested
- Sapphire Radeon RX 9070 XT Nitro+ Review - Beating NVIDIA
- AMD Ryzen 7 9800X3D Review - The Best Gaming Processor
Controversial News Posts
- AMD Radeon RX 9060 XT to Roll Out 8 GB GDDR6 Edition, Despite Rumors (129)
- NVIDIA Sends MSRP Numbers to Partners: GeForce RTX 5060 Ti 8 GB at $379, RTX 5060 Ti 16 GB at $429 (128)
- NVIDIA Launches GeForce RTX 5060 Series, Beginning with RTX 5060 Ti This Week (115)
- Nintendo Confirms That Switch 2 Joy-Cons Will Not Utilize Hall Effect Stick Technology (105)
- NVIDIA PhysX and Flow Made Fully Open-Source (95)
- Sony Increases the PS5 Pricing in EMEA and ANZ by Around 25 Percent (84)
- Parts of NVIDIA GeForce RTX 50 Series GPU PCB Reach Over 100°C: Report (78)
- Intel "Bartlett Lake-S" Gaming CPU is Possible, More Hints Appear for a 12 P-Core SKU (77)