 3
3
OrigenAE C10 Low Profile CPU Cooler Review
Performance »Installation
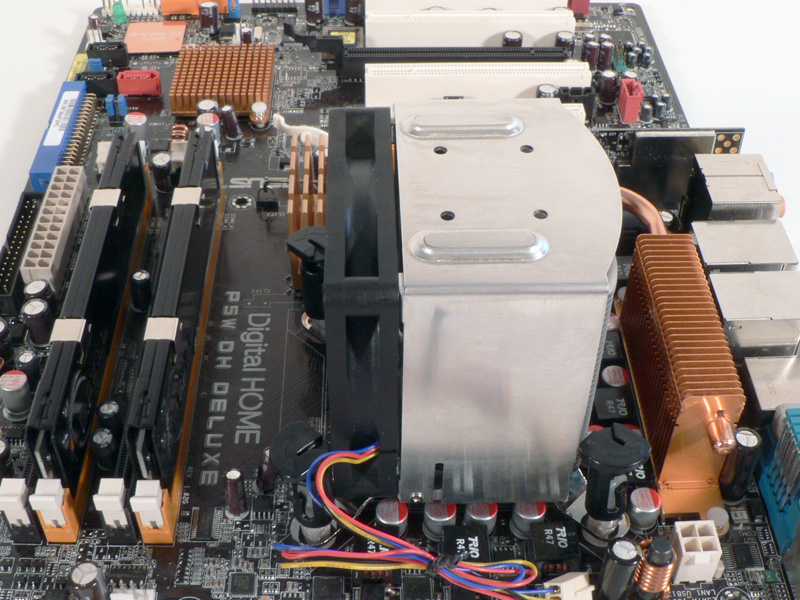
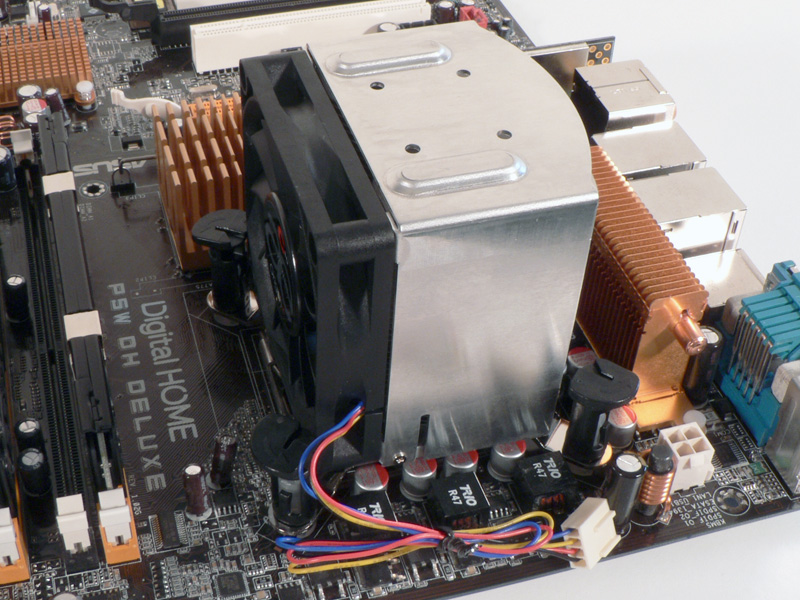
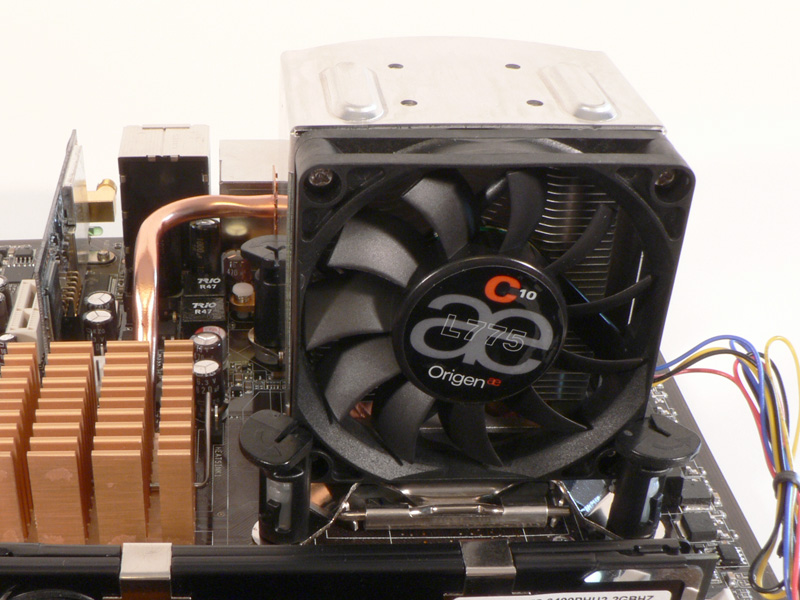
Installation for the OrigenAE C10 is easy and straight-forward. In fact, it is almost identical to the mounting of a stock Intel heatsink. The only major difference is that the C10 will exhaust the air in only one direction, so the heatsink should be aimed at either a MOSFET heatsink or a case exhaust fan. Simply apply the thermal compound according to the manufacturer's directions, place the heatsink on top of the CPU and insert the push-pins into their respective holes. Working at opposite corners, push down on two push-pins at the same time until they click, then repeat for the other two push-pins.
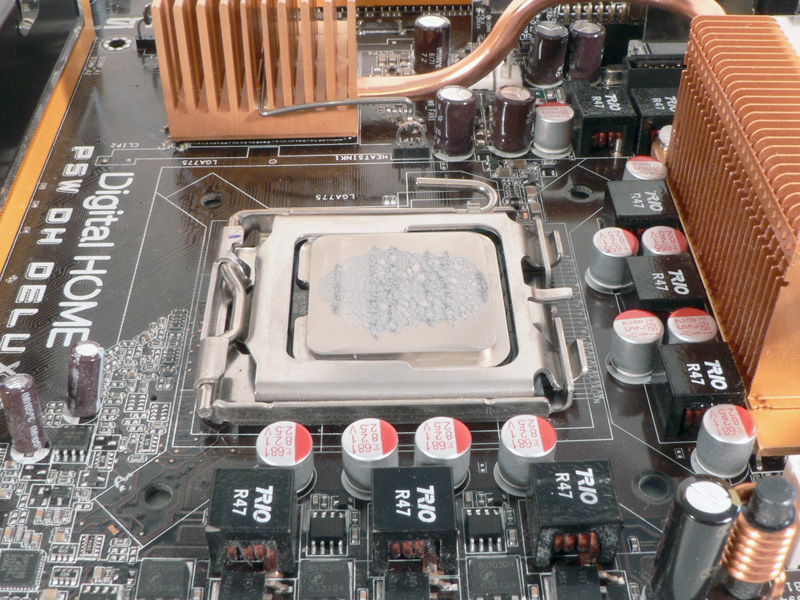

Immediately the C10 was removed and the base was inspected for contact. The thermal compound had spread nicely, but there was some build-up where the aluminum part of the base was due to the height difference. For direct-contact bases such as on the C10, it may prove more effective to apply the thermal compound along each heatpipe on the base. Any extra compound would be pushed out the sides or to any other low-points on the base and provide more even coverage.
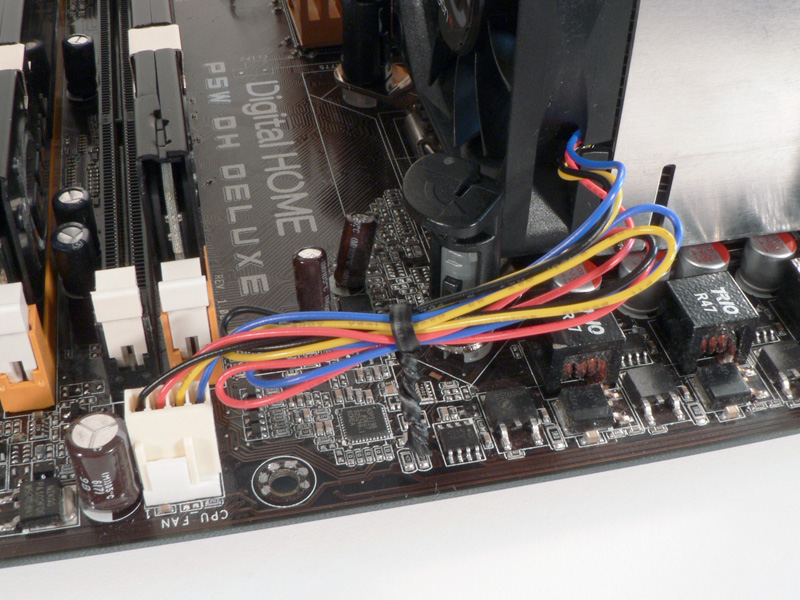
With the thermal compound cleaned off and reapplied, the C10 was installed again. To finish the installation, the fan needs to be plugged into the motherboard header. For this system, the wires for the fan were too long, but I left them bundled up as they came from the factory for the perfect length.

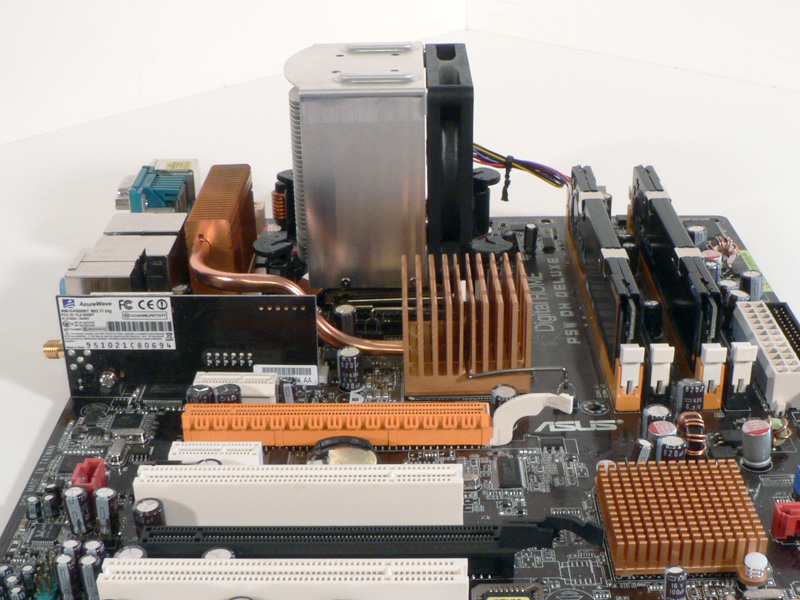
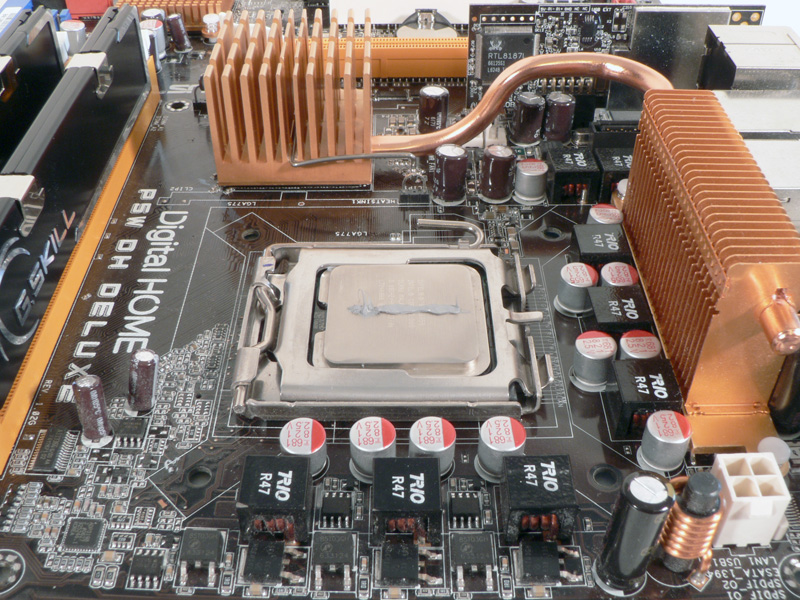
Looking around the CPU socket area on the motherboard, there are no compatibility issues, just as one would expect for a heatsink this size.
Nov 5th, 2024 19:20 EST
change timezone
Latest GPU Drivers
New Forum Posts
- Technical Issues - TPU Main Site & Forum (2024) (321)
- 5950x/5900x on a low end trash mb-black friday sale (8)
- What are you playing? (22125)
- Anyone with true HDDs still around here? (239)
- Games keep changing visuality random (1)
- Are the 2 mentioned monitors a good upgrade over my current one? (6)
- 2022-X58/1366 PIN Motherboards NVME M.2 SSD BIOS MOD Collection (760)
- E-cores still evolve. But is there a reason for it? (112)
- Laptop battery degrading or charger issue (9)
- Ryzen 7950X on air..? (38)
Popular Reviews
- Dragon Age: The Veilguard Performance Benchmark Review
- SilverStone SETA A2 Review
- Call of Duty: Black Ops 6 Performance Benchmark Review - AMD FTW
- Intel Core Ultra 9 285K Review
- NuPhy Air60 HE Review - World's First Low Profile Magnetic Keyboard
- Ocypus Iota C70 BK ARGB Review
- MSI MPG X870E Carbon Wi-Fi Review
- I\OAudio SOGNO In-Ear Monitors Review - 2 DD, 6 BA, All Harman
- Intel Core Ultra 7 265K Review
- DDR5 Memory Performance Scaling with AMD Zen 5
Controversial News Posts
- AMD Falling Behind: Radeon dGPUs Absent from Steam's Top 20 (170)
- Quick Denuvo DRM Cracks Cost Game Publishers 20% in Revenue, According to Study (136)
- AMD Introduces Next-Generation AMD Ryzen 7 9800X3D Processor, $479, Nov 7 (124)
- MSI OCLab Reveals Ryzen 9000X3D 11-13% Faster Than 7000X3D, AMD Set to Dominate "Arrow Lake" in Gaming (123)
- Apple and Samsung in the Fray to Acquire Intel: Rumor (121)
- AMD Ryzen 7 9800X3D Comes with 120W TDP, 5.20 GHz Boost, All Specs Leaked (120)
- Intel's Core Ultra 9 285K Performance Claims Leaked, Doesn't Beat i9-14900K at Gaming (114)
- NVIDIA Tunes GeForce RTX 5080 GDDR7 Memory to 32 Gbps, RTX 5070 Launches at CES (112)