 3
3
Pulsar X2 Review
Sensor & Performance »Build Quality
Overall build quality is solid. When shaking the mouse, a minor rattle comes from the main buttons. When applying lateral pressure, no creaking or flexing of the shell can be observed. Activating the side buttons by squeezing the sides is impossible. Lastly, accidental clicks do not occur when slamming down the mouse, irrespective of what the debounce time is set to.Buttons

Main buttons on the X2 are good. Pre-travel is moderate and post-travel low to moderate, resulting in a fairly firm and snappy button response. However, the left main button in particular is loose and can be moved readily under one's finger when pressed. Button stiffness is medium. A pair of Kailh GM 8.0 (80 M) switches are used.


Side buttons are very good. Pre-travel is low and post-travel nonexistent, resulting in a snappy and pleasing button response. The pressure point is even across the entirety of these. Button size and placement are good, as actuation is possible rather easily by rolling one's thumb across. A set of Huano switches (white plunger) is used for these.
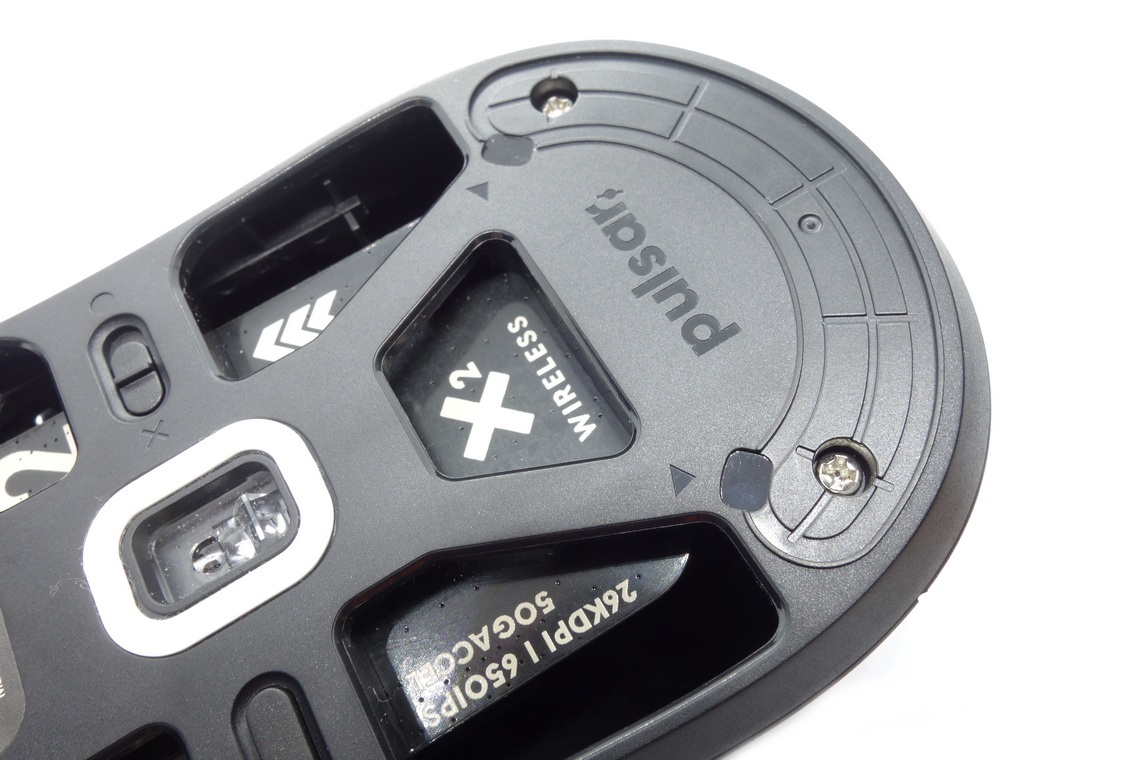
At the bottom of the mouse is a single button for cycling through the set CPI levels, which works just fine. A seemingly unbranded tactile switch is used for this one. The slider at the bottom switches between on and off-state. While fairly stiff, this slider also works just fine.
Scroll Wheel

The scroll wheel is good to very good. Noise levels are elevated in general and scrolling up occasionally gives off a clicking noise, but tactility is good, providing clearly separated steps and controlled scrolling. The encoder comes from TTC (yellow) and has a height of 10 mm. The middle (scroll wheel) click requires high force for actuation. Another Huano switch (yellow plunger) is used for this one.
Surface
The X2 has a smooth matte surface all over. Grip is fine, and it doesn't attract fingerprints or dirt too much. It is easy to clean, and there are no signs of wear left after doing so. All in all, excellent materials.Button Sound Test
Disassembly
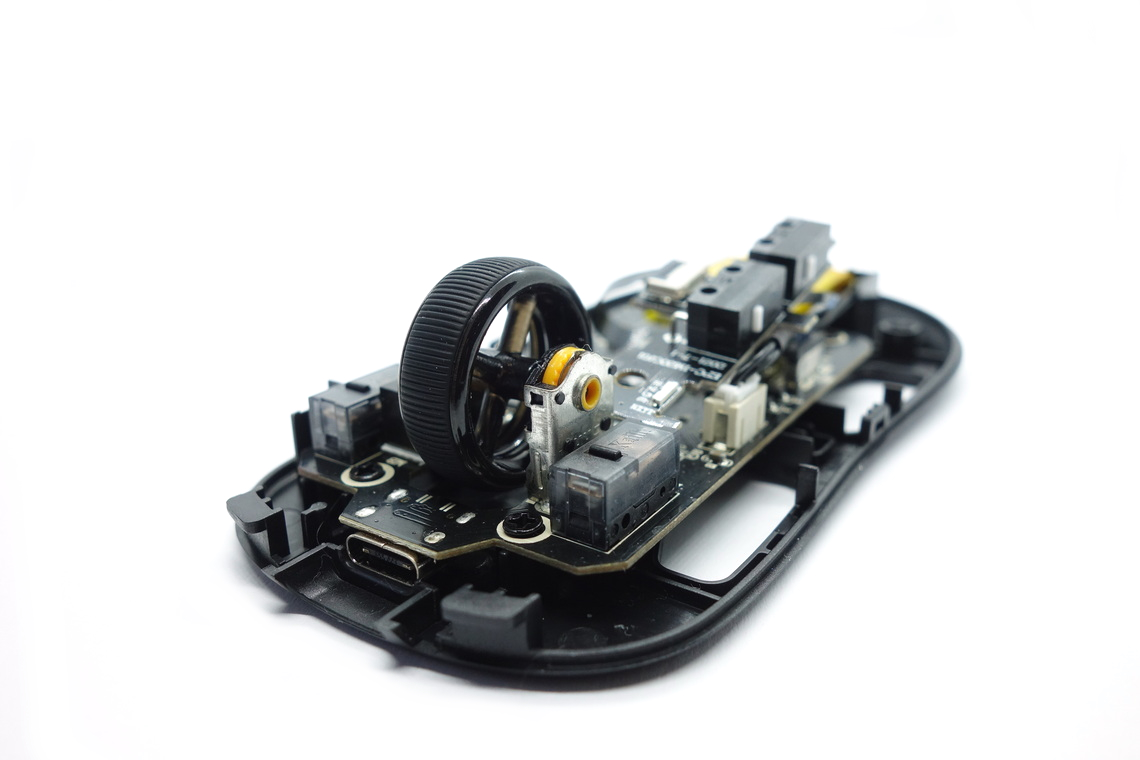
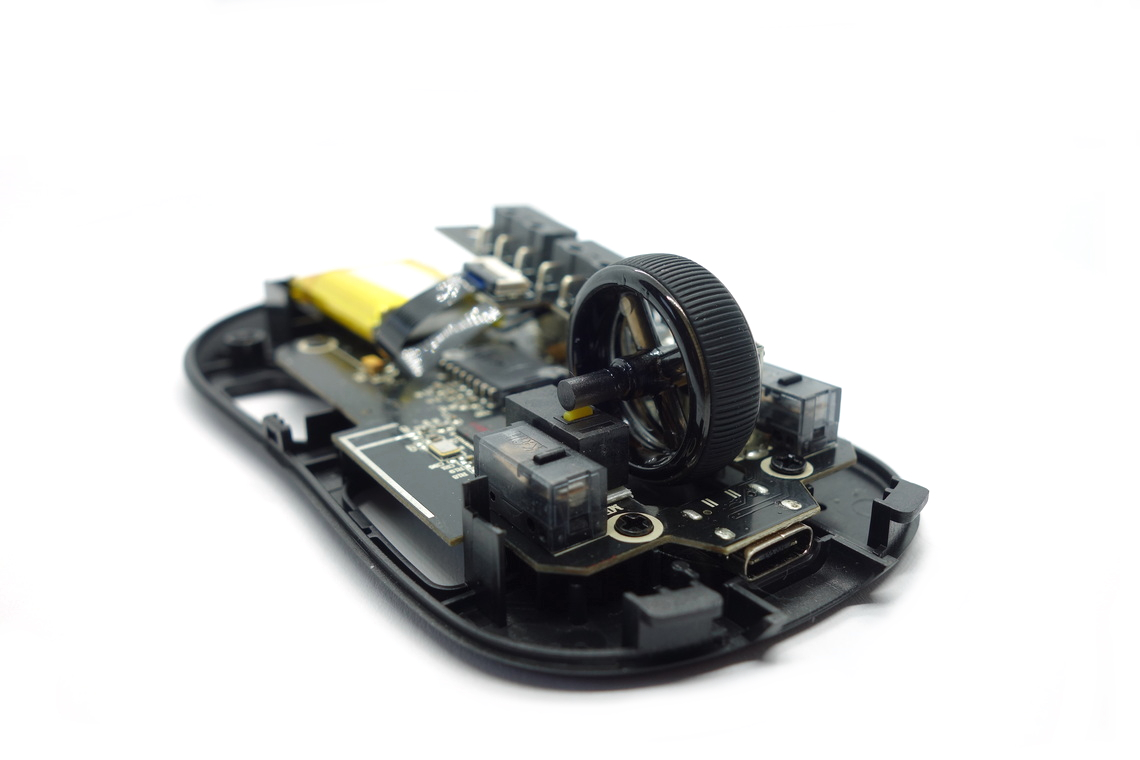
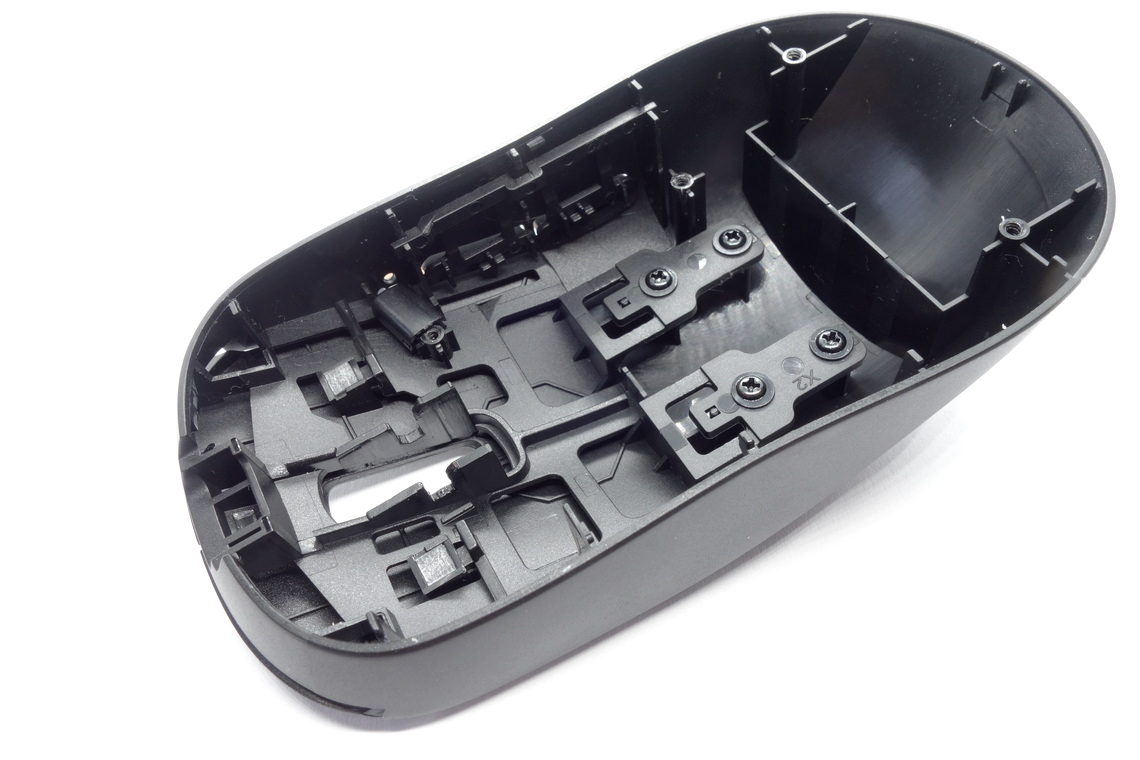
Disassembling the X2 is fairly easy. The screws are located beneath the rear skate. The sides are additionally locked in with clips, which can be hard to dislodge. As always, wedging a credit card or something similar in is the preferred course of action. When doing so, make sure not to rip the cable connecting the side-button and main PCB.
The design is reasonably efficient. Much like on the Xlite Wireless V2, the battery is located towards the rear. The side buttons sit on their own PCB screwed into the top shell, which also harbors the LED for the CPI level indicator and is connected to the main PCB through a ribbon cable. All PCBs are very thin to save as much weight as possible, but the main PCB is larger than it could be. Five screws in total are used to affix the main PCB to the bottom shell, which may be deemed excessive. Inexplicably, the PCB has a "PMW3395" marking on it. The MCU is a CompX CX52850.
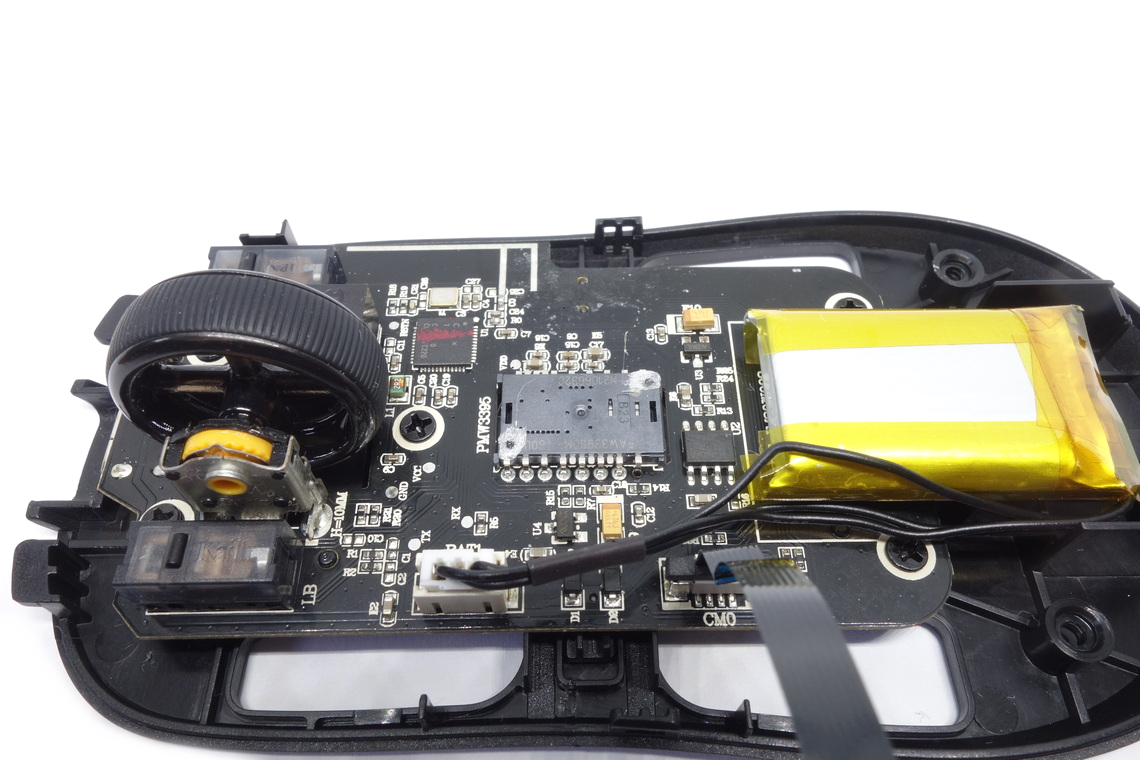
As for the soldering and general quality of the PCB, I'm unable to find any noteworthy flaws.
Apr 17th, 2025 22:31 EDT
change timezone
Latest GPU Drivers
New Forum Posts
- RX 9000 series GPU Owners Club (364)
- RTX5000 Series Owners Club (180)
- Asus RTX 4080 Super 16 GB BIOS (TUF) (1)
- EVGA 3070ti hotspot is too high 107.7° (13)
- 5070 Ti power limit questions (48)
- It's happening again, melting 12v high pwr connectors (1021)
- Need some help with vbios flashing (5)
- TPU's Nostalgic Hardware Club (20255)
- 2060 super fe problem (3)
- Have you got pie today? (16669)
Popular Reviews
- ASUS GeForce RTX 5060 Ti TUF OC 16 GB Review
- NVIDIA GeForce RTX 5060 Ti PCI-Express x8 Scaling
- G.SKILL Trident Z5 NEO RGB DDR5-6000 32 GB CL26 Review - AMD EXPO
- Palit GeForce RTX 5060 Ti Infinity 3 16 GB Review
- ASUS GeForce RTX 5060 Ti Prime OC 16 GB Review
- Zotac GeForce RTX 5060 Ti AMP 16 GB Review
- MSI GeForce RTX 5060 Ti Gaming OC 16 GB Review
- ASUS GeForce RTX 5080 TUF OC Review
- MSI GeForce RTX 5060 Ti Gaming Trio OC 16 GB Review
- Teevolution Terra Pro Review
Controversial News Posts
- NVIDIA GeForce RTX 5060 Ti 16 GB SKU Likely Launching at $499, According to Supply Chain Leak (182)
- NVIDIA Sends MSRP Numbers to Partners: GeForce RTX 5060 Ti 8 GB at $379, RTX 5060 Ti 16 GB at $429 (127)
- Nintendo Confirms That Switch 2 Joy-Cons Will Not Utilize Hall Effect Stick Technology (105)
- Over 200,000 Sold Radeon RX 9070 and RX 9070 XT GPUs? AMD Says No Number was Given (100)
- Nintendo Switch 2 Launches June 5 at $449.99 with New Hardware and Games (99)
- NVIDIA Launches GeForce RTX 5060 Series, Beginning with RTX 5060 Ti This Week (96)
- Sony Increases the PS5 Pricing in EMEA and ANZ by Around 25 Percent (85)
- NVIDIA PhysX and Flow Made Fully Open-Source (77)