 4
4
Rapoo VT3Pro Max Review
Sensor & Performance »Build Quality
Overall build quality is mostly solid. There is no rattle when shaking the mouse. When applying lateral pressure, major creaking and some flexing of the shell can be observed, to where the side buttons contract slightly. Activating the side buttons by squeezing the sides is impossible. Lastly, accidental clicks when slamming down the mouse do not occur.Buttons

Main buttons on the VT3Pro Max are good. Pre-travel is moderate, whereas post-travel is low, resulting in a firm and snappy button response nonetheless. Despite being visually separated from the shell, button movement is fairly low even when provoked. Button stiffness is medium. A pair of Omron D2FC-F-K (60 M) (China) switches are used here.
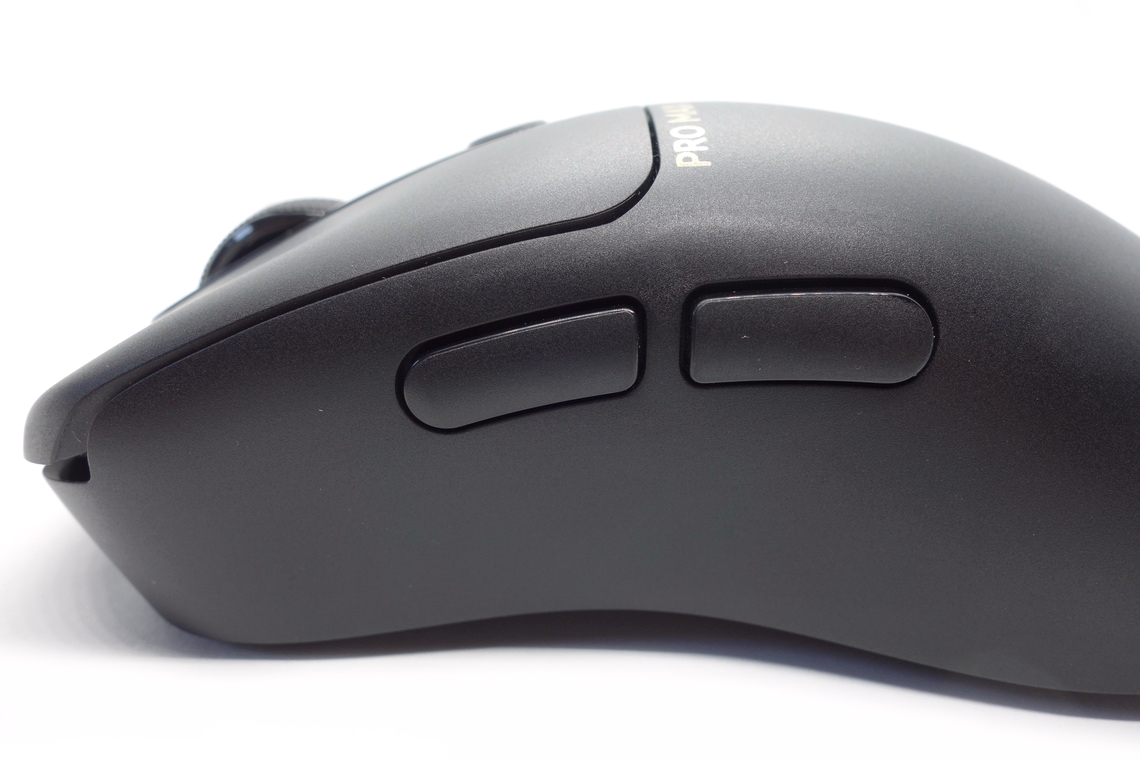
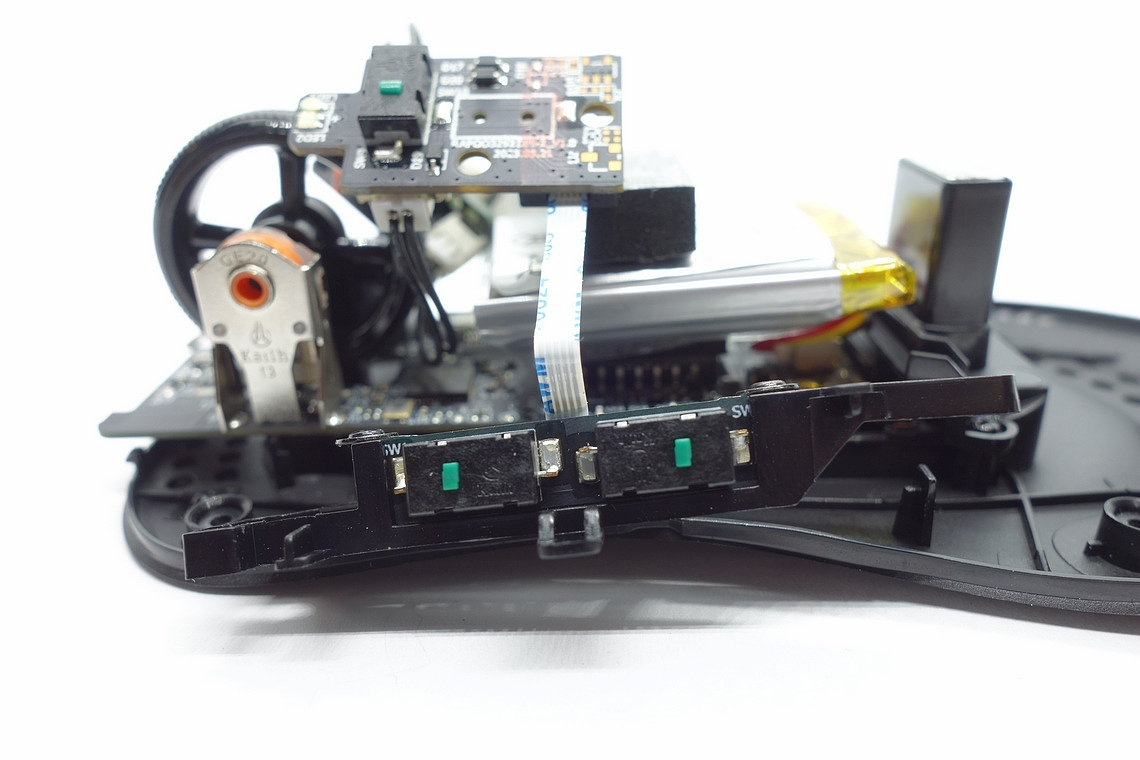
Side buttons are very good. Both pre and post-travel are low, though feedback will have a different pitch when pressing the back button towards the rear. Actuation is satisfying nevertheless. The actuation point is even across the entirety of these. Button placement is good as actuation is possible very easily by rolling one's thumb across. A set of surface-mounted switches from Kailh (green plunger) are used for these.
At the top of the mouse is a button for cycling through the set CPI levels. Another surface-mounted switch from Kailh (green plunger) is used for this one. At the bottom of the mouse is a single button which cycles through the available polling rates. In addition, a simple on/off-slider is also found on the bottom, which works fine.
Scroll Wheel
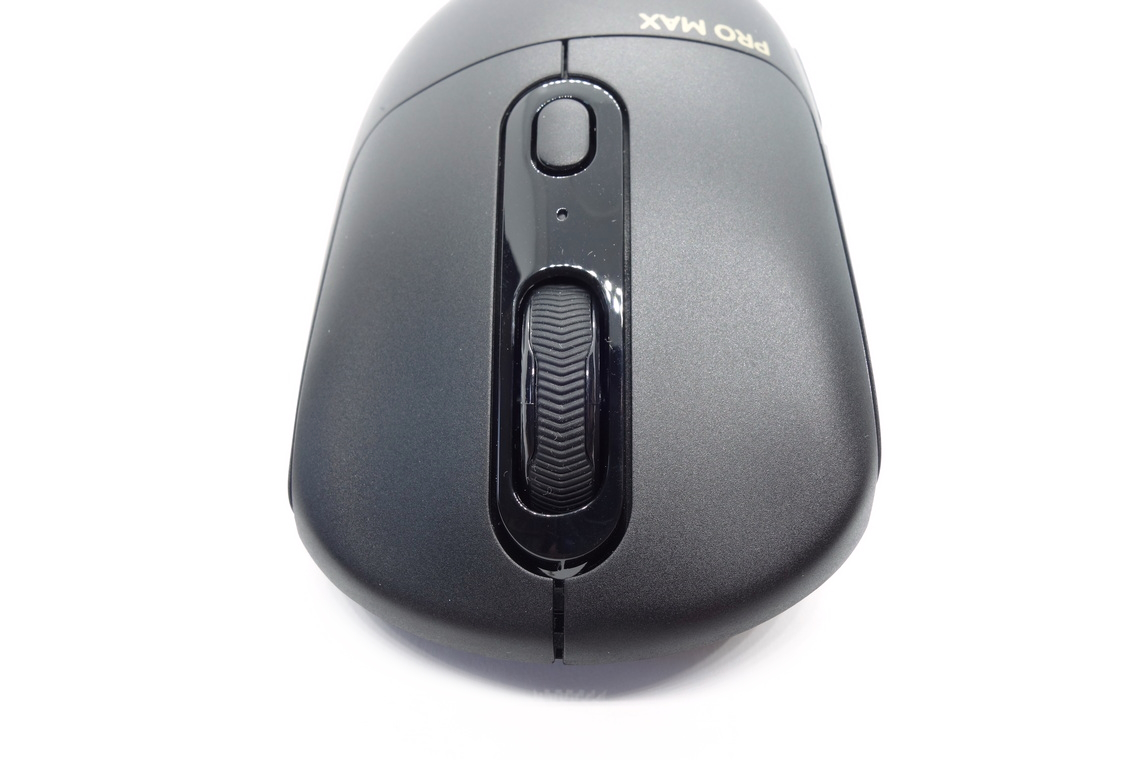
The scroll wheel is decent. Noise levels are significant, and tactility is merely average, as the individual steps aren't particularly pronounced. The encoder comes from Kailh (GE 2.0) and has a height of 13 mm. The middle (scroll wheel) click requires high force for actuation. An elevated switch from Huano (green plunger) is used for this one.
Surface
The VT3Pro Max has a matte surface all over. Grip is fine, and it doesn't attract fingerprints or dirt too much. It is easy to clean, and there are no signs of wear left after doing so. All in all, excellent materials.Button Sound Test
Disassembly

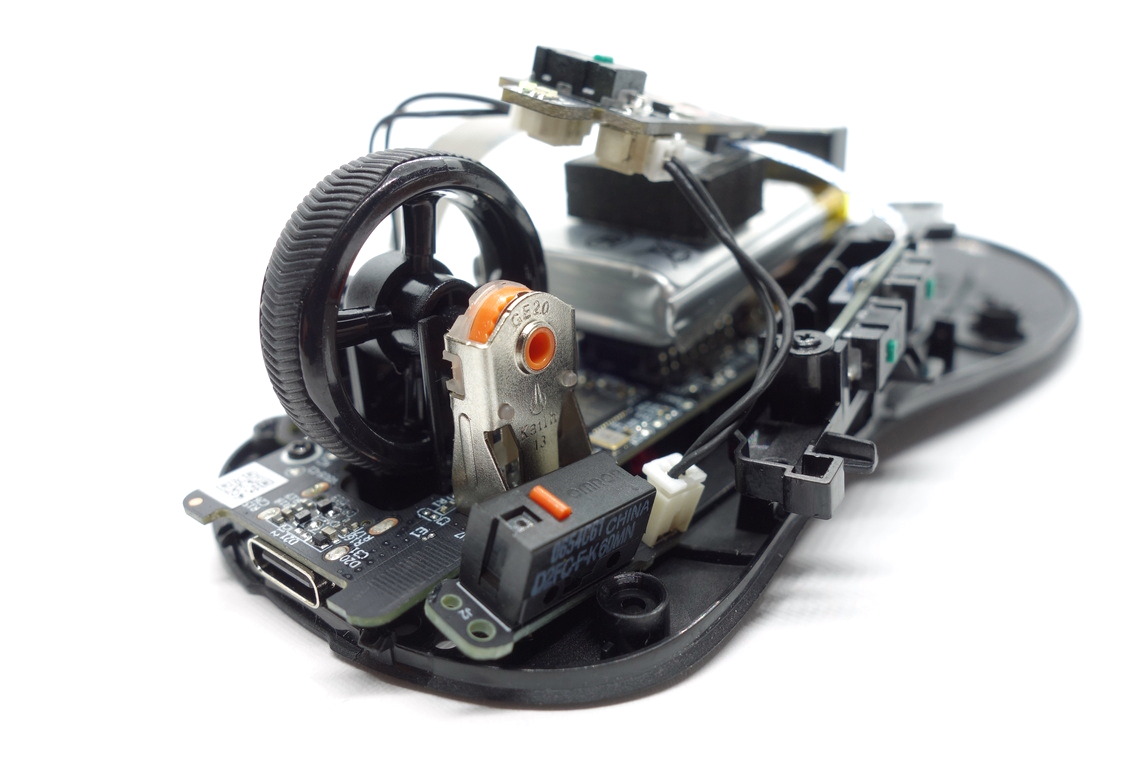
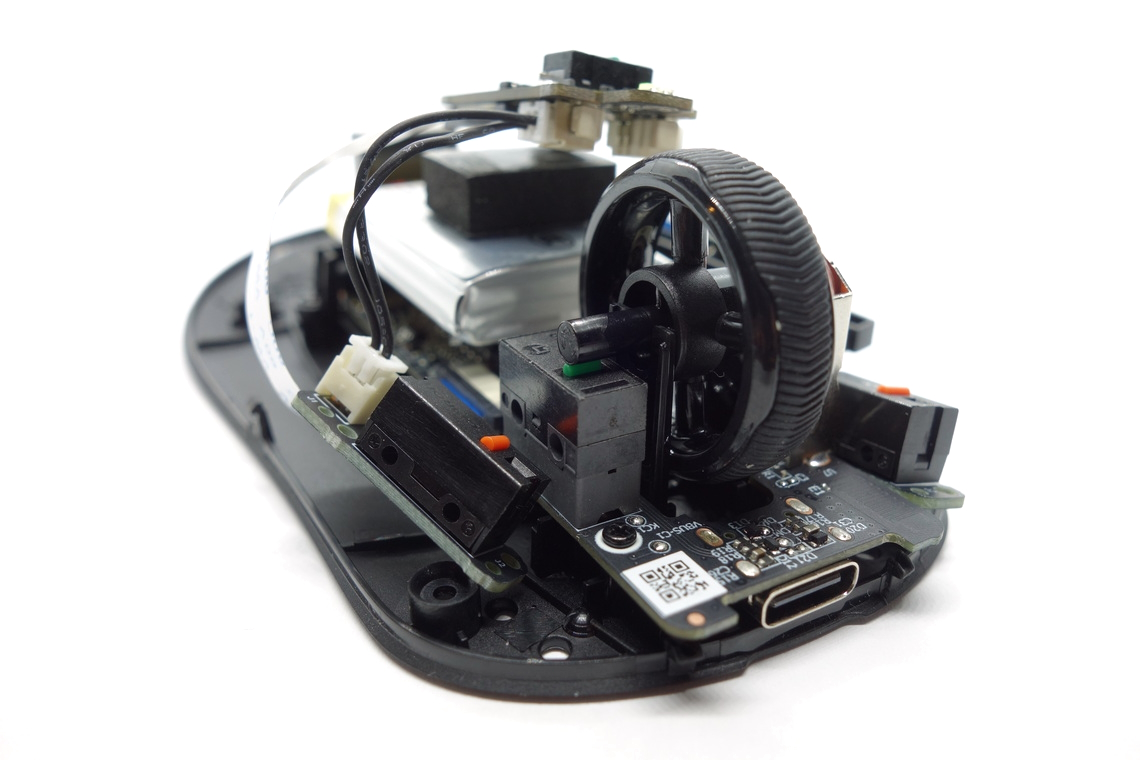
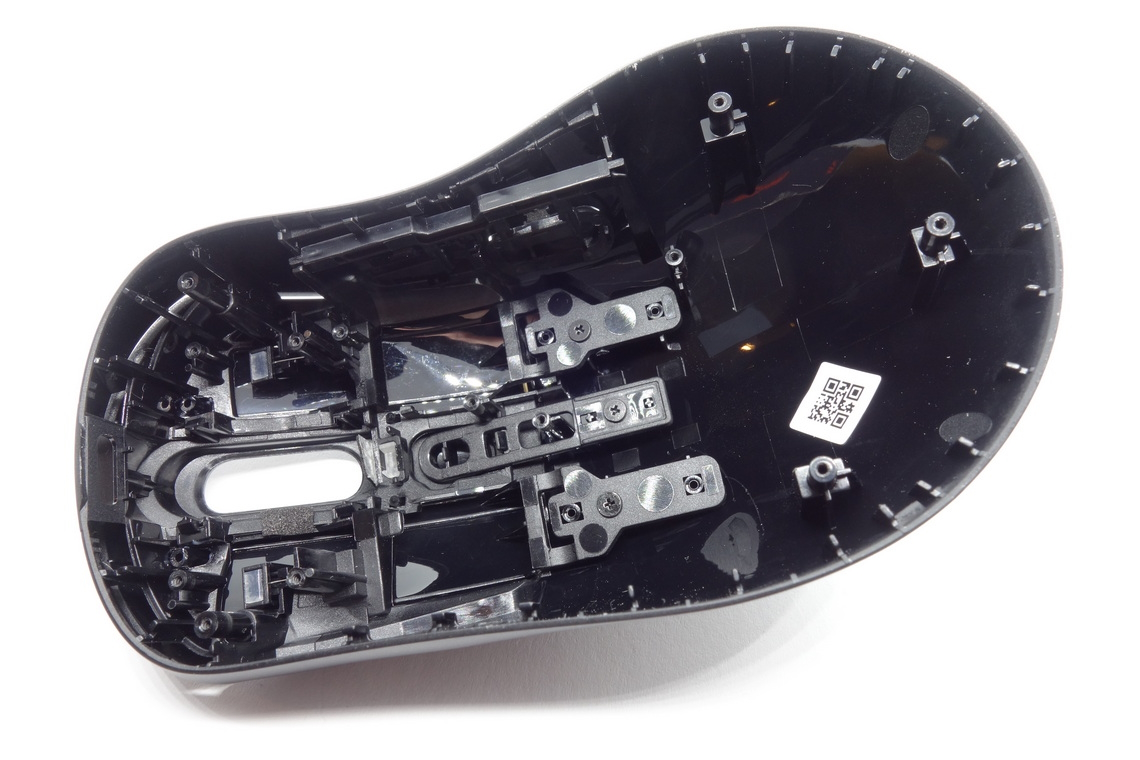
Disassembling the VT3Pro Max is easy. The screws are found beneath the front and rear skates. After removing those, four additional clips at the sides and front need to be dislodged, doing which may require wedging a credit card (or similar) in between. When separating top and bottom shell, make sure not the rip the cable connecting the two.
The internal design is very efficient. The very thin and compact main PCB holds the sensor, MCU, scroll wheel encoder, and scroll wheel switch. On top of the sensor, the battery sits on a sticky pad. A secondary PCB connected through a ribbon cable is screwed to the top shell. This PCB holds the top button switches, and two PCBs holding a main button switch each and connected through a 2-pin connector as well as the side-button PCB connected through another ribbon cable branch off. The side-button PCB is screwed to a plastic assembly, which in turn is screwed to the top shell. The MCU is a Realtek RTL8762GKH, whose datasheet can be found here. Production date for the main-button PCBs is the 28th week of 2024.
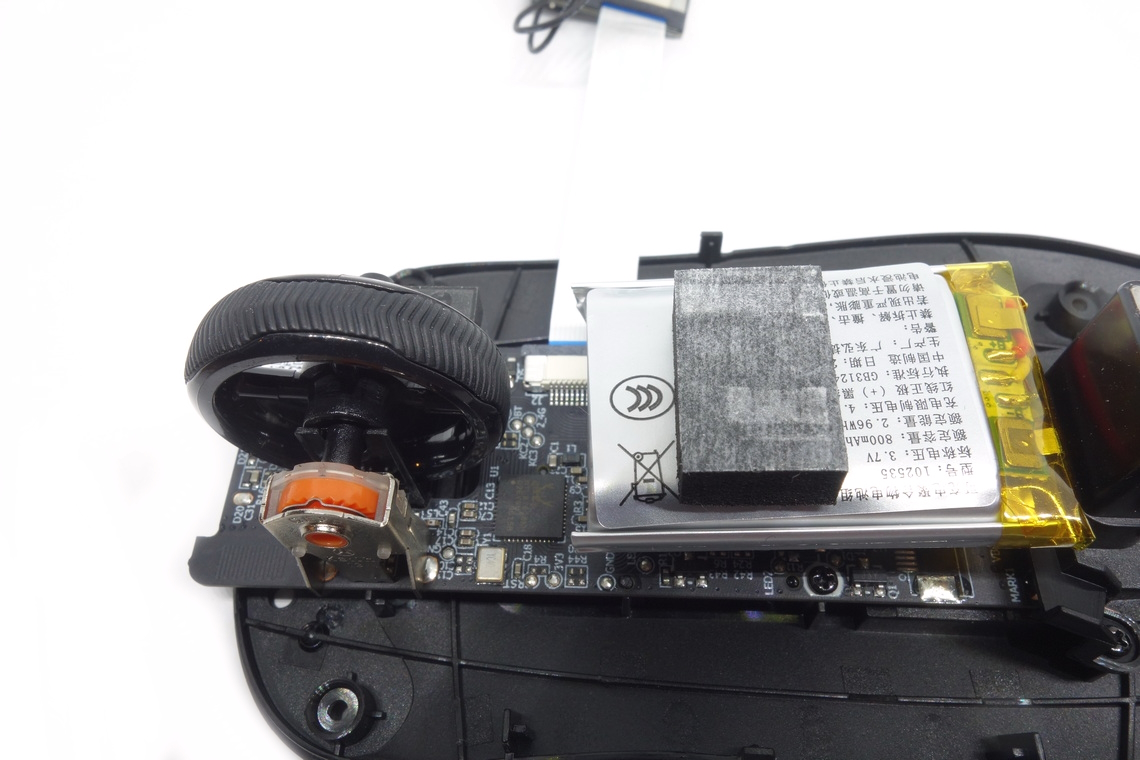
As for the soldering and general quality of the PCB, I'm unable to find any noteworthy flaws.
Mar 10th, 2025 13:25 EDT
change timezone
Latest GPU Drivers
New Forum Posts
- AMD RX 9070 XT & RX 9070 non-XT thread (OC, undervolt, benchmarks, ...) (2)
- newegg ATX 3.1 PSU on Clearance and Free Fan (3)
- Nvidia's GPU market share hits 90% in Q4 2024 (gets closer to full monopoly) (770)
- AAF Optimus Modded Driver For Windows 10 & Windows 11 - Only for Realtek HDAUDIO Chips (375)
- RX 9070 availability (165)
- DTS DCH Driver for Realtek HDA [DTS:X APO4 + DTS Interactive] (2110)
- Zen6 is almost here ? (45)
- Gaming PC instabiliity (16)
- It's happening again, melting 12v high pwr connectors (1019)
- What's your latest tech purchase? (23269)
Popular Reviews
- Sapphire Radeon RX 9070 XT Nitro+ Review - Beating NVIDIA
- XFX Radeon RX 9070 XT Mercury OC Magnetic Air Review
- ASUS Radeon RX 9070 TUF OC Review
- MSI MAG B850 Tomahawk Max Wi-Fi Review
- NVIDIA GeForce RTX 5080 Founders Edition Review
- NVIDIA GeForce RTX 5070 Founders Edition Review
- Corsair Vengeance RGB CUDIMM DDR5-8800 48 GB CL42 Review
- AMD Ryzen 7 9800X3D Review - The Best Gaming Processor
- ASUS GeForce RTX 5070 Ti TUF OC Review
- MSI GeForce RTX 5070 Ti Gaming Trio OC+ Review
Controversial News Posts
- NVIDIA GeForce RTX 50 Cards Spotted with Missing ROPs, NVIDIA Confirms the Issue, Multiple Vendors Affected (513)
- AMD Plans Aggressive Price Competition with Radeon RX 9000 Series (277)
- AMD Radeon RX 9070 and 9070 XT Listed On Amazon - One Buyer Snags a Unit (261)
- AMD RDNA 4 and Radeon RX 9070 Series Unveiled: $549 & $599 (260)
- AMD Mentions Sub-$700 Pricing for Radeon RX 9070 GPU Series, Looks Like NV Minus $50 Again (248)
- NVIDIA Investigates GeForce RTX 50 Series "Blackwell" Black Screen and BSOD Issues (244)
- AMD Radeon RX 9070 and 9070 XT Official Performance Metrics Leaked, +42% 4K Performance Over Radeon RX 7900 GRE (195)
- AMD Radeon RX 9070-series Pricing Leaks Courtesy of MicroCenter (158)