 5
5
SilverStone SETA A2 Review
Review System Setup »A Closer Look - Inside
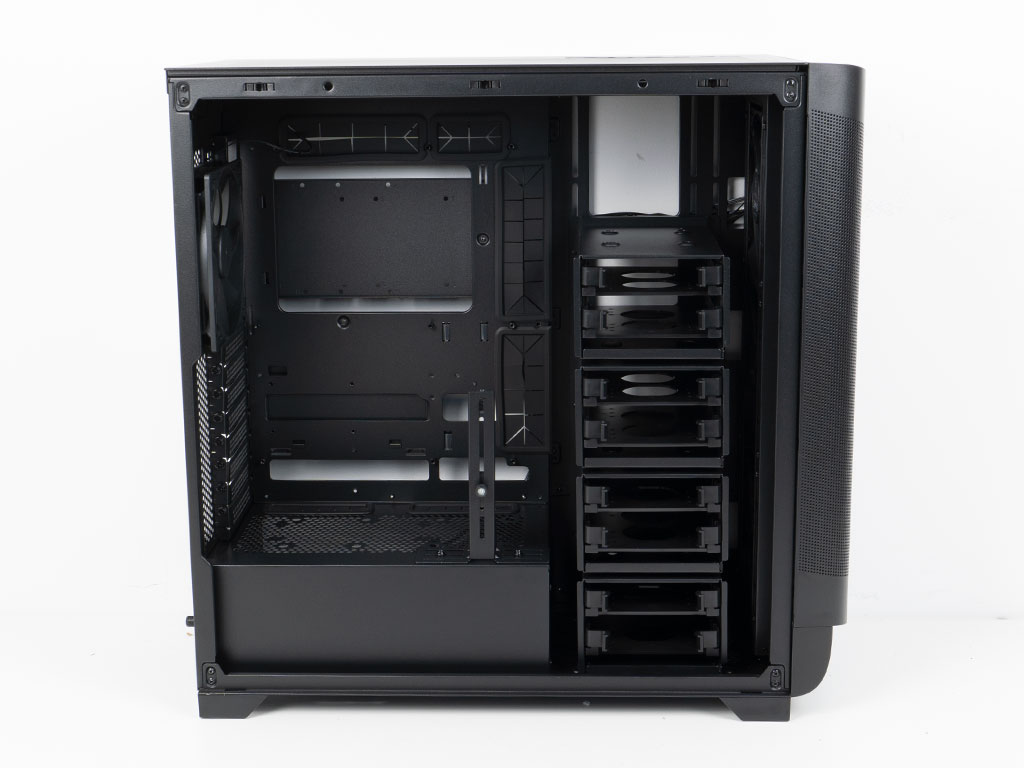
On the interior, the SilverStone SETA A2 provides a pretty traditional layout with the front section intended for cooling and an upright motherboard. If you look closely, you can see that the chassis has all the cutouts for both Micro-BTF and full size BTF variants. It also comes equipped with grommets on the left and top of the motherboard, which should allow you to keep things clean and tidy, but they will all be partially blocked by any wide motherboard. The reason for these oversized openings is once again due to providing openings for the reverse connectors of a BTF motherboard. On the shroud, you will also find a pre-installed metal GPU support bracket, which should come in very handy when installing large GPUs. Looking at the backside, all the surface area is used well behind the motherboard tray.
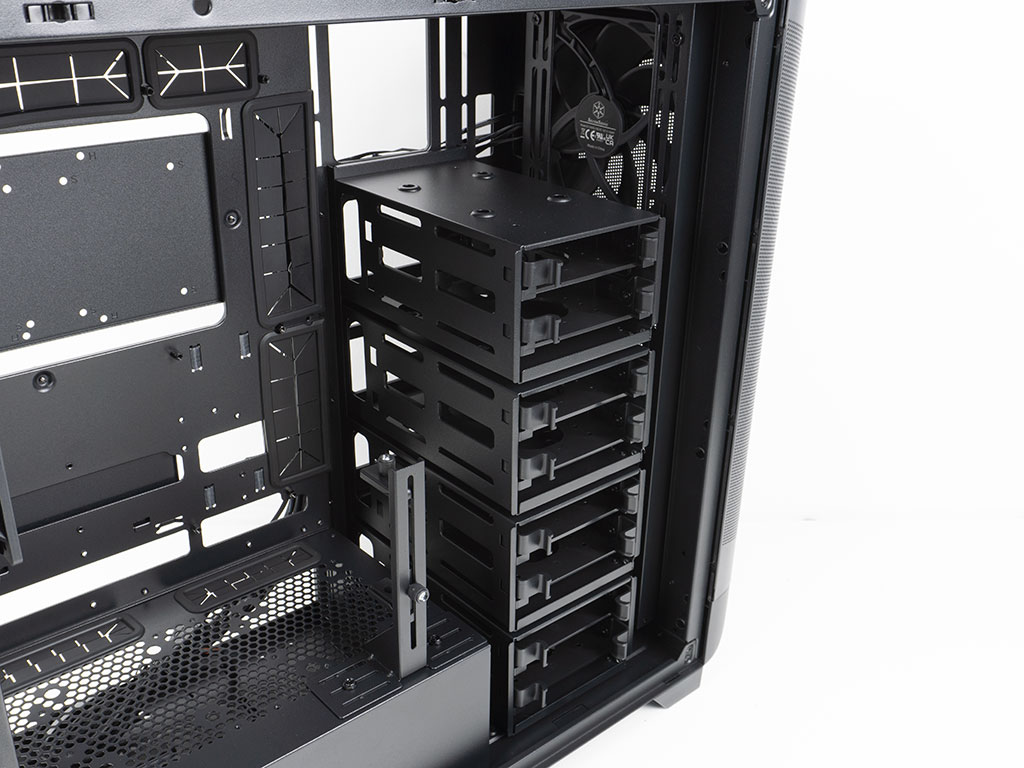

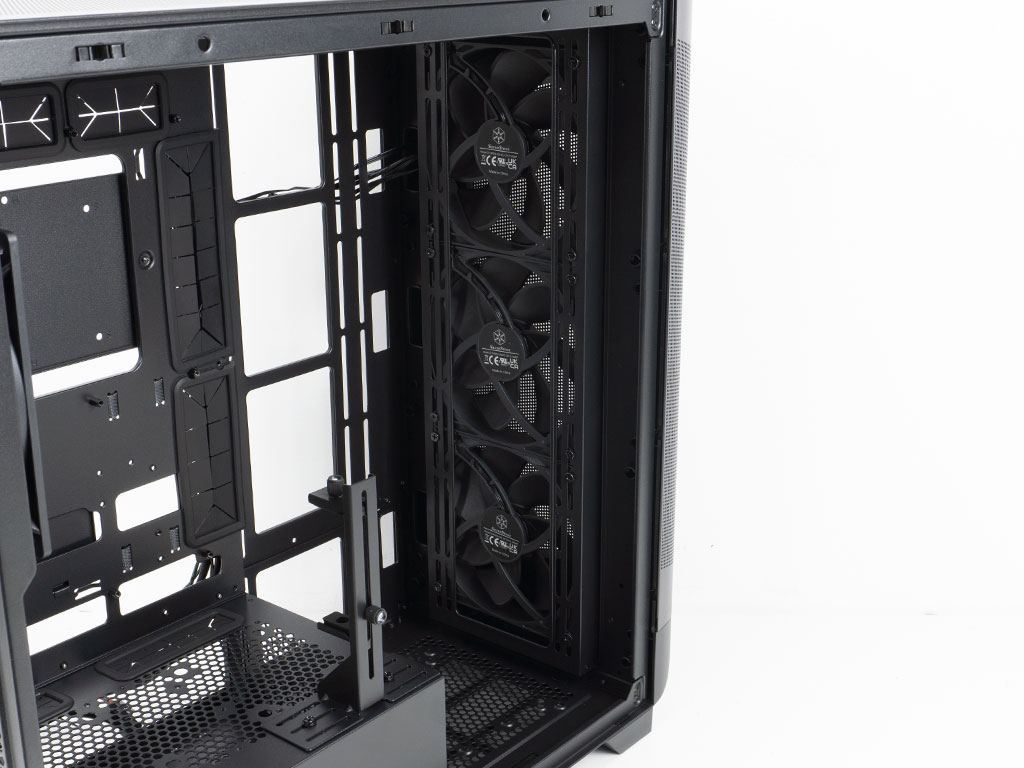
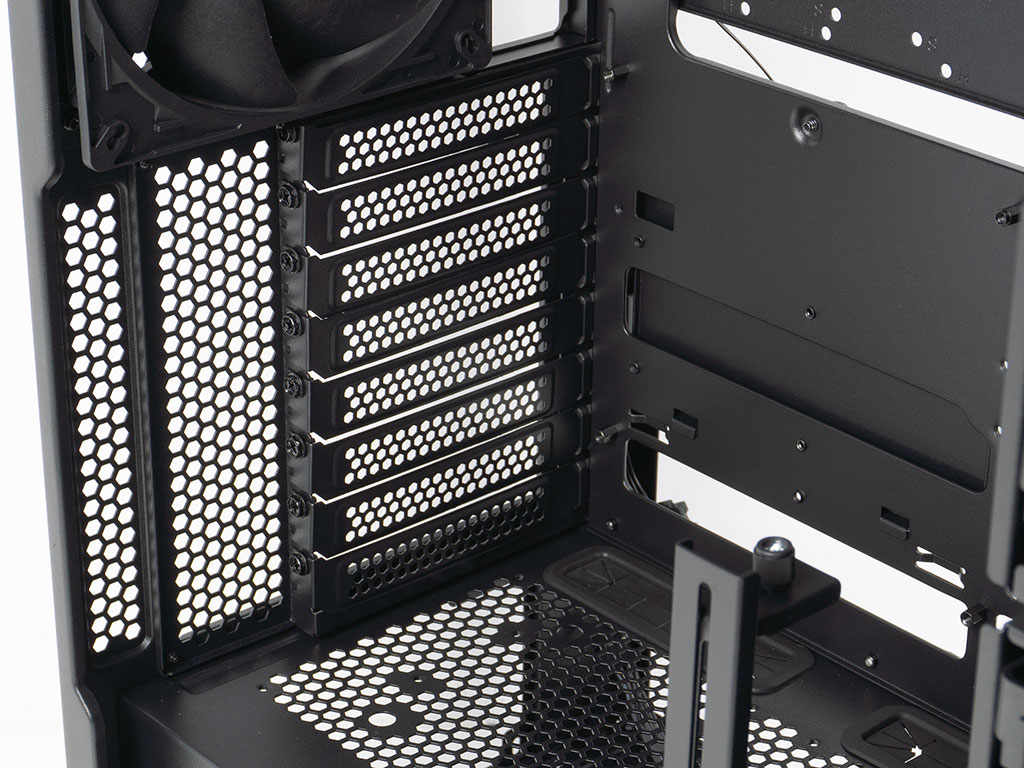
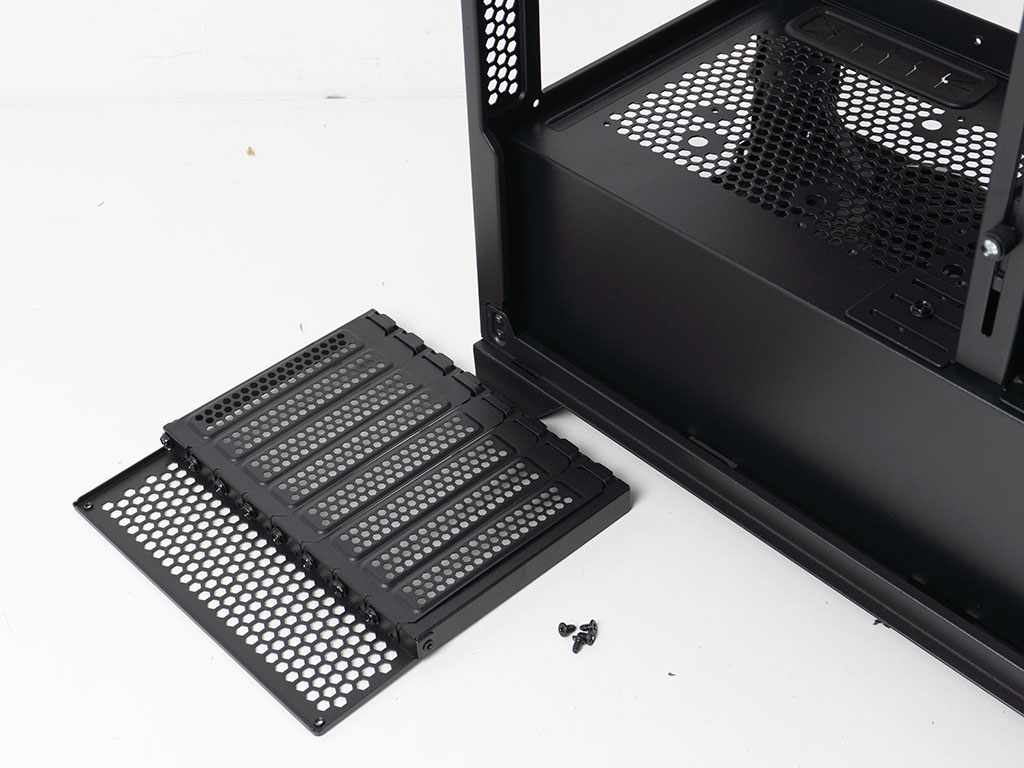
Interestingly, SilverStone has opted to include a stack of four HDD cages in the front of the chassis. That will be a welcome sight to that very specific group planning to stuff eight drives into the SETA A2, but the vast majority of users will go as far as removing most of them and still have more than enough storage at their disposal. On one hand, they block airflow from the front fans, and you will have to remove one of them at the very least when installing a large GPU - which is one essential aspect if buying a larger enclosure in the first place. On top of that, these are in full view of the glass panel. This is unfortunate, as you are paying for these in the first place. SilverStone could have sold this entire stack with its backplate as a separate SKU and likely reduced the price of the SETA A2 to $140-150 instead. Once you remove the stack, you can clearly see the front intake fans, the side mounting position for three additional ones or even a radiator of up to 420 mm in size.
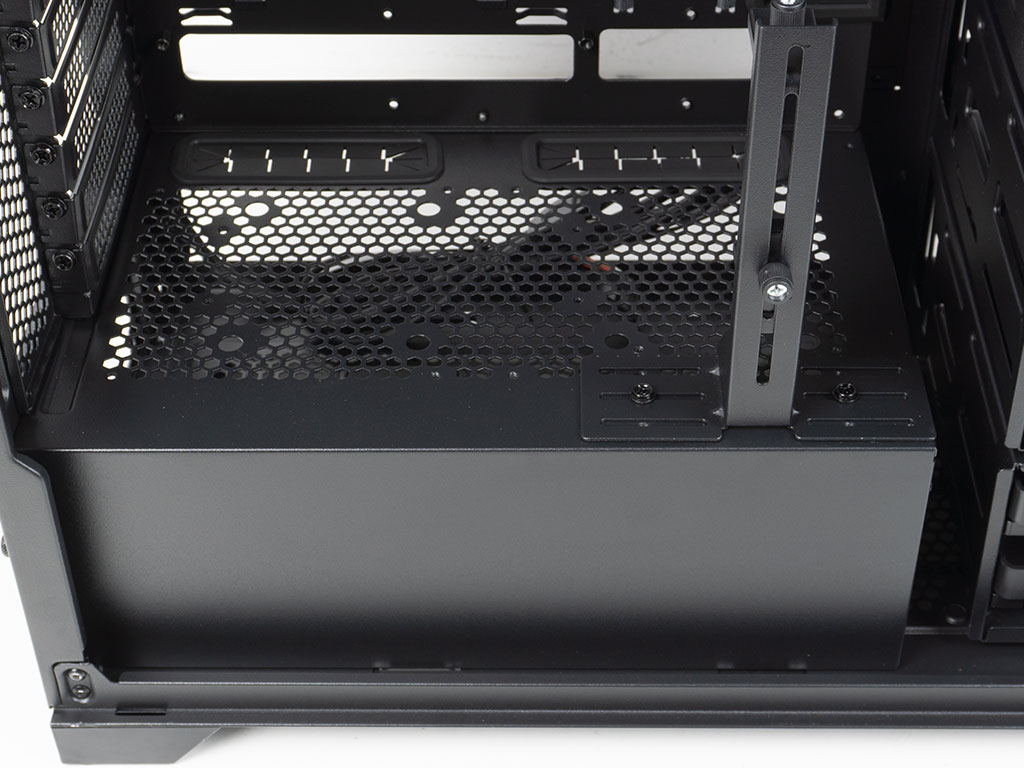
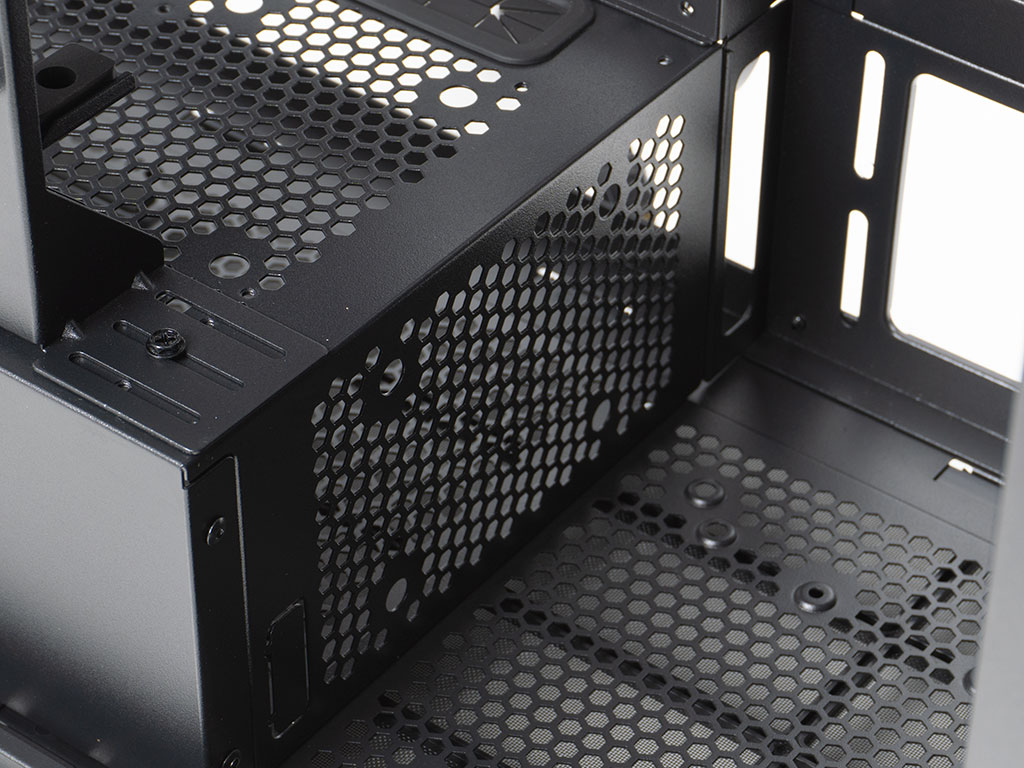
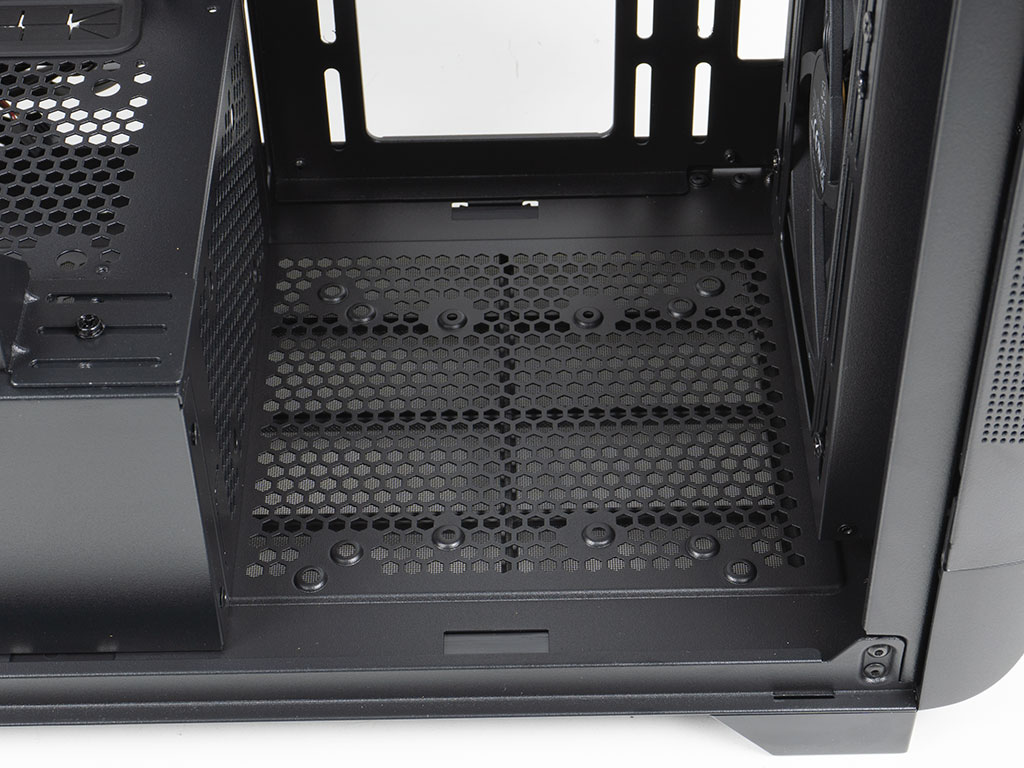
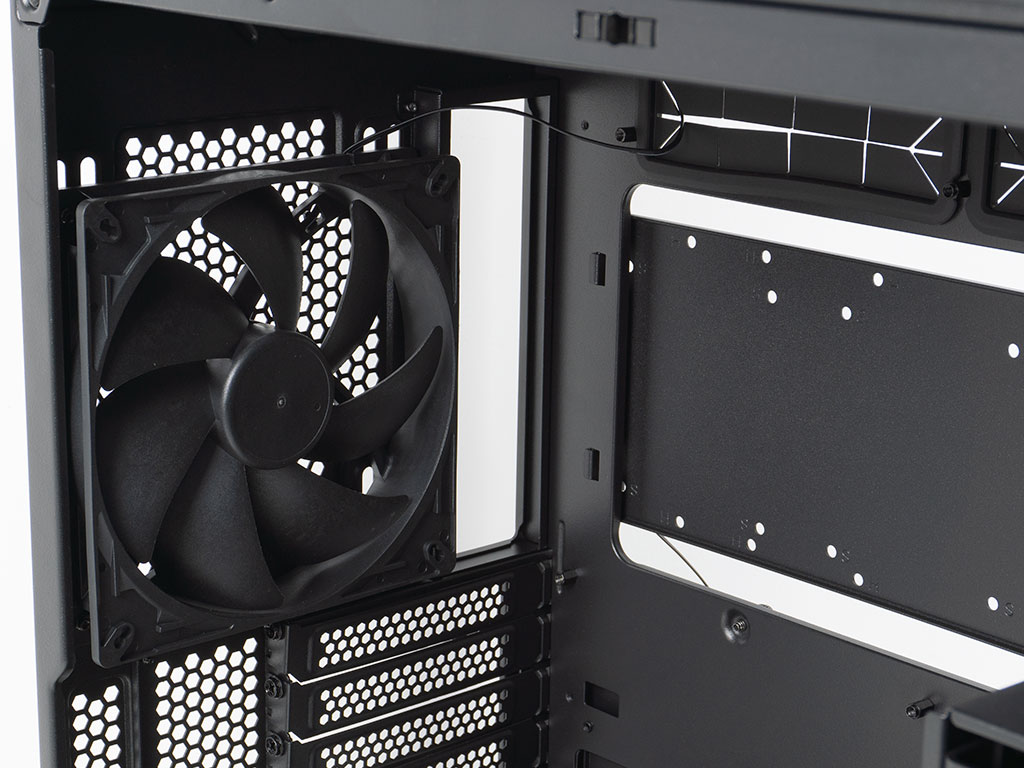
The short shroud in the chassis is also equipped with grommets, which is a very nice detail. Here you may install either two 120 fans or two 2.5" SSDs on top and one further 2.5" drive on the side. On the floor towards the front of the interior, you may also install one more 120 or 140 mm fan, but this space may also be used for one more 3.5" drive instead. Thanks to the fact that the included HDD stack comes with its own mounting frame you could move it up slightly to accommodate that drive or cooling setup as well.
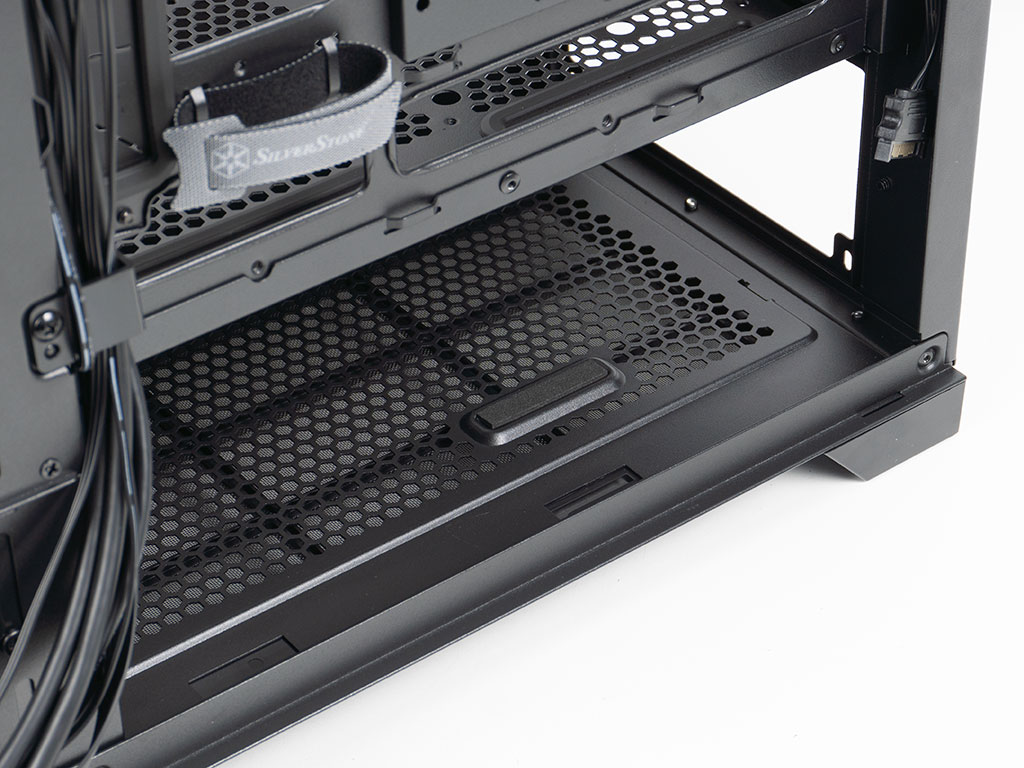
In the rear the PSU bay underneath the shroud is spacious, so you could install larger capacity units. Above that are the eight expansion slots. These reside completely inside the case and have classic screws holding each cover in place. In the top, there is that aforementioned fourth fan.

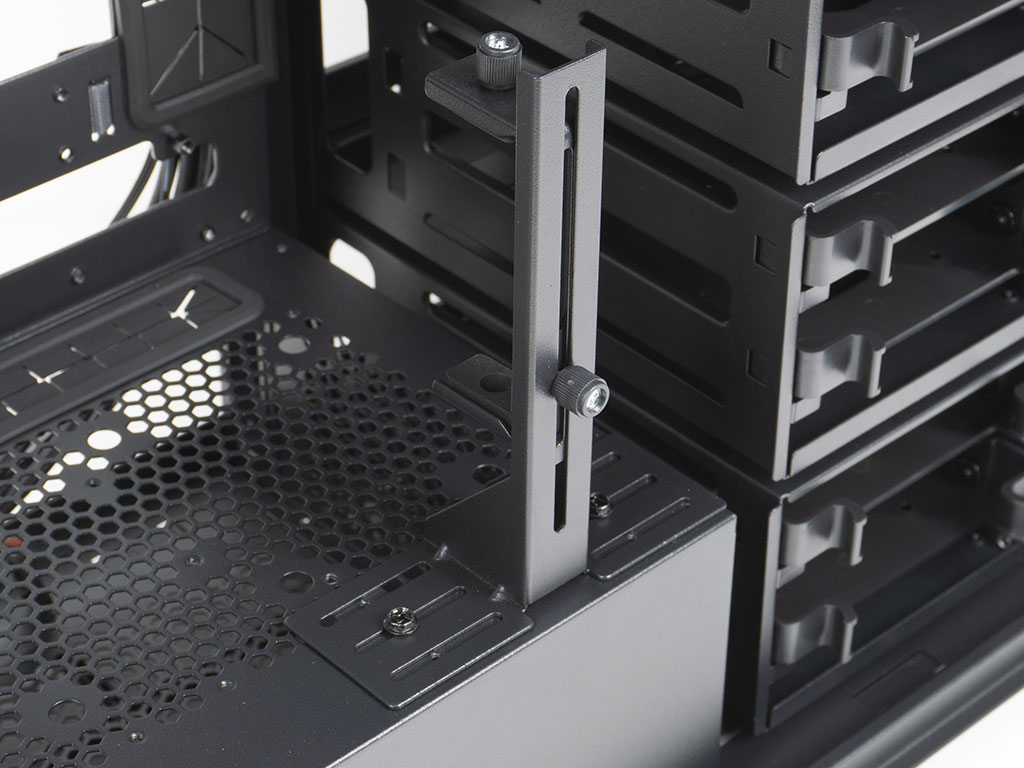
To rotate the expansion slots, you have to unscrew the four screws holding the plate in place and then simply reinsert it, so the slots are upright. It would have been nice to have thumb screws securing this, but odds are you won't be changing your setup repeatedly anyway.
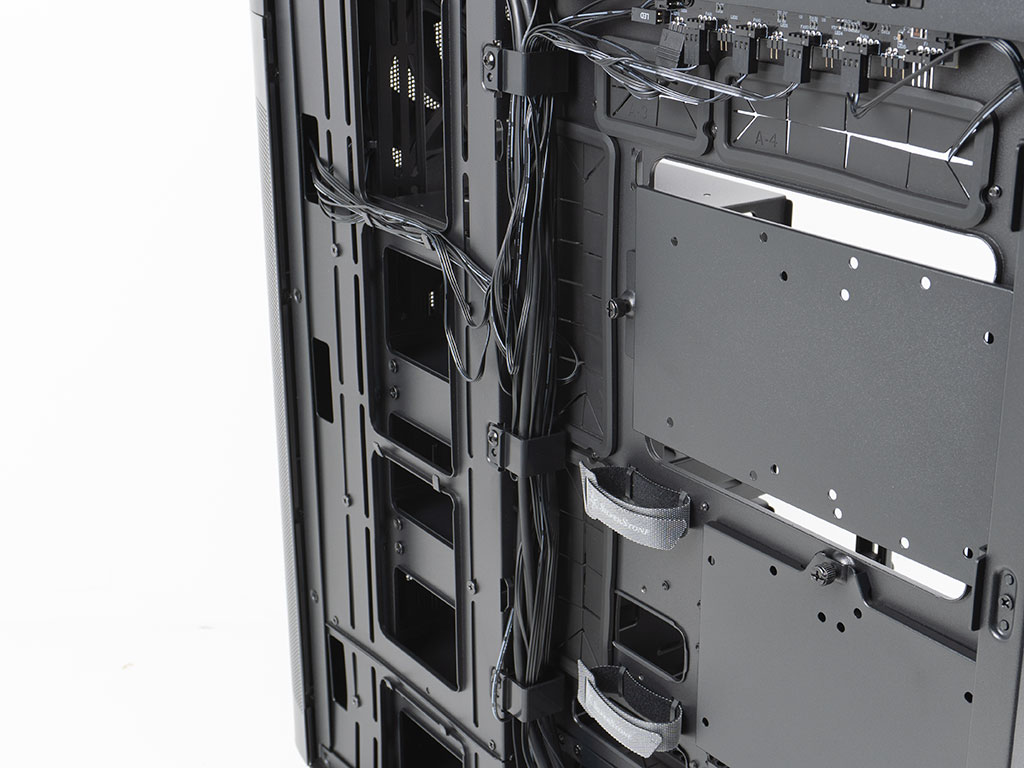
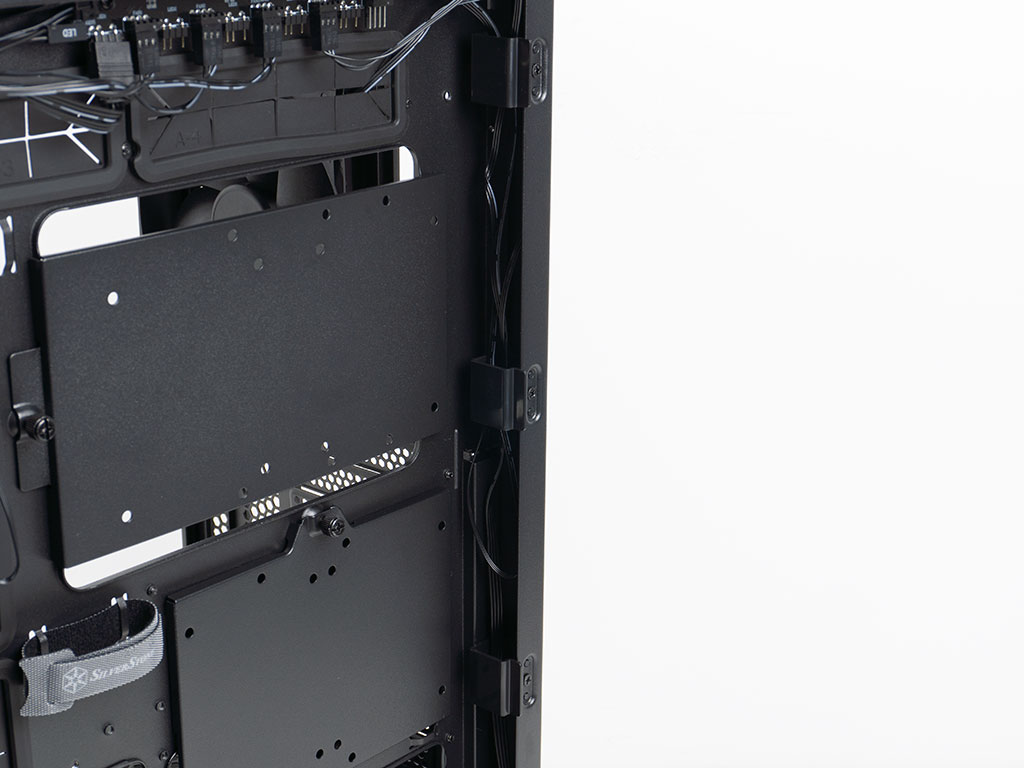
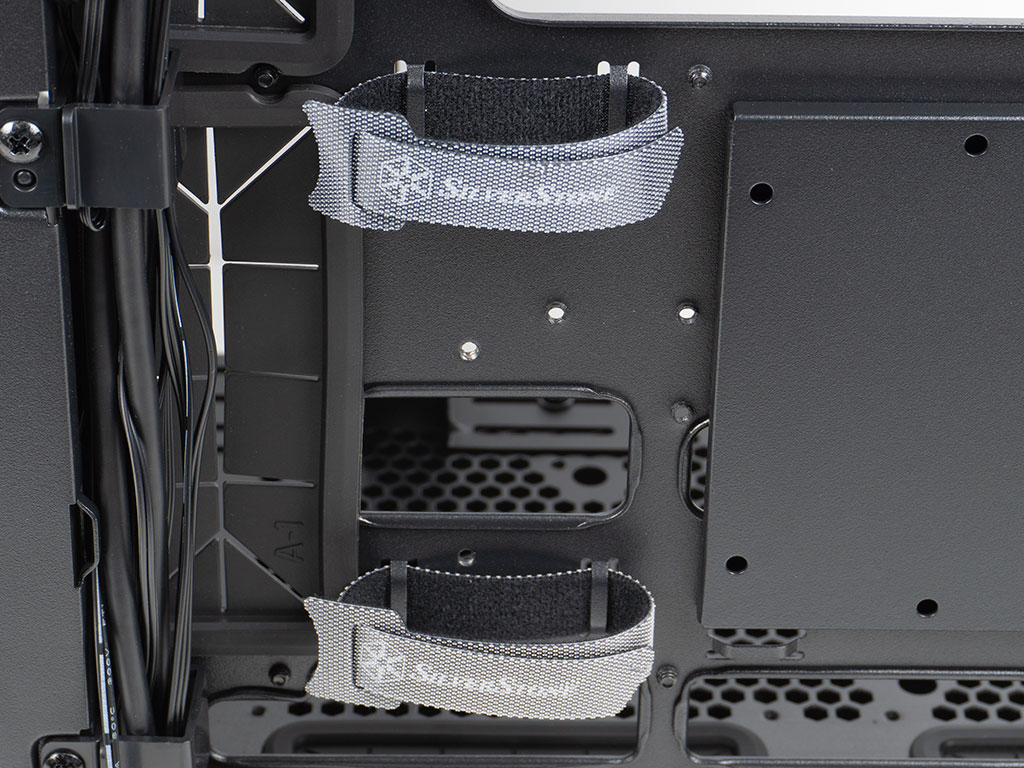
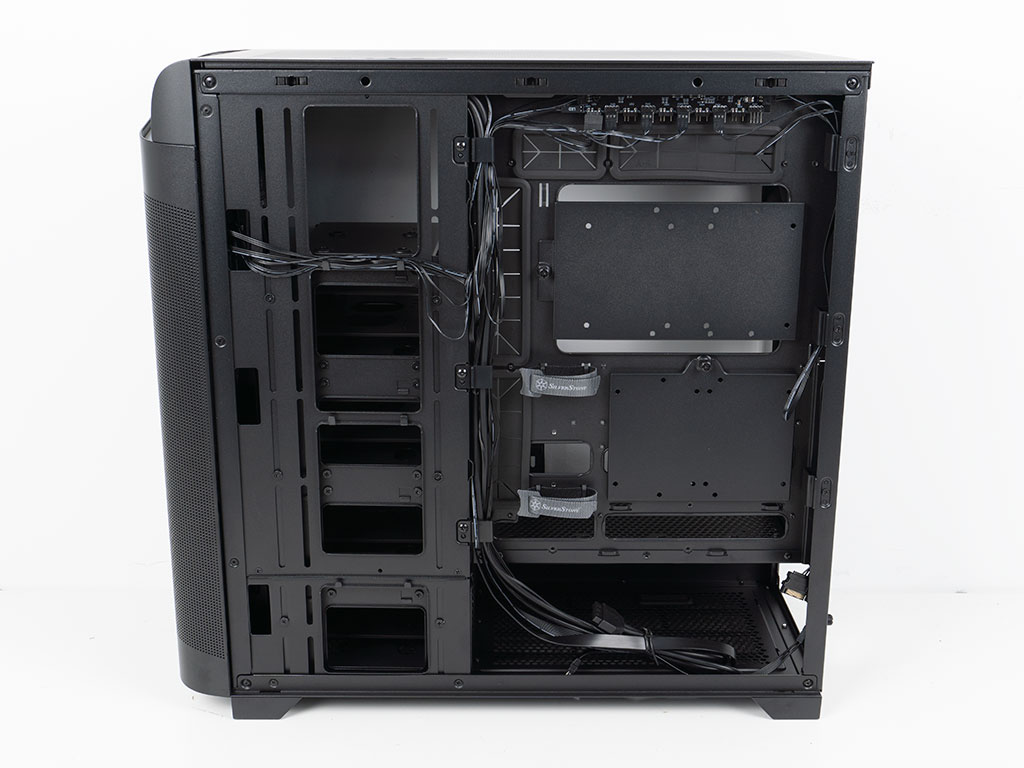
The backside of the SilverStone SETA A2 provides some interesting soft plastic clips at the left and right edges to easily route cables, which will certainly come in handy. On top of that, there are two Velcro strips which we will use for the thicker power cables during the assembly process.
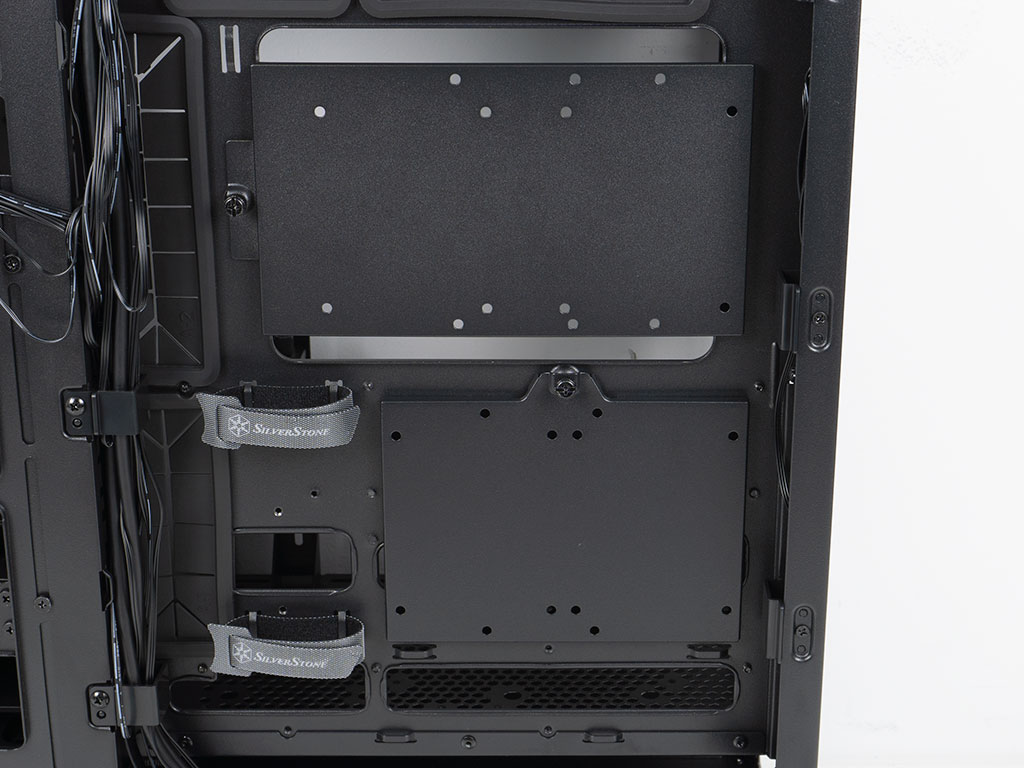
While most cases of this layout and size opt to have one mounting plate alongside an HDD cage, the SETA A2 provides two mounting plates. You may install two 3.5" drives here or opt for up to four 2.5" variants instead, which is already a solid number if you want to make sure all this type of storage is hidden away. Only if you opt for a Micro-BTF board will you have to remove the smaller tray, but it is unlikely that a user buys this large enclosure and then opts for that type of motherboard format.
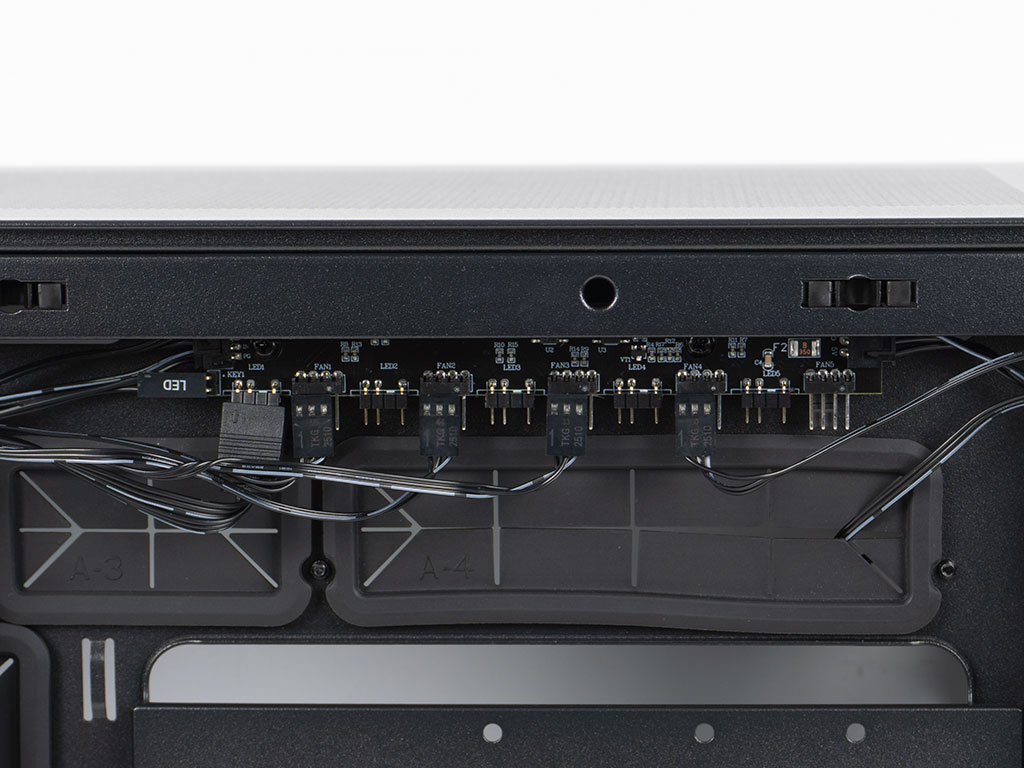
At the top edge behind the motherboard tray you will find a PCB which allows for up to five PWM fans and the same number of ARGB components to be connected. SilverStone has pre-wired up all the fans and the ARGB component from the front of the case cleanly. A SATA cable provides power, and you also have the alternate ability to let your motherboard take over illumination control to match your internal components. But there is one big issue here that limits the usefulness of this PCB in its out-of-the-box configuration: the fan interface for the motherboard only allows for PWM signals, but SilverStone has equipped the SETA with four RPM based fans. This means they will always run at full speed. The best remedy is to get a 4-way RPM splitter cable and only use this PCB when installing lots of extra cooling in form of additional PWM fans.
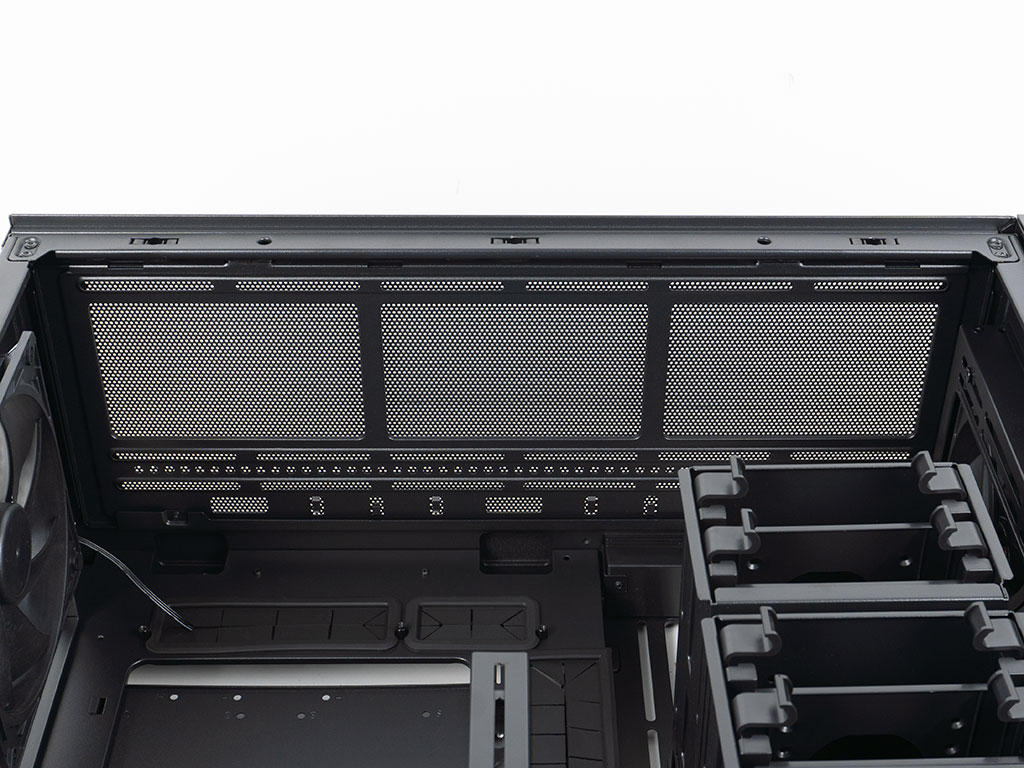
The ceiling is the third spot where you can install a 420 mm radiator or three fans each up to 140 mm in size. Even with the stack of HDD cages, there is still plenty of room to fit liquid cooling setups.
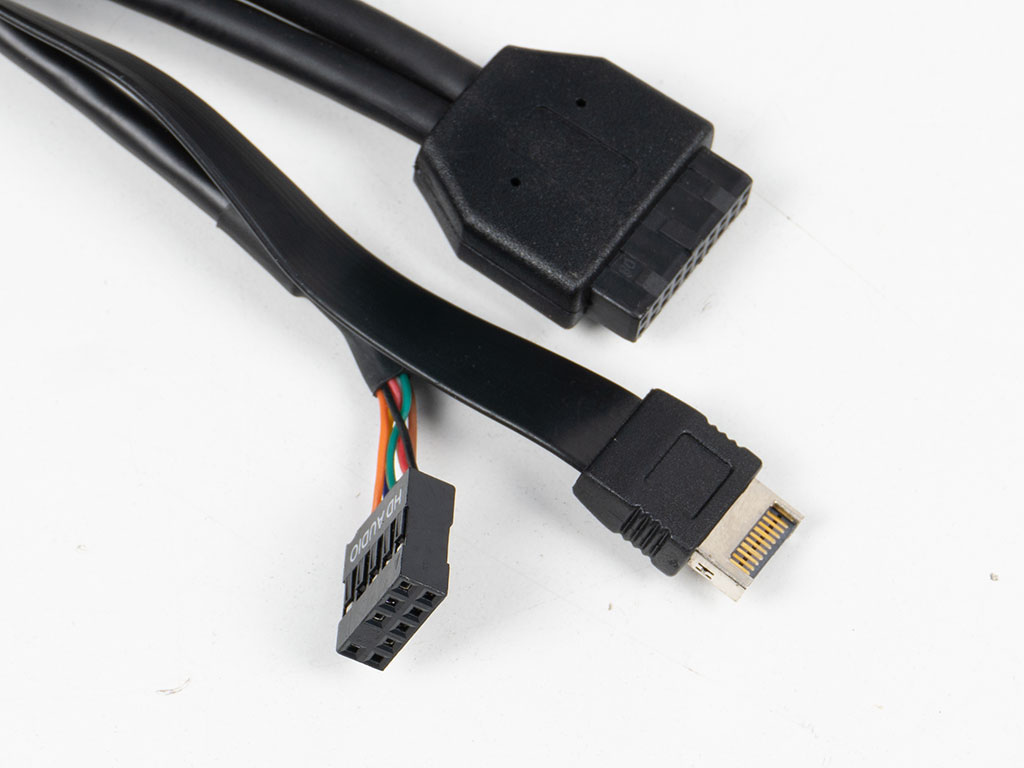
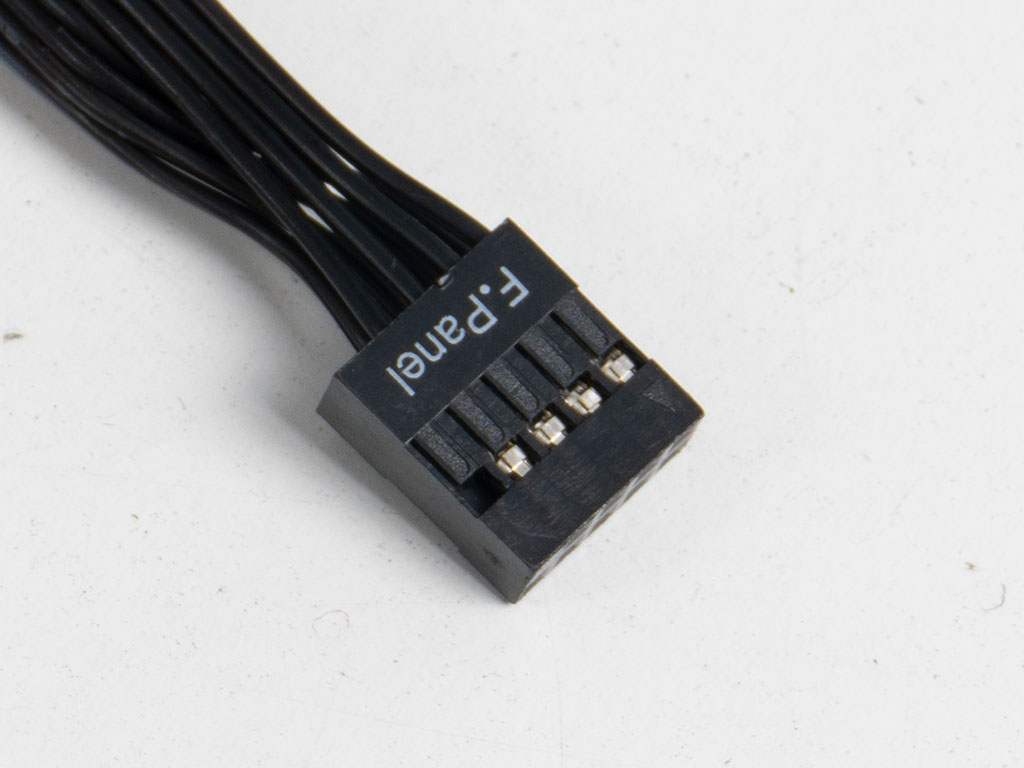
All the wiring within the SilverStone SETA A2 is sleeved black. Both the USB wires are sturdy, which also makes them a bit bulky, making their utilization a little tricker in combination with BTF motherboards. The front panel connectors have been unified into a single header, which is great to see.
Feb 12th, 2025 05:41 EST
change timezone
Latest GPU Drivers
New Forum Posts
- It's happening again, melting 12v high pwr connectors (302)
- Asteroid 2024 YR4 reaches level 3 on the Torino Scale (97)
- ECC memory for X670E (15)
- win10 or win11 (11)
- Help me decide..........OLED monitors (30)
- AMD RX 7000 series GPU Owners' Club (1294)
- Microsoft Officially drops AC3 (Dolby Digital) Support from W11 24H2 (19)
- Post your 7-Zip v22.01 scores (407)
- Do you guys have backup GPUs? (33)
- Where did the 7900xtx go? (18)
Popular Reviews
- Civilization VII Performance Benchmark Review - 35 GPUs Tested
- Kingdom Come Deliverance II Performance Benchmark Review - 35 GPUs Tested
- Team Group T-Force XTREEM DDR5-7200 48GB CL34 Review
- ASRock Phantom Gaming B850I Lightning Wi-Fi Review
- DAREU A980 Pro Max Review
- AMD Ryzen 7 9800X3D Review - The Best Gaming Processor
- NVIDIA GeForce RTX 5080 Founders Edition Review
- Corsair Frame 4000D Review
- Spider-Man 2 Performance Benchmark Review - 35 GPUs Tested
- MSI GeForce RTX 5080 Vanguard SOC Review
Controversial News Posts
- AMD Radeon 9070 XT Rumored to Outpace RTX 5070 Ti by Almost 15% (287)
- AMD is Taking Time with Radeon RX 9000 to Optimize Software and FSR 4 (256)
- AMD Denies Radeon RX 9070 XT $899 USD Starting Price Point Rumors (239)
- Edward Snowden Lashes Out at NVIDIA Over GeForce RTX 50 Pricing And Value (239)
- AMD Radeon RX 9070 XT & RX 9070 Custom Models In Stock at European Stores (226)
- New Leak Reveals NVIDIA RTX 5080 Is Slower Than RTX 4090 (215)
- AMD's Radeon RX 9070 Launch Faces Pricing Hurdles (175)
- AMD Radeon RX 9070 XT Tested in Cyberpunk 2077 and Black Myth: Wukong (169)