 7
7
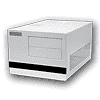
Silverstone Sugo SG02 SFF chassis Review
Installation & Finished Looks »A Closer Look
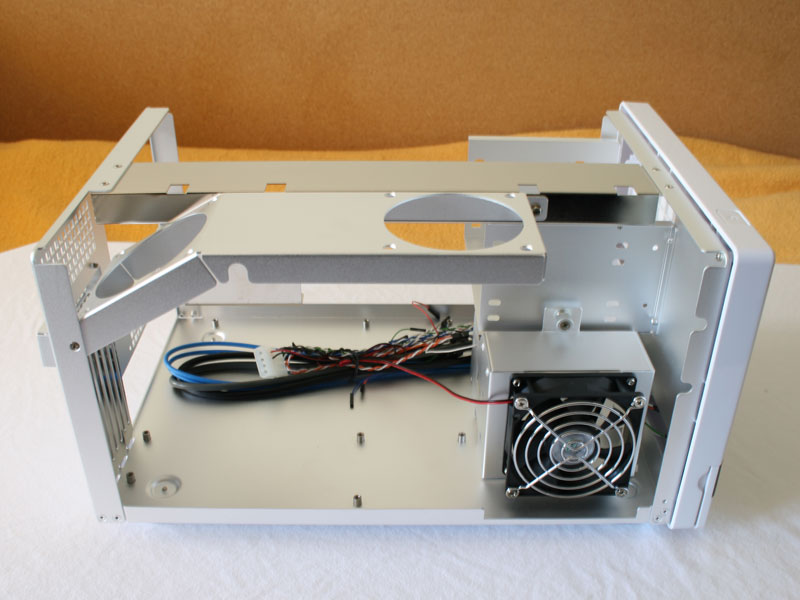
Removing the single piece cover is done by unscrewing four case screws in the back. Thermaltake made their Lanbox with a removable top, but Silverstone - just like Apevia (formerly Aspire) utilizes a single piece of folded metal to cover the entire case. While the Apevia X-Qpack is made completely of aluminum, Silverstone has opted for a sturdy steel cover and an aluminum interior. The only exception within the case itself, is a metal cross bar, which stabilizes the entire chassis. You may remove it as well, but there is really no reason to. The two 80 mm fans can be installed on the alumium construction above the PCI cards. This piece needs to be removed for mainboard installation.

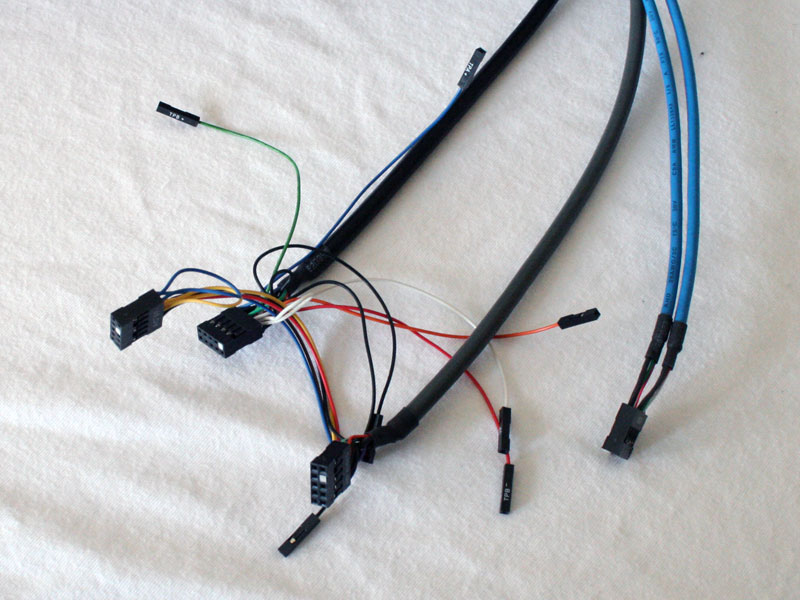
The front I/O PCB can be seen clearly in the inside. Each of the USB 2.0, Firewire and audio cables can be disconnected, so they will not clutter the inside of the case. The mainboard headers cover all possible audio connectivity, by including single piece ends. While this is great for compatility, it would have been better to see a complete HD Audio, AC'97 and seperate header set on the cable to provide a bit simpler installation.
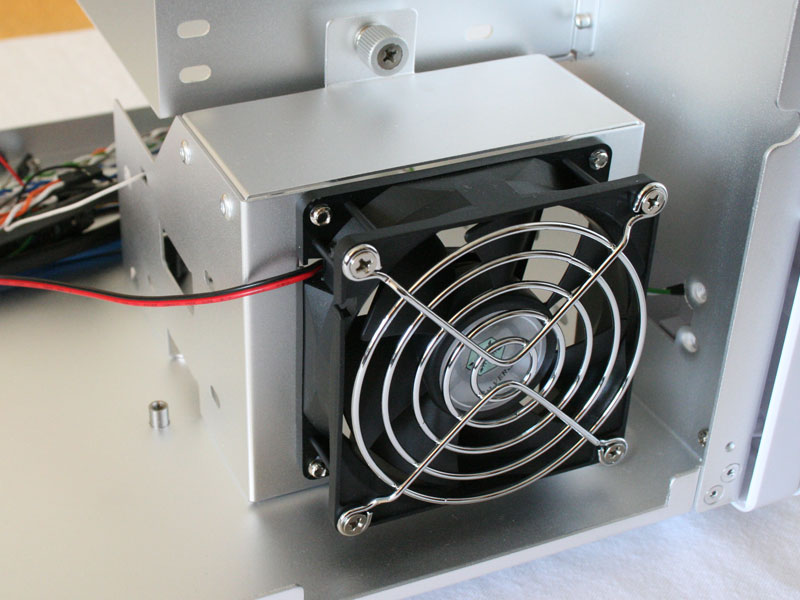
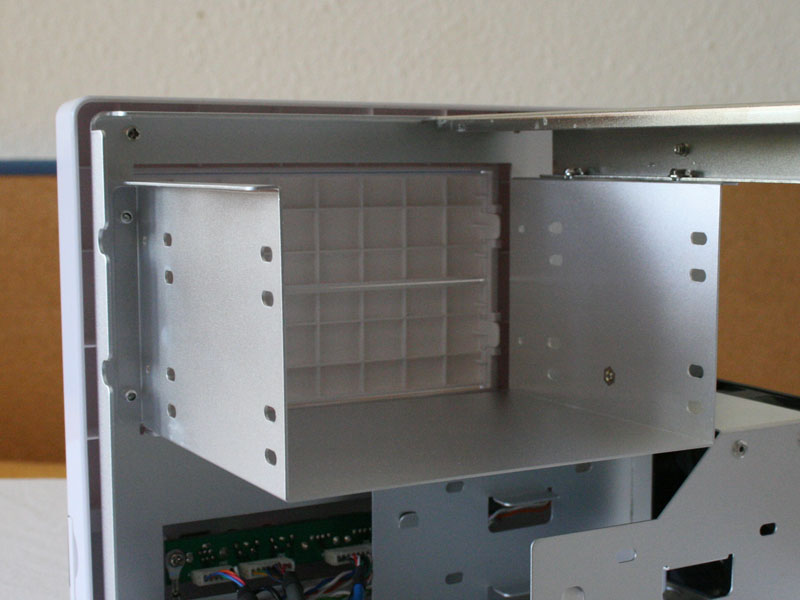
The hard drive cage holds the only fan included in the system. Silverstone has opted to use a Molex connector to power the fan, which makes no sense, especially at this location. The mainboard is bound to have a fan header at that corner of the board, which would allow temperature regulation if supported by the motherboard. The hard drive cage is secured by a single, spring loaded thumb screw.
Right above that you will find the optical drive bay, which can hold two 5.25 inch devices. These have to be installed with four screws, just as you would in any other case. Installation of optical drives is much simpler than the Lanbox as you do not require trial and error to line up the drive with the exterior.
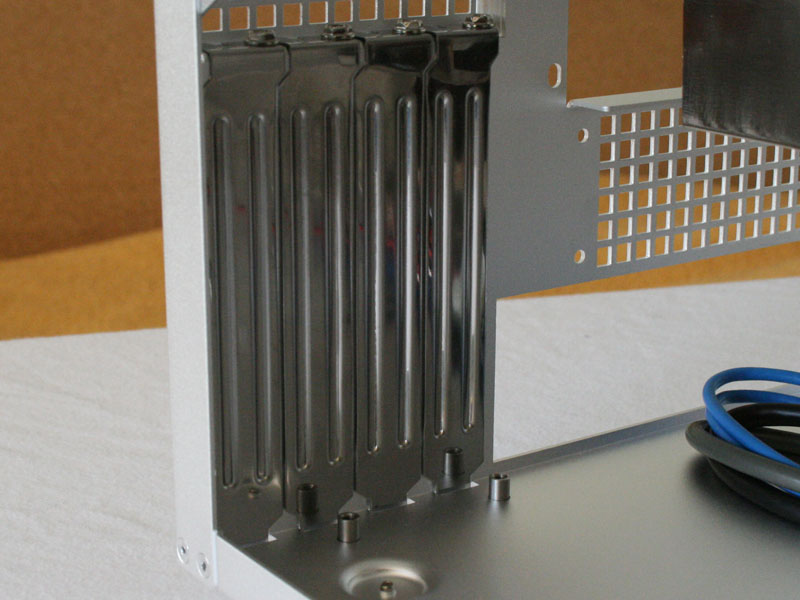
The four PCI covers can be accessed from the outside of the case and do not need to be broken out. Silverstone included individual metal covers which can be reused. The screws holding the PCI brackets are covered by an additional aluminum piece, which needs to be removed first to get access to the PCI bracket screws.
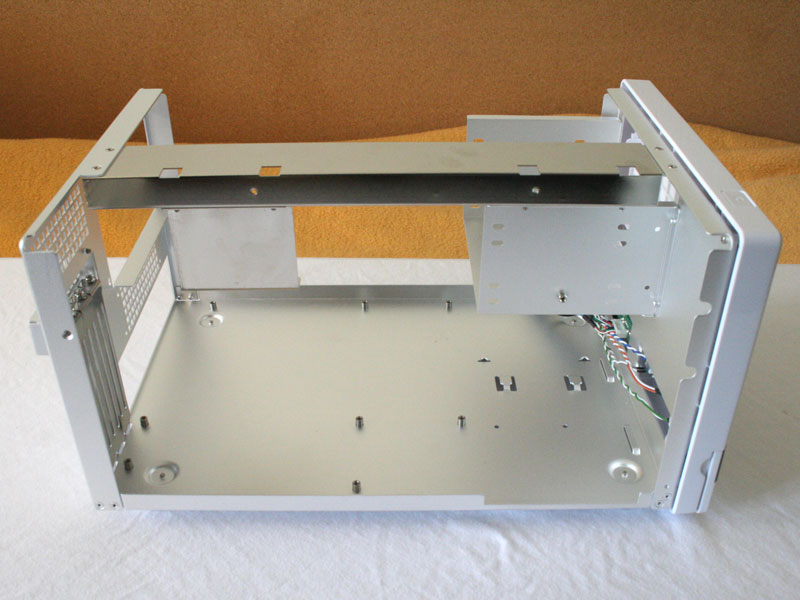
Once the fan and hard drive cage are removed, the case is ready to be filled with parts. Silverstone has decided not to go with a mainboard tray or any other fancy layout, but constructed the interior simple and efficiently. Once the two previously mentioned items are removed, you have access to every mainboard header within the case.
Feb 23rd, 2025 09:13 EST
change timezone
Latest GPU Drivers
New Forum Posts
- RTX5000 Series Owners Club (124)
- TPU's Nostalgic Hardware Club (19981)
- 3D Printer Club (431)
- Keep a 4080s or take a 5070ti? (34)
- RDNA4 Prediction Time Part Deux!!! (6)
- Hynix A die/M die recognising (0)
- As we live the age of game remakes, which game you would like to see to have a remake? (323)
- Why is coil whine still a nuisance? (18)
- The TPU UK Clubhouse (25764)
- It's happening again, melting 12v high pwr connectors (887)
Popular Reviews
- MSI GeForce RTX 5070 Ti Ventus 3X OC Review
- ASUS GeForce RTX 5070 Ti TUF OC Review
- Ducky One X Inductive Keyboard Review
- Galax GeForce RTX 5070 Ti 1-Click OC White Review
- MSI GeForce RTX 5070 Ti Vanguard SOC Review
- darkFlash DY470 Review
- Gigabyte GeForce RTX 5090 Gaming OC Review
- MSI GeForce RTX 5070 Ti Gaming Trio OC+ Review
- Palit GeForce RTX 5070 Ti GameRock OC Review
- Fantech Aria II Pro Review
Controversial News Posts
- NVIDIA GeForce RTX 5090 Spotted with Missing ROPs, NVIDIA Confirms the Issue, Multiple Vendors Affected, RTX 5070 Ti, Too (426)
- AMD Radeon 9070 XT Rumored to Outpace RTX 5070 Ti by Almost 15% (302)
- AMD Plans Aggressive Price Competition with Radeon RX 9000 Series (271)
- AMD Radeon RX 9070 and 9070 XT Listed On Amazon - One Buyer Snags a Unit (247)
- Edward Snowden Lashes Out at NVIDIA Over GeForce RTX 50 Pricing And Value (241)
- AMD Denies Radeon RX 9070 XT $899 USD Starting Price Point Rumors (239)
- New Leak Reveals NVIDIA RTX 5080 Is Slower Than RTX 4090 (215)
- NVIDIA Investigates GeForce RTX 50 Series "Blackwell" Black Screen and BSOD Issues (195)