 8
8
Thermaltake Blue Orb II Review
(8 Comments) »Introduction
From the manufacturer Thermaltake:- Radiate aluminum blue fin provide sufficient air flow.
- Copper core touches the heat center directly and conducts heat quickly.
- Silent Fan with blue LED, 17dBA only.
- Universal design for Intel P4 LGA775 & AMD K8.
| Heatsink Dimensions | 140 x 66 mm |
|---|---|
| Fan Dimensions | 113 x 24 mm |
| Heatsink Material | Copper Core & Aluminum Extrusion (140Fin) |
| Fan Voltage | 12V, 7V startup |
| Power Input | 3.00W, 3 Pin connector |
| Fan Speed | 1700 RPM +- 10% |
| Air Flow | Max. 77.85 cfm, max. 1.80 mm H2O |
| Noise | 17 dbA |
| Weight | 869g |
| Life time | 30,000 hours (= ~ 3.5 years) |
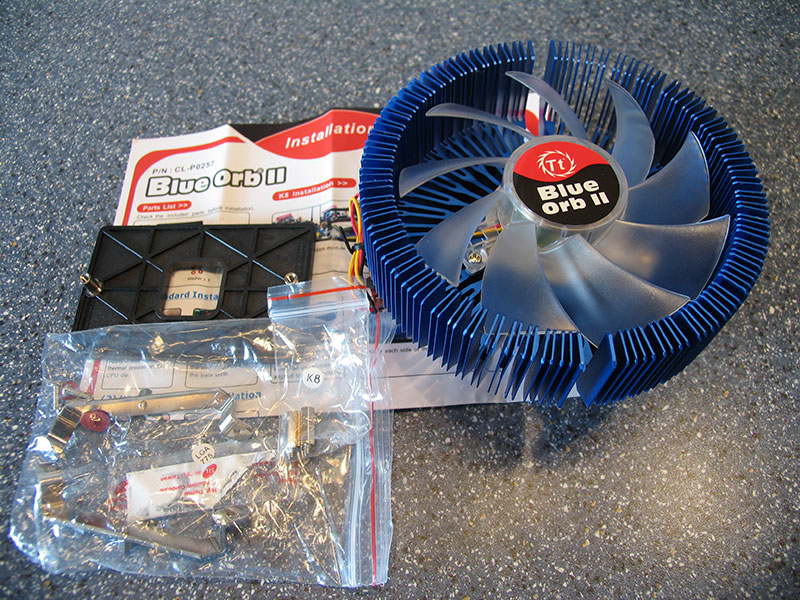
Packaging


Box contents:
- CPU Cooler
- Bag with mounting parts for Socket LGA775
- Bag with mounting parts for Socket 939
- Backside mounting plate for Socket 939
- Thermal grease
- Instruction manual
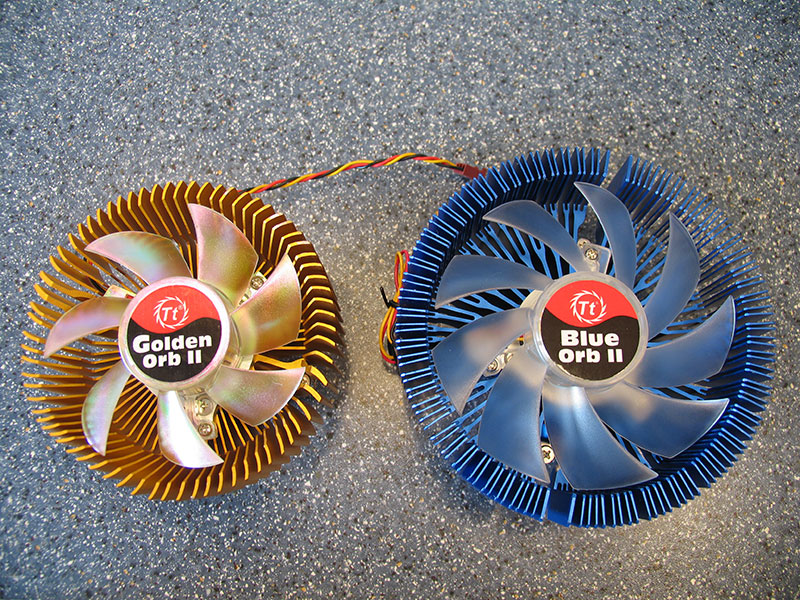
We recently reviewed the Thermaltake Golden Orb II (review here).
The Blue Orb II is even bigger than this massive cooler, its diameter is 2 cm more.


The contact area of the heatsink base is very flat, but has some very minor scratches, which will certainly not affect cooling performance.

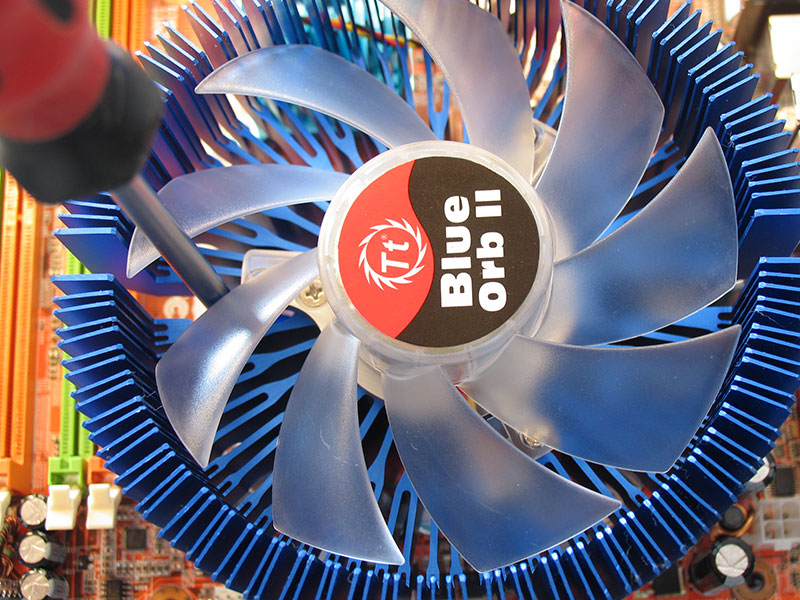
Three blue LEDs light up the fan when it is running.
Installation
Installation is extremely easy and can be done in a few minutes, if you don't run into the space problem, as we did below. The easy understandable english manual covers installation for Socket 775 and two installation methods for Socket 939. On the Thermaltake Website you can also find a nice Flash animation which shows the installation process. Since the installation process is identical to that of the Golden Orb II, this time, we will show the installation on the Socket 775 ABIT AL8.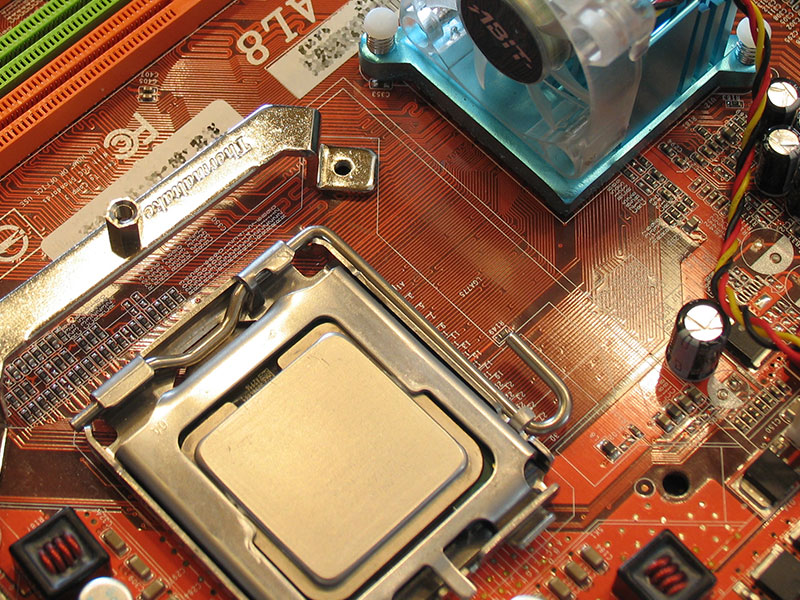
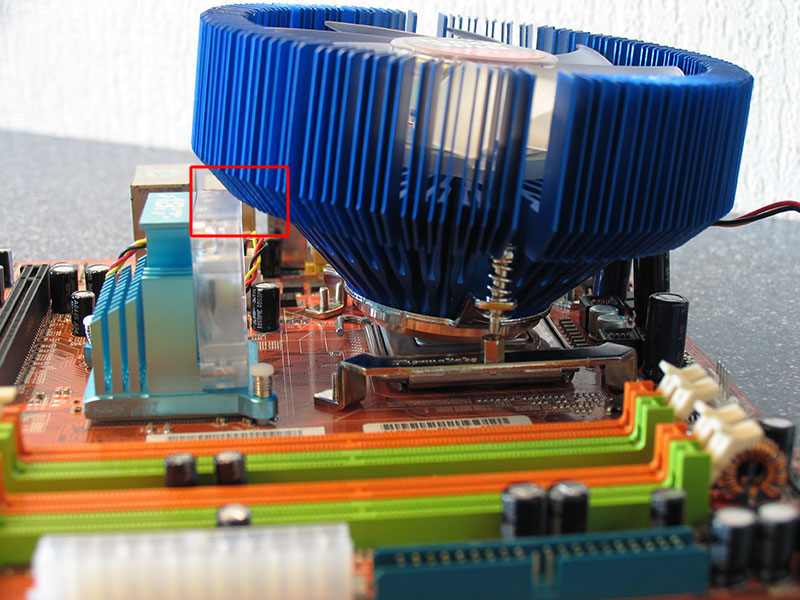
The Blue Orb II does not fit, because ABIT's chipset heatsink is blocking it. As Thermaltake support told us this can be easily fixed by rotating the chipset heatsink 180°.
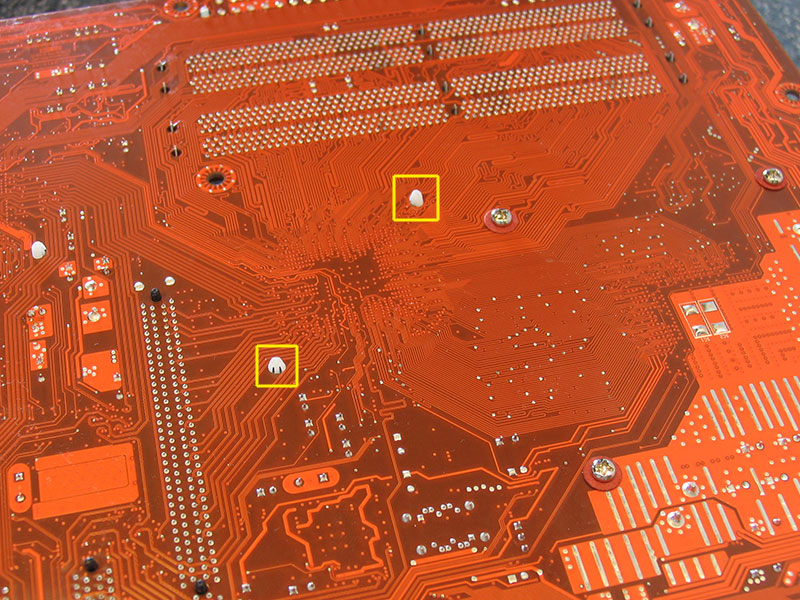
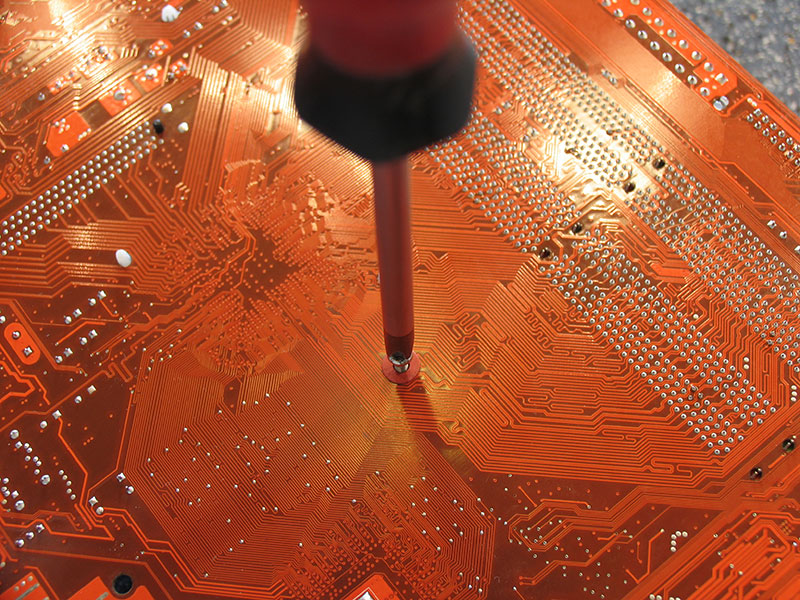
We remove the plastic pins which hold the ABIT heatsink by pushing them together and through the hole.
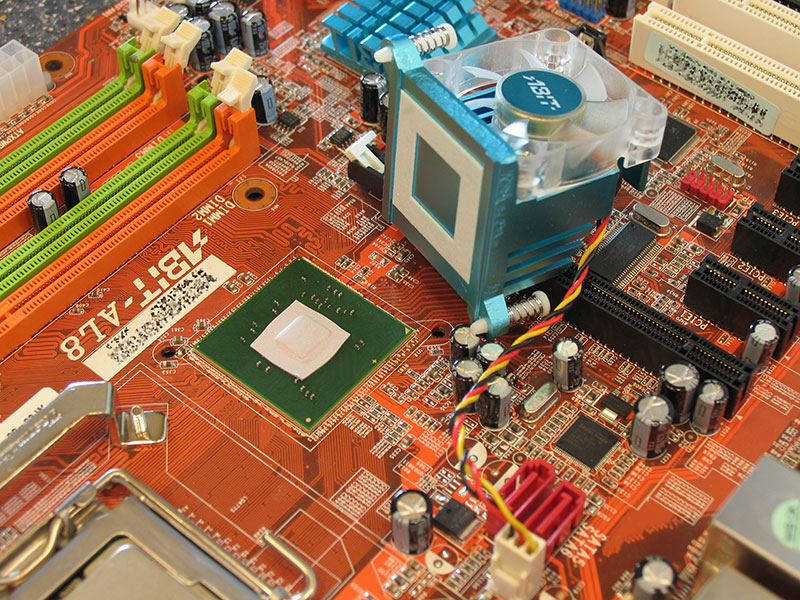
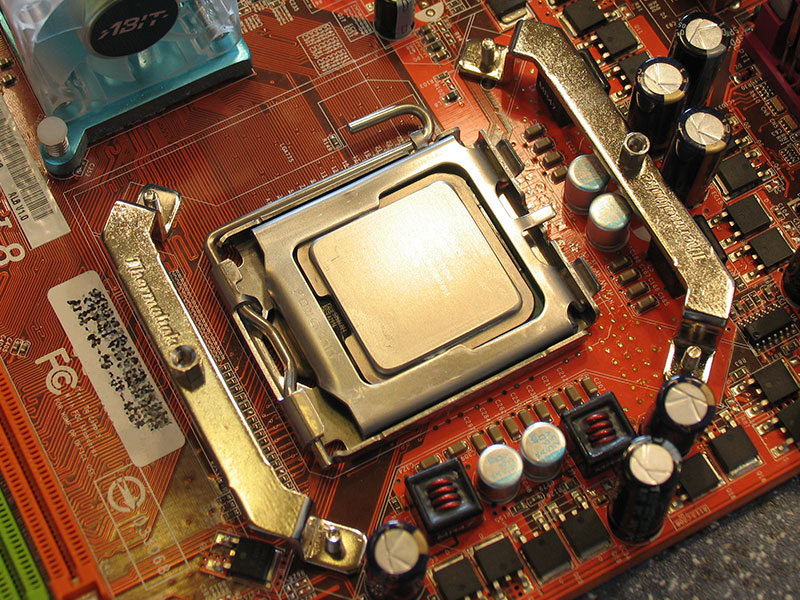
Now the heatsink comes off easily. As you can see the thermal pad on the core is intact - we reviewed this board here and took it through quite some overclocking. Just rotate the heatsink, put it back on, put the clips through the mounting holes.. done.

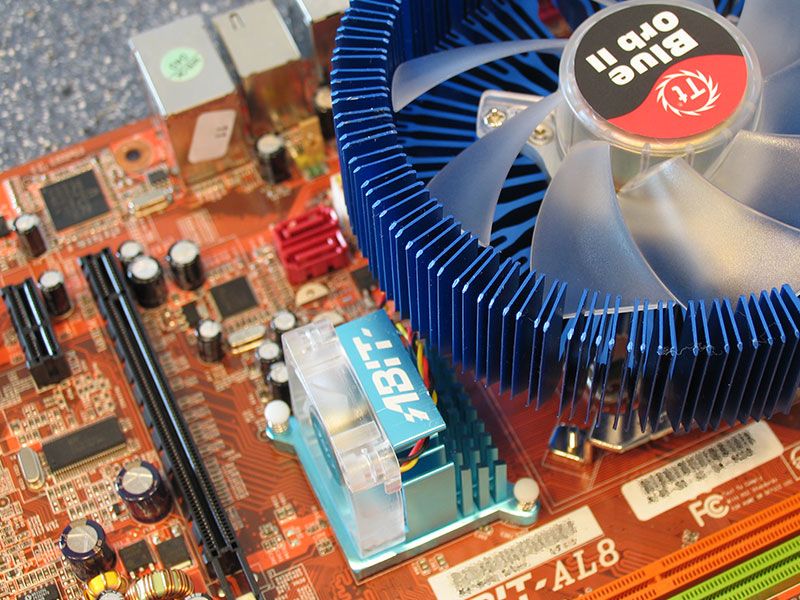
Now the cooler fits without problems and we can finish the installation by screwing down the cooler.
On the DFI LanParty NF4 the big cooler blocks access to two memory slots.
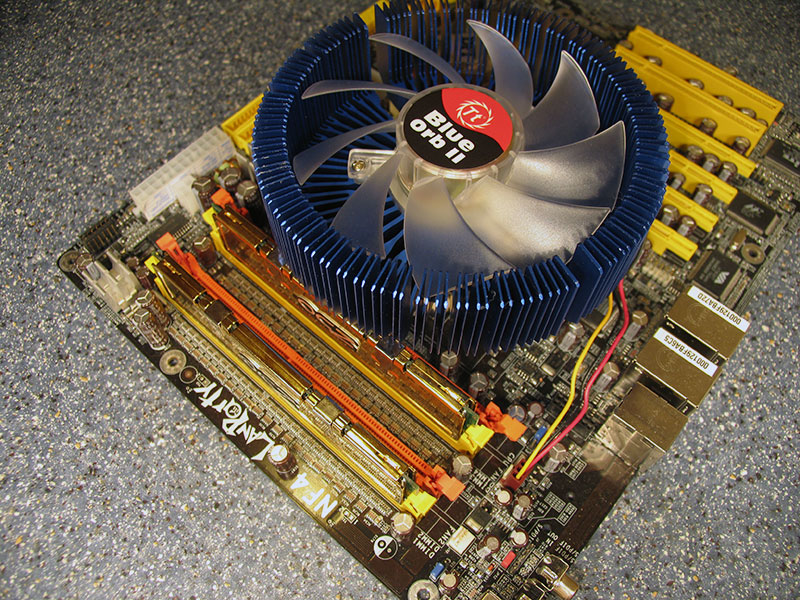
With the cooler installed, it is no longer possible to add or remove memory in slots 3 and 4. Make sure to install the memory before putting on the cooler. I tried fitting a few memory modules, and even with a heatspreader, there should be enough space left to install the cooler.
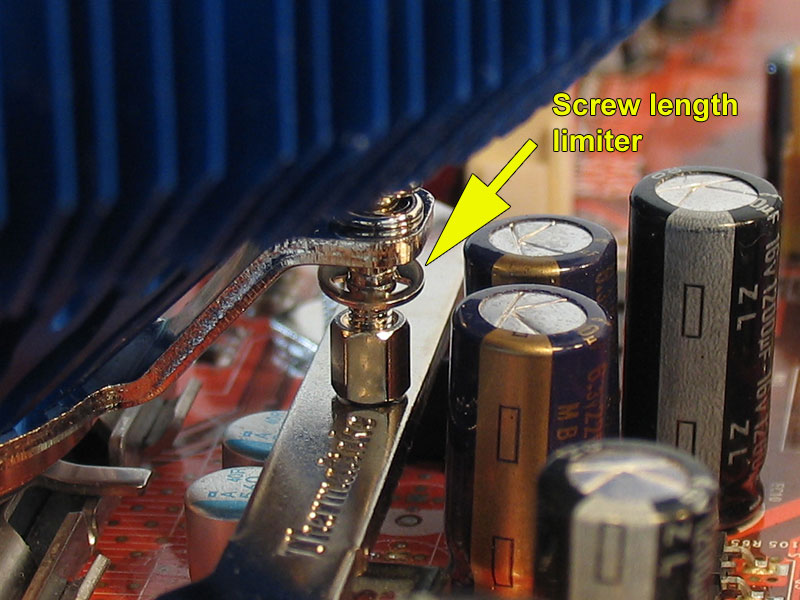
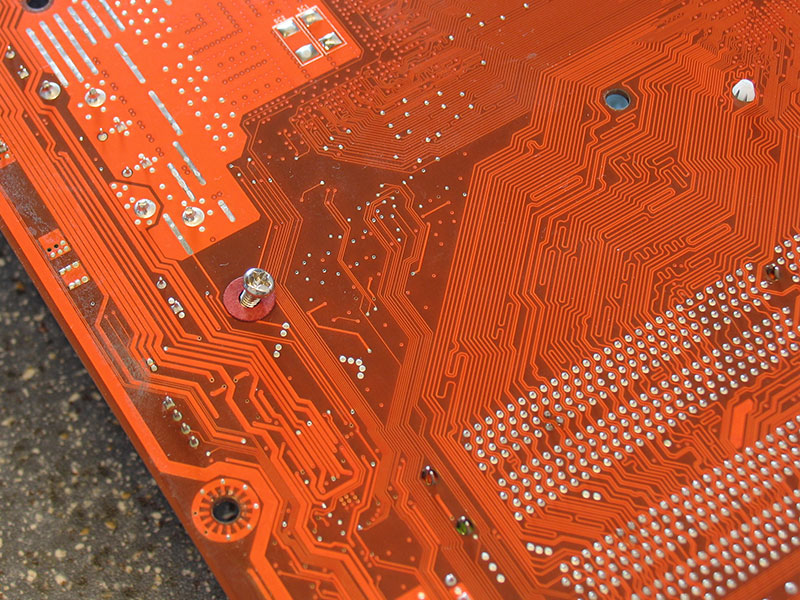
In order to make sure that mounting pressure on the CPU is not exceeded, Thermaltake has added limiters to the screws. You just screw it down till it stops, the springs help distribute the load on the CPU evenly.
Our Patreon Silver Supporters can read articles in single-page format.
Apr 24th, 2025 06:05 EDT
change timezone
Latest GPU Drivers
New Forum Posts
- 3DMARK "LEGENDARY" (307)
- What are you playing? (23454)
- The TPU UK Clubhouse (26161)
- Are the 8 GB cards worth it? (122)
- Help me identify Chip of this DDR4 RAM (33)
- 5070 Ti power limit questions (61)
- any way to get past bios mismatch error? (2)
- AMD RX 9070 XT & RX 9070 non-XT thread (OC, undervolt, benchmarks, ...) (95)
- RX 9000 series GPU Owners Club (503)
- Help getting a mini pc (8)
Popular Reviews
- NVIDIA GeForce RTX 5060 Ti 8 GB Review - So Many Compromises
- Colorful iGame B860M Ultra V20 Review
- ASUS GeForce RTX 5060 Ti TUF OC 16 GB Review
- ASRock X870E Taichi Lite Review
- Upcoming Hardware Launches 2025 (Updated Apr 2025)
- Sapphire Radeon RX 9070 XT Pulse Review
- Sapphire Radeon RX 9070 XT Nitro+ Review - Beating NVIDIA
- NVIDIA GeForce RTX 5060 Ti PCI-Express x8 Scaling
- AMD Ryzen 7 9800X3D Review - The Best Gaming Processor
- ASUS GeForce RTX 5080 TUF OC Review
Controversial News Posts
- NVIDIA GeForce RTX 5060 Ti 16 GB SKU Likely Launching at $499, According to Supply Chain Leak (182)
- NVIDIA Sends MSRP Numbers to Partners: GeForce RTX 5060 Ti 8 GB at $379, RTX 5060 Ti 16 GB at $429 (127)
- NVIDIA Launches GeForce RTX 5060 Series, Beginning with RTX 5060 Ti This Week (115)
- Nintendo Confirms That Switch 2 Joy-Cons Will Not Utilize Hall Effect Stick Technology (105)
- Nintendo Switch 2 Launches June 5 at $449.99 with New Hardware and Games (99)
- Sony Increases the PS5 Pricing in EMEA and ANZ by Around 25 Percent (85)
- NVIDIA PhysX and Flow Made Fully Open-Source (77)
- Windows Notepad Gets Microsoft Copilot Integration (75)