 8
8
Thermaltake Tai-Chi Review
Inside »Around the Case

With the Hydraulic door open we see the back of the case and if you look closely you can sport the screws used to hold the changeable back panel to add the BTX capable panel. At first I had assumed the BTX panel was part of the hardware in the box of the Tai-Chi, but as stated in the contents section the kit is purchased separately. Still a feature Thermaltake presents, as well as the easy lift handles seen on top of the case. Trust me there's nothing easy about lifting this case, especially once we fill it with components.
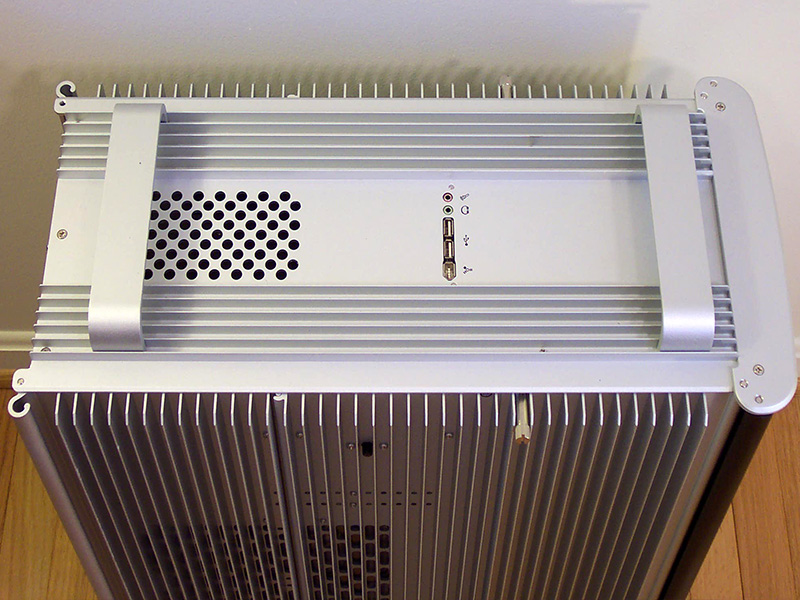
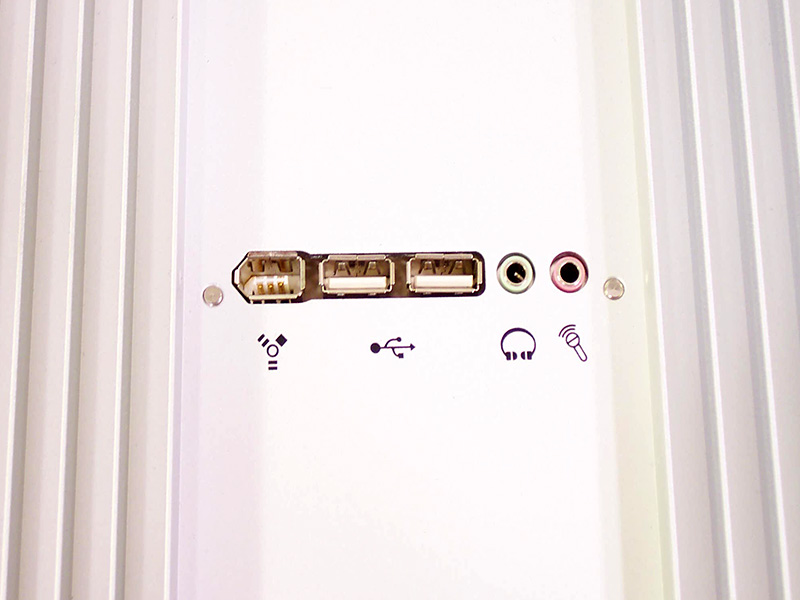
Like most Thermaltake cases there are USB, Firewire, Headset and Microphone ports on top of the case. I think they're a little to far back and would have preferred them a tad closer to the front. Not like you’re going to be setting this thing on top of the computer desk, so being under or beside one is more likely, the ports being closer to the front would be a little more advantageous. This can be said of the drilled holes for the top blow hole, which is made up of 90 1/4" (6.35 mm) holes. Setting over the power supply the holes do not have a fan and not really sure they provide much intake nor exhaust. Being partially blocked by the PSU it may serve to allow heat from the PSU to dissipate upwards, but most PSUs have one or more exhaust fans.
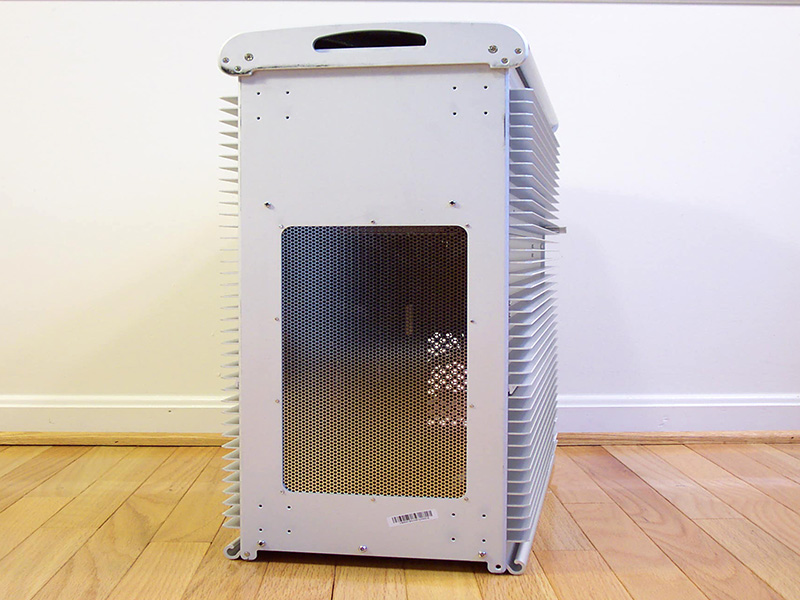
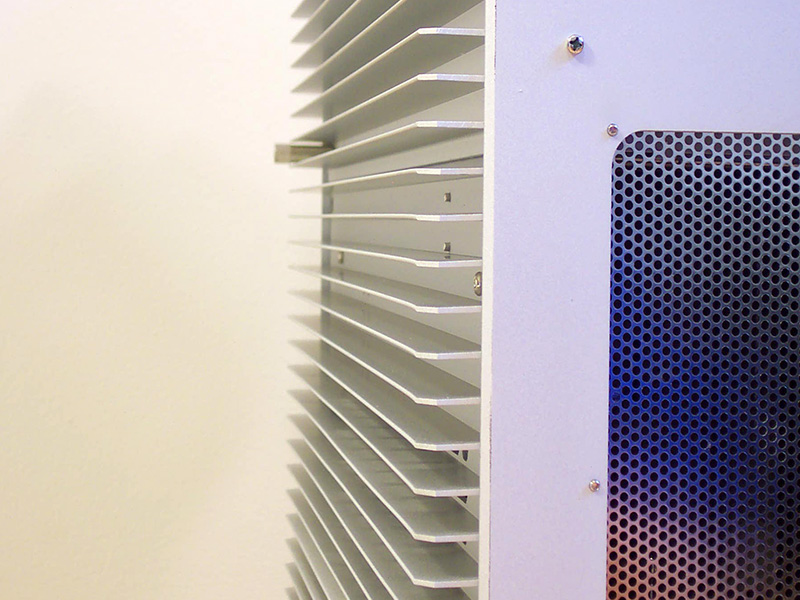
Tipped up on its back we can see the bottom of the case and the mesh covered 10" x 6" (25.4 x 15.24 cm) opening. The mesh is also made of aluminum and to me this opening provides the best intake air flow, positioned right under the dual 120cm radiator. As we'll see farther along in the review once the Hydraulic door is closed things are a lot more cramped than I would have guessed. Under the front swinging doors there is a small slot which acts as a handle when tipping the case and also provides air intake for the front case fan. A side shot of the fins measuring 7/8" (198.12 cm) high.
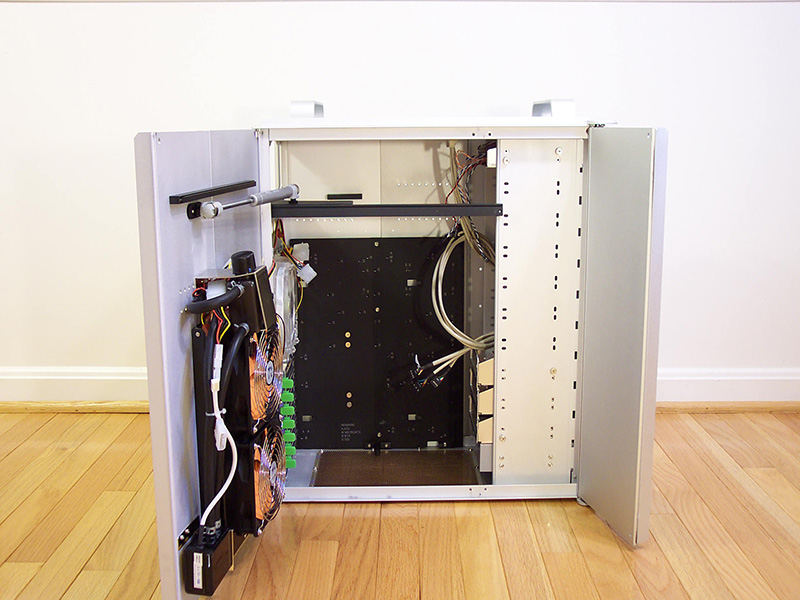
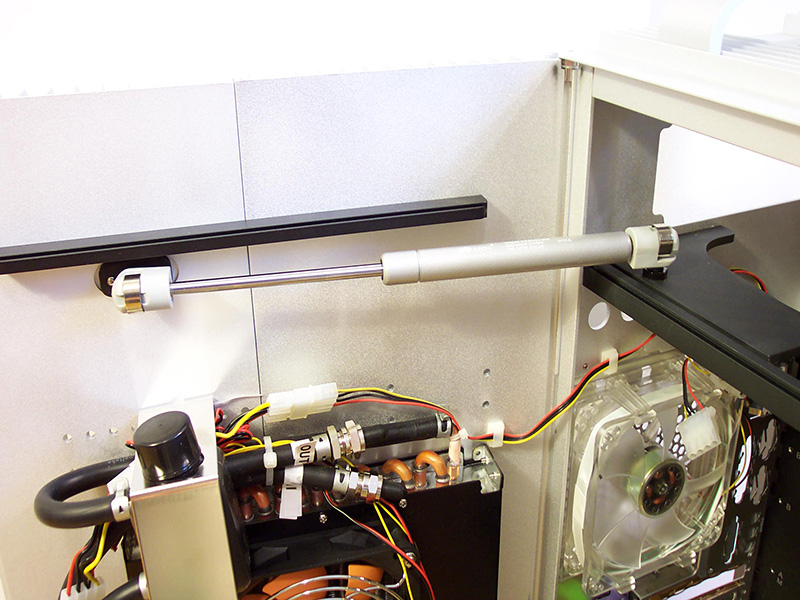
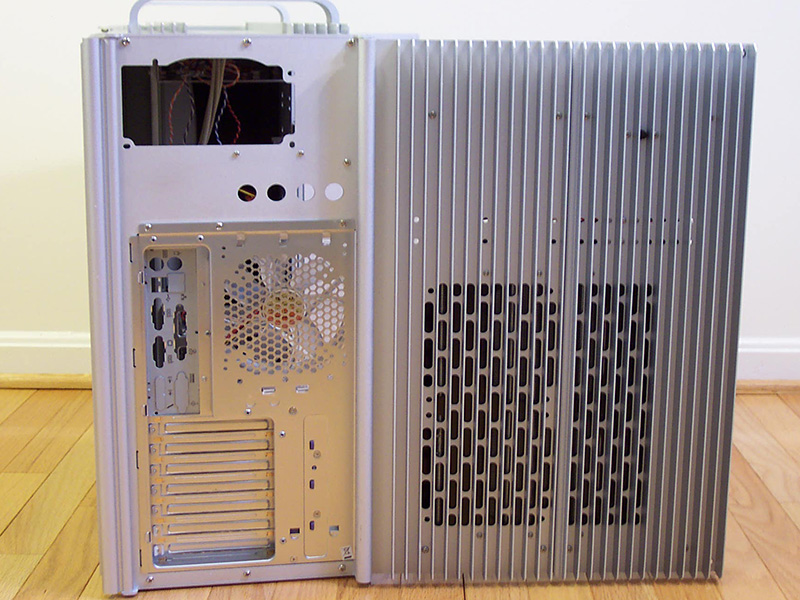
From the side with both doors open we can see the layout of case internals. In the next picture a close up of the Hydraulic door, which if not careful swings right open after removing the long thumbscrew.
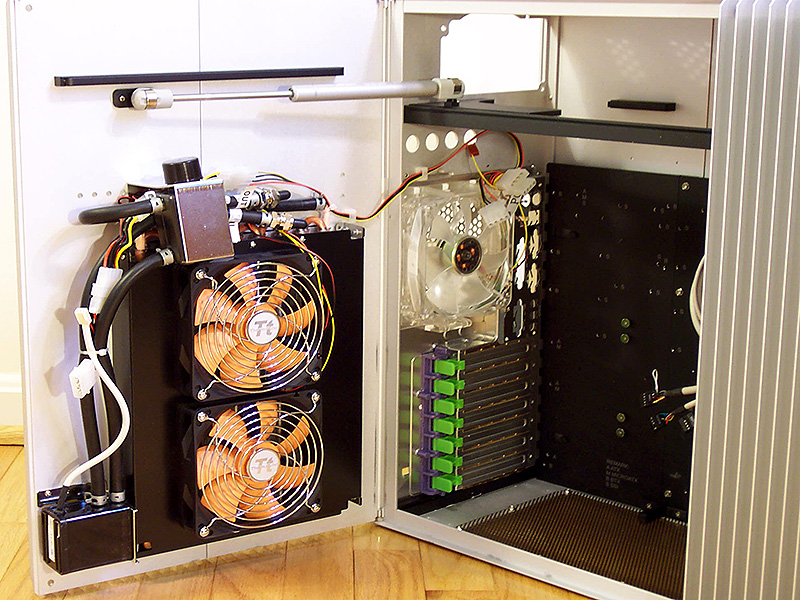
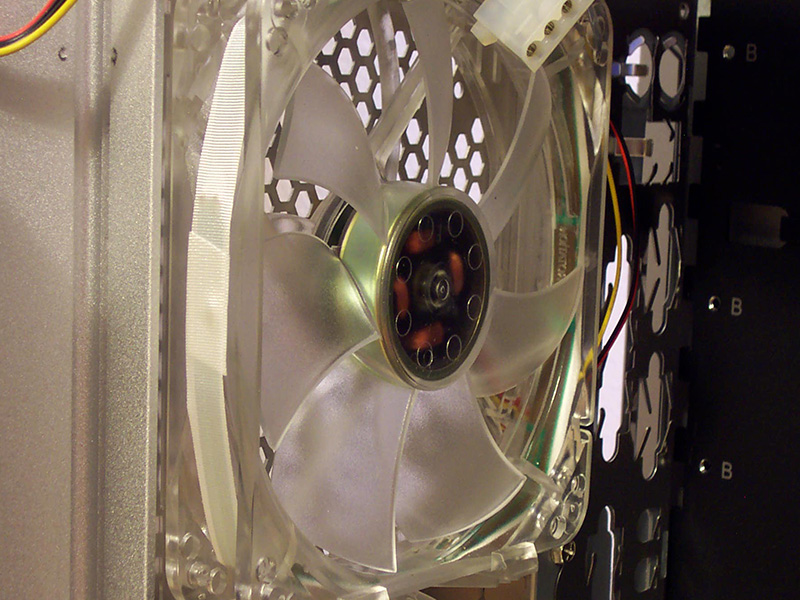
Something I didn't notice at first but caught my eye when I was looking for a good way to run the tubing. If you look at the picture on the left the in and out tubing lines are tie banded together, to which I don't have a problem with as long as they are not pulled too tight. When you run your tubing it's going to run along the door and across the back of the case which puts it right in the path of the fan, no problem except there is not a grill on the fan, as we can see in the second picture. That will be something we'll have to deal with during the install.
Feb 23rd, 2025 10:23 EST
change timezone
Latest GPU Drivers
New Forum Posts
- Why is coil whine still a nuisance? (19)
- Hynix A die/M die recognising (7)
- 5800X3D CO and RAM - Thoughts? (19)
- RDNA4 Prediction Time Part Deux!!! (15)
- PC Turns Off Immediately After Pressing Power Button--Must be Held Down to Power On (14)
- As we live the age of game remakes, which game you would like to see to have a remake? (325)
- RTX5000 Series Owners Club (127)
- EFI partition too small, can't update Windows 11 on laptop (3)
- Cooler for r7 5700X3D [Stock] (8)
- TPU's Nostalgic Hardware Club (19981)
Popular Reviews
- MSI GeForce RTX 5070 Ti Ventus 3X OC Review
- ASUS GeForce RTX 5070 Ti TUF OC Review
- Ducky One X Inductive Keyboard Review
- Galax GeForce RTX 5070 Ti 1-Click OC White Review
- MSI GeForce RTX 5070 Ti Vanguard SOC Review
- darkFlash DY470 Review
- Gigabyte GeForce RTX 5090 Gaming OC Review
- MSI GeForce RTX 5070 Ti Gaming Trio OC+ Review
- Palit GeForce RTX 5070 Ti GameRock OC Review
- Fantech Aria II Pro Review
Controversial News Posts
- NVIDIA GeForce RTX 5090 Spotted with Missing ROPs, NVIDIA Confirms the Issue, Multiple Vendors Affected, RTX 5070 Ti, Too (424)
- AMD Radeon 9070 XT Rumored to Outpace RTX 5070 Ti by Almost 15% (302)
- AMD Plans Aggressive Price Competition with Radeon RX 9000 Series (271)
- AMD Radeon RX 9070 and 9070 XT Listed On Amazon - One Buyer Snags a Unit (247)
- Edward Snowden Lashes Out at NVIDIA Over GeForce RTX 50 Pricing And Value (241)
- AMD Denies Radeon RX 9070 XT $899 USD Starting Price Point Rumors (239)
- New Leak Reveals NVIDIA RTX 5080 Is Slower Than RTX 4090 (215)
- NVIDIA Investigates GeForce RTX 50 Series "Blackwell" Black Screen and BSOD Issues (197)