 2
2
Thermaltake Tower 500 Review
Thermal Stress Test »Review System
| System Parts for Case Reviews | |
|---|---|
| Processor: | Intel Core i5-12600K Provided by: Intel |
| Motherboards: | ATX: ASUS ROG Strix Z690-E Gaming WiFi mATX: ASUS TUF Gaming B660M-PLUS WiFi D4 ITX: ASUS ROG STRIX Z690-I Gaming WiFi Provided by: ASUS |
| Graphics Card: | Gigabyte Radeon RX 6600 Eagle Provided by: Gigabyte ZOTAC GAMING GeForce RTX 3060 Ti Twin Edge OC Provided by: Zotac |
| Memory: | 32 GB XPG LANCER RGB DDR5 6000 MHz 32 GB XPG CASTER DDR5 6400 MHz 32 GB XPG HUNTER DDR5 5200 MHz Provided by: ADATA |
| HDD: | Toshiba MG08ADA400E 7200 RPM SATA III Provided by: Toshiba |
| SSD: | ATX:XPG GAMMIX S70 BLADE 1 TB mATX: ADATA LEGEND 840 512 GB ITX: XPG SPECTRIX S20G 500 GB ADATA Ultimate SU800 512 GB ADATA Ultimate SU720 500 GB Provided by: ADATA |
| Power Supply: | ATX: Fractal Design ION+ 650W 80 Plus Gold SFX: Fractal Design ION SFX-L 650W 80 Plus Gold Provided by: Fractal Design |
| Cooling: | Thermaltake Toughliquid Ultra 360 RGB Provided by: Thermaltake |
Assembly
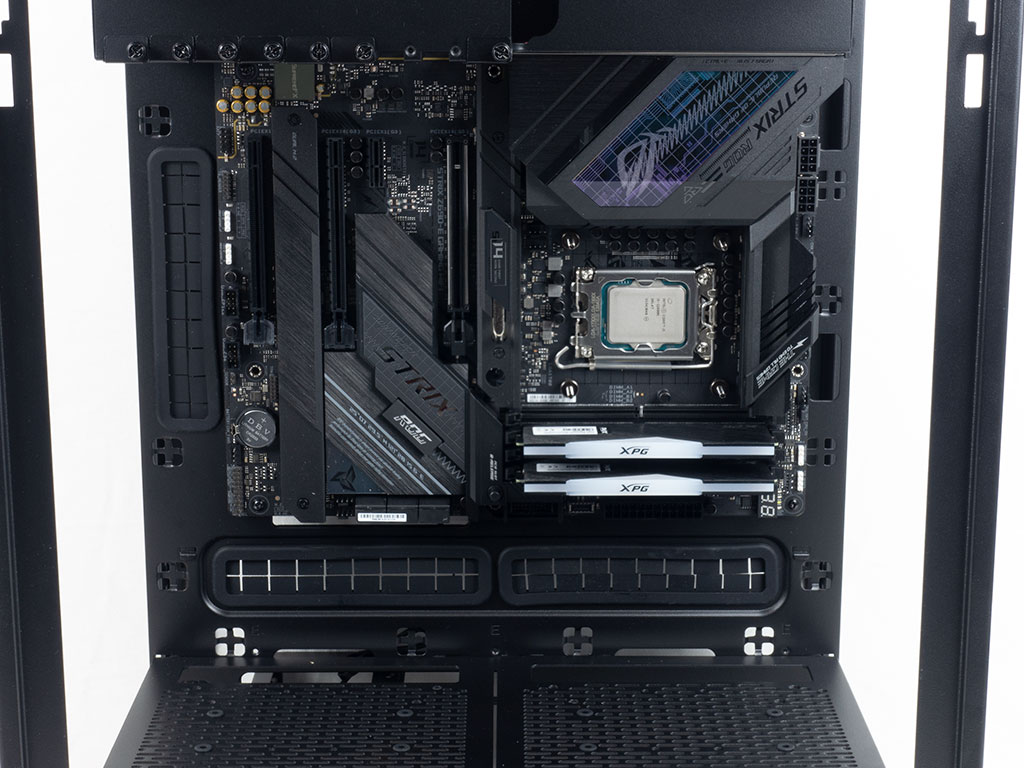

Installing the motherboard is done with screws and spacers. Thermaltake pre-installs three spacers that have little ridges to align the board easily. However, should components of yours not have correctly sized holes, the Tower 500 also comes with three classic spacers. As you can see, there is loads of space all around the board, with the grommets and zip-tie mounting points extremely well laid out. Just like in a traditional chassis, adding a GPU is done using the expansion slots and a thumb screw.

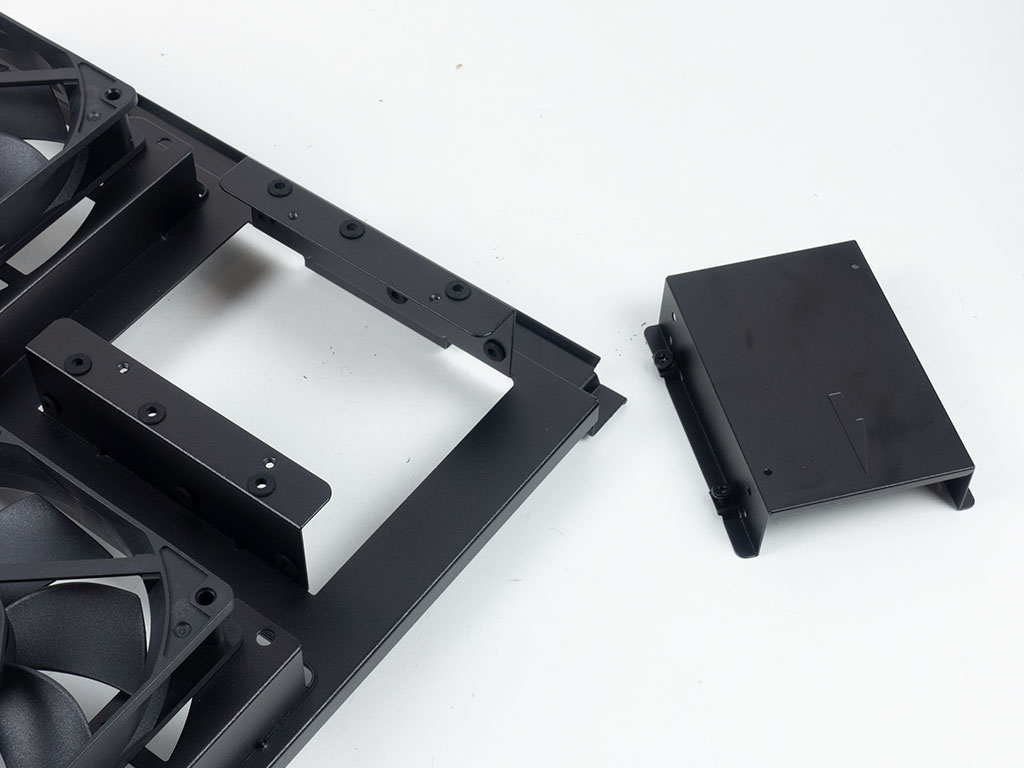
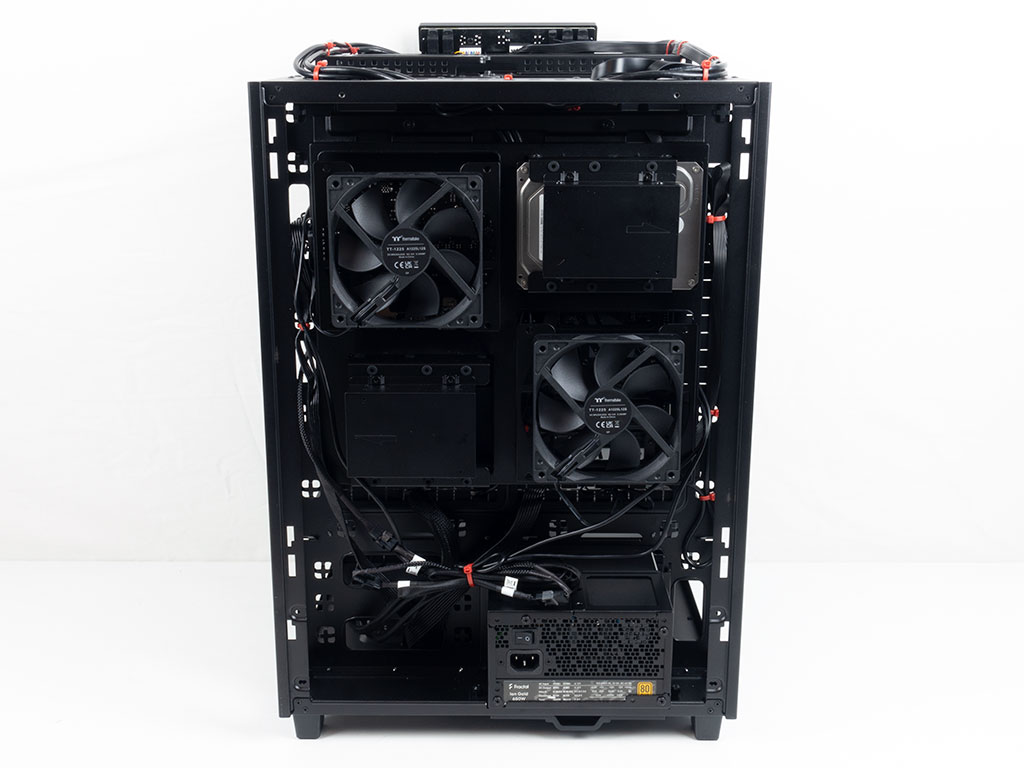
While several storage possibilities are available, we will focus on the hidden backplate. You may take it off the frame by releasing two thumb screws. Once done, detach the top 2.5" frame to make adding those type of drives easier.
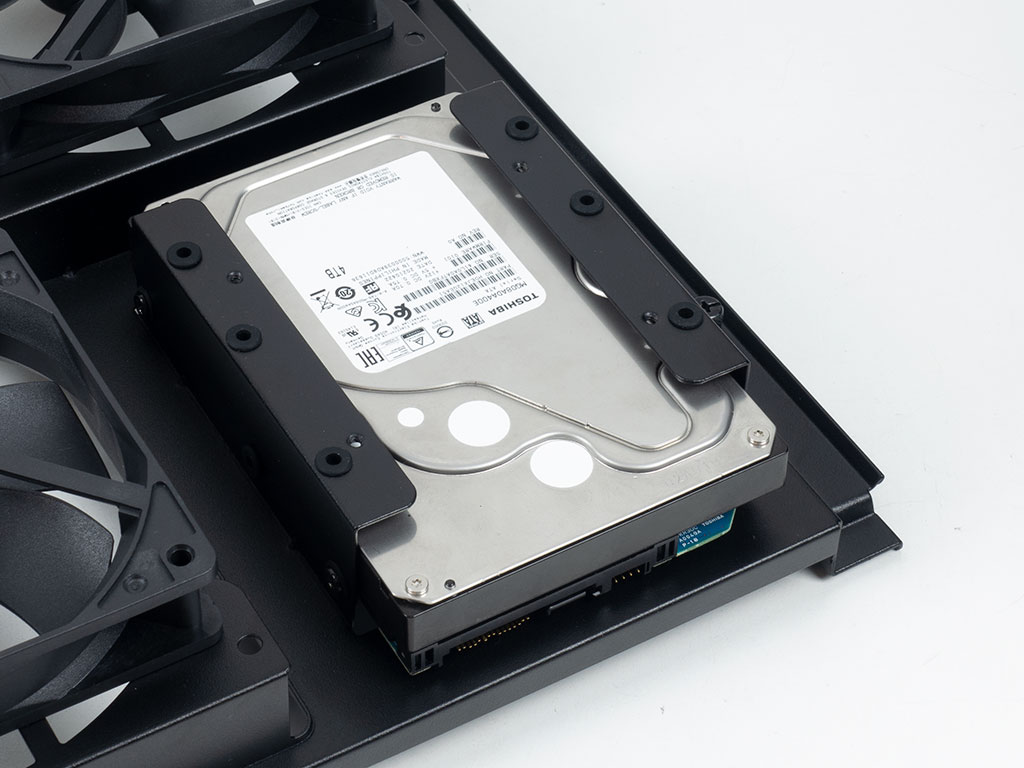

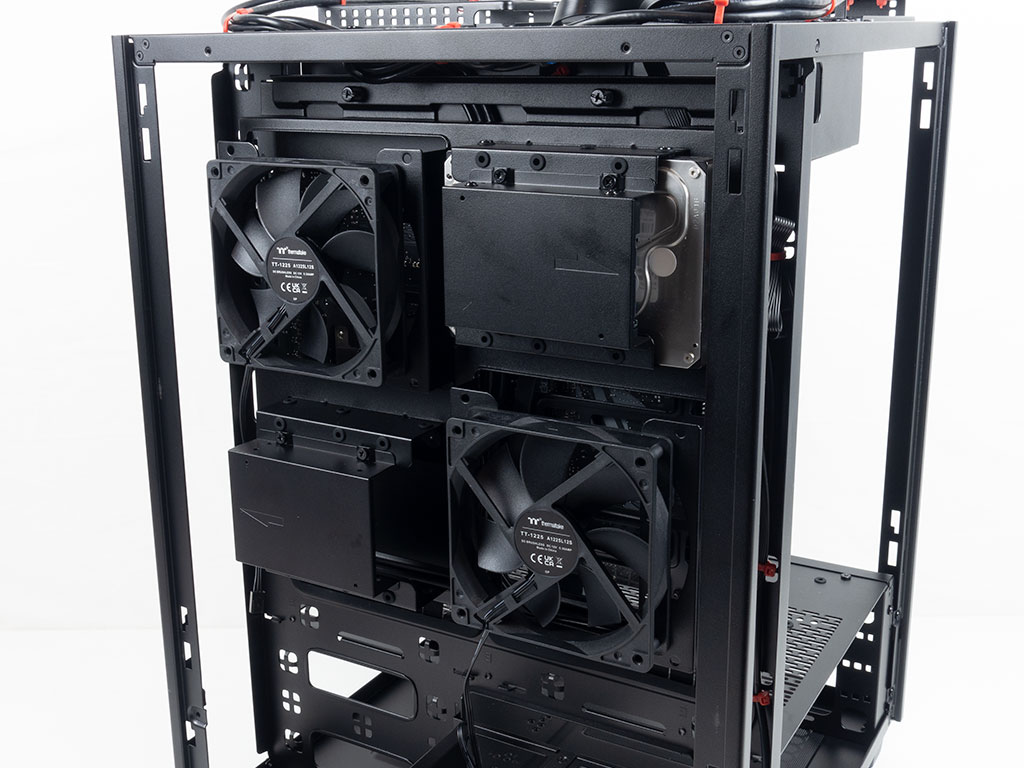
Installing a 3.5" unit requires a little finesse with the screw driver to reach the rubber-ringed mounting holes, which isn't too hard. Top it off with the 2.5" bracket and drives. Putting this whole mounting frame back onto the chassis is easily done, and as you can see, thanks to some smart attention to detail by Thermaltake's designers, cable routing is also accounted for quite nicely.
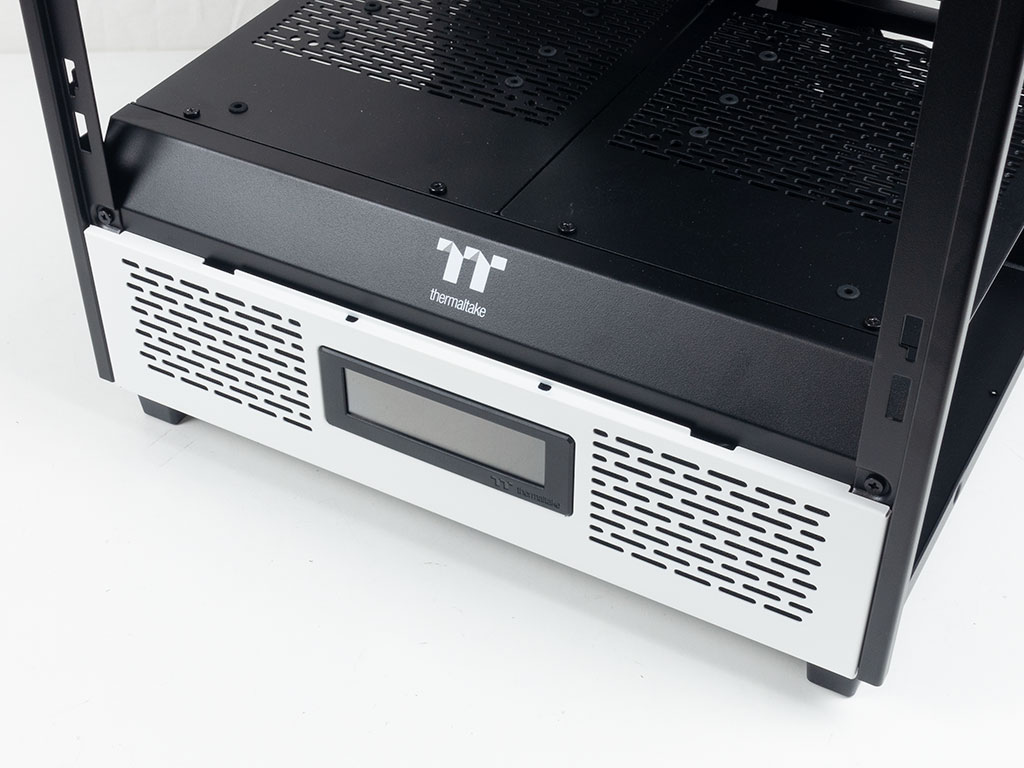
Adding the optional LCD panel kit quite literally just means screwing it down with a single thumb screw as it takes the place of the front metal vent on the base. As with all these LCD screens from Thermaltake, a micro USB cable is used to drive it.
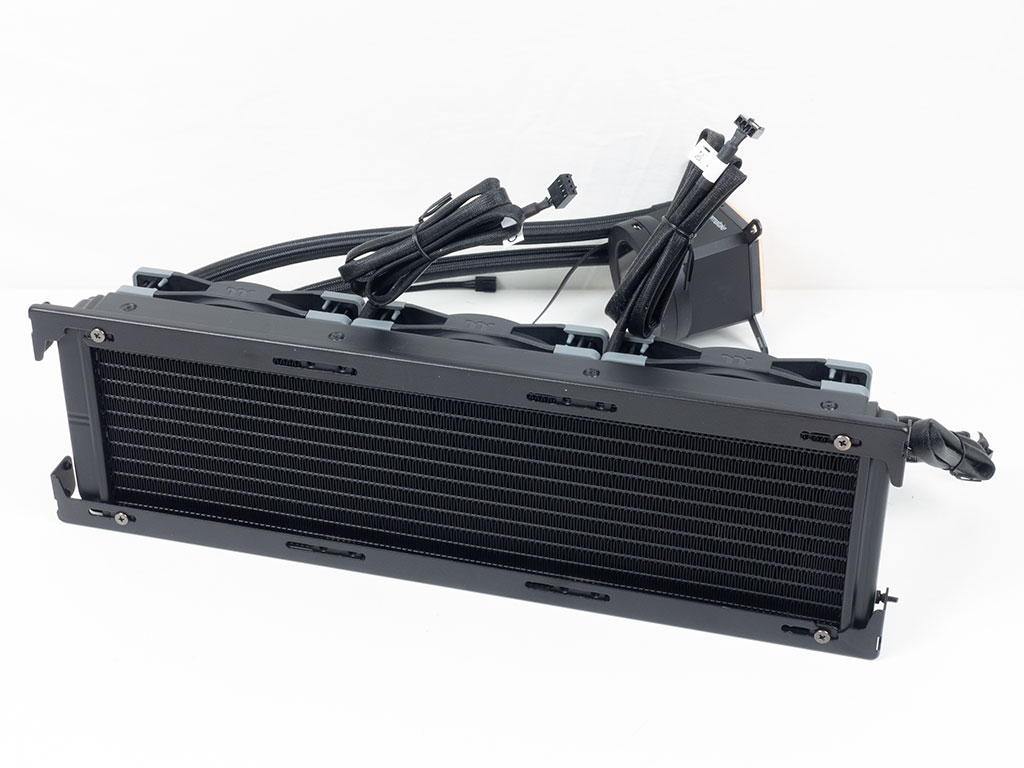
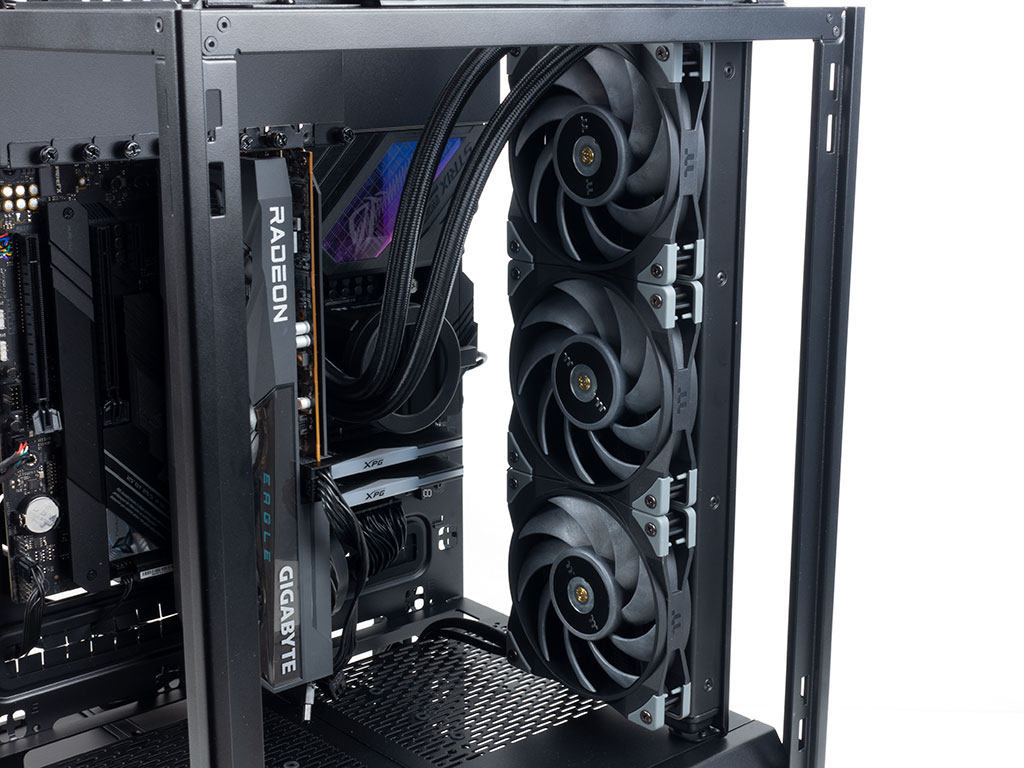
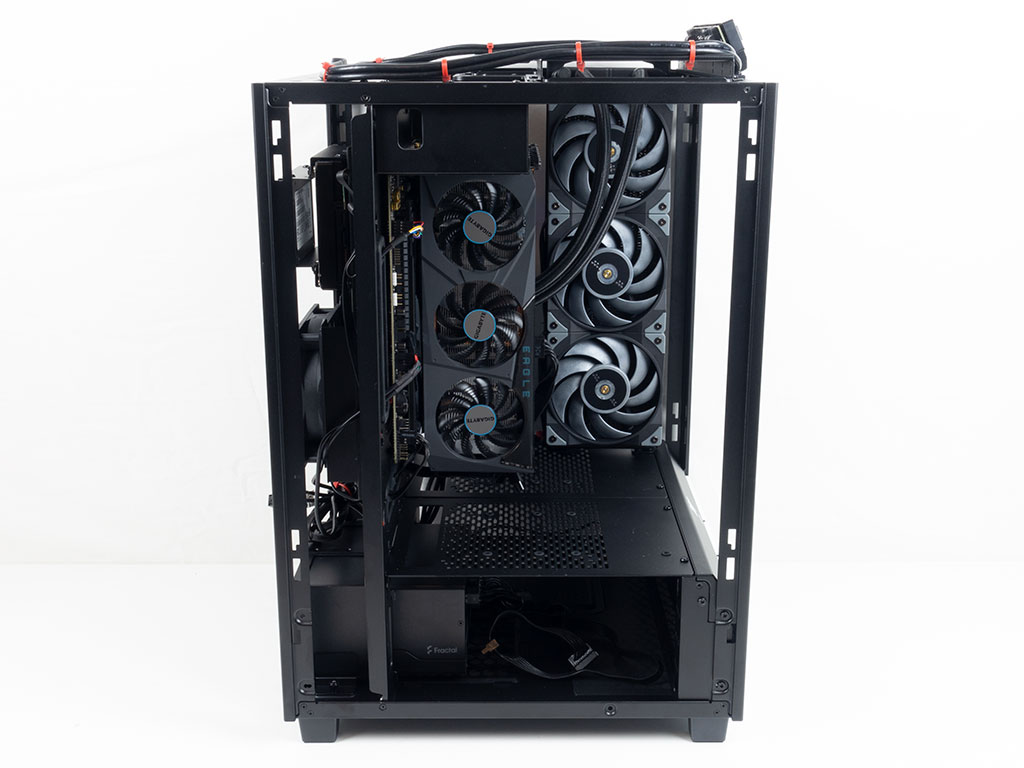
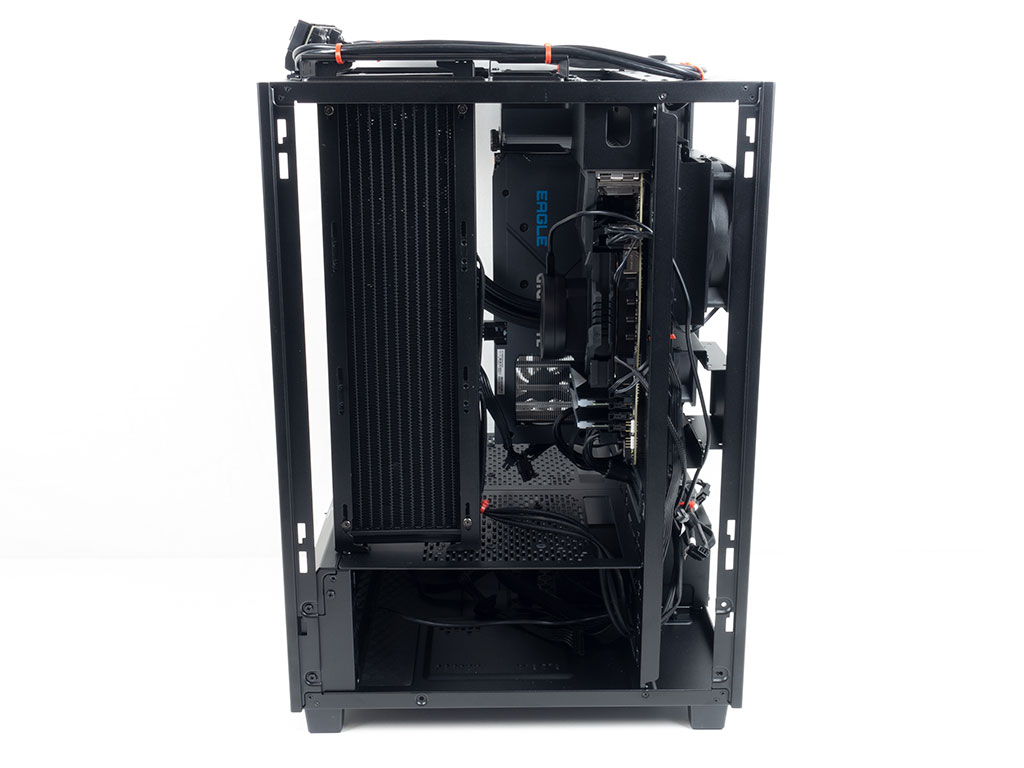
If you opt for a 360 mm liquid cooler, you have to use the provided rails. Once installed onto your liquid cooler, it is propped into the chassis. Thermaltake placed it far enough from the side panel for a push/pull configuration as well. While you could install the AIO on the opposite side, Thermaltake strongly recommends you do not, so that the GPU still gets the best-possible airflow from that direction. On top of that, you should rotate the glass panel to the right of the AIO so that the vented portion aligns with it, which is something we considered when putting the final touches on the review build.
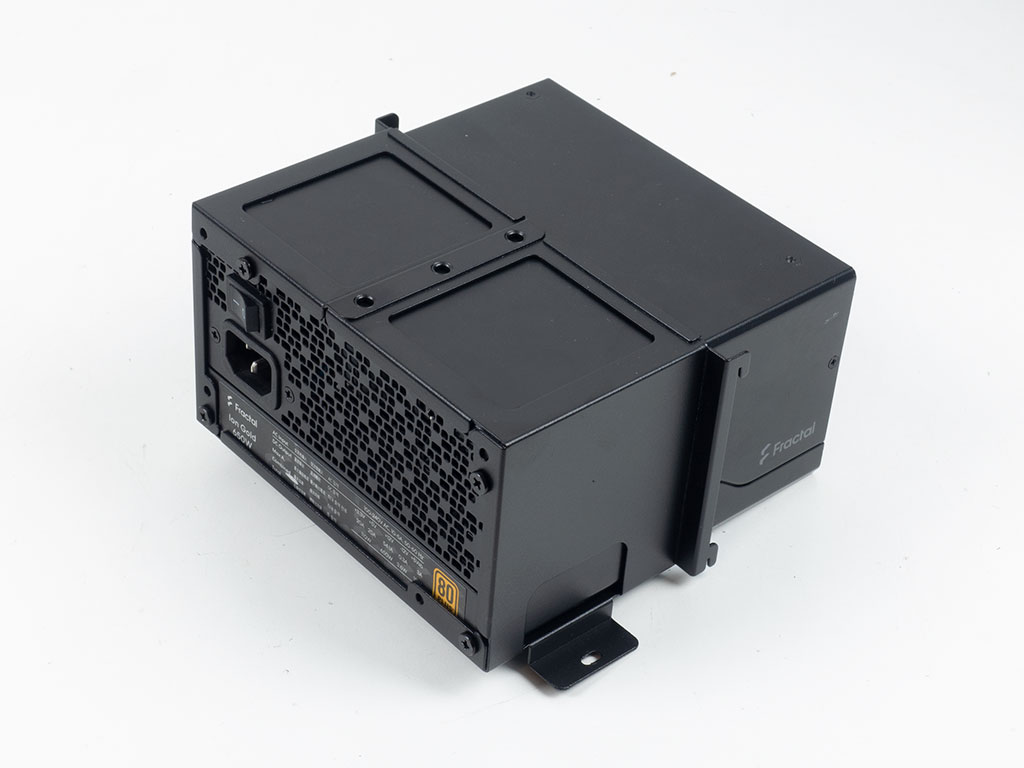

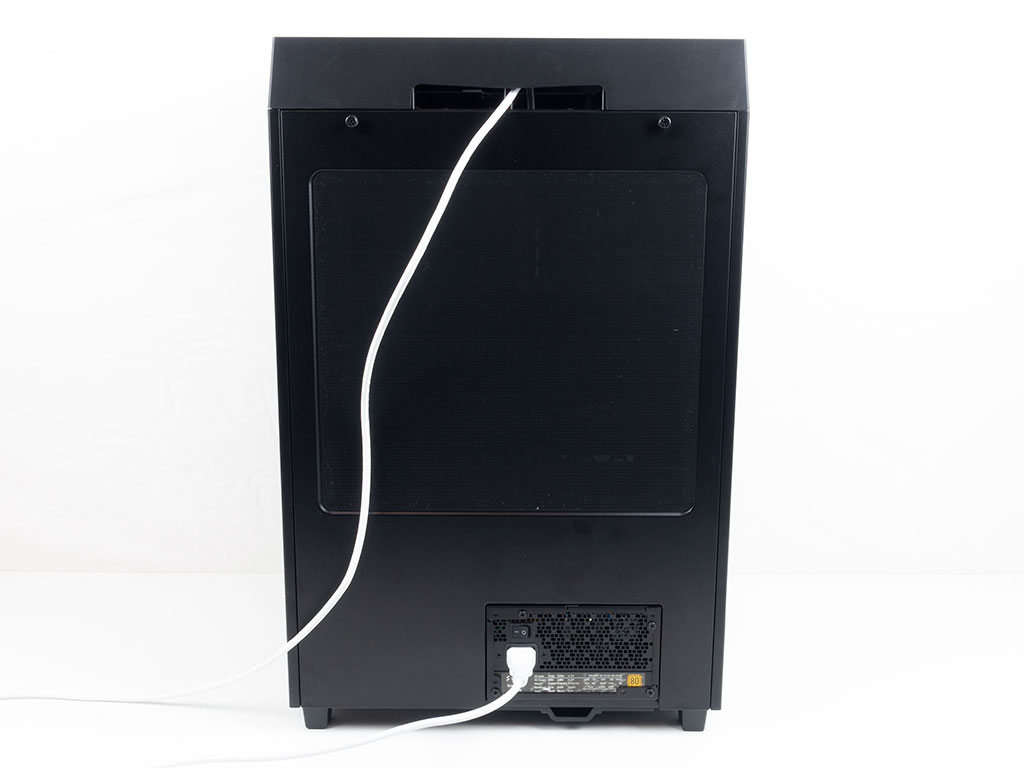
To install the PSU, first remove the mounting cage, screw it onto the power supply and slide it back into the Tower 500. Even though Thermaltake mentions 200 mm as the maximum length, there is plenty more room as long as you don't go for floor-mounted active cooling.
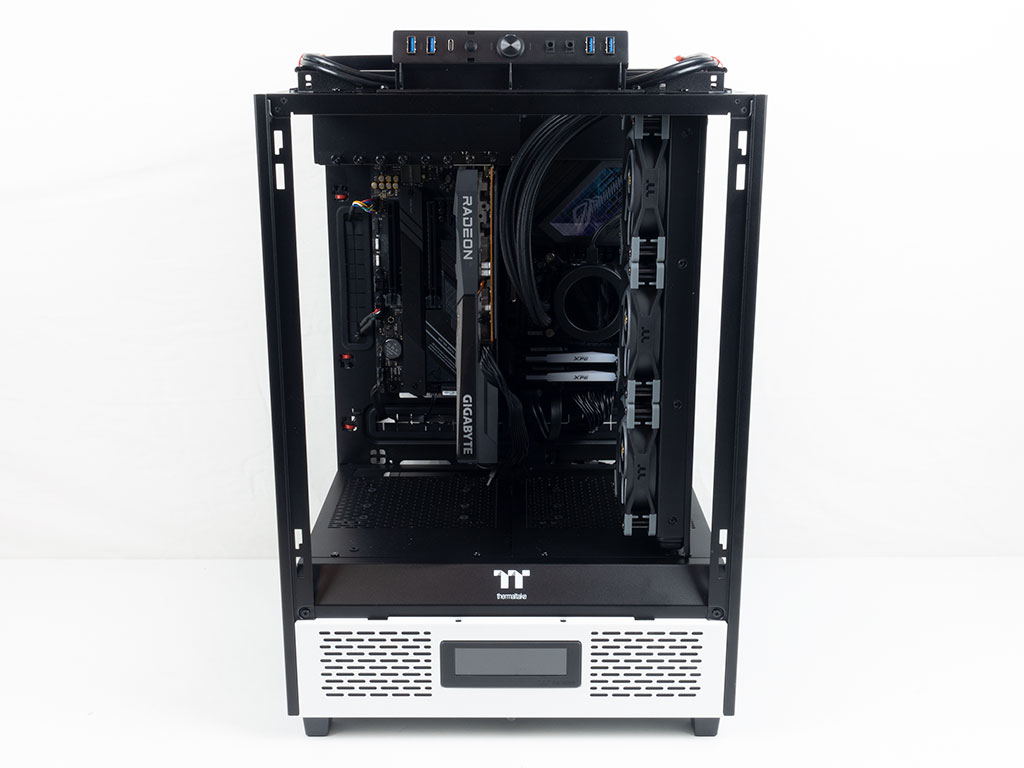
With everything installed, the Thermaltake Tower 500 makes a very clean impression all around the motherboard, both in the front and back. This is due to the easy-to-use hooks and very well thought out openings.
Even the free floating radiator fans can be routed pretty nicely with a bit of creativity, while the GPU power cable comes out through one of the horizontal grommets for a short path to the graphics card.
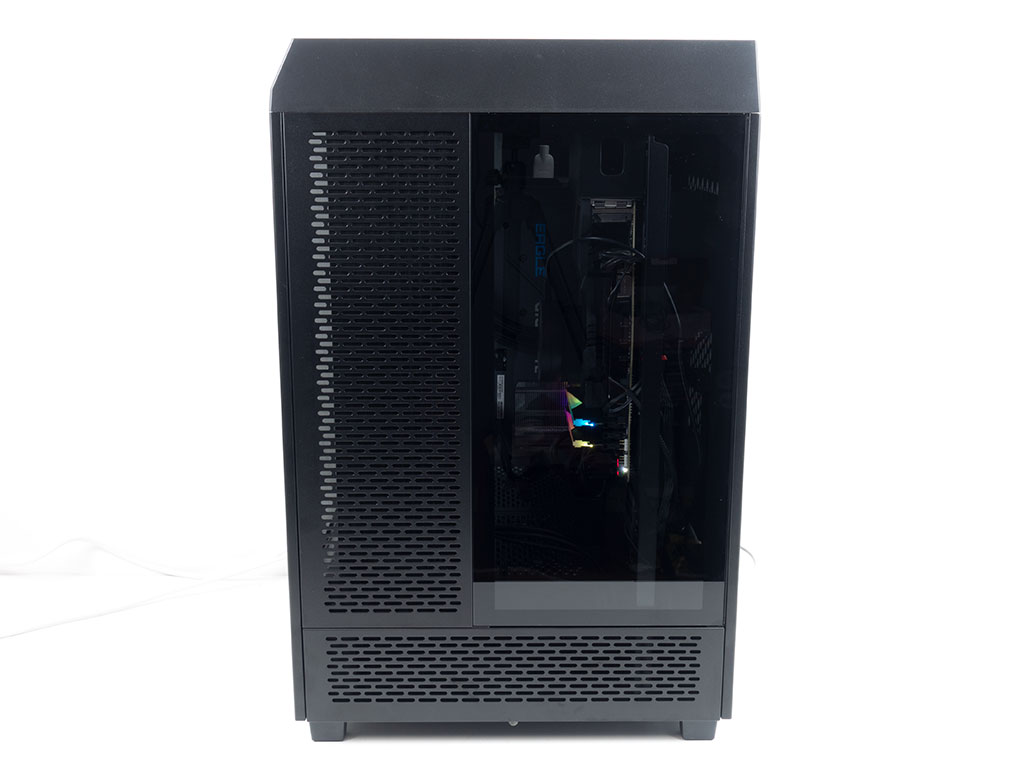
Finished Looks
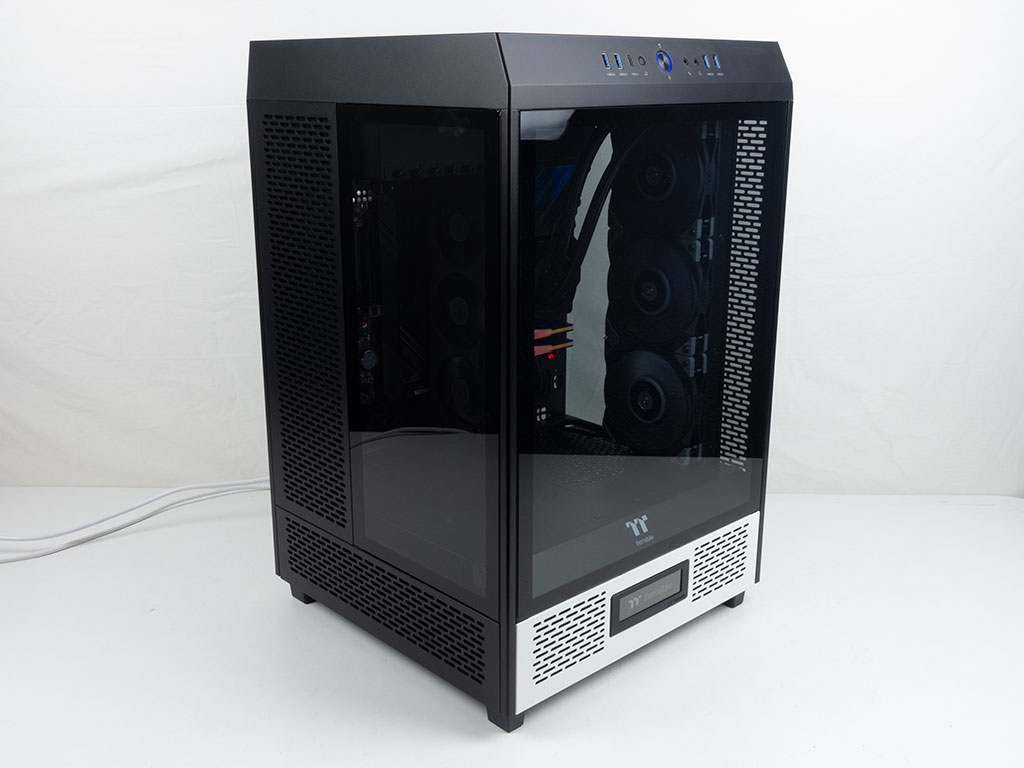
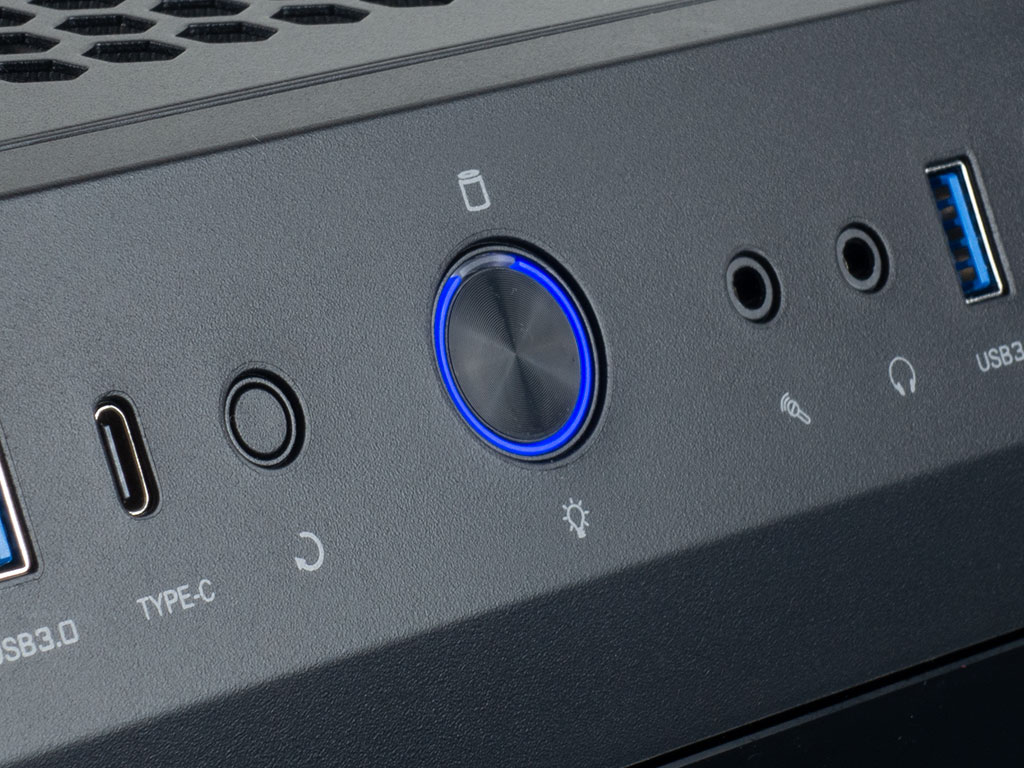
With all the panels and top cap back on the Tower 500, turning it on, you are greeted by a blue LED around the power button. As the case itself does not come with any RGB elements and the TOUGHLIQUID also lacks them, there is not a lot of bling to speak of.

From the front, you can clearly see the temperature of the liquid, as well as any memory and motherboard RGB elements. Both screens turn on as expected with the Thermaltake boot animation. To check out what the screens are capable of, take a look at this page for the 3.9" display and this page for the AIO from our Divider 550 TG review.
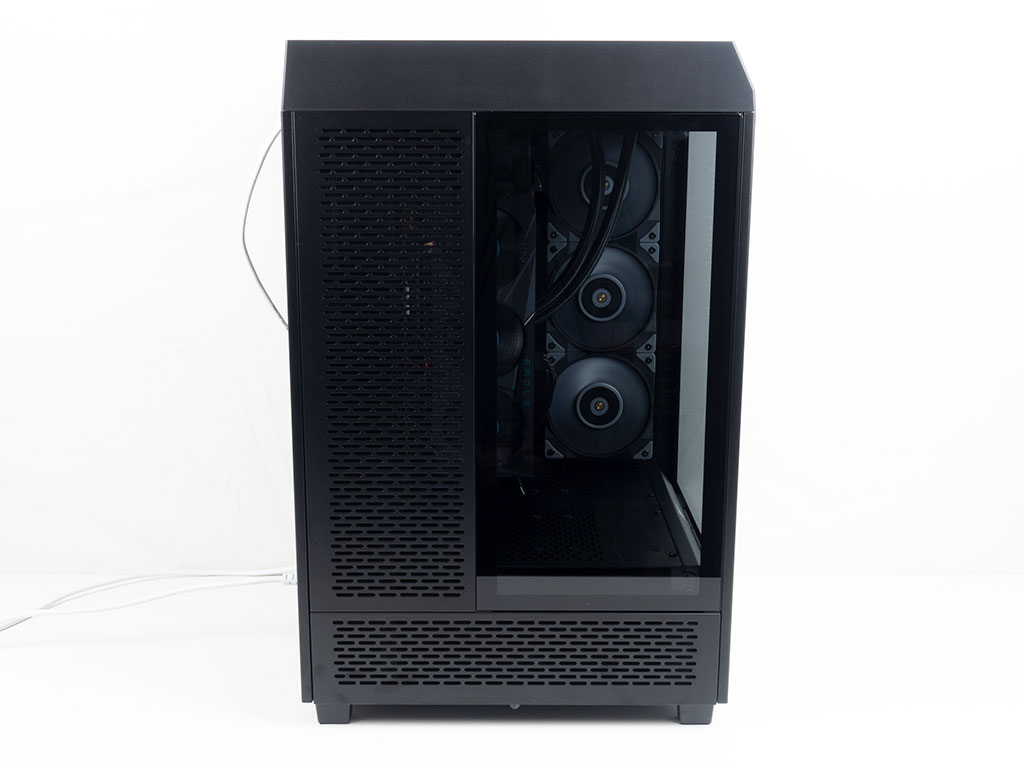
To give the interior AIO access to fresh air, simply rotate the glass panel on this side so that the vent aligns with the radiator placement. You may also rotate the one on the opposite side if you crave symmetry, but leaving it in its original state should benefit the GPU.
Apr 9th, 2025 12:07 EDT
change timezone
Latest GPU Drivers
New Forum Posts
- worth overclocking 2666mhz cl19 ram for 1080p 75hz monitor? (23)
- (Some of) What I'd like to See From a Final Fantasy IX Remake (5)
- Entry level 4K gaming RIG for cRPG and h'n's games - Ryzen 5 5600 + RX 7600? (69)
- Steam Deck Owners Clubhouse (498)
- OEM and Retail GPU (4)
- GTX1080 Phoenix GLH broken? monitor signal but black screen? (2)
- DTS DCH Driver for Realtek HDA [DTS:X APO4 + DTS Interactive] (2130)
- Windows 11 General Discussion (5955)
- 9070XT or 7900XT or 7900XTX (171)
- ## [Golden Sample] RTX 5080 – 3300 MHz @ 1.020 V (Stock Curve) – Ultra-Stable & Efficient (40)
Popular Reviews
- The Last Of Us Part 2 Performance Benchmark Review - 30 GPUs Compared
- MCHOSE L7 Pro Review
- UPERFECT UStation Delta Max Review - Two Screens In One
- PowerColor Radeon RX 9070 Hellhound Review
- Sapphire Radeon RX 9070 XT Pulse Review
- Upcoming Hardware Launches 2025 (Updated Apr 2025)
- Sapphire Radeon RX 9070 XT Nitro+ Review - Beating NVIDIA
- ASUS Prime X870-P Wi-Fi Review
- Acer Predator GM9000 2 TB Review
- AMD Ryzen 7 9800X3D Review - The Best Gaming Processor
Controversial News Posts
- NVIDIA GeForce RTX 5060 Ti 16 GB SKU Likely Launching at $499, According to Supply Chain Leak (167)
- MSI Doesn't Plan Radeon RX 9000 Series GPUs, Skips AMD RDNA 4 Generation Entirely (146)
- Microsoft Introduces Copilot for Gaming (124)
- AMD Radeon RX 9070 XT Reportedly Outperforms RTX 5080 Through Undervolting (119)
- NVIDIA Reportedly Prepares GeForce RTX 5060 and RTX 5060 Ti Unveil Tomorrow (115)
- Over 200,000 Sold Radeon RX 9070 and RX 9070 XT GPUs? AMD Says No Number was Given (100)
- Nintendo Switch 2 Launches June 5 at $449.99 with New Hardware and Games (98)
- Nintendo Confirms That Switch 2 Joy-Cons Will Not Utilize Hall Effect Stick Technology (98)