 4
4
XPG Defender Pro Review
Thermal Stress Test »Review System
| System Parts for Case Reviews | |
|---|---|
| Processor: | Intel Core i5-9600K |
| Motherboards: | ATX: MSI Z390 GAMING EDGE AC MATX: Z370M GAMING EDGE AC Mini-ITX: MSI Z370I GAMING EDGE AC Provided by: MSI |
| Graphics Card: | ATX/mATX: Palit GeForce RTX 2080 Gaming Pro OC ITX: EVGA GTX 1650 SC Ultra Black 4 GB |
| Memory: | 16 GB XPG GAMMIX D30 DDR4 2666 MHz CL16-18-18 1.20 V 16 GB XPG SPECTRIX D60G DDR4 3000 MHz CL16-18-18 1.35 V Provided by: ADATA |
| HDD: | Western Digital 320 GB 7200 RPM |
| SSD: | ITX: ADATA SX6000 Pro M.2 256 GB mATX: ADATA GAMMIX S11 Pro M.2 256 GB ATX: ADATA SPECTRIX S40G M.2 256 GB ADATA XPG SX850 256 GB ADATA Ultimate SU630 240 GB ADATA Ultimate SU750 256 GB Provided by: ADATA |
| Power Supply: | Fractal Design ION+ 750W 80 Plus Platinum Provided by: Fractal Design |
| Cooling: | be quiet! Dark Rock 4 be quiet! Dark Rock Slim be quiet! Shadow Rock LP Provided by: be quiet! |
Assembly
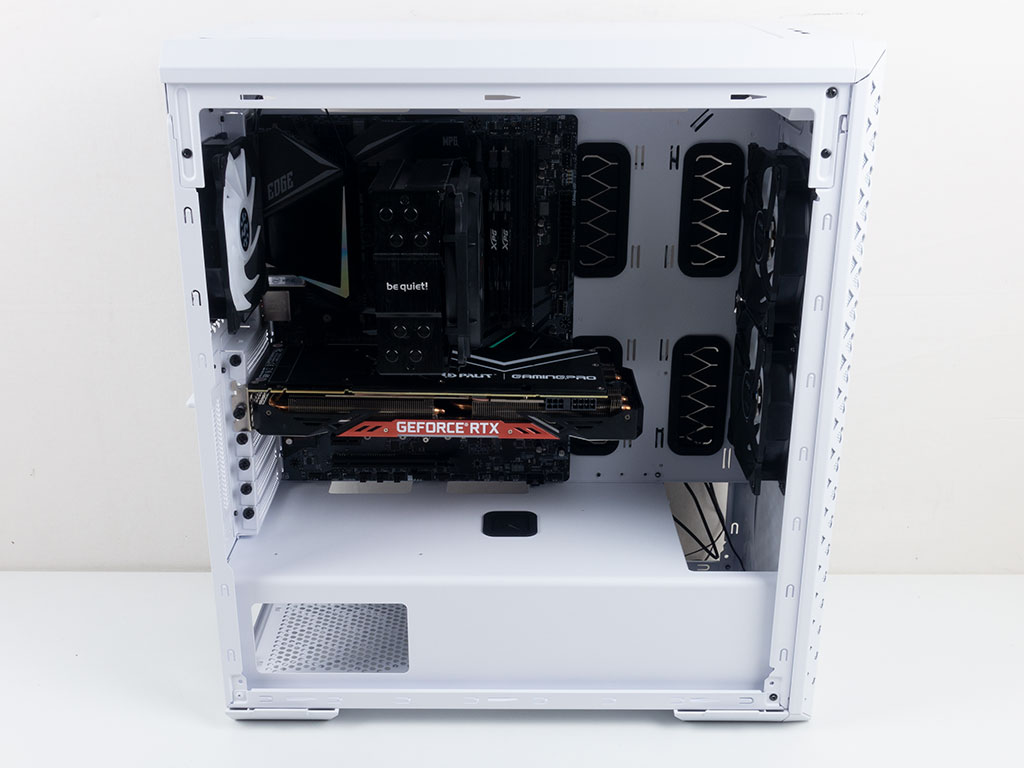
Installing a full-size ATX motherboard is done by traditional means, with spacers and screws. There is loads of space for E-ATX boards, and the grommets towards the front will line up nicely.
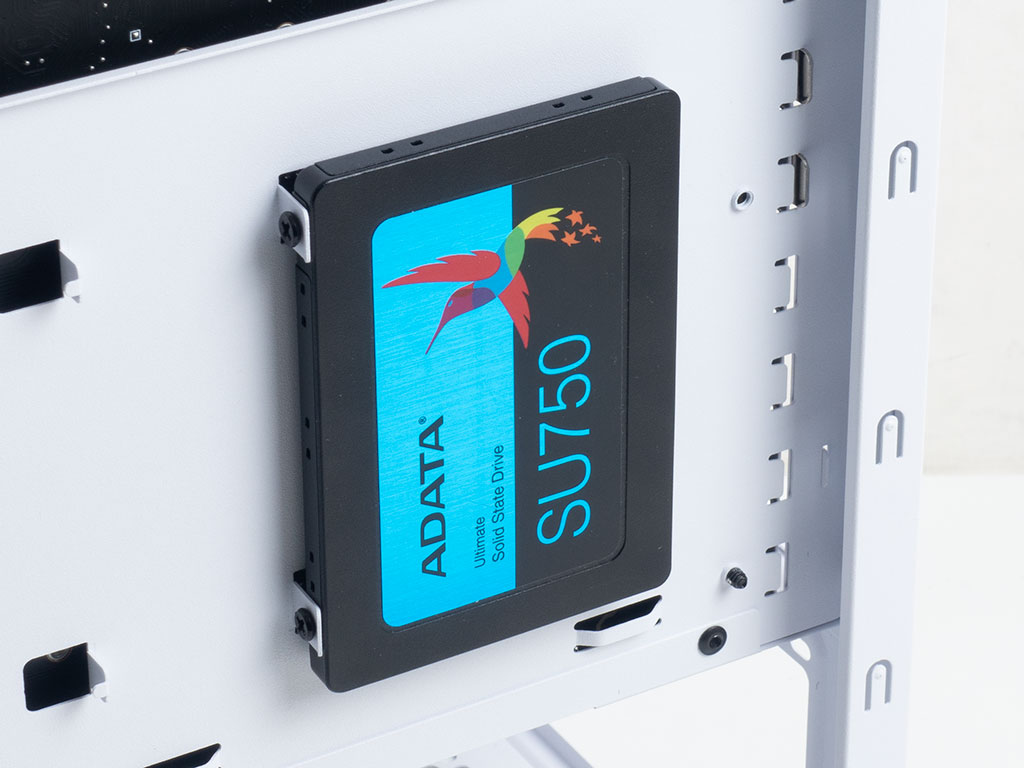
Adding SSDs is simple and works well, but you won't get any anti-vibration measures. That said, this simple way of mounting drives works just fine, and odds are you will never install a mechanical 2.5" drive here. However, it simply is not what the rest of the market offers.
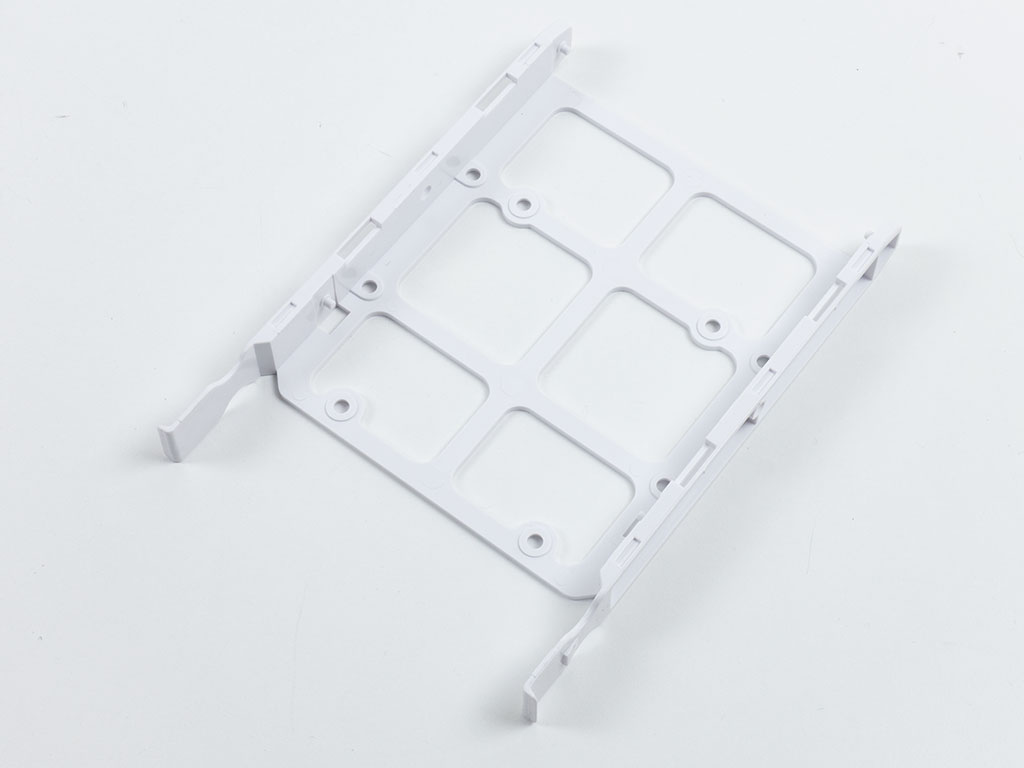
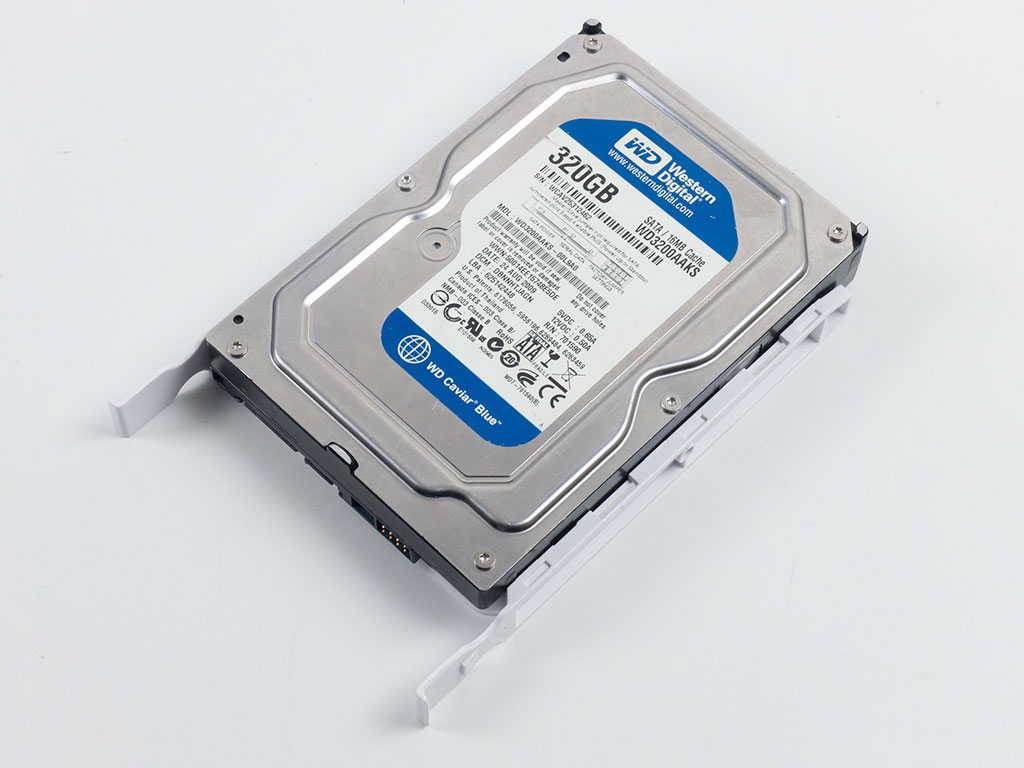
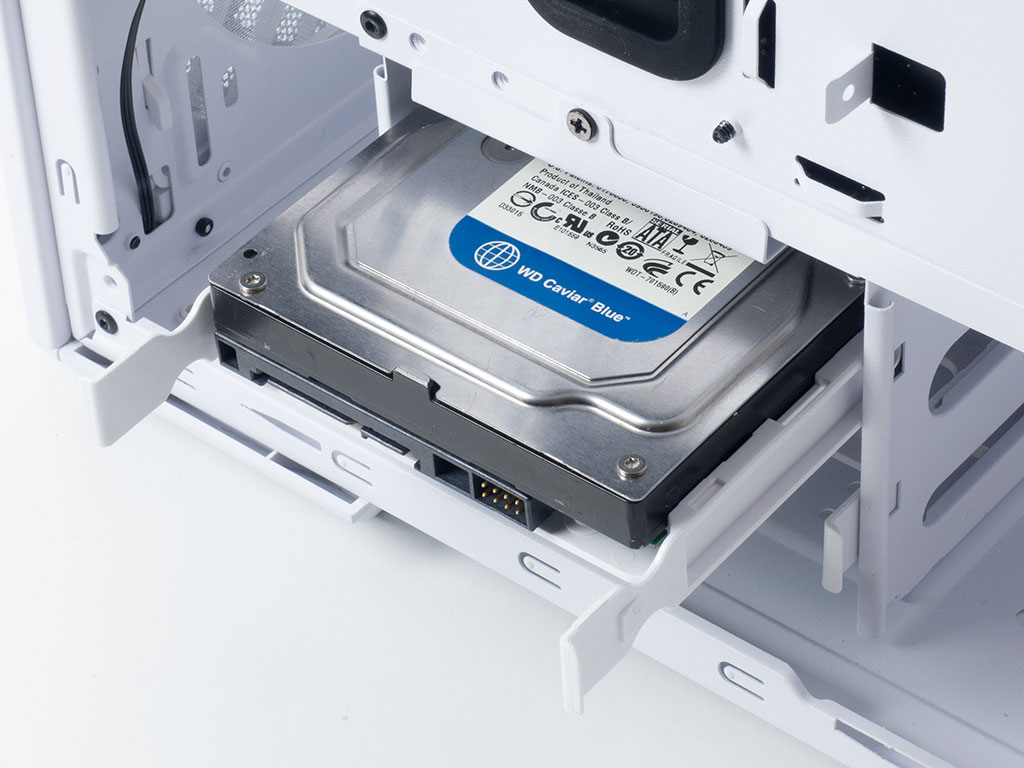
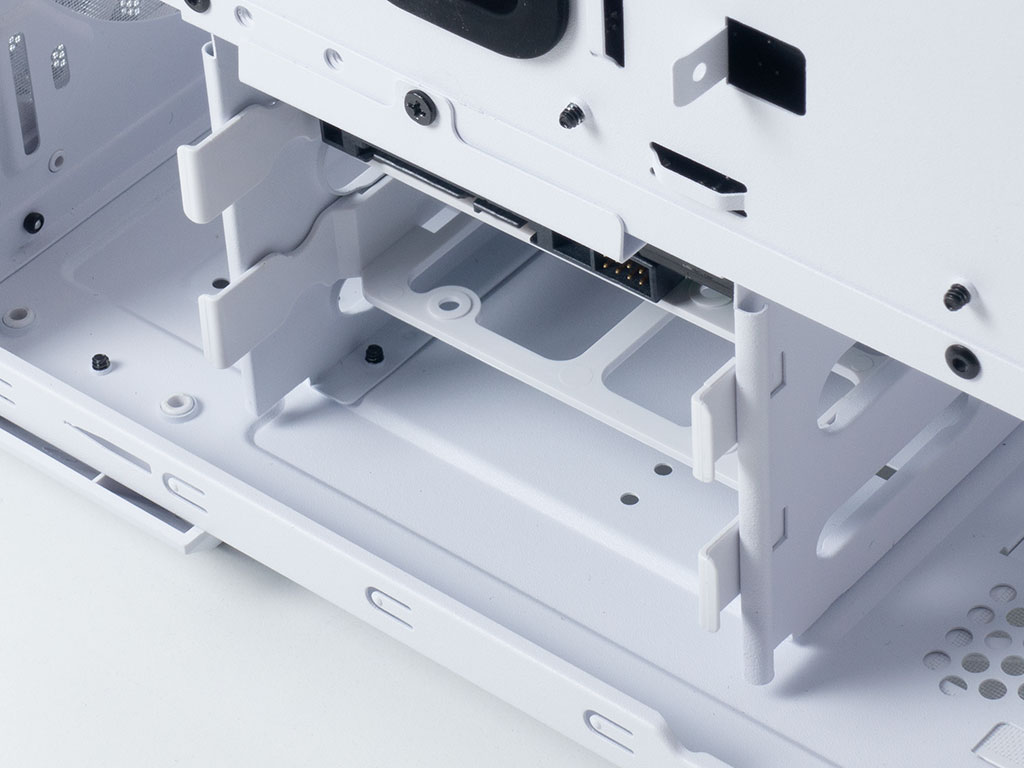
Adding a 3.5" drive doesn't take any tools as you simply fill the plastic tray holding the storage unit with embedded pins. Once filled, just slide it back into the cage underneath the shroud until it snaps into place.
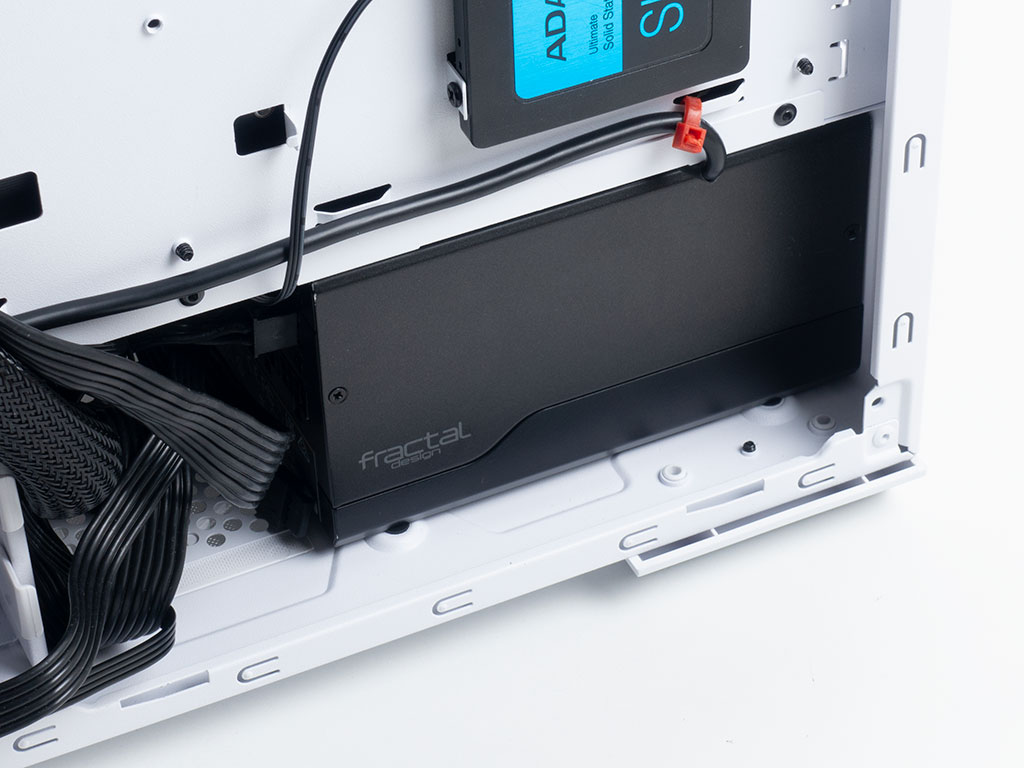
Installing the PSU is pretty straightforward as well. There is plenty of room to slip it into place, and traditional screws are used to secure it as a last step.
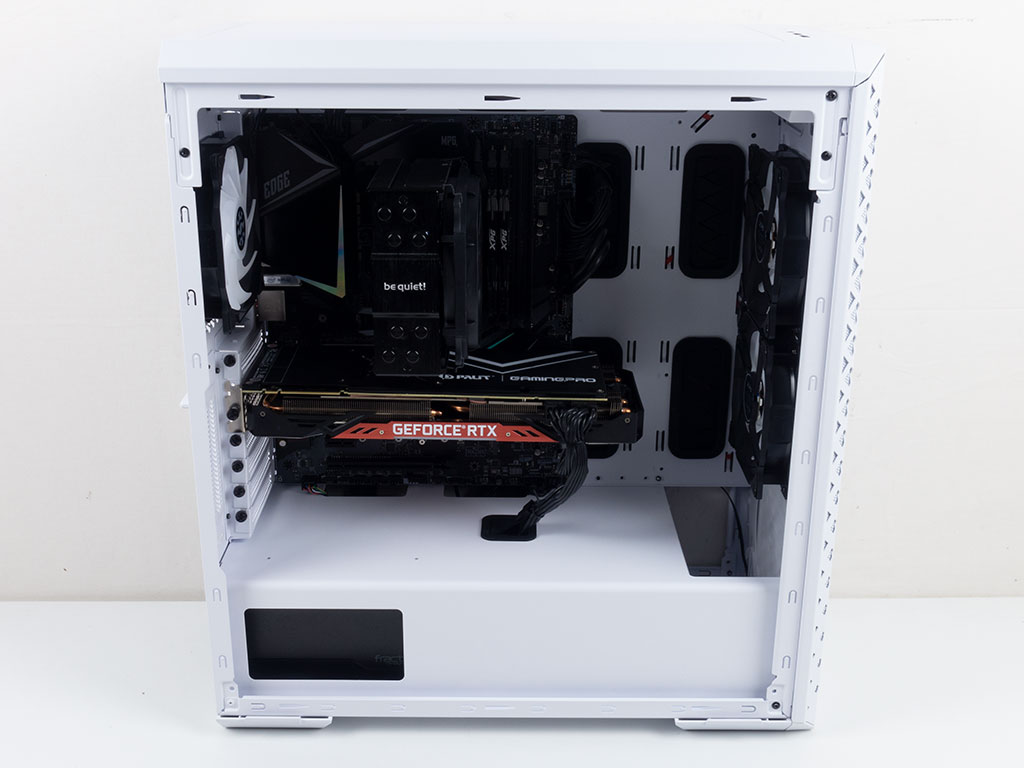

With everything installed, the interior of the XPG Defender Pro looks really nice and clean because of the grommets and the central opening in the shroud. Considerable time was also spent cleaning up the back of the chassis, and the results are great, so you should really invest the effort there. The fans within the chassis may be daisy-chained if you happen to have fewer than three available headers on your motherboard, which makes routing a little easier as well.
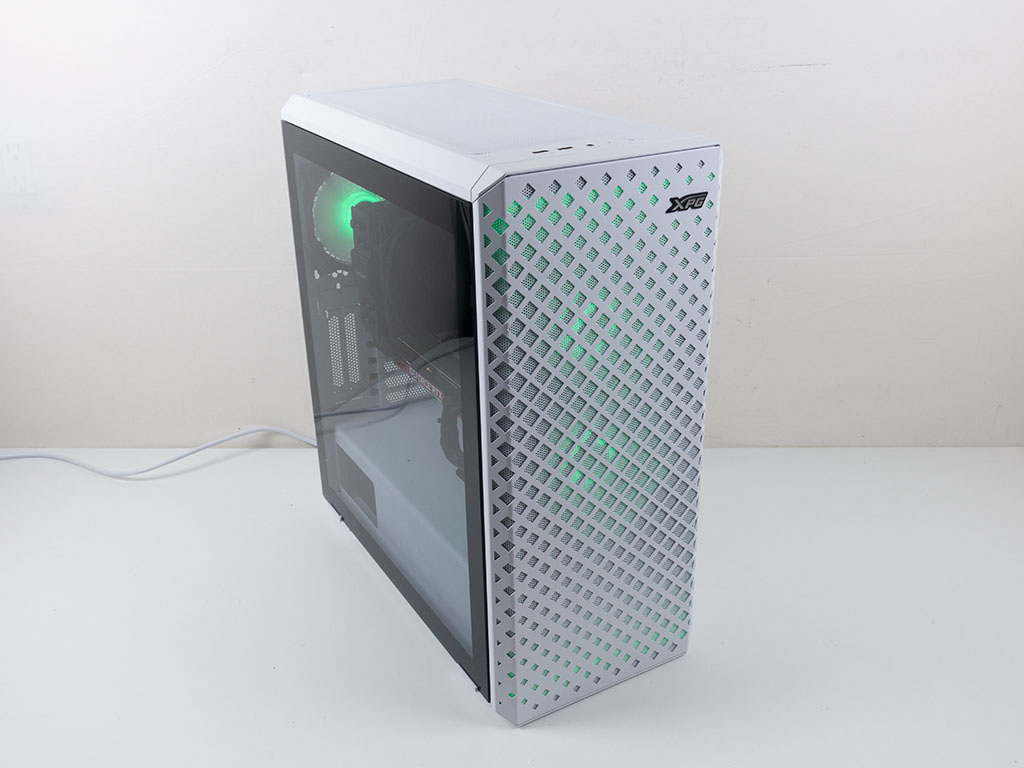
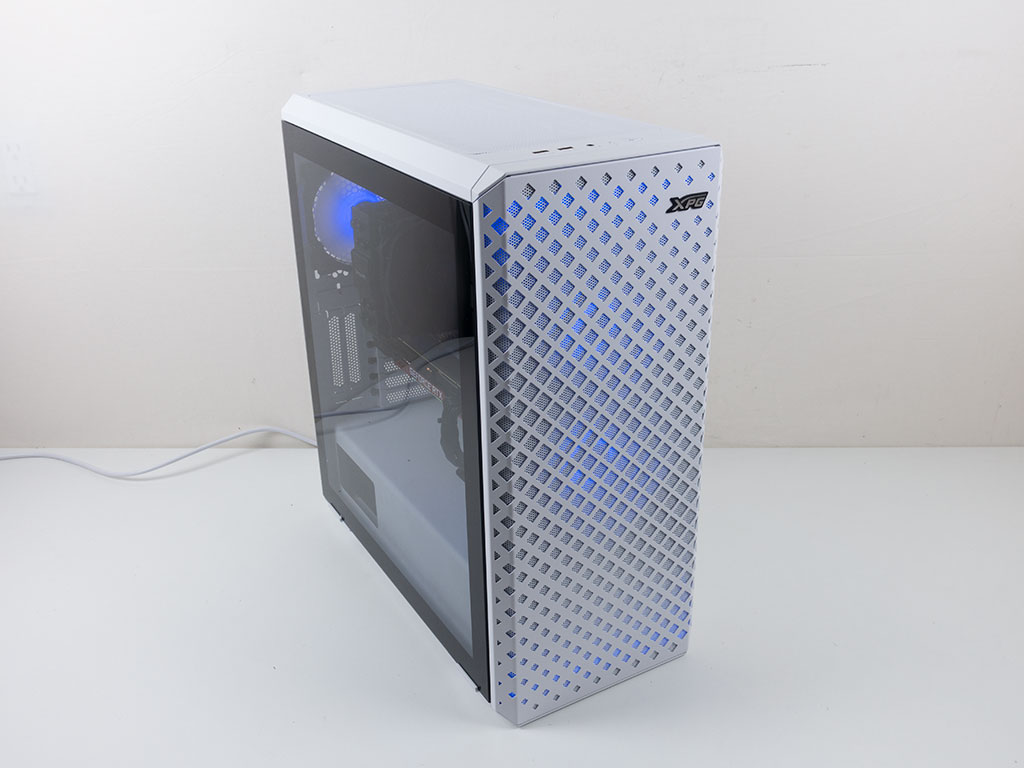
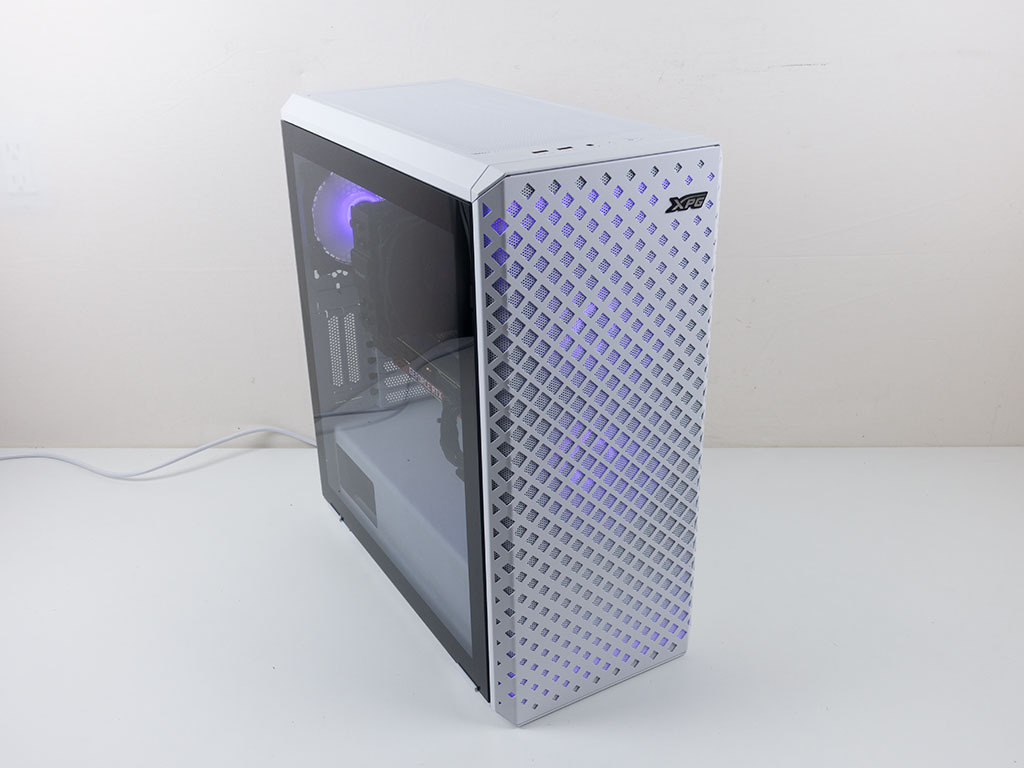
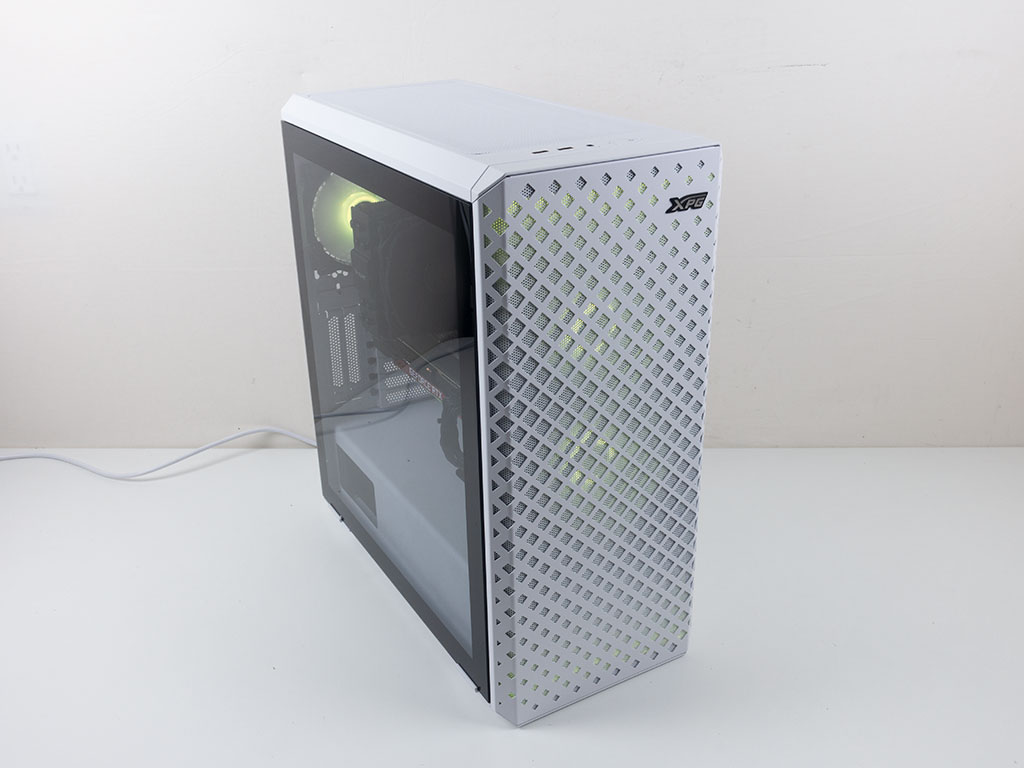
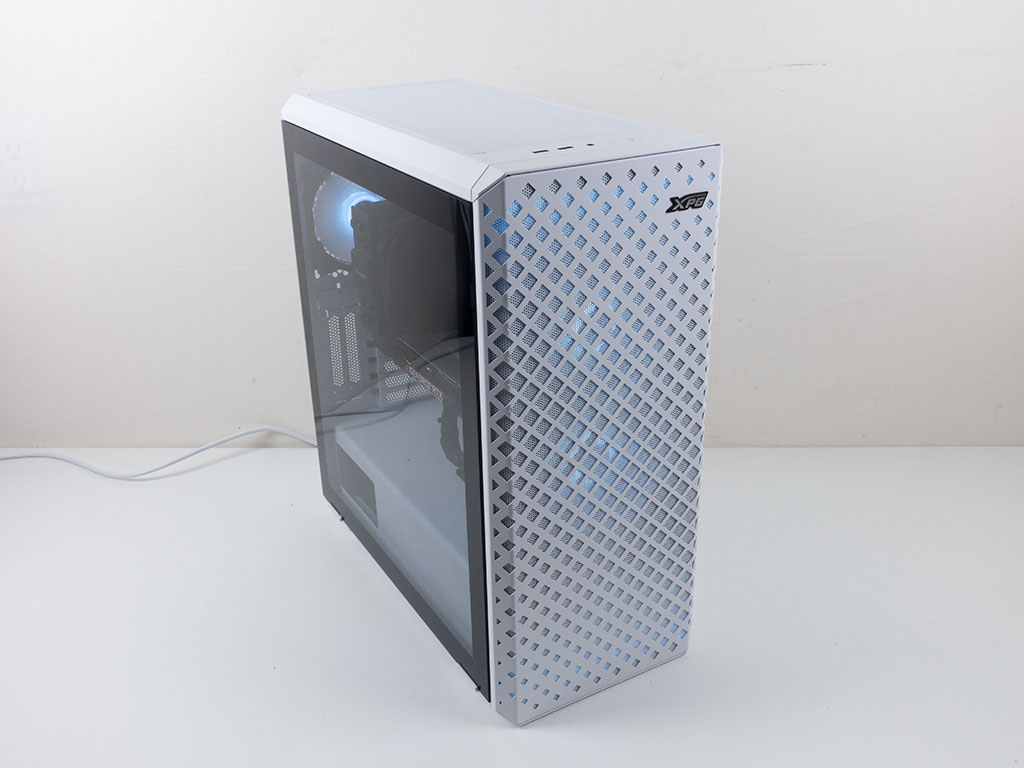
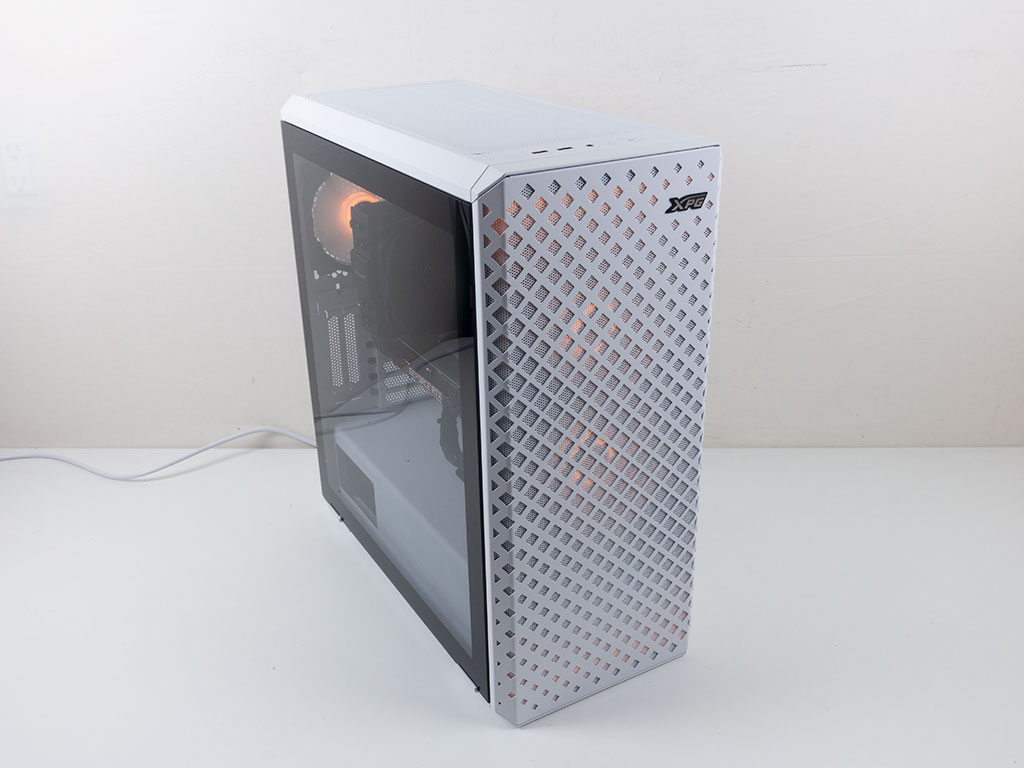
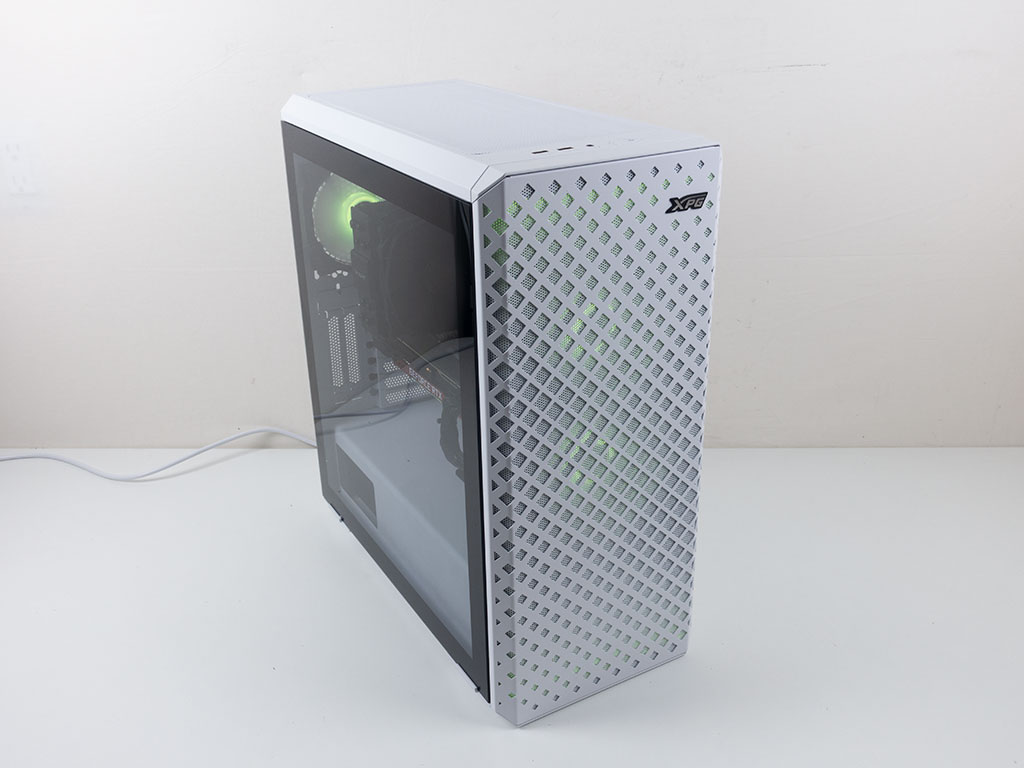
Finished Looks
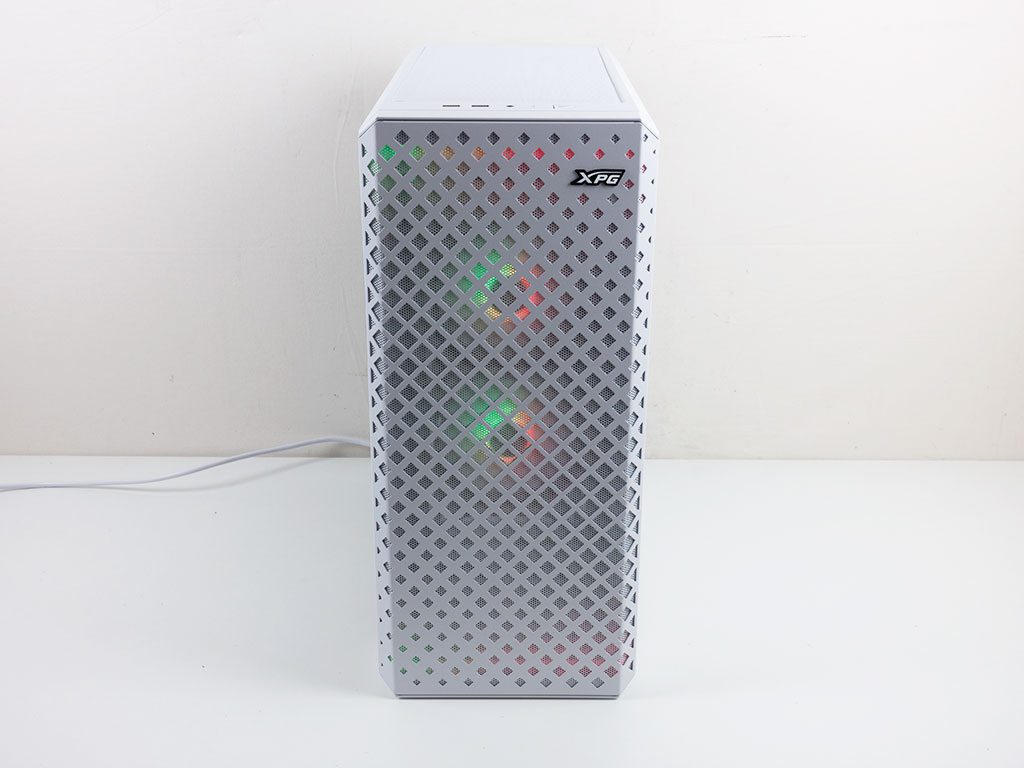
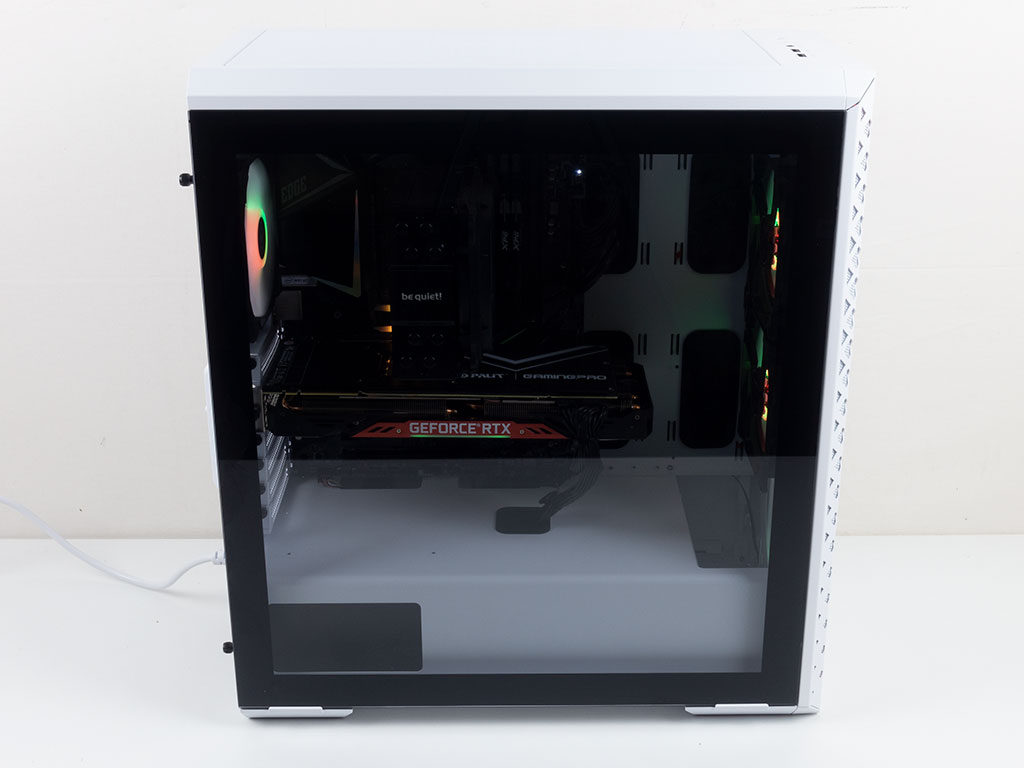
With all the panels in place, the XPG Defender Pro comes together nicely. You can see the ARGB from the fans and the top and bottom LED strips through the chassis surprisingly well. For symmetry, a third fan here would have come in pretty handy, though. Looking through the glass panel, you can clearly see all your hardware and some of the glow from the front and rear fans as well.
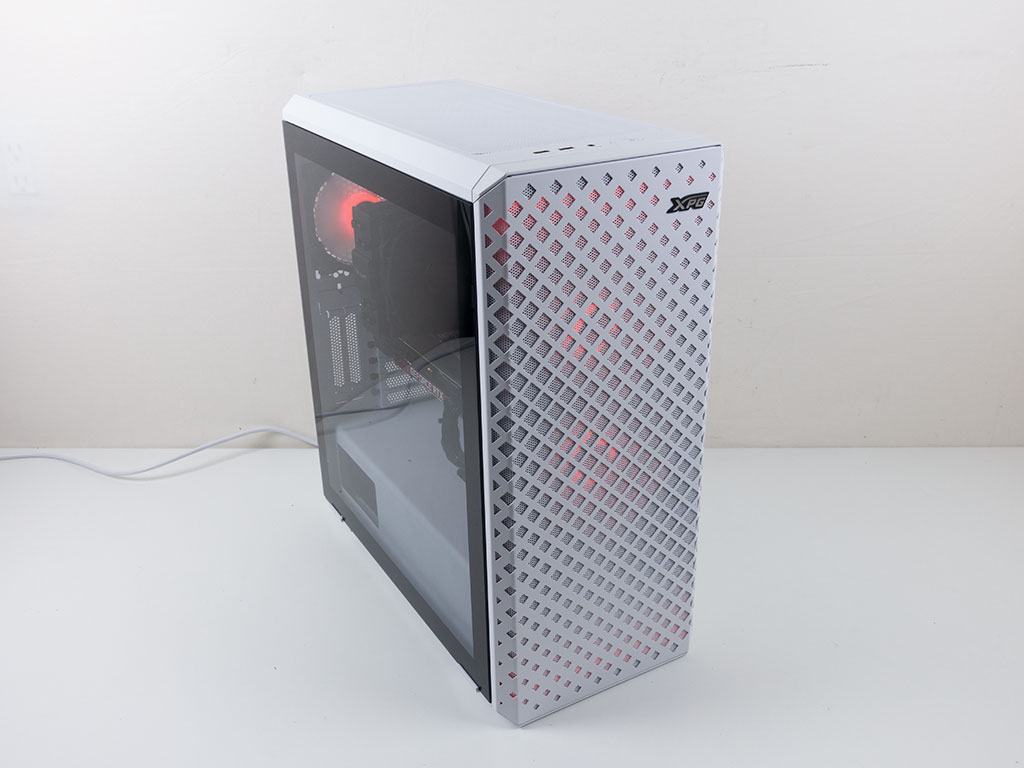
You may cycle through quite a number of animations and color combinations, but as you can see below, this case also offers several solid colors.
Feb 12th, 2025 09:00 EST
change timezone
Latest GPU Drivers
New Forum Posts
- Do you guys have backup GPUs? (42)
- Last game you purchased? (684)
- AMD RX 7000 series GPU Owners' Club (1298)
- camper van computer (5)
- Proposed new Power Connector (40)
- What are you playing? (22870)
- It's happening again, melting 12v high pwr connectors (313)
- Asteroid 2024 YR4 reaches level 3 on the Torino Scale (107)
- Someone run games on AMD BC-250 under Linux * Cut down PS5 die to 6 CPU cores 24 GPU cores for use in crypto mining (66)
- RTX5000 Series Owners Club (95)
Popular Reviews
- Civilization VII Performance Benchmark Review - 35 GPUs Tested
- Kingdom Come Deliverance II Performance Benchmark Review - 35 GPUs Tested
- Team Group T-Force XTREEM DDR5-7200 48GB CL34 Review
- ASRock Phantom Gaming B850I Lightning Wi-Fi Review
- DAREU A980 Pro Max Review
- AMD Ryzen 7 9800X3D Review - The Best Gaming Processor
- NVIDIA GeForce RTX 5080 Founders Edition Review
- Corsair Frame 4000D Review
- Spider-Man 2 Performance Benchmark Review - 35 GPUs Tested
- MSI GeForce RTX 5080 Vanguard SOC Review
Controversial News Posts
- AMD Radeon 9070 XT Rumored to Outpace RTX 5070 Ti by Almost 15% (287)
- AMD is Taking Time with Radeon RX 9000 to Optimize Software and FSR 4 (256)
- AMD Denies Radeon RX 9070 XT $899 USD Starting Price Point Rumors (239)
- Edward Snowden Lashes Out at NVIDIA Over GeForce RTX 50 Pricing And Value (239)
- AMD Radeon RX 9070 XT & RX 9070 Custom Models In Stock at European Stores (226)
- New Leak Reveals NVIDIA RTX 5080 Is Slower Than RTX 4090 (215)
- AMD's Radeon RX 9070 Launch Faces Pricing Hurdles (175)
- AMD Radeon RX 9070 XT Tested in Cyberpunk 2077 and Black Myth: Wukong (169)