 0
0
be quiet! Silent Base 600 Review
A Closer Look - Inside »A Closer Look - Outside

be quiet!'s Silent Base 600 features a similar design language as the bigger Silent Base 800, but goes on to refine some elements, most notably the top and its colored elements. The overall look is still close, though, so you should recognize it as a be quiet! chassis right off the bat.


The front features a door with clean and fairly sharp edges that takes up half of the front's real estate. Everything in the rear seems to point to a traditional interior layout. However, the fan in the rear has been recessed into the chassis by more than is the norm.


As we received the windowed variant for review, there are no special air-vent and fan-mounting positions on both sides; those can only be found on the solid panel for the back of the motherboard tray.


By default, the door swings open to the left, but you may switch the hinges over to the other side because of the symmetrical design. A thin layer of sound-insulating material has also been applied to the insides of the panel to help with keeping things as quiet as possible. Look closely and you will even see a small fan-speed switch be quiet! embedded there. Lastly, you will find a small be quiet! logo on the bottom half; it is completely solid.


Turning the chassis around, you will find the PSU bay at the very bottom. You may install the power supply with its fan facing down or up since the bay comes with two sets of mounting holes. Each protected by a separate cover, the seven motherboard-expansion slots are above the bay. At the very top are a 120 mm exhaust fan with rubber mounts and three possible ways to route water-cooling tubes out the back of the case. I already mentioned that the rear differs slightly to that of a normal case. be quiet! has, instead of maximizing internal space, placed the fan-mounting possibility about 10 mm into the chassis, which leads to much less room around the motherboard for large CPU coolers, and I have seen plenty of tower and top-down coolers that come really close to the fan in the rear, which may even force you to remove the unit entirely.


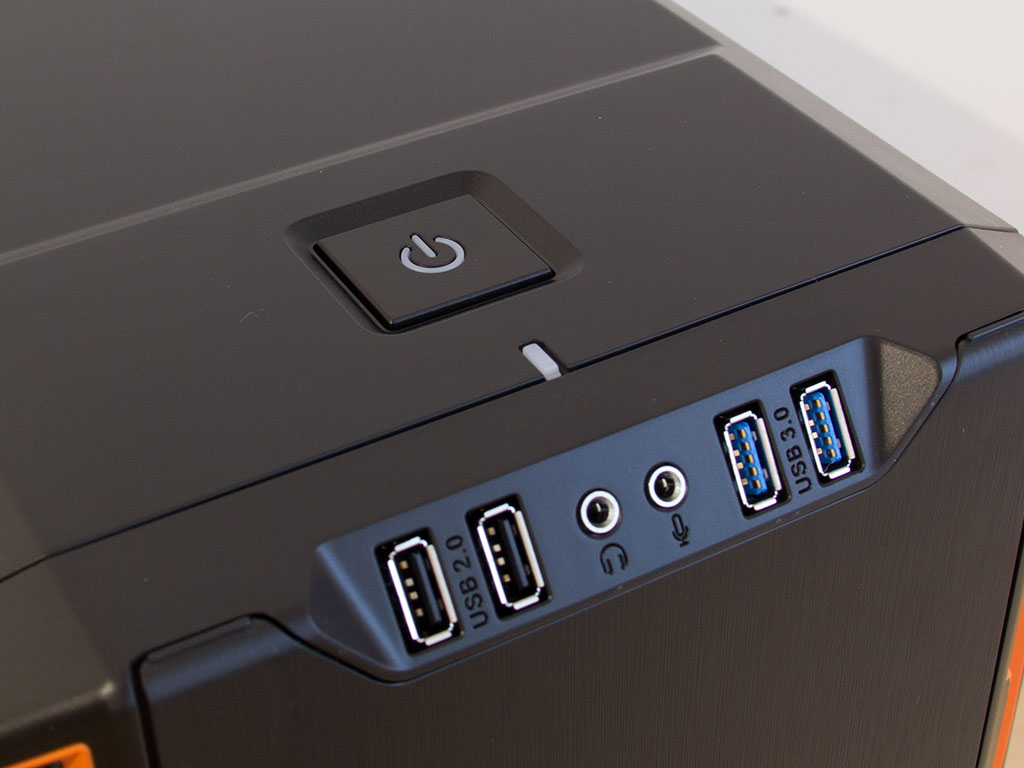
You may pull the bottom dust filter out for easy cleaning. It covers every openings on the case's underside. In the top is a pretty restrictive air vent above the dual 120/140 mm fan-placement possibility, especially if you install a radiator of up to 240 mm in size there. A large square power button has been placed on top, while the I/O consisting of a pair of USB 2.0 and USB 3.0 plugs and the usual audio connectivity are set at a 45° angle into the front's edge.
Nov 23rd, 2024 20:45 EST
change timezone
Latest GPU Drivers
New Forum Posts
- Have you got pie today? (16530)
- WCG Daily Numbers (12713)
- test memory cards PS2 (11)
- The Official Linux/Unix Desktop Screenshots Megathread (754)
- TPU's Rosetta Milestones and Daily Pie Thread (2093)
- Folding Pie and Milestones!! (9233)
- TPU's Nostalgic Hardware Club (19545)
- Scratched mobo traces with a screwdriver (30)
- New gaming PC build. (33)
- GPU upgrade - buy 7900xtx or 4080 Super now or wait for next gen release in 2025? (32)
Popular Reviews
- STALKER 2 Performance Benchmark Review - 35 GPUs Tested
- Sennheiser HD 490 PRO Open-Back Headphones Review
- ARCTIC P12 PWM PST 120 mm Fan Review
- NVIDIA SFF-Ready System Build & Benchmark Review - Build Small, Play Big
- Gigabyte X870E Aorus Master Review
- AMD Ryzen 7 9800X3D Review - The Best Gaming Processor
- APNX V1-W Review
- Upcoming Hardware Launches 2024 (Updated Nov 2024)
- Chieftec Visio Review
- Quick Look: Shanling M1 Plus Portable Audio Player
Controversial News Posts
- AMD Falling Behind: Radeon dGPUs Absent from Steam's Top 20 (222)
- AMD Ryzen 7 9800X3D Stocks Vaporized in Retail, Being Scalped (153)
- AMD Introduces Next-Generation AMD Ryzen 7 9800X3D Processor, $479, Nov 7 (124)
- Apple and Samsung in the Fray to Acquire Intel: Rumor (123)
- AMD Ryzen 7 9800X3D Comes with 120W TDP, 5.20 GHz Boost, All Specs Leaked (120)
- Microsoft Offers $30 Windows 10 Security Extension for Home Users (118)
- AMD Ryzen 7 9800X3D Has the CCD on Top of the 3D V-cache Die, Not Under it (110)
- TechPowerUp is Hiring a Power Supply (PSU) Reviewer (109)