 9
9
Alphacool Apex 1 CPU Water Block Review - Performance King!
Liquid Flow Restriction »Installation and Lighting
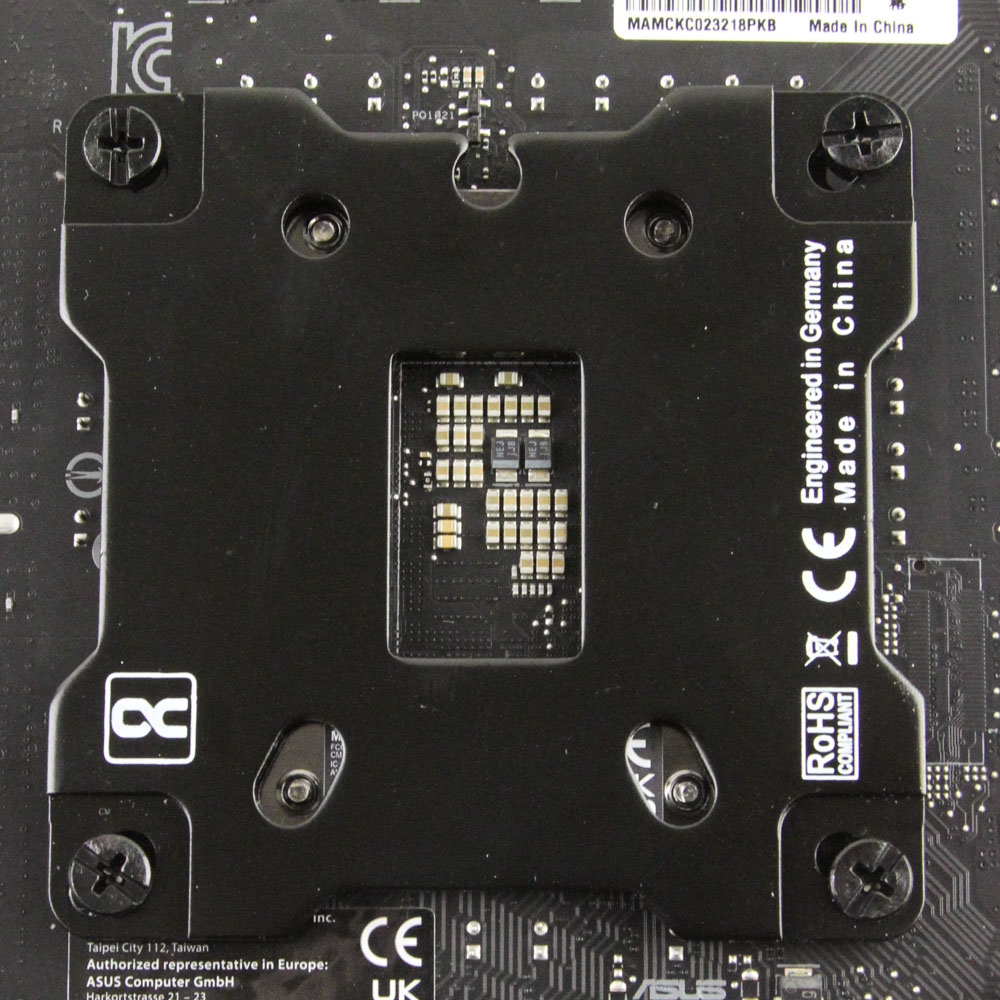
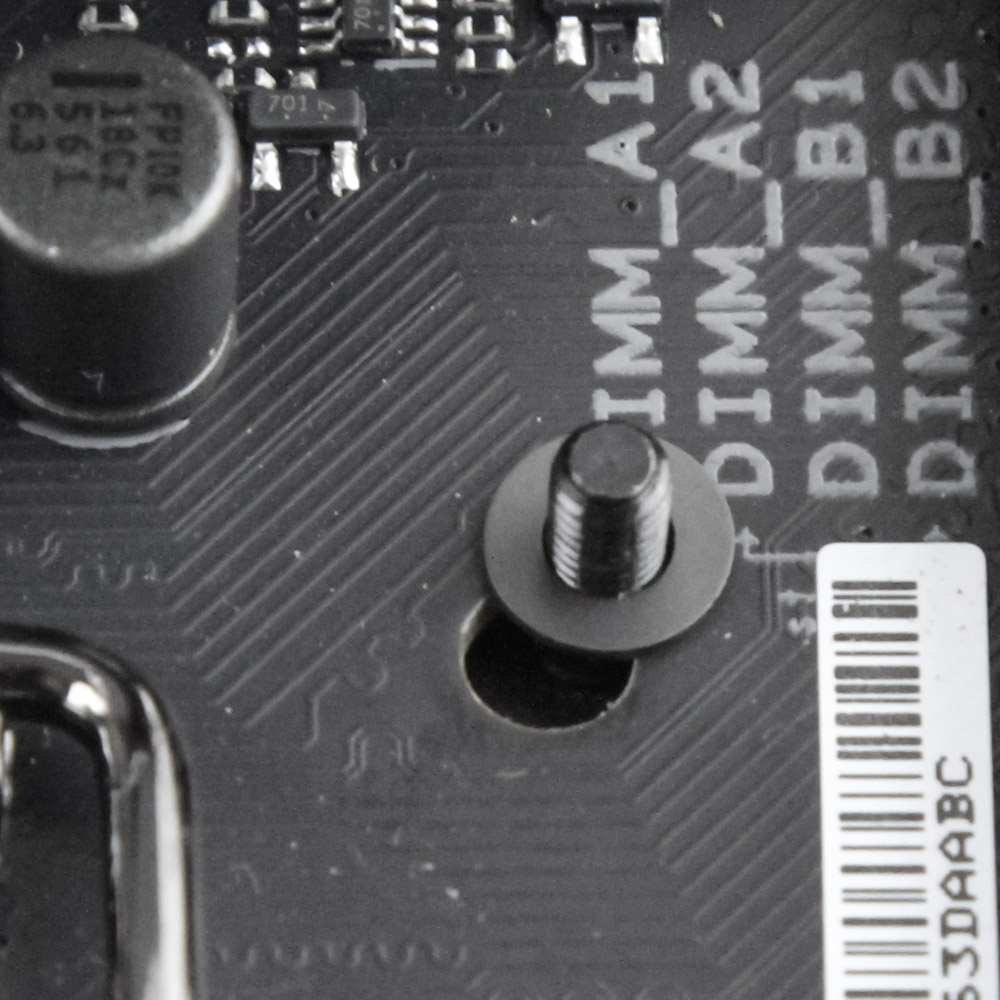
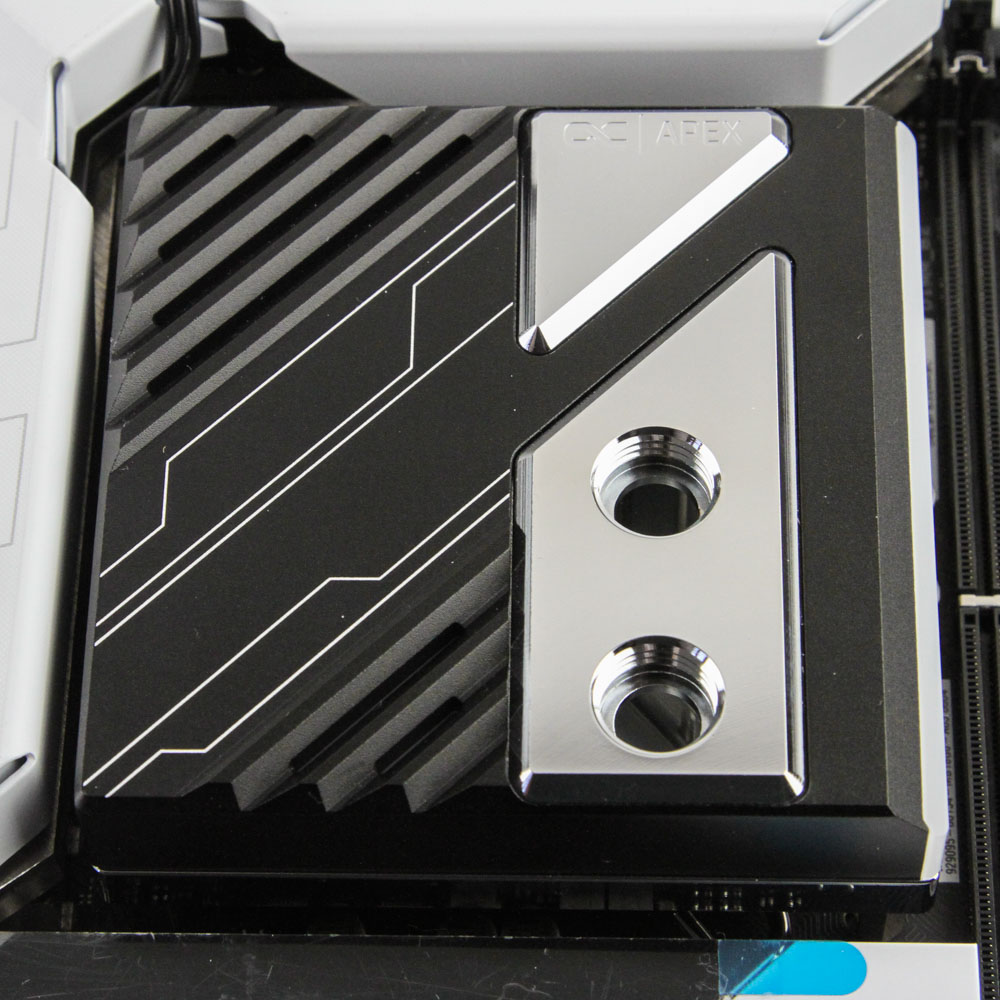
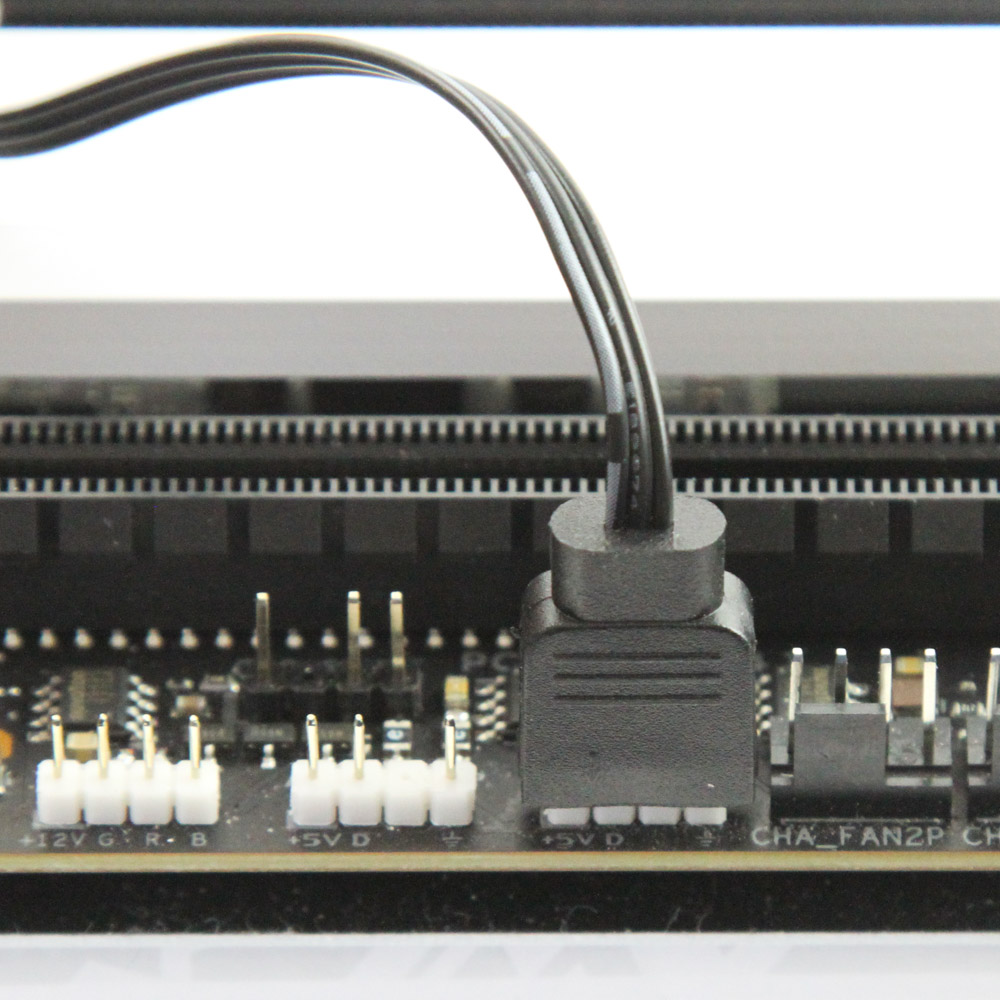
Installing the Alphacool Apex 1 CPU block is quite simple since these are socket-specific blocks with the spring-less procedure we saw in the Core 1 continuing here to further facilitate the process. Place the socket backplate on the underside of the motherboard and ensure that the corner pieces are in the correct place so that all four locking screws fit through the socket cooler mounting holes in the motherboard and are accessible through the other side. Then remove the tape cover to stick the backplate in place and also help prevent any electrical shorting, owing to the non-conductive tape touching the motherboard as opposed to the metal backplate itself. Now apply thermal paste on the CPU IHS and then use the provided washers around the screws to provide a stable surface for the block, with its pre-fixed mounting posts, to now go over these locking screws. Once you have lined everything up, use a flat or Phillips head screwdriver to secure the block to the backplate from the back, tightening them diagonally alternating from one set to another until you simply run out of thread. This does mean the Apex 1 does not follow a tool-less installation, albeit the end result is an extremely clean look from the top in the absence of any visible installation hardware. It's not as convenient as the standard top-down installation though, so it's best to have the block installed on the motherboard before installing the board in your case. The heavy mass should not be an issue for the metal backplate either, it's certainly less than many heavier air coolers on the market today even if it is denser. You can also orient the block to have the ports positioned better for your plumbing layout. Finally, connect the RGB cable using the provided adapter that will work natively with any standard 3-pin, 5 V addressable RGB header.
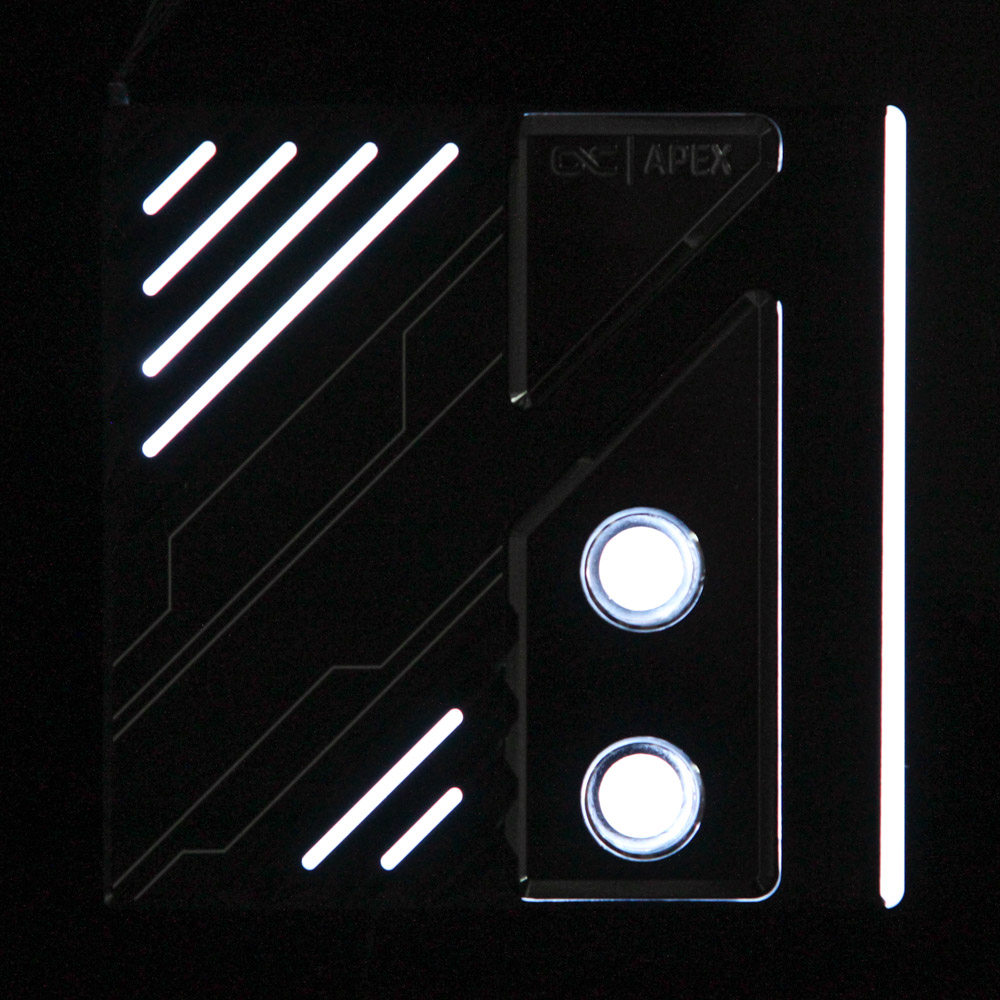
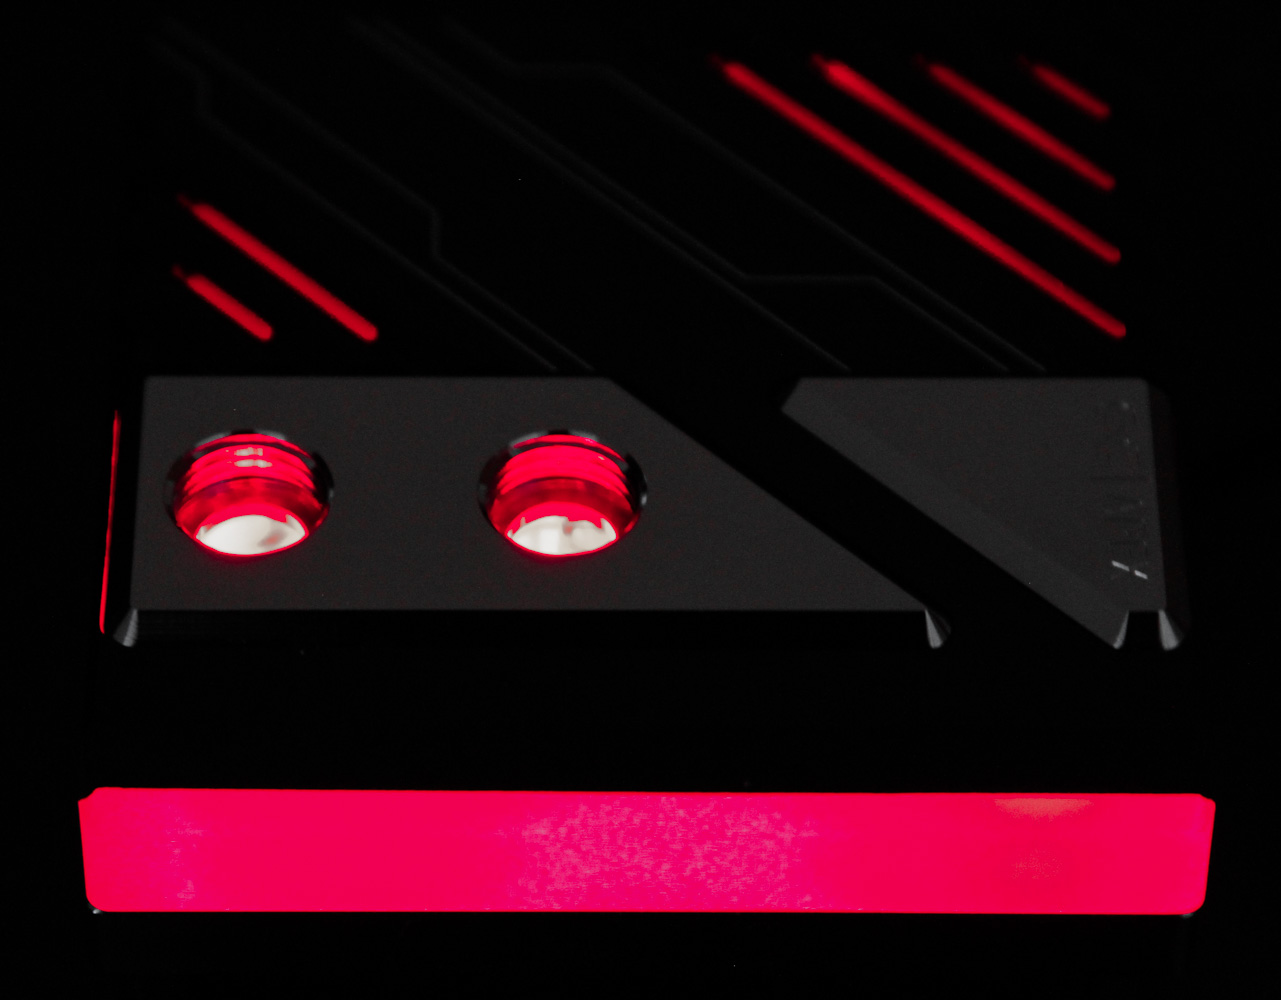
As with the Alphacool Core 1, the ARGB lighting on offer with the Apex 1 is more for accent lighting on the top and sides. The cutouts in the ridges allow for six light lines poking out, and a cool side effect of the acrylic top is the G1/4" ports also light up to illuminate the coolant and tubing as applicable. More importantly, the exposed side also lights up bright and uniformly, not showing the individual LEDs thanks to the diffused white plastic used. The end result is a smooth transition of colors and lighting effects, although this can of course be subjective. I found the side lighting to get bright enough to also illuminate the case and motherboard to an extent, albeit most people will find the RAM sticks blocking this light from going further. Seen above is the Apex 1 block lit up and in a few different static and dynamic lighting effects for reference.
Feb 2nd, 2025 13:02 EST
change timezone
Latest GPU Drivers
New Forum Posts
- Best silent laptop for 1000 dollars max.? (0)
- Testing max ram overclock pn Ryzen 1700 (37)
- Modem/Router suggestions (15)
- Starting my AM5 build (16)
- Please let me know if the UPS that I want to buy is good or not for my PC. (118)
- eXtreme Outer Vision PSU Calculator Shutting Down :( (7)
- WHAT SHOULD I DO IF MY BD PROCHOT GREY WON'T OPEN? (1)
- QVL - Myth, Legend, Marketing/Advertising, what is your take? (71)
- ThrottleStop triggers Defender on svchost process (3)
- Trying to install OS and stick to it for 2 Years Atleast. Windows 10 or 11? (0)
Popular Reviews
- NVIDIA GeForce RTX 5080 Founders Edition Review
- Spider-Man 2 Performance Benchmark Review - 35 GPUs Tested
- Galax GeForce RTX 5080 1-Click OC Review
- NVIDIA DLSS 4 Transformer Review - Better Image Quality for Everyone
- MSI GeForce RTX 5080 Vanguard SOC Review
- ASUS GeForce RTX 5080 Astral OC Review
- Gigabyte GeForce RTX 5080 Gaming OC Review
- MSI GeForce RTX 5080 Suprim SOC Review
- ASUS GeForce RTX 5090 Astral OC Review - Astronomical Premium
- NVIDIA GeForce RTX 5090 Founders Edition Review - The New Flagship
Controversial News Posts
- NVIDIA 2025 International CES Keynote: Liveblog (470)
- AMD Debuts Radeon RX 9070 XT and RX 9070 Powered by RDNA 4, and FSR 4 (349)
- AMD is Taking Time with Radeon RX 9000 to Optimize Software and FSR 4 (251)
- AMD Radeon 9070 XT Rumored to Outpace RTX 5070 Ti by Almost 15% (243)
- AMD Denies Radeon RX 9070 XT $899 USD Starting Price Point Rumors (239)
- AMD Radeon RX 9070 XT & RX 9070 Custom Models In Stock at European Stores (226)
- NVIDIA GeForce RTX 5090 Features 575 W TDP, RTX 5080 Carries 360 W TDP (217)
- New Leak Reveals NVIDIA RTX 5080 Is Slower Than RTX 4090 (215)