 100
100
Arctic Liquid Freezer III 240 Black Review - Intel Contact Frame Included
Finished Looks »Installation
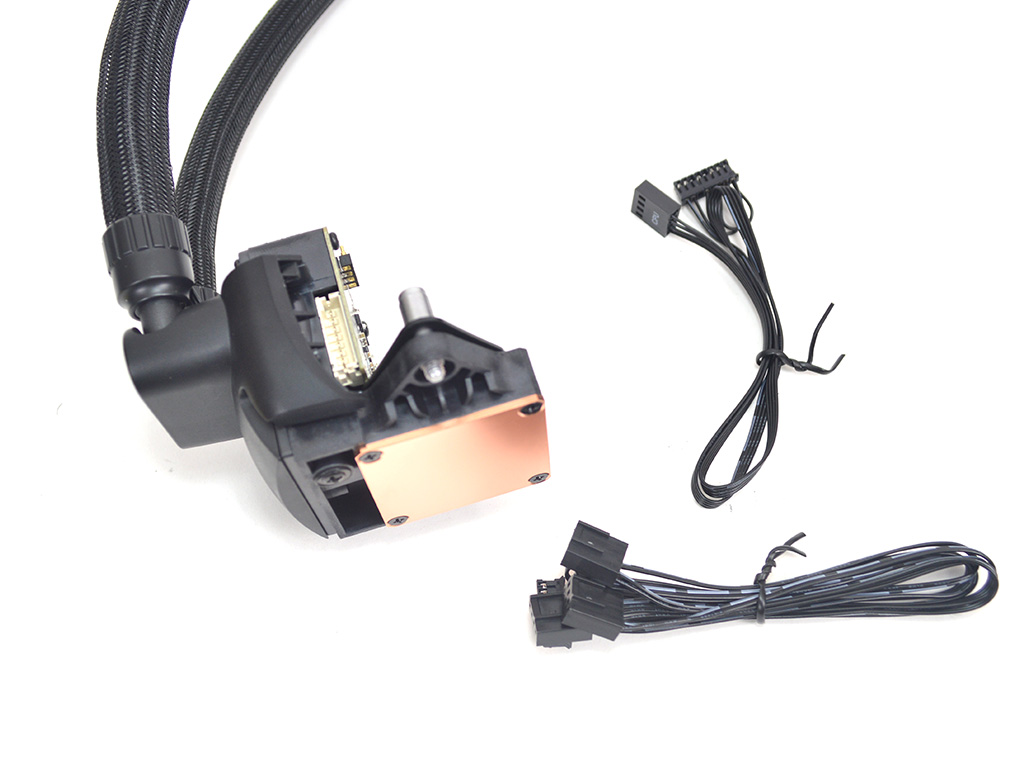
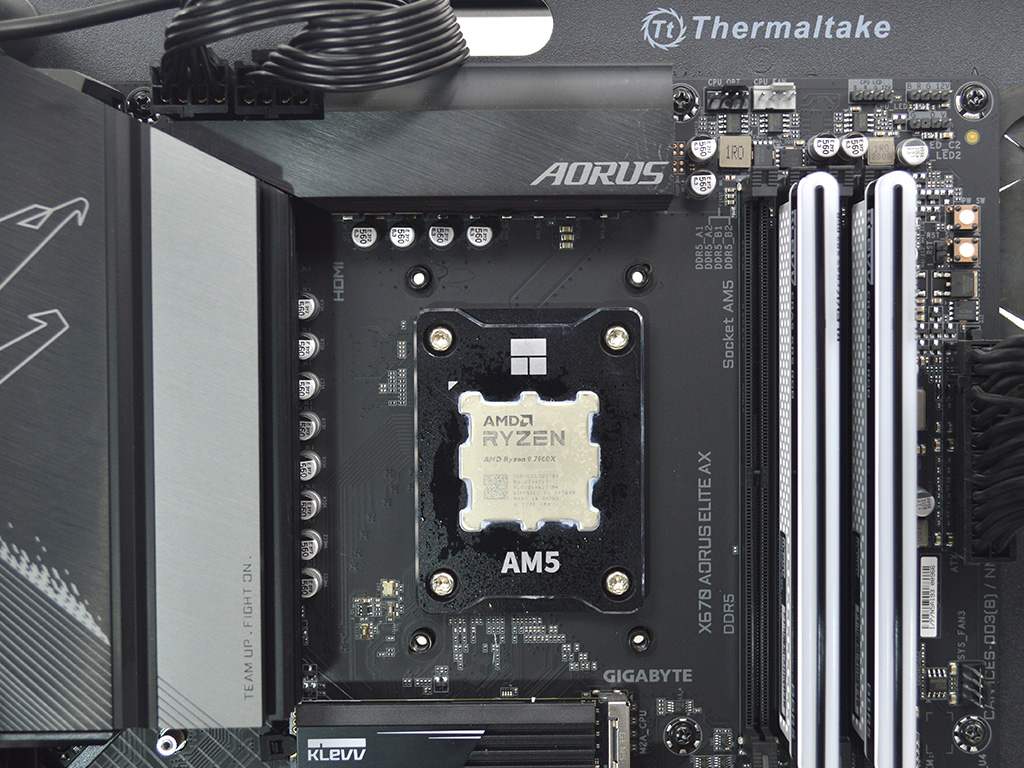

To install the cooler on AMD's Socket AM5, you first need to prepare the pump by connecting either the all-in-one PWM cable or the separate control cable (VRM FAN / PUMP / RAD FANS have individual connectors). Once you have that sorted, plug the cable into the header on the pump. Next, remove the plastic AMD motherboard cooler brackets and install the AMD brackets using the provided screws and spacers. Keep in mind that the brackets are labeled L for left and R for right.


Next, apply thermal paste and mount the pump to the mounting brackets. Once fully secured, slide the VRM fan into place on the pump. You will know it's fully seated when it makes a noise as the magnets pull it down and keep it firmly in place.
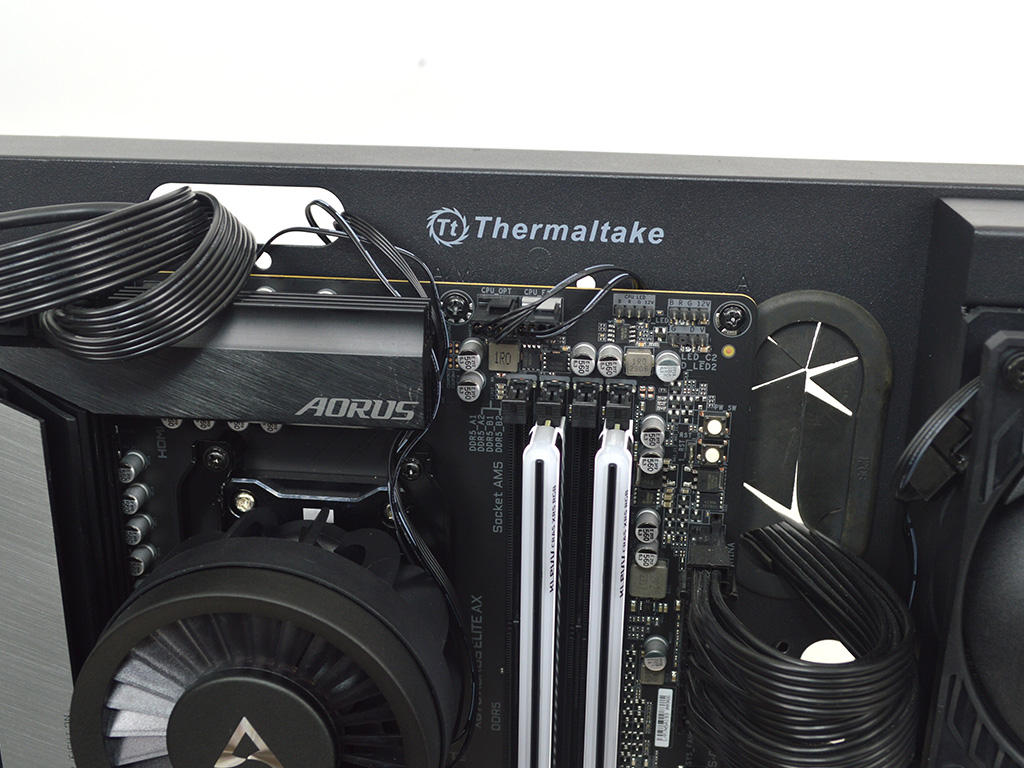
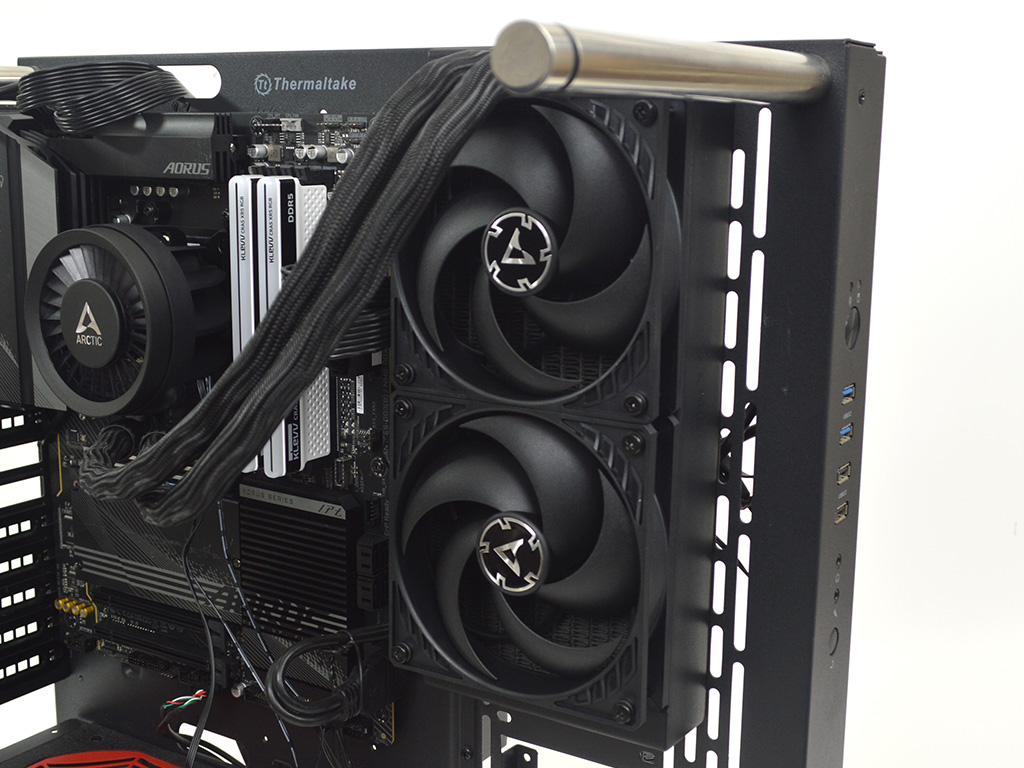
With that out of the way, you can mount the radiator to the chassis without too much fuss, as the radiator fans come preinstalled. Once secure, route your wiring and plug everything in.
Overall, the installation is pretty straightforward on AMD with no real issues to report beyond a bit of a struggle getting the screws on the pump to grab the threaded holes in the mounting brackets. I would have appreciated a bit more thread length to make things a bit easier.
Intel Installation / Contact Frame
That said, on the Intel side, I wasn't a fan of the mounting solution, but not in the way you might think. As you can see below, Arctic has opted to use their own contact frame that replaces Intel's default retention mechanism. It also functions as the mounting bracket. While it works fine, it's not as easy to work with compared to more traditional solutions, and it's likely going to be a lot more nerve-wracking for first-time or less experienced builders. So while I have no other issues with it, it's not as appealing as easier-to-install options.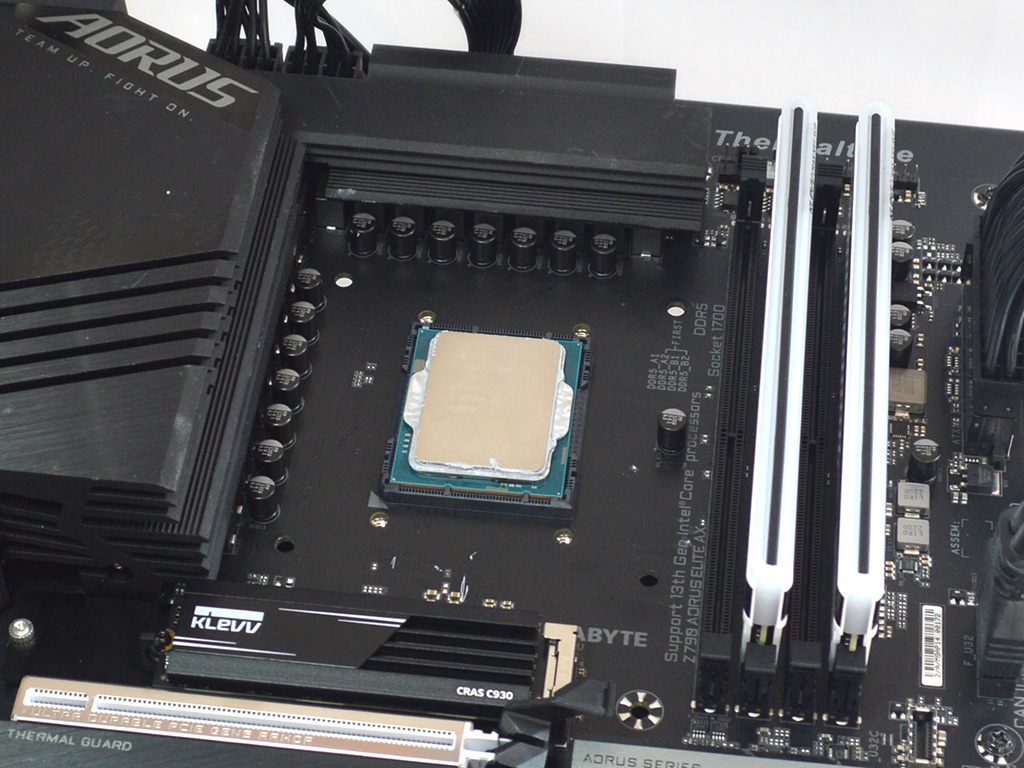
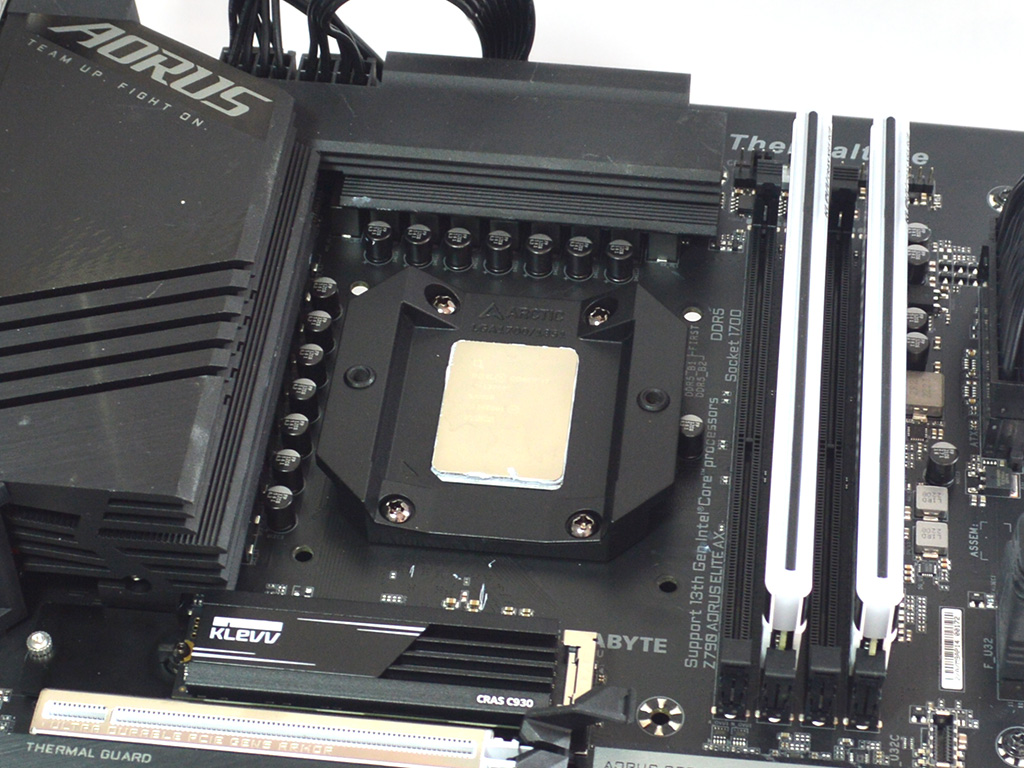
I highly recommend removing the motherboard from the chassis to prep the cooler for installation. Once the contact frame/bracket is installed, you can then reinstall the motherboard. After that, installing the cooler will be far easier, especially for those with less experience building PCs. Trying to install the contact frame when the system is already built is a bit more challenging, with Arctic suggesting the use of painter's tape to hold things in place. However, based on firsthand experience with the cooler, I can't really consider that a great option. Yes, it works, but it doesn't inspire confidence. I also have a feeling it may cause a few extra headaches and some disgruntled customers down the road. Again, all of that is avoided by using regular mounting hardware, and if a customer is worried about bending, they can buy a contact frame if they deem it necessary.
Nov 18th, 2024 21:30 EST
change timezone
Latest GPU Drivers
New Forum Posts
- Black monitor screen.. only sometimes. (1)
- New GameTech GPU benchmark. Share your results! (STEAM page live now) (150)
- TPU's Nostalgic Hardware Club (19481)
- NVIDIA App (35)
- What phone you use as your daily driver? And, a discussion of them. (1629)
- whats going on with core 2 quad and windows? (58)
- ROM not erased. Error 0FL01 (12)
- What Was Your First... (Gaming Related Things) (30)
- Unknown Adapter ?Disk shows lots of partitions why and how? (12)
- Dedicated PSU for GPU (18)
Popular Reviews
- AMD Ryzen 7 9800X3D Review - The Best Gaming Processor
- Quick Look: MOONDROP Quark2 Type-C In-Ear Monitors
- Valkyrie VK02 Lite Review
- Beelink GTi12 Ultra Mini-PC + EX Dock (Intel Core i9-12900H) Review
- NVIDIA App v1.0 Review
- Epomaker TH40 Wireless Mechanical Keyboard Review
- Redragon K1NG 8K Review
- Upcoming Hardware Launches 2024 (Updated Nov 2024)
- Quick Look: G.SKILL WigiDash PC Command Panel
- DDR5 Memory Performance Scaling with AMD Zen 5
Controversial News Posts
- AMD Falling Behind: Radeon dGPUs Absent from Steam's Top 20 (222)
- AMD Ryzen 7 9800X3D Stocks Vaporized in Retail, Being Scalped (151)
- AMD Introduces Next-Generation AMD Ryzen 7 9800X3D Processor, $479, Nov 7 (124)
- Apple and Samsung in the Fray to Acquire Intel: Rumor (123)
- AMD Ryzen 7 9800X3D Comes with 120W TDP, 5.20 GHz Boost, All Specs Leaked (120)
- Microsoft Offers $30 Windows 10 Security Extension for Home Users (118)
- AMD Ryzen 7 9800X3D Has the CCD on Top of the 3D V-cache Die, Not Under it (110)
- TechPowerUp is Hiring a Power Supply (PSU) Reviewer (105)