 15
15
be quiet! Pure Base 500DX Review
Temperature & Noise Testing »Test System
| System Parts for Case Reviews | |
|---|---|
| Processor: | Intel Core i5-9600K |
| Motherboards: | ATX: MSI Z390 GAMING EDGE AC MATX: Z370M GAMING EDGE AC Mini-ITX: MSI Z370I GAMING EDGE AC Provided by: MSI |
| Graphics Card: | ATX/mATX: Palit GeForce RTX 2080 Gaming Pro OC ITX: EVGA GTX 1650 SC Ultra Black 4 GB |
| Memory: | 16 GB XPG GAMMIX D30 DDR4 2666 MHz CL16-18-18 1.20 V 16 GB XPG SPECTRIX D60G DDR4 3000 MHz CL16-18-18 1.35 V Provided by: ADATA |
| HDD: | Western Digital 320 GB 7200 RPM |
| SSD: | ITX: ADATA SX6000 Pro M.2 256 GB mATX: ADATA GAMMIX S11 Pro M.2 256 GB ATX: ADATA SPECTRIX S40G M.2 256 GB ADATA XPG SX850 256 GB ADATA Ultimate SU630 240 GB ADATA Ultimate SU750 256 GB Provided by: ADATA |
| Power Supply: | be quiet! Straight Power 11 850 Watt 80 Plus Platinum Provided by: be quiet! |
| Cooling: | be quiet! Dark Rock 4 be quiet! Dark Rock Slim be quiet! Shadow Rock LP Provided by: be quiet! |
Assembly
Installing the motherboard is easily done on the pre-installed spacers. An aligning pin in the center also helps with placing it before screwing it down. As you can see, the three openings on the bottom of the motherboard line up perfectly, so you will be able to route everything nicely.
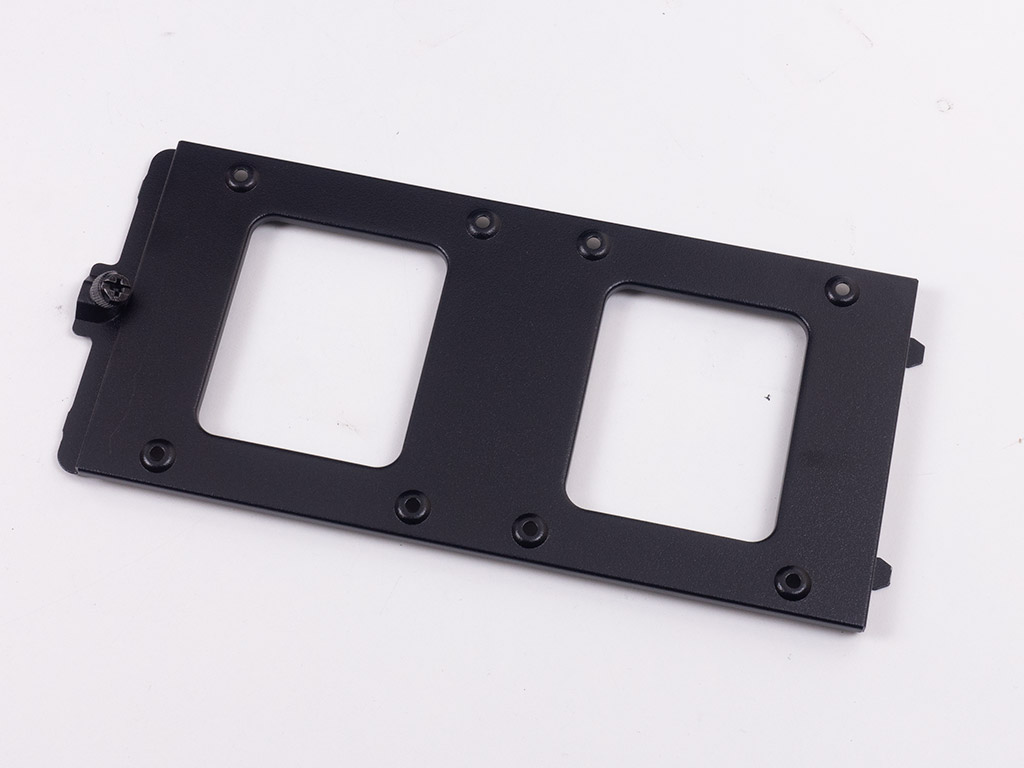
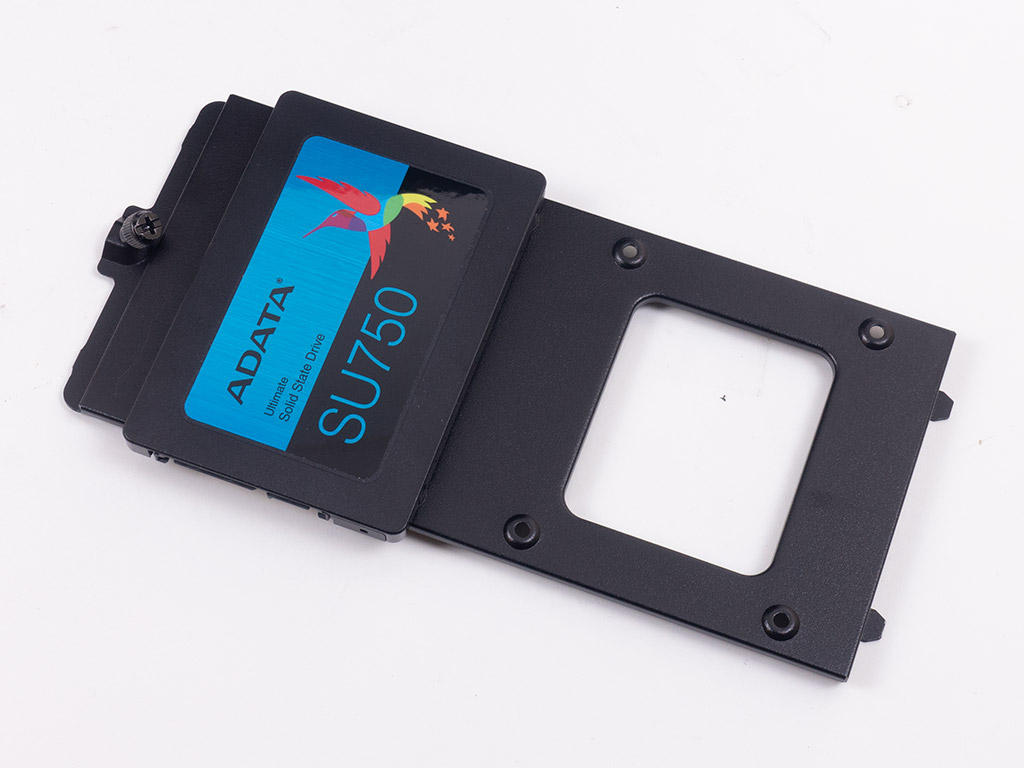

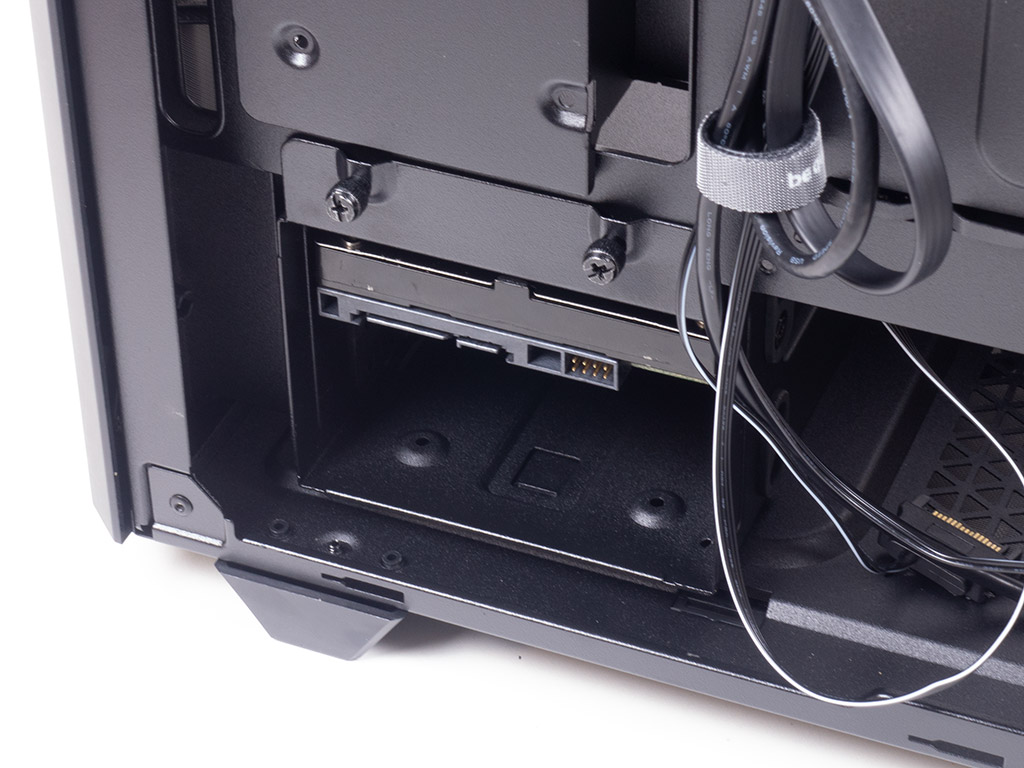
You may install the SSD hidden away from view by screwing it to the plate above the CPU cooler opening and putting that whole contraption back into place. Alternatively, if you would like to show things off more, you could simply screw the drive into the plate provided to cover the cable-routing hole.
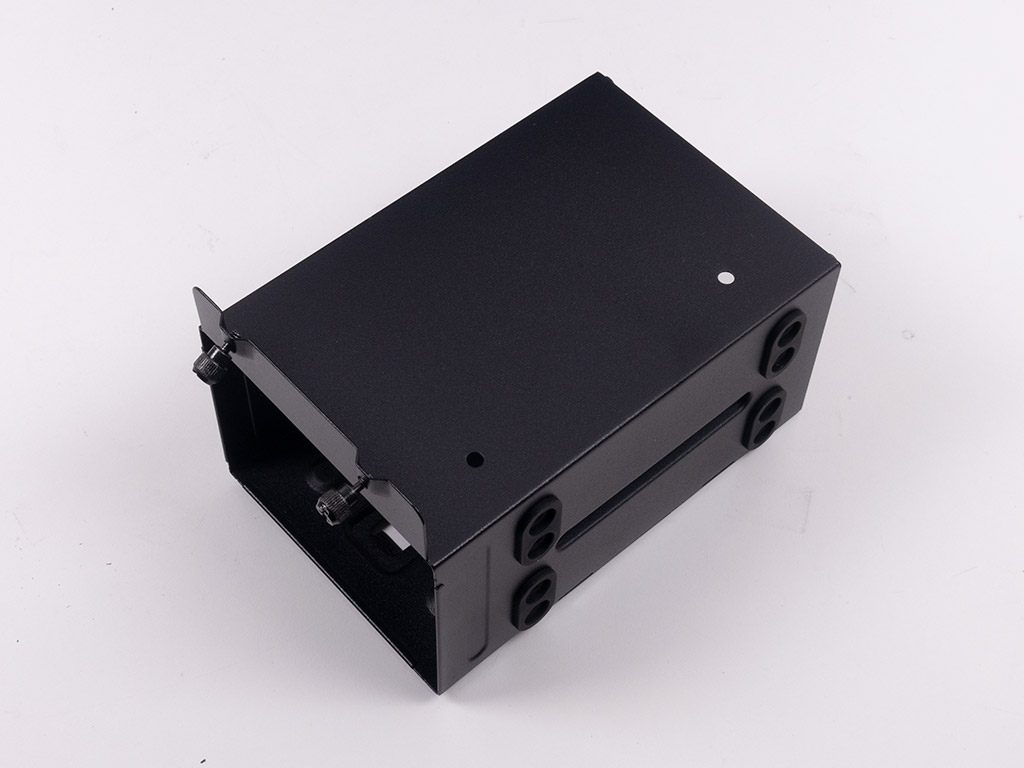
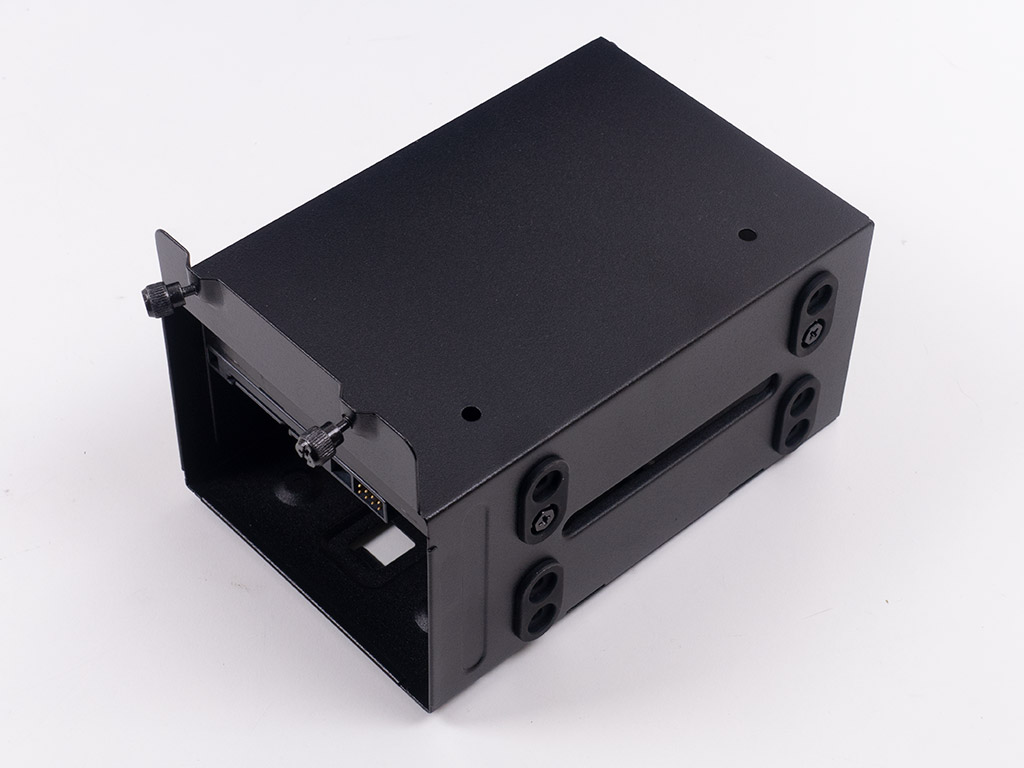
The 3.5" drives also have to be installed outside of the chassis. be quiet! includes special screws that are long enough to go through the rubber-equipped holes. Once filled, simply slide the whole cage back in place and tighten down the two attached thumb screws.
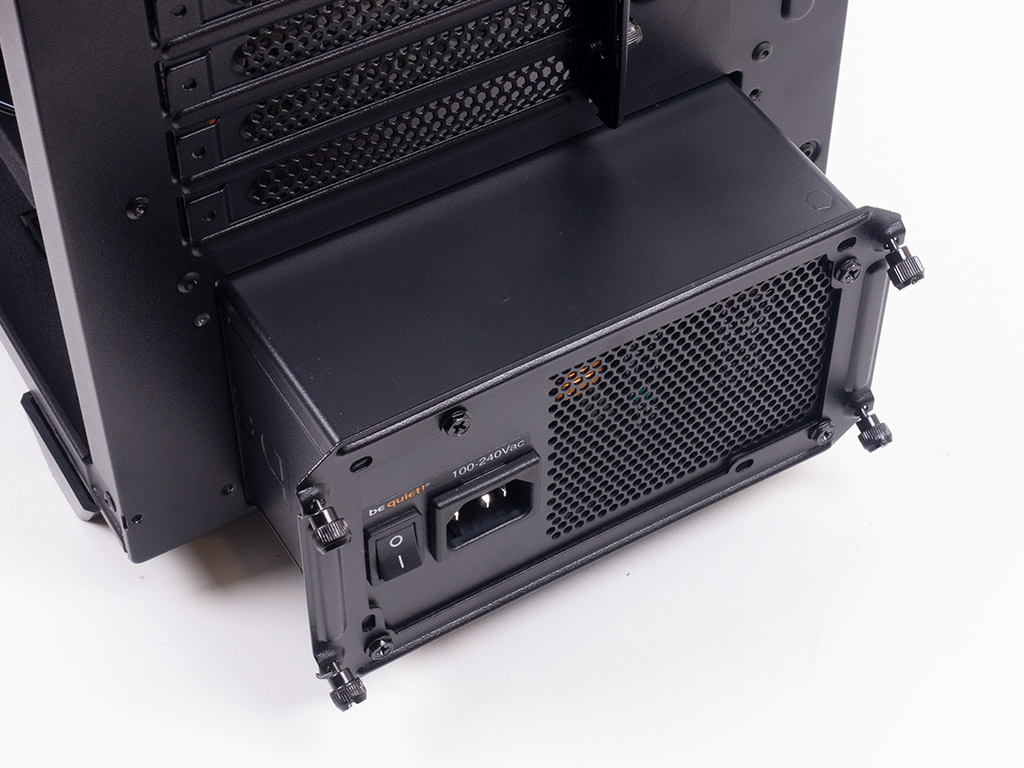

As you cannot remove the metal shroud, the only way to add a PSU is by screwing the frame down onto the PSU and sliding it all in through the back of the Pure Base 500DX, which is quick, simple, and easy. There is plenty of space for long power supplies, so you should not run into any issues when building a high-performance system.
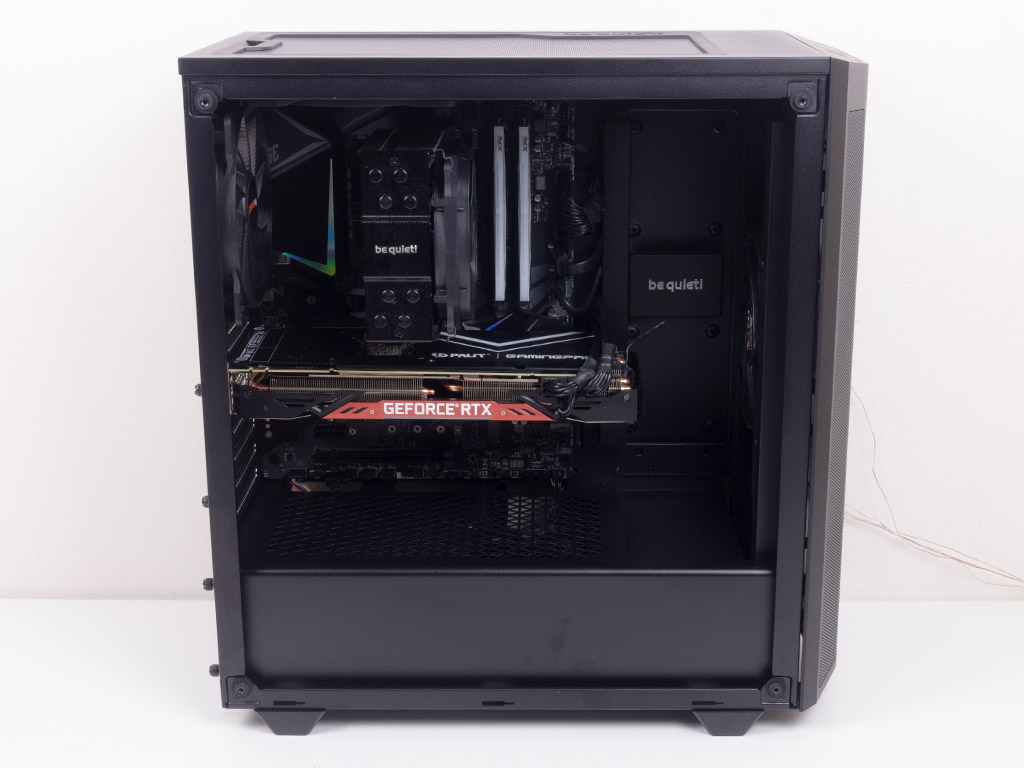
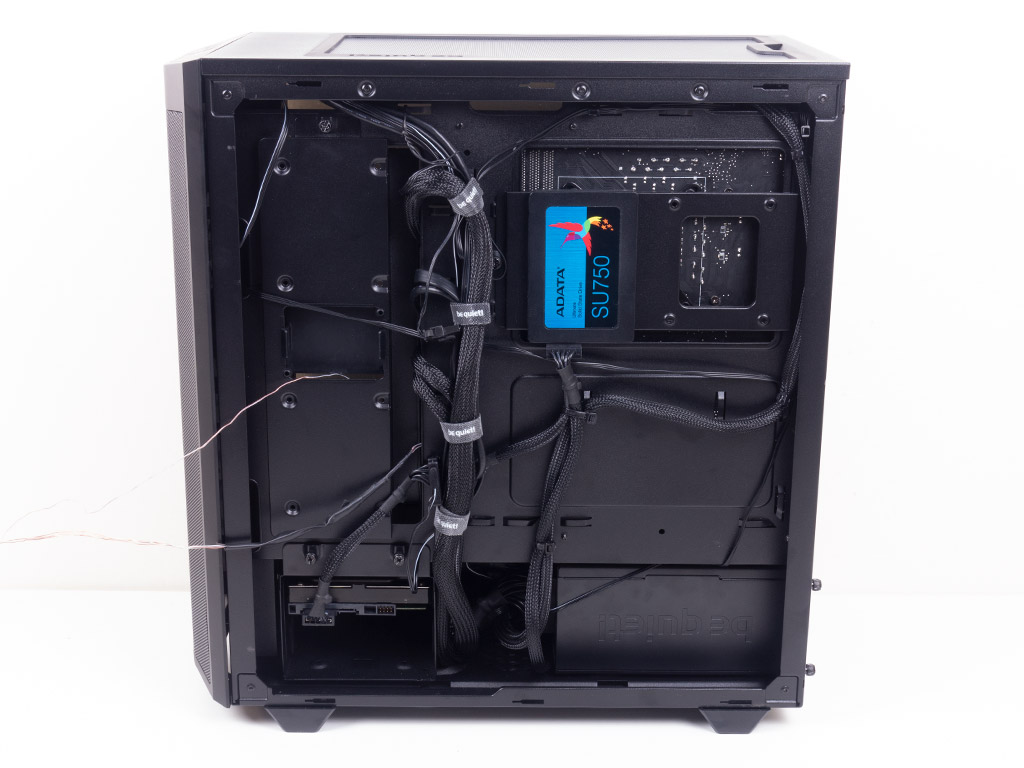
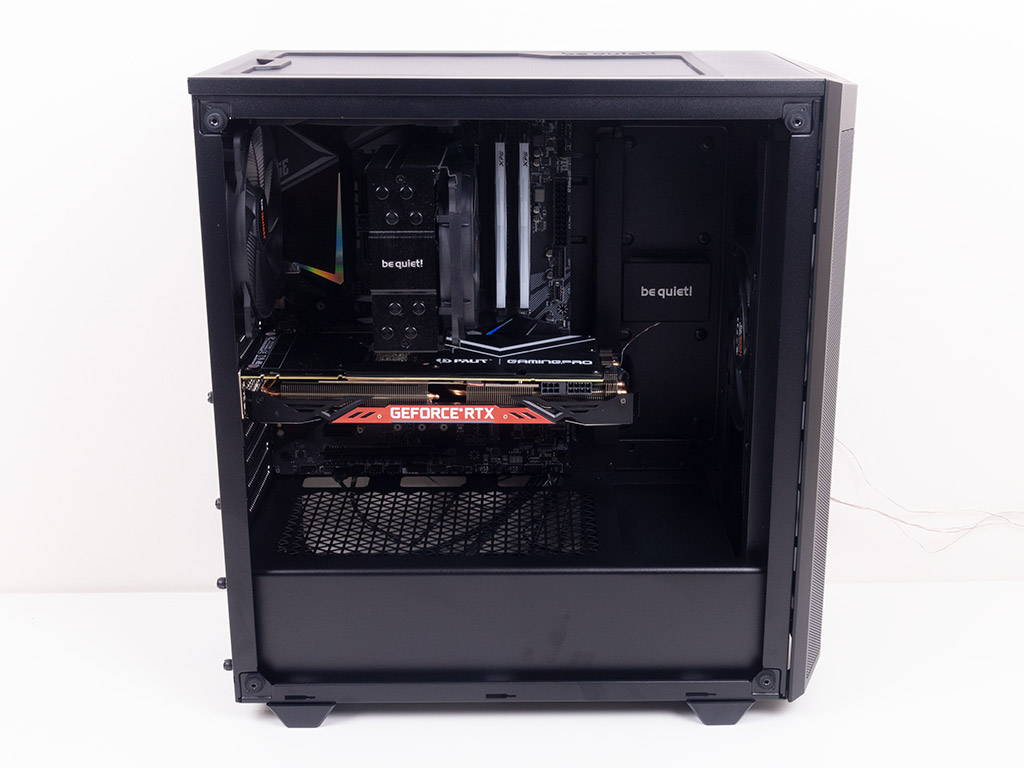
With everything installed, the Pure Base 500DX is beautifully clean on the interior thanks to the unique bracket in the front, which also acts as a cable channel, and we made sure the GPU power cable hugs the GPU well to keep that distraction to a minimum as well. As we know from the original 500, the plastic cover underneath the SSD also really helps in that regard. On the rear, most the cables are held in place by the four Velcro strips, but I did use a few zip ties, which was a breeze because of the large hooks.
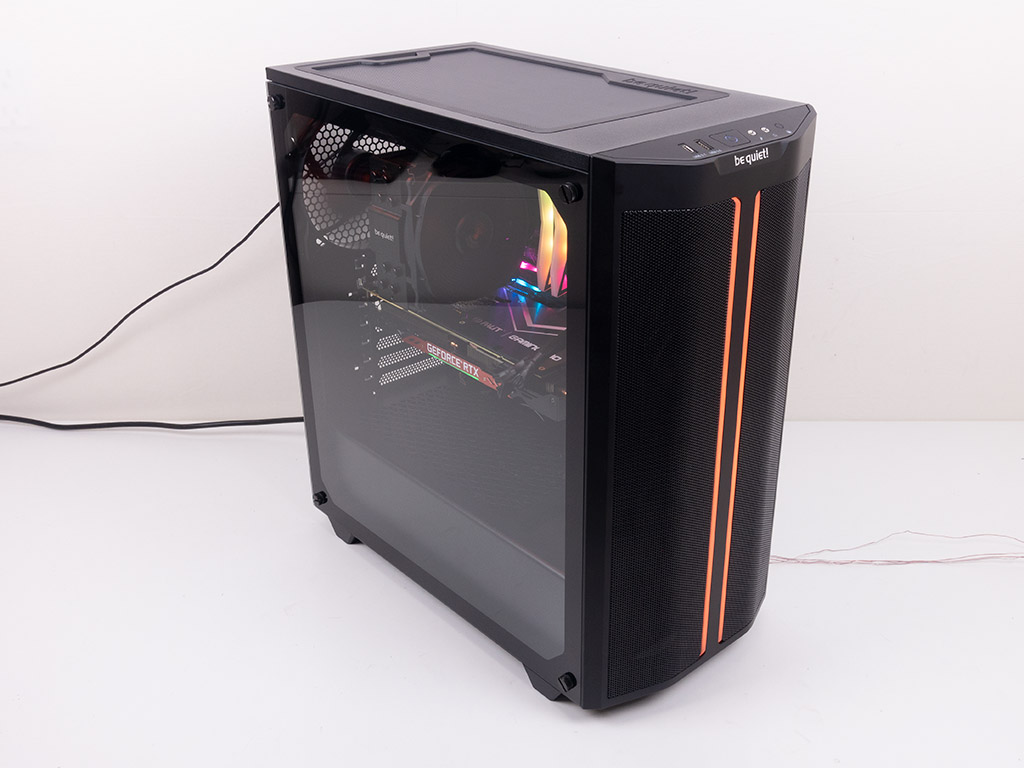
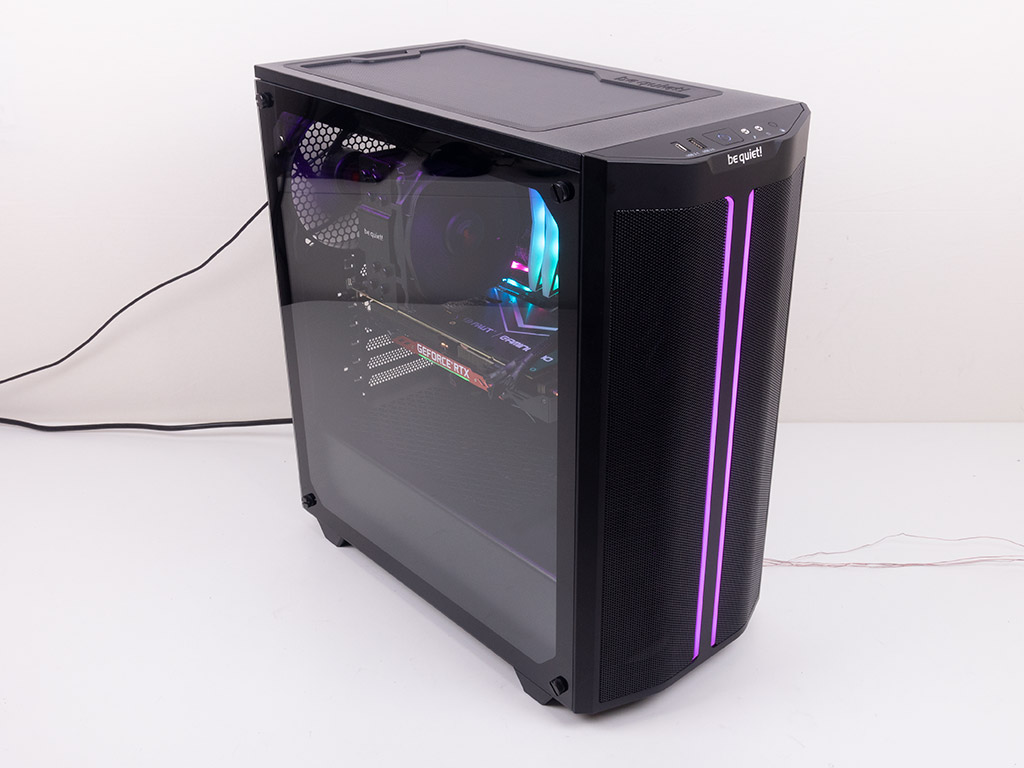
Finished Looks
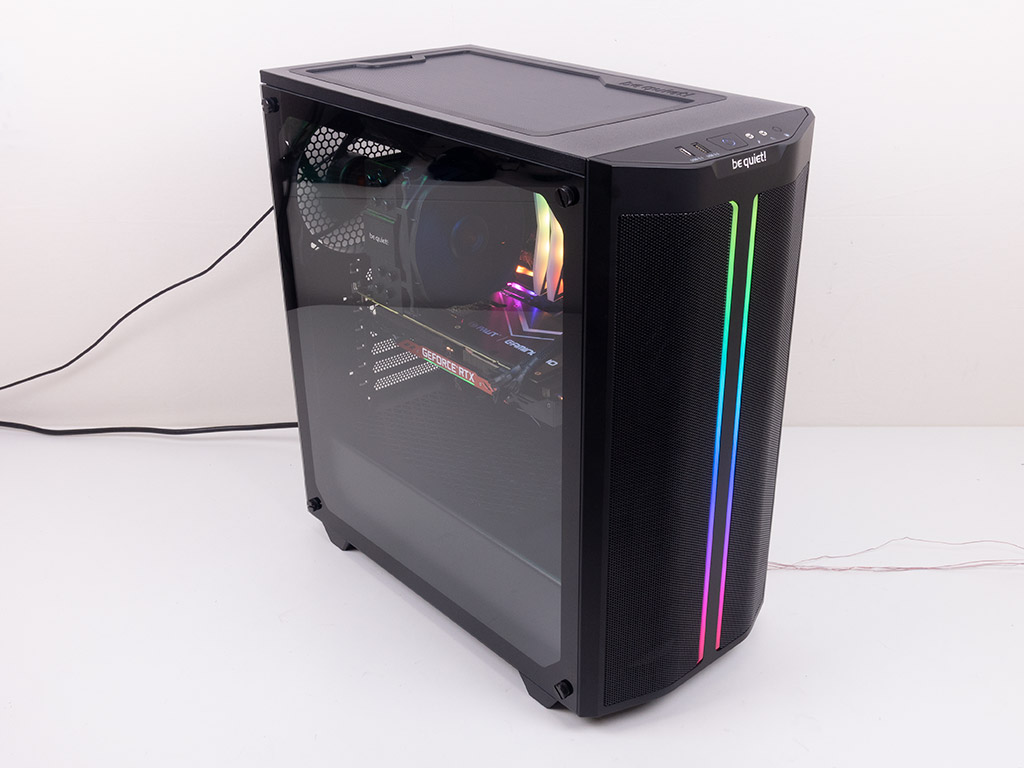
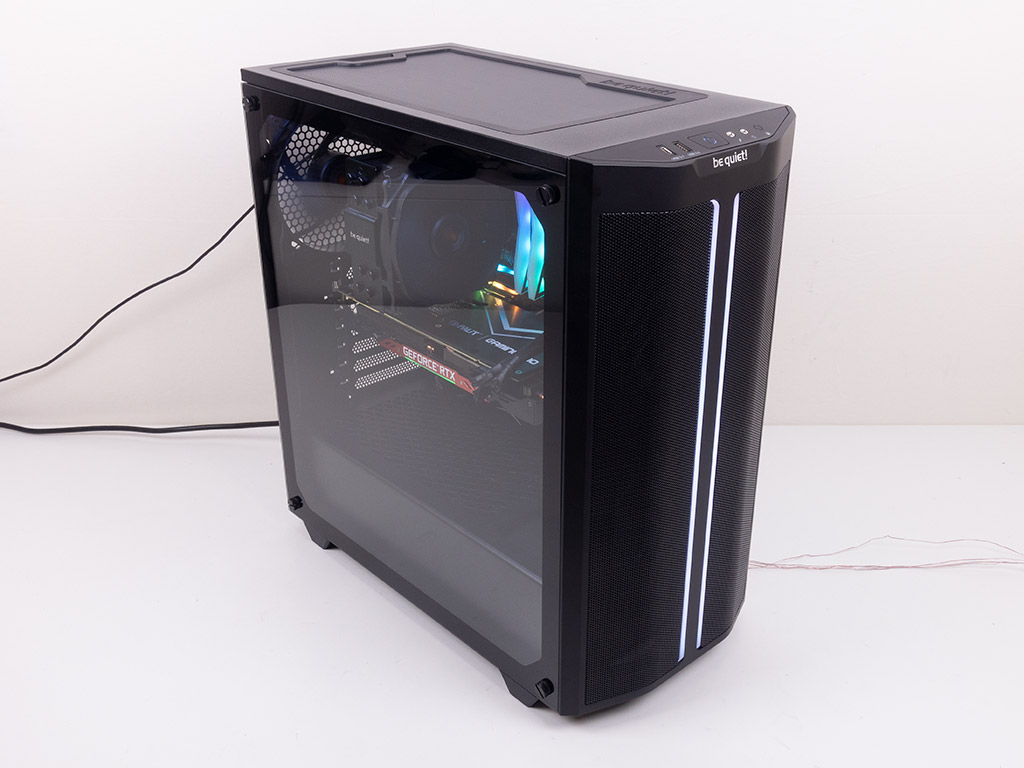
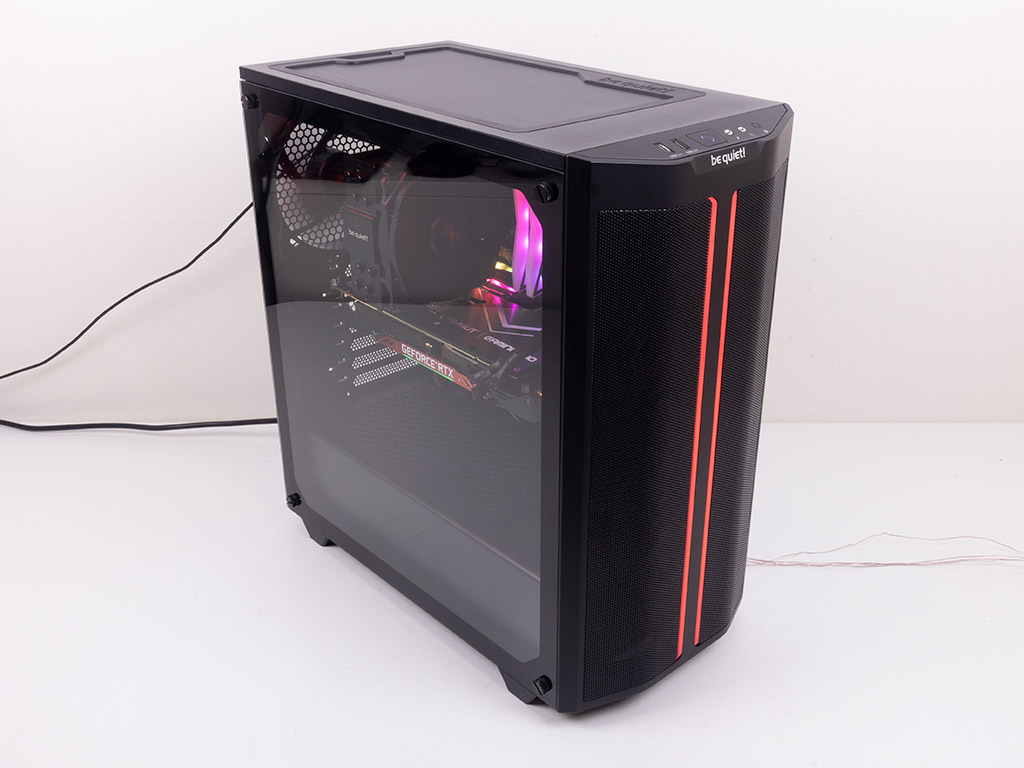
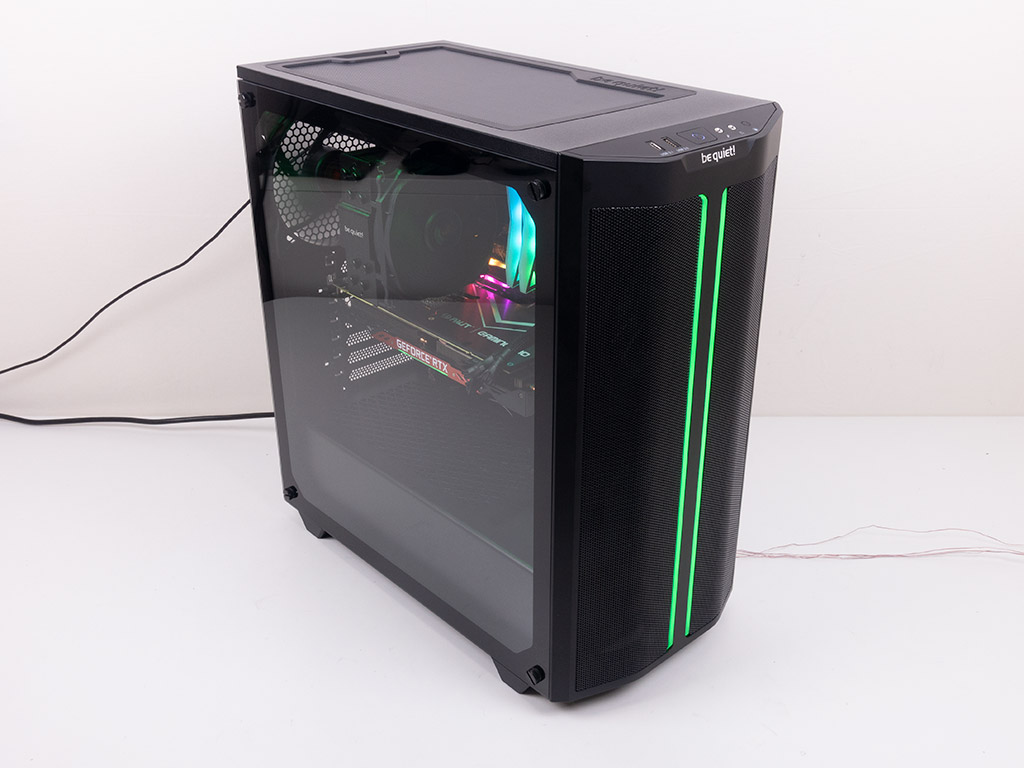
Fully assembled and turned on—with the covers back in place—system noise is just what you would expect from a system filled with such hardware, with the three 140 mm fans nicely quiet during operation. That said, the original 500DX is certainly quieter because of its solid front and top. You will find a white light underneath the power button to let you know the system is powered on should you happen to ignore all the fancy RGB lighting.
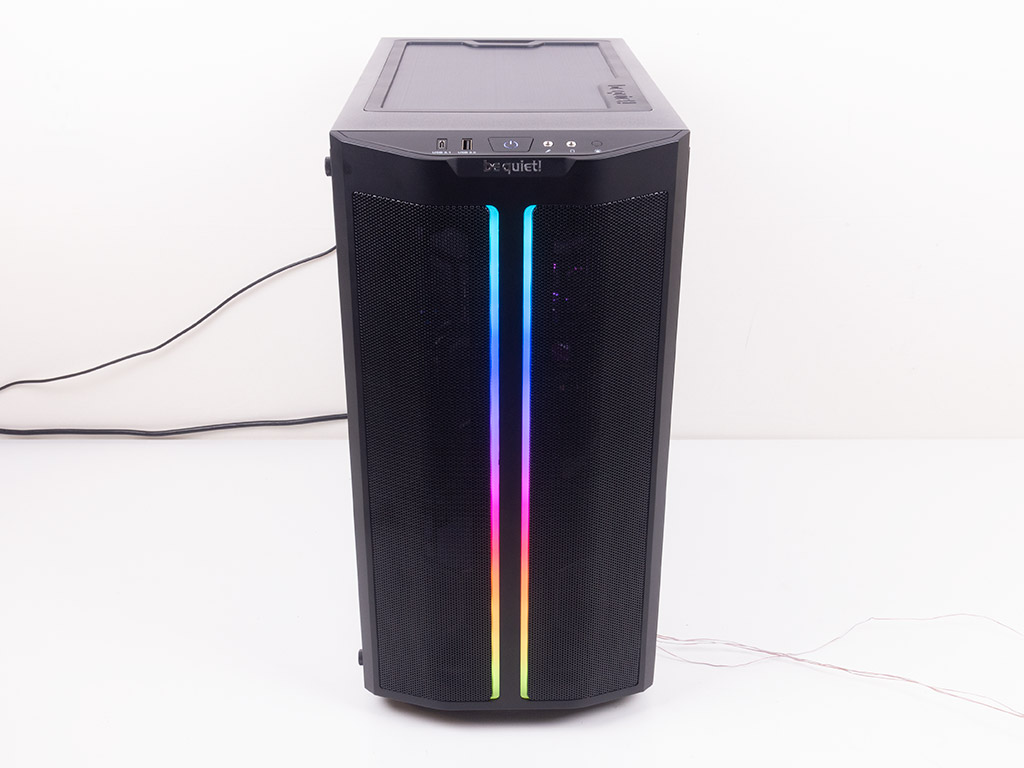
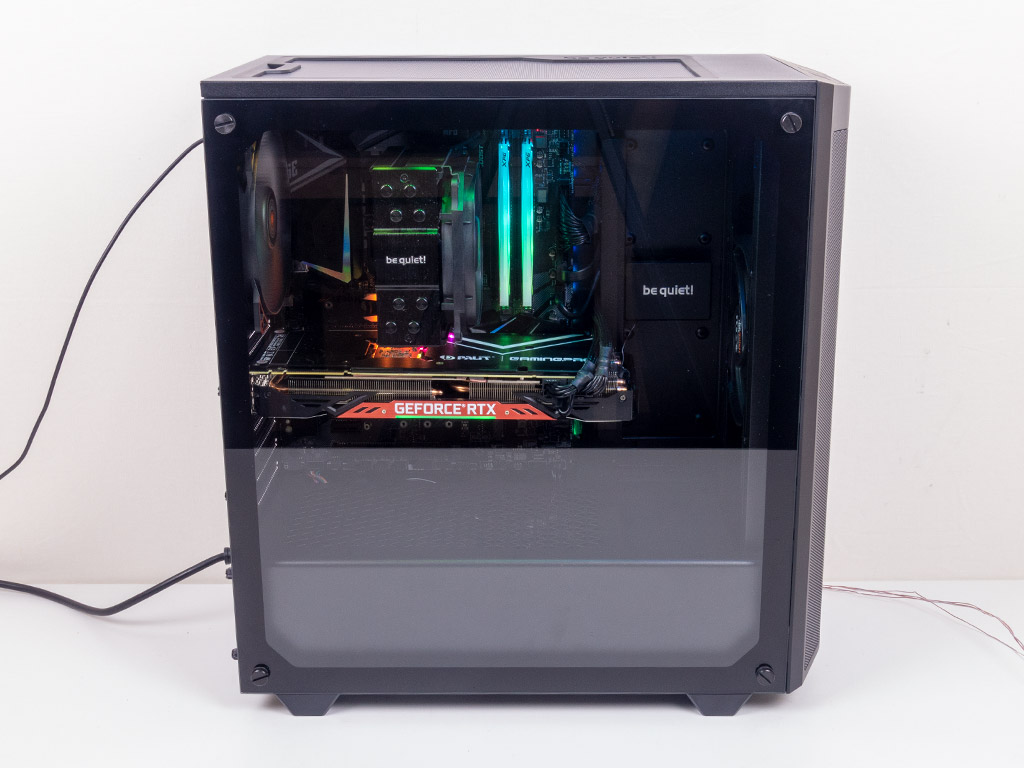

The ARGB strip in the front is diffused nicely and thanks to the clear glass panel you can see all your components easily as well. In the rear, everything is where you would expect to see it from a modern chassis like this. You may toggle through various animations and color modes with the built-in controller. Below are the solid color choices it is capable of.

Jan 22nd, 2025 07:59 EST
change timezone
Latest GPU Drivers
New Forum Posts
- New rtx 5070 (84)
- RDNA4 (RX 9070XT / 9070) launch announced for (delayed to) March 2025 (259)
- The coffee and tea appreciation thread (110)
- RANT- front panel connectors are a crime against pc builders/users (26)
- Ignorant question about my network (Have mercy on me) (7)
- Need to remove PCIe Gen Limitation on P104-100 and P106-100 (8)
- What DLSS/FSR Upscaling Mode do you use? (192)
- Windows 11 causing random stutters / frame-pacing / frame-time issues? (56)
- What do you do with your case stickers? (75)
- FAN control software (13)
Popular Reviews
- NVIDIA GeForce RTX 5090 Founders Edition Unboxing
- NZXT C1500 Review
- Montech Heritage Pro Review - The Leather Case
- Fosi Audio K7 Gaming Desktop DAC/Headphone Amplifier Review
- NVIDIA GeForce RTX 50 Technical Deep Dive
- AMD Ryzen 7 9800X3D Review - The Best Gaming Processor
- ASRock Arc B570 Challenger OC Review
- PowerColor Alphyn AH10 Review
- Pwnage StormBreaker Max CF Review
- be quiet! Light Loop 360 mm AIO Review
Controversial News Posts
- NVIDIA 2025 International CES Keynote: Liveblog (468)
- AMD Debuts Radeon RX 9070 XT and RX 9070 Powered by RDNA 4, and FSR 4 (349)
- AMD Radeon RX 9070 XT & RX 9070 Custom Models In Stock at European Stores (226)
- NVIDIA GeForce RTX 5090 Features 575 W TDP, RTX 5080 Carries 360 W TDP (217)
- AMD Radeon RX 9070 XT Alleged Benchmark Leaks, Underwhelming Performance (204)
- Potential RTX 5090 and RTX 5080 Pricing in China Leaks (173)
- AMD's Radeon RX 9070 Launch Faces Pricing Hurdles (173)
- AMD Radeon RX 9070 XT Tested in Cyberpunk 2077 and Black Myth: Wukong (169)