 2
2
Building a Keyboard 4: Epomaker GK61XS, Akko Carbon Retro Keycaps, Kailh BOX Switches
(2 Comments) »Summary and Conclusion
Prices- The Epomaker GK61XS wooden kit costs $149 from the Epomaker webshop.
- The Akko Carbon Retro PBT keycap set in the ASA profile costs $69.99 from the Epomaker Amazon store and less directly from Akko.
- The Kailh BOX mechanical switches vary in cost depending on which you pick—a pack of 15 costs $8.99–$16.99 from the Epomaker webshop.
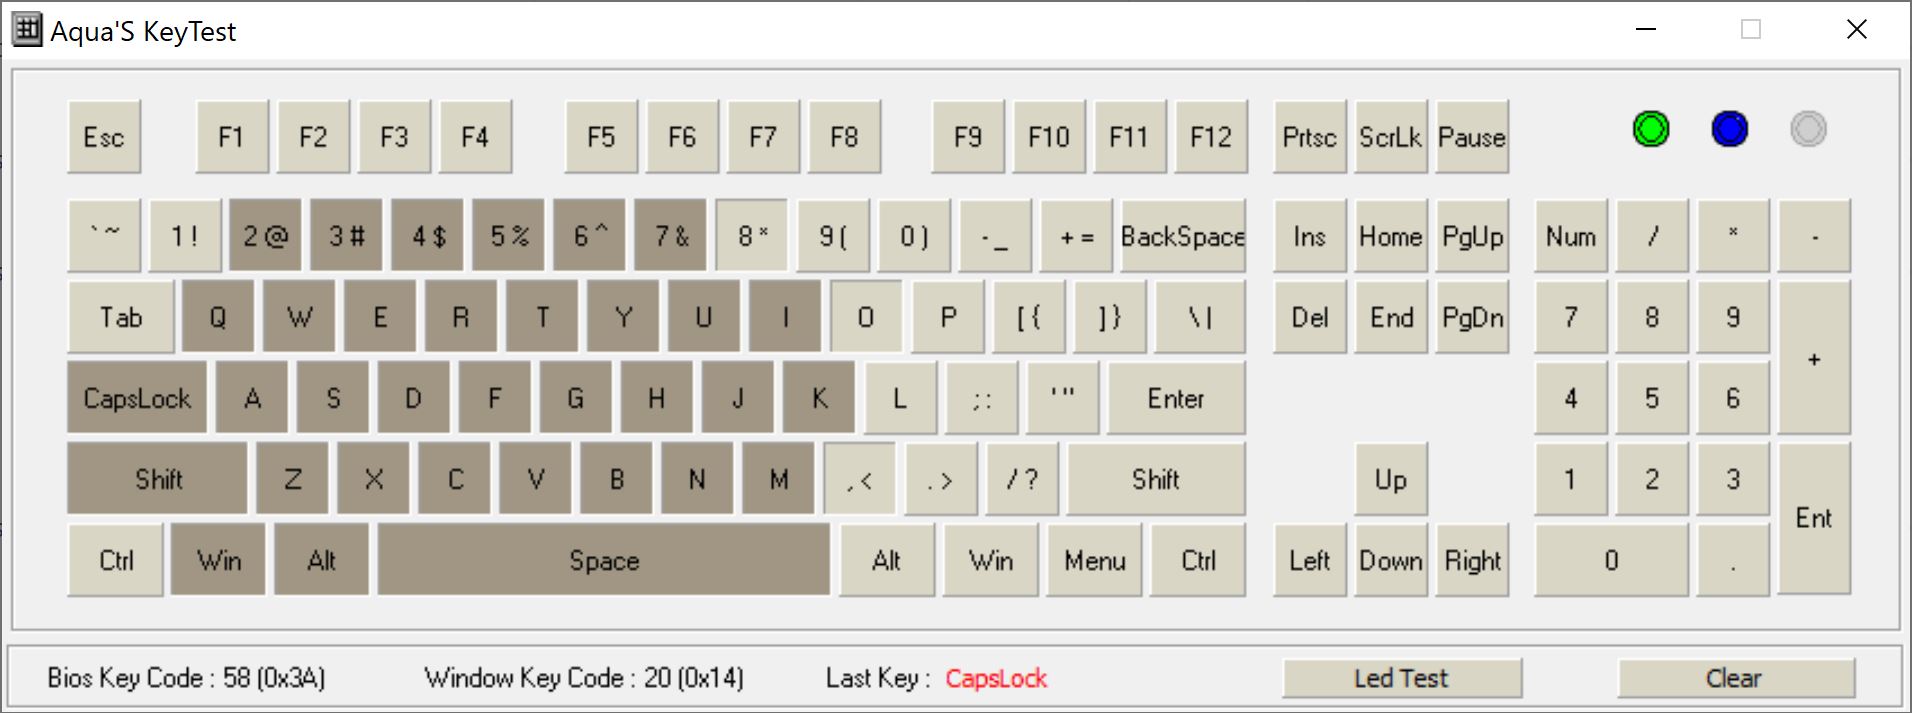

No matter what you do with your keyboard build, make sure every single switch is working. This is especially important with hot-swappable switches since the metal contacts may be bent if not perfectly inserted into the socket. Simple tools, including those I use for my reviews, will help you test for key rollover and key chatter in addition to key actuation/recognition. For example, this GK61XS adopts a standard 60% form factor with the alphanumeric section being all you get, and even there, the tilde (~) key is replaced by Esc. There is software support for key mapping along with layers, all of which helps make the most of this potentially ergonomic typing solution if you spend the time getting used to it. There is one drawback here—not having a set of default keycaps means you don't exactly know which secondary functions are pre-programmed to the keys. That may result in a longer learning curve even with the manual alongside.
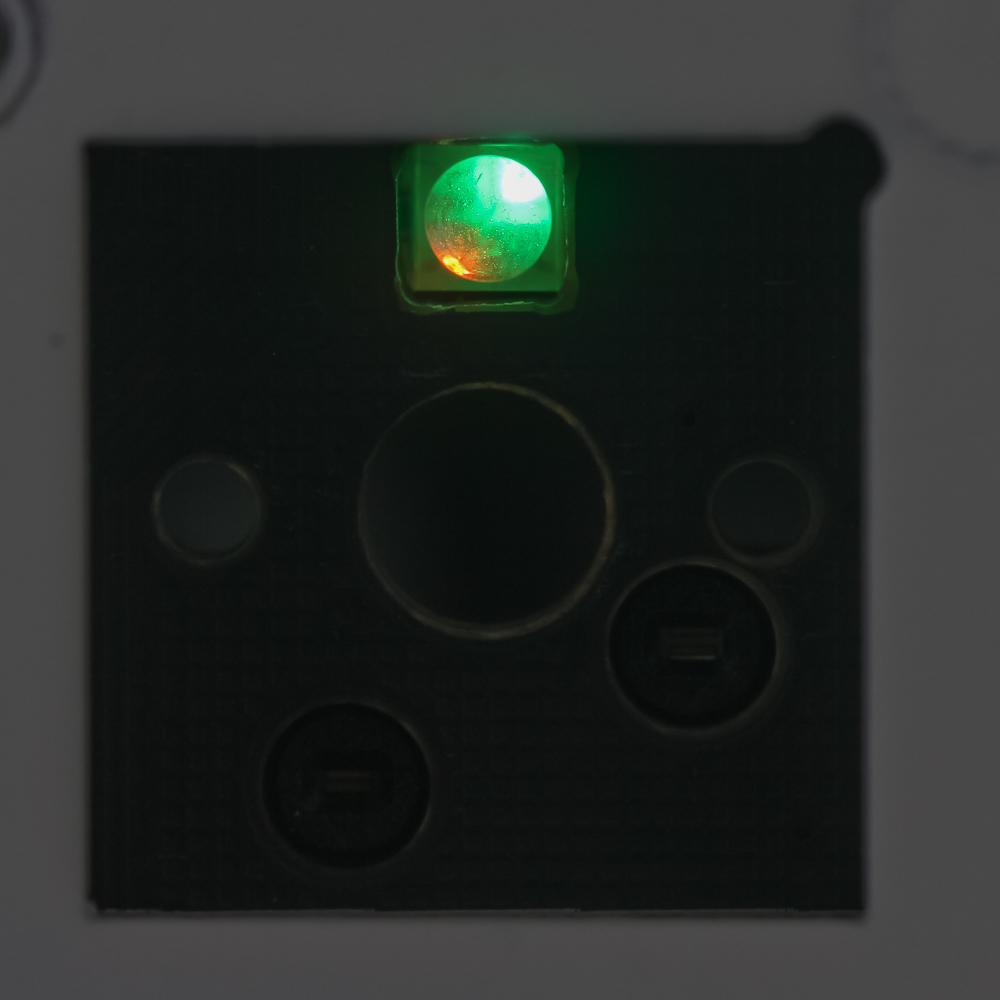
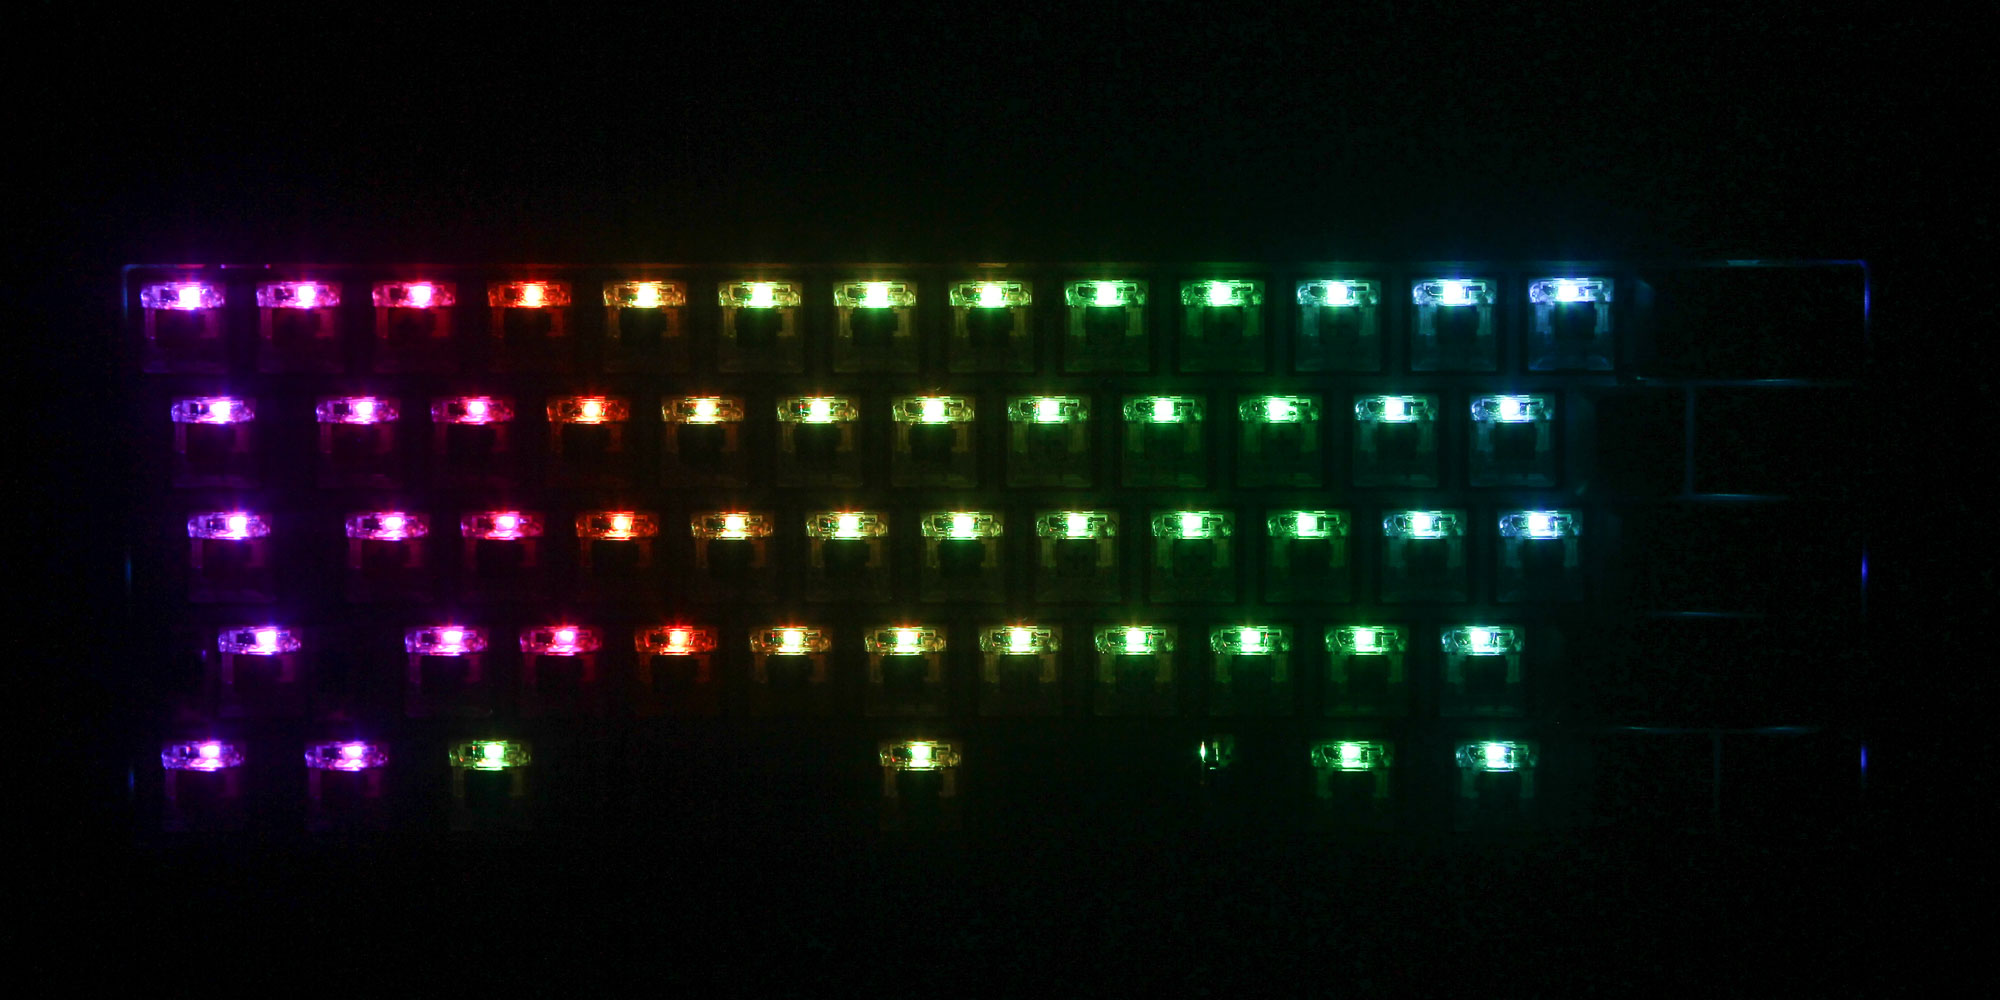
If the PCB supports lighting, it is a great and fast way to visually see whether all the contacts are working. It's also fun to see the individual switches light up, at least until you get to where these keycaps support no backlighting at all. The interesting hiccup I had was that after disconnecting the battery and re-connecting it, the LEDs on the PCB immediately lit up, and I had no way to turn them off outside of removing the physical connection since there is no dedicated power button unlike on the newer Epomaker AK84S. As such, I quickly plugged in two switches and turned the board off.
At first look, the entire combination may end up more expensive than buying a pre-built keyboard, but one would argue that gaming keyboards are already expensive compared to your bog-standard OEM membrane keyboard. There are functional benefits to going with a more expensive keyboard offering ergonomics and customization for the typing experience. This route is for those interested in the latter by using different switches, including perhaps on the same keyboard with, say, linear switches on WASD and tactile switches everywhere else. But make no mistake: The main reason for doing so is to customize the aesthetics to your preferences, and custom keycaps are the quickest way of going about it. A standalone case/PCB with different materials and color finishes takes one further down the rabbit hole, one others will now perhaps be tempted to head down as well.
In my case, I primarily sought to share my appreciation for the Kailh BOX switches here. The wood kit is quite groovy, but these are the switches that genuinely made me think there is a proper contender to Cherry now. It then got to where I now think Kailh does mechanical switches better than Cherry, at least for us PC DIY enthusiasts. There is also a lot more support from Kailh for individuals and smaller brands, going as far as using this very BOX switch design for several unique third-party switches, some of which we will take a look at in another entry to our Building a Keyboard series soon!
May 9th, 2025 05:56 EDT
change timezone
Latest GPU Drivers
New Forum Posts
- It's happening again, melting 12v high pwr connectors (1131)
- which cooler CPU is better? (26)
- RX 9000 series GPU Owners Club (735)
- 1440p gaming pc. (21)
- Gigabyte graphic cards - TIM gel SLIPPAGE problem (13)
- Help in overclocking the AMD Ryzen 7 7700 in ASUS TUF B650-PLUS WiFi Mobo (31)
- Need a 4U case recommendation (6)
- The TPU UK Clubhouse (26233)
- 5070 Ti power limit questions (91)
- My PCIe5 SSD is slow. Samsung 9100 PRO (1)
Popular Reviews
- Arctic Liquid Freezer III Pro 360 A-RGB Review
- SCYROX V6 Review
- ASRock Radeon RX 9070 Steel Legend OC Review
- Clair Obscur: Expedition 33 Performance Benchmark Review - 33 GPUs Tested
- ASUS Radeon RX 9070 XT TUF OC Review
- NVIDIA GeForce RTX 5060 Ti PCI-Express x8 Scaling
- Upcoming Hardware Launches 2025 (Updated Apr 2025)
- Sapphire Radeon RX 9070 XT Nitro+ Review - Beating NVIDIA
- AMD Ryzen 7 9800X3D Review - The Best Gaming Processor
- NVIDIA GeForce RTX 5070 Founders Edition Review
Controversial News Posts
- AMD Radeon RX 9060 XT to Roll Out 8 GB GDDR6 Edition, Despite Rumors (142)
- NVIDIA Launches GeForce RTX 5060 Series, Beginning with RTX 5060 Ti This Week (115)
- Microsoft Forces Automatic Windows 11 24H2 Update on Pro and Home PCs (97)
- Parts of NVIDIA GeForce RTX 50 Series GPU PCB Reach Over 100°C: Report (85)
- Sony Increases the PS5 Pricing in EMEA and ANZ by Around 25 Percent (84)
- Intel "Bartlett Lake-S" Gaming CPU is Possible, More Hints Appear for a 12 P-Core SKU (78)
- NVIDIA Reportedly Working on GeForce RTX 5080 SUPER 24 GB & RTX 5070 SUPER 18 GB Designs (74)
- NVIDIA GeForce RTX 5060 Ti 8 GB Variant Benched by Chinese Reviewer, Lags Behind 16 GB Sibling in DLSS 4 Test Scenario (73)