 4
4
Building a Keyboard 8: Akko Acrylic Gasket Mount Kit, ASA Low Profile Keycaps, CS Sponge Switches
(4 Comments) »Assembly and Testing

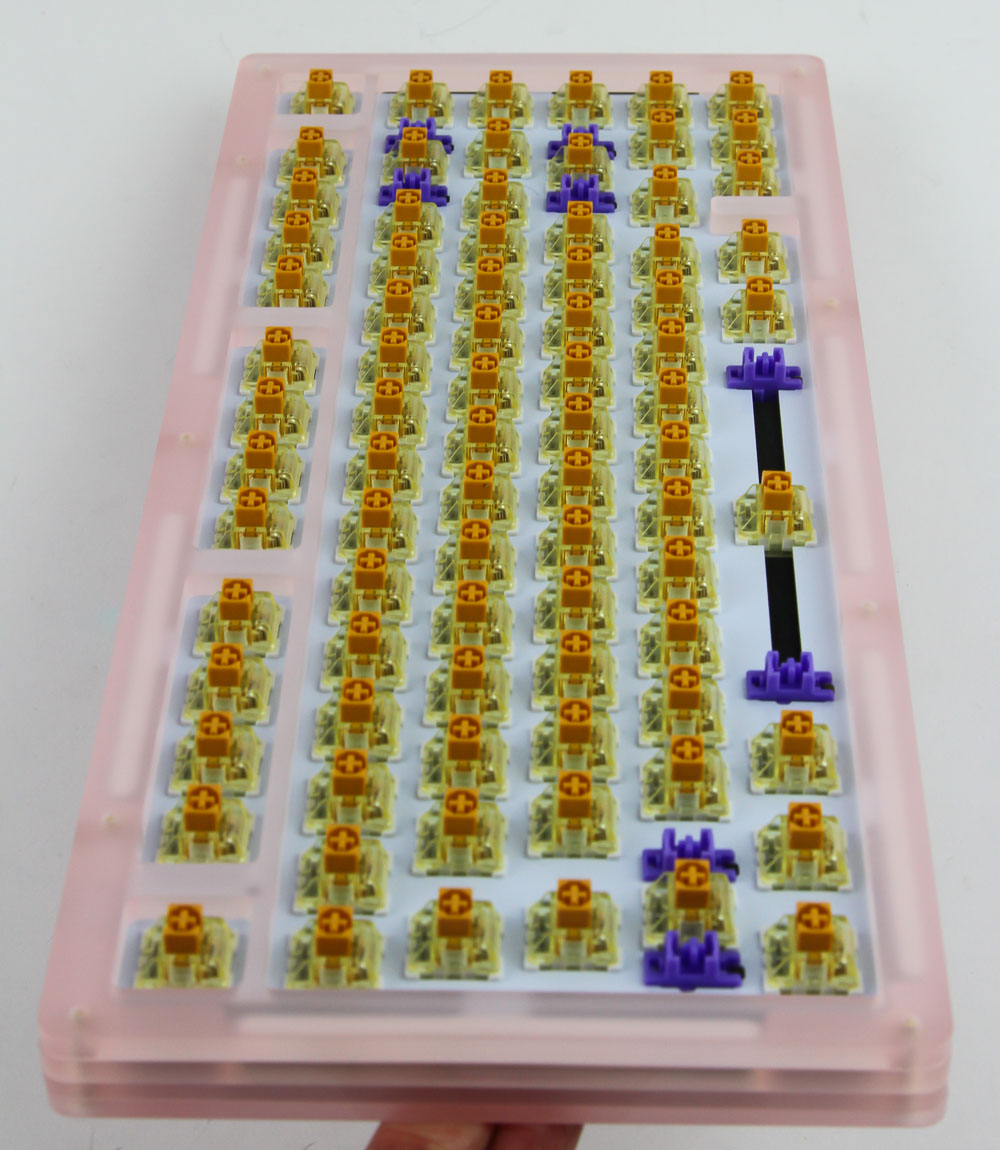

Since I only have one of each type going into this keyboard build, I decided to separate the assembly page and conclude here accordingly. Using the Akko CS Sponge switches on the ACR 75 kit is simple enough, just orient the pins with the switch socket and press down vertically. I only ended up with one bent pin in total, so that's not too bad considering the TTC socket is supposed to have a tighter tolerance with the metal pins going in. The walls around the stem also make for added surface area to hold onto the switch before inserting in. These switches may not match the theme, but sure do look quite the part, appearing to float on the white plate.

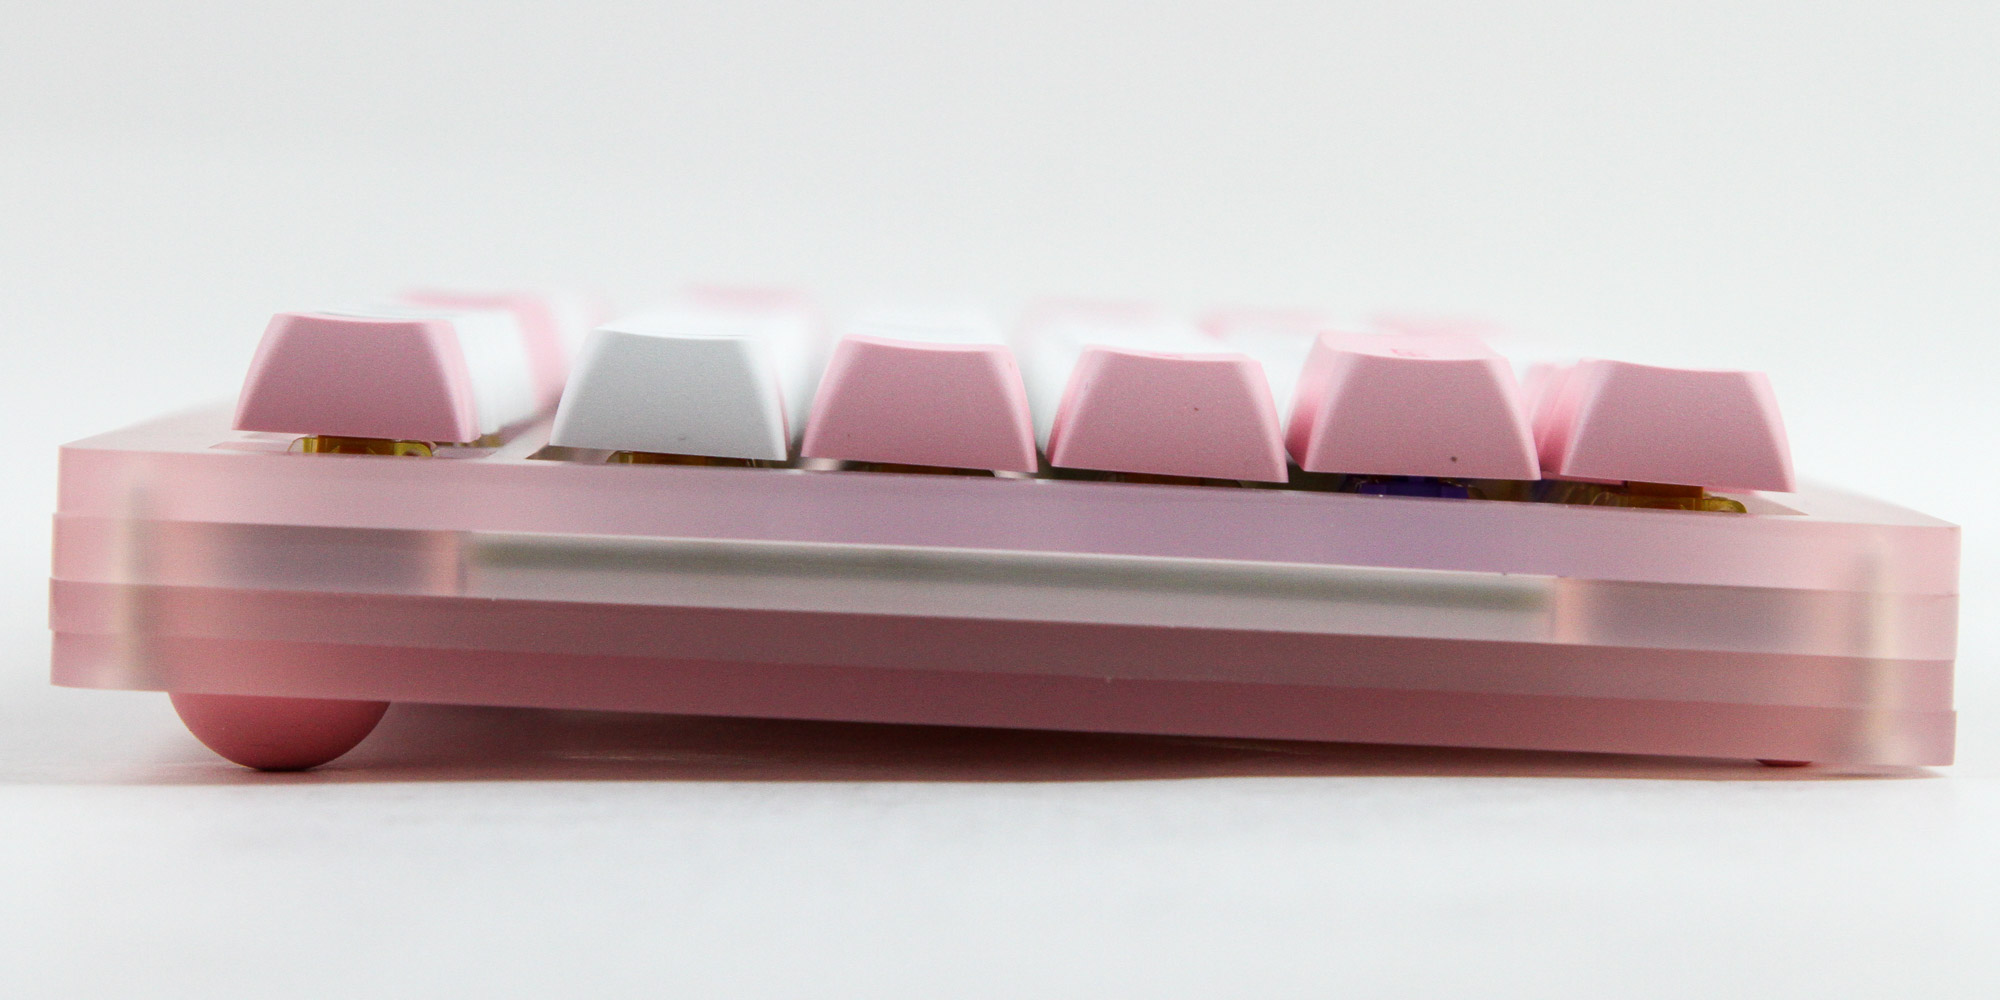
Here is a look at the keyboard fully assembled with the Akko Prunus Lannesiana keycaps installed in the default configuration. Note that I initially had a different key configuration, especially on the bottom row with R. Ctrl and Fn swapped, but testing with Switch Hitter showed that this is how the kit ships pre-programmed out of the box. I do like the colorway of the keycaps, and the white and pink set nicely matches the pink acrylic case as well. There are plenty of novelty keycaps to choose from, but there isn't much room to use them on this 75% keyboard kit, which already necessitated a shorter R.Shift than usual. A look from the side confirms the relatively low keycap profile, which is the new ASA low profile mentioned before. For those unfamiliar with keycap profiles, do look up different profiles before committing your money to a set you like since it heavily influences the typing experience. I have mixed thoughts on this one since I would have liked some contouring to the various rows, but it does fall in line with most low profiles. One benefit it does bring to the table is that this combination is easier to type on in the absence of a wrist rest since the case itself is not as elevated at the top relative to the bottom.
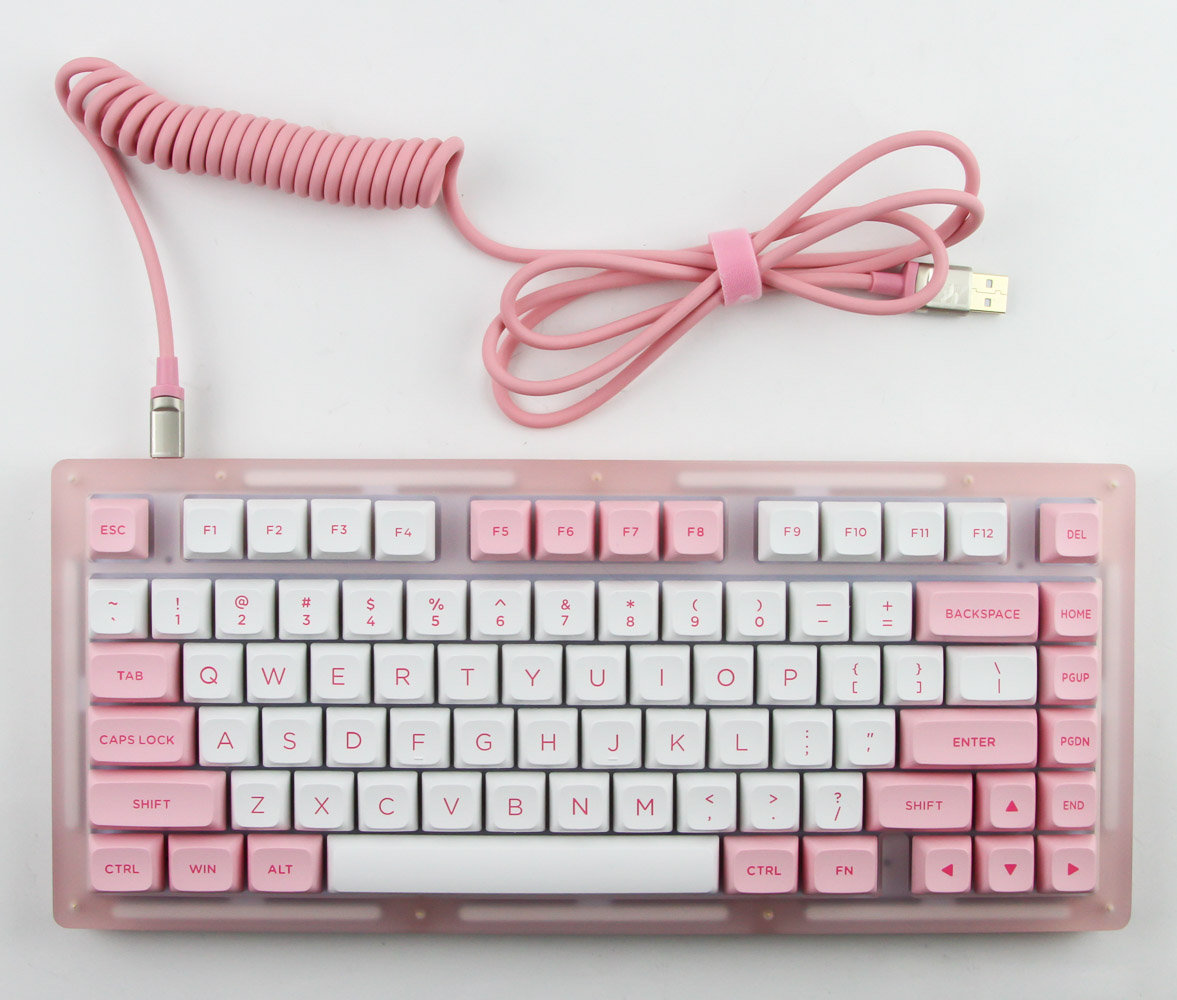
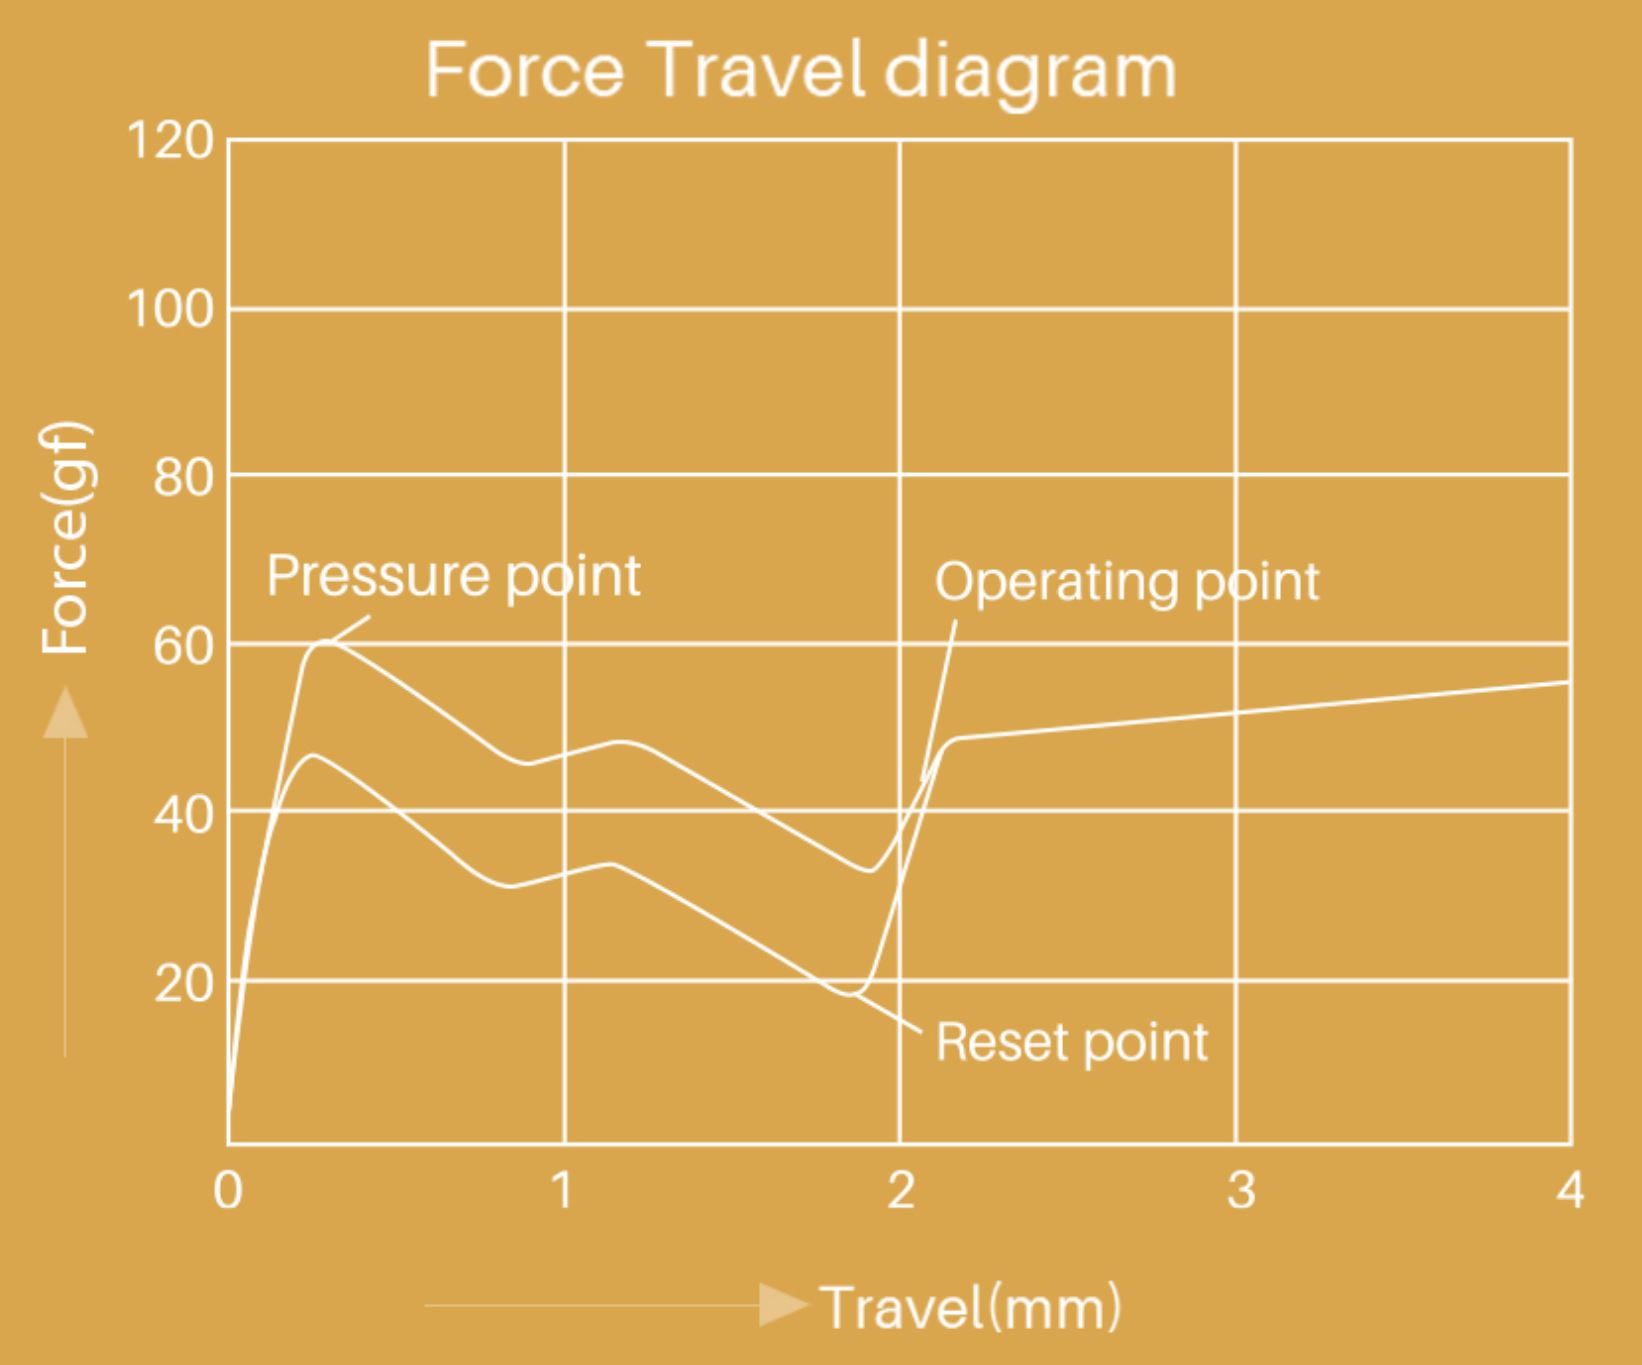
Here is the keyboard with the cable as well, which I chose to show off given how well the entire set works as a matching theme aesthetically. Of course, the switches are not pink, but they aren't really visible in use even from the side since the lower-profile keycaps barely float above the case. The switches are going to be a love or hate affair; I do appreciate the dual tactile bump version here more than those that just have the tactile bump very early on in their switch travel. The latter holds true here too, with the initial tactile bump at only ~0.3 mm travel, which is nowhere near the actuation point of ~2.0 mm on this 4 mm travel switch. The tactile force rapidly builds up to 60 gf early on thus, before going down and up again once spring resistance again becomes a factor. This is the reason for that long spring, and the force curve goes up just in time to barely make this a medium-force actuation switch at ~40 gf. You are very likely to bottom out given the minimal increase in required force thereafter, making the reset point and subsequent upstroke tactile bump almost a certainty. Having two bumps per press can feel weird initially, especially with neither lining up with the actuation point, but I do see the appeal. The tactile bumps themselves are not the most pronounced, but easily felt and appreciated for those who want them.
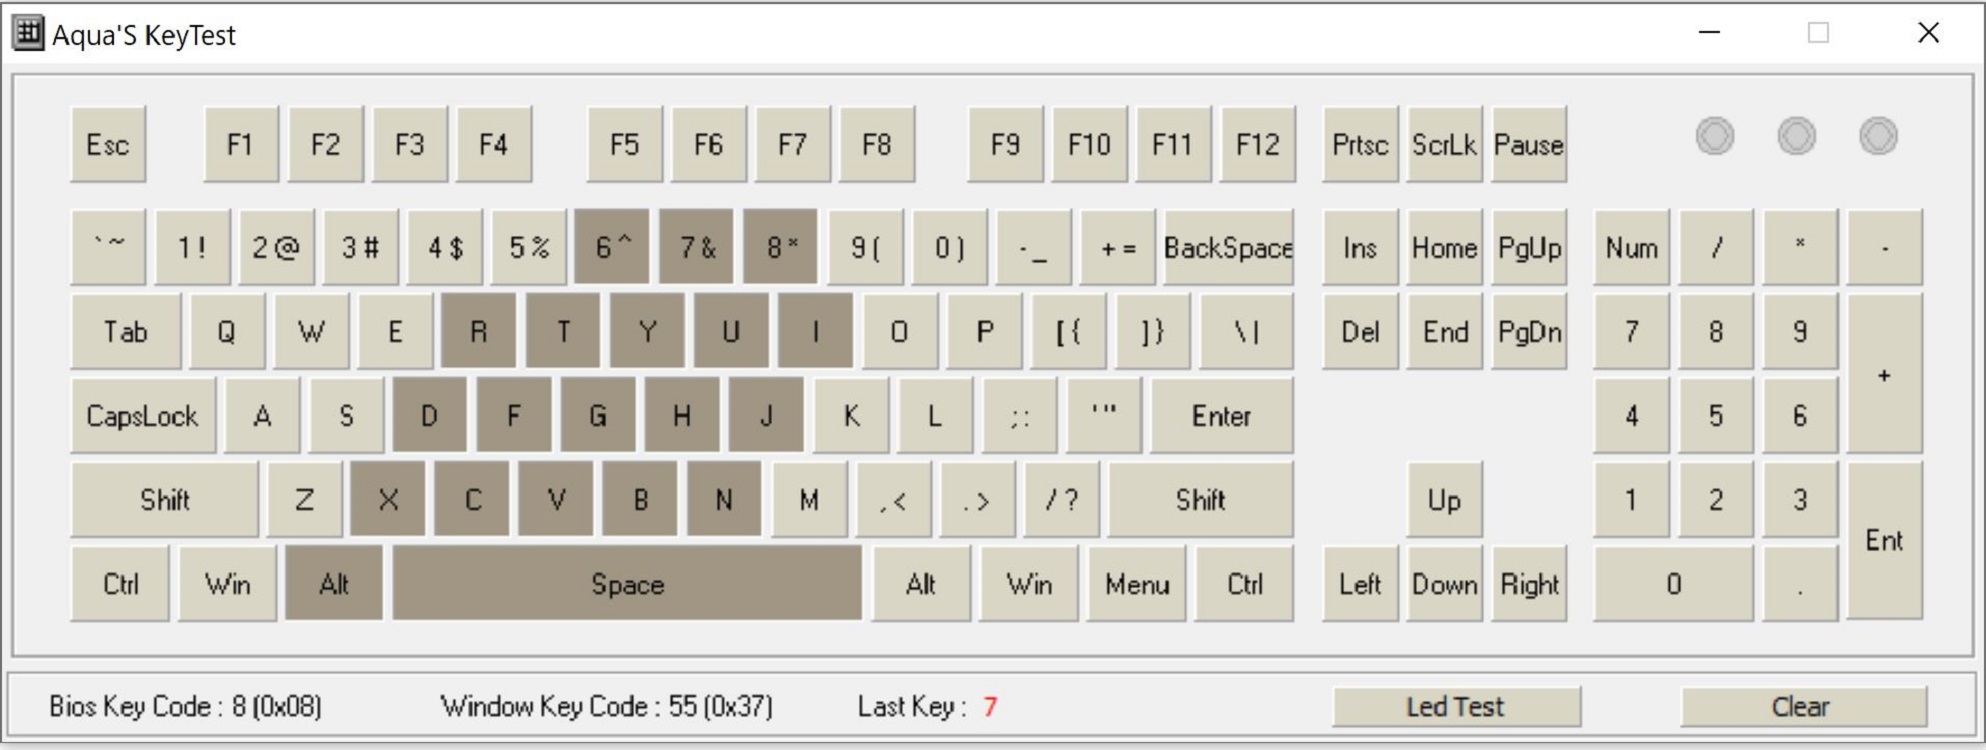
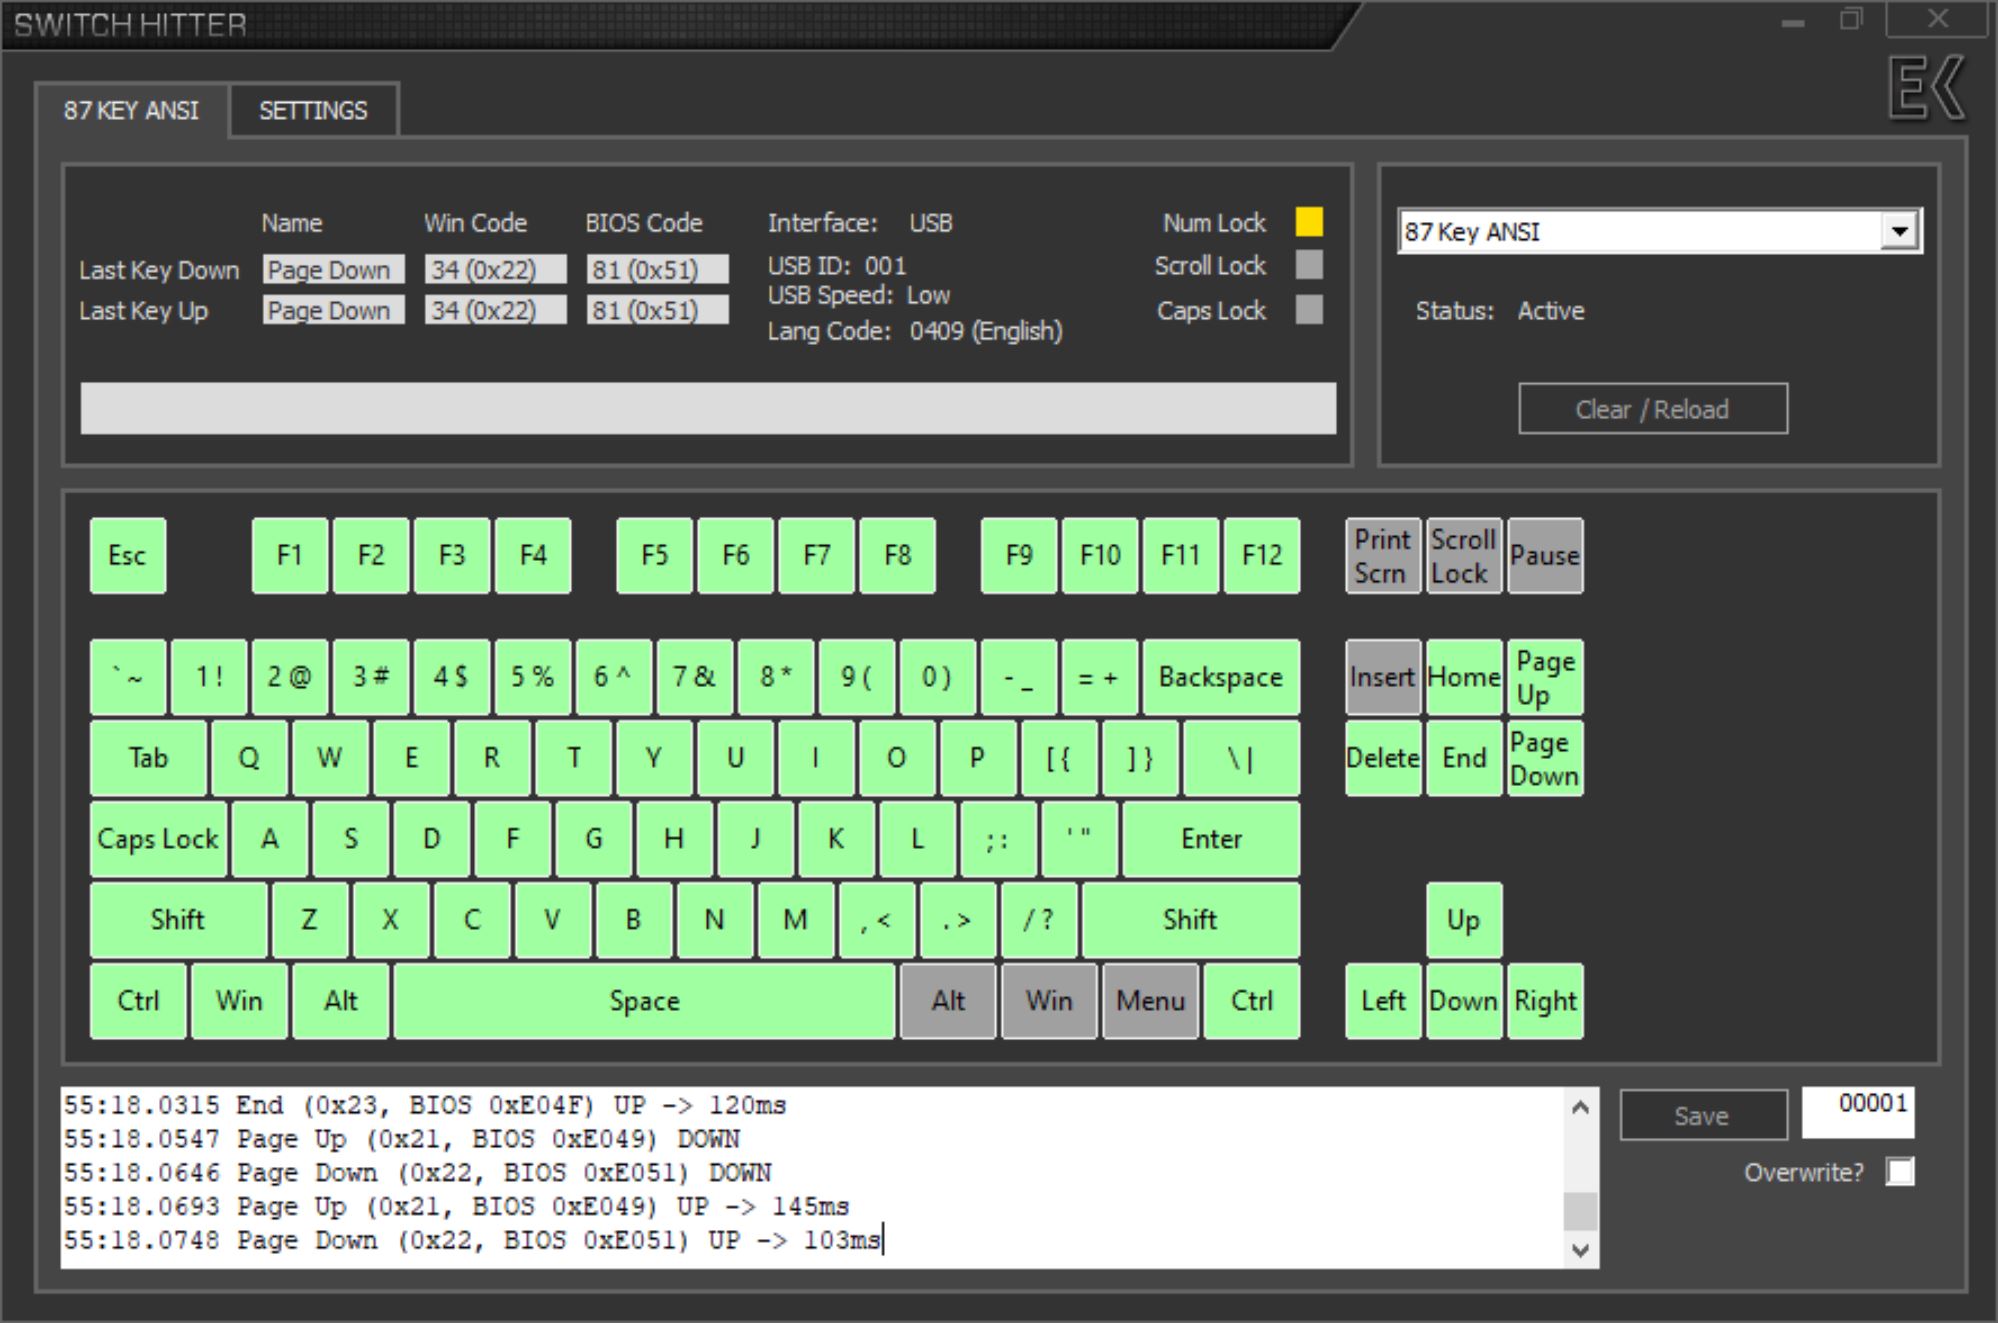
Once fully assembled, plug the keyboard in and ensure all switches work. The LEDs on the PCB might well light up anyway, but that is not indicative of the switch pins making contact. Tools such as Switch Hitter come in handy as they also confirm the base functionality of the switches assigned on the PCB for when you are not sure which keys are what, especially on the right side of the keyboard on this 75% form factor kit. There is unfortunately no key mapping or programming, but Akko did add some extra functionality on the Fn layer, including volume control, media playback, and pulling up some commonly used programs, such as the file explorer, email client, and your default internet browser. Akko's on-the-fly macro recording also makes a comeback, and I will refer you here for more if interested in these options. Aqua's test is handy to check for ghosting, which was not the case with full NKRO available by default.

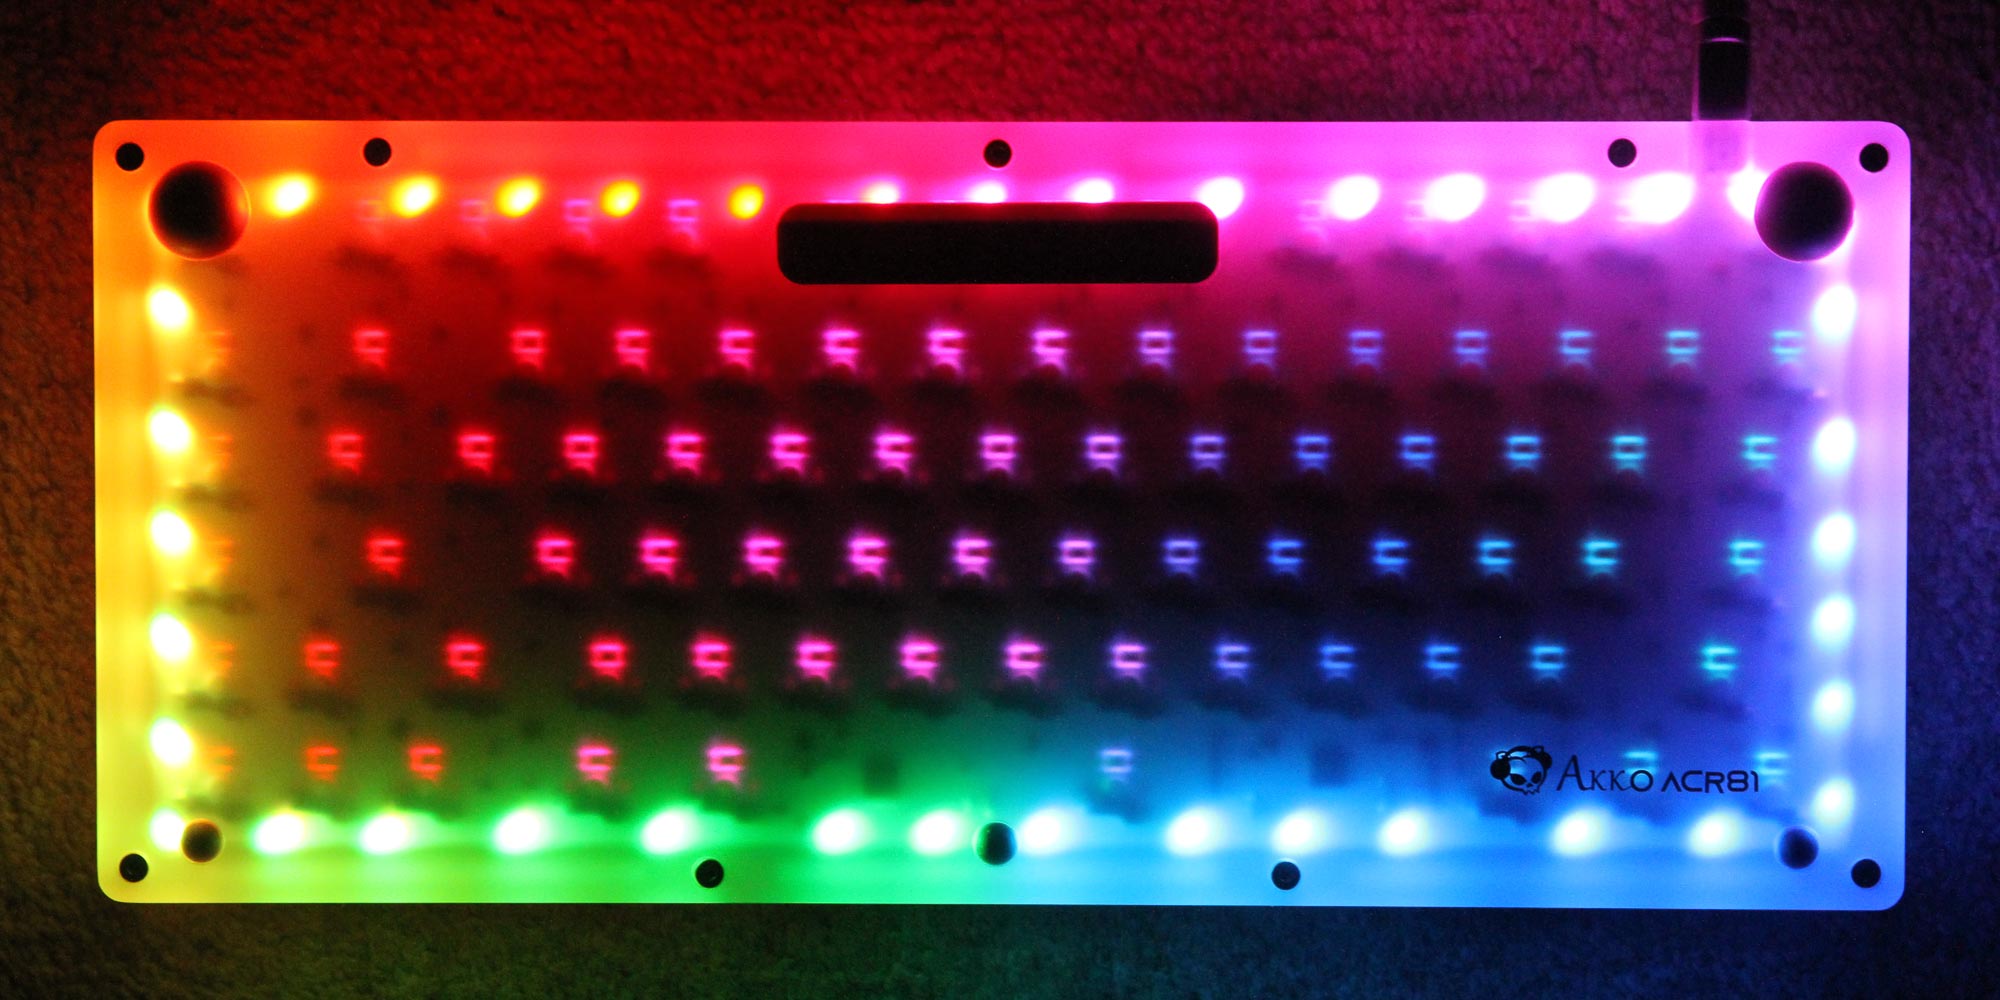
Here is a look at the keyboard all lit up, which reveals the connection is working and the PCB fine. As clarified in the user manual, there are a few pre-programmed lighting effects, which work well enough on the RGB-compatible switches with the cutout for the north-facing LEDs, but the keycaps themselves are opaque and don't make for much outside of accent lighting. The side and bottom lighting is really where things shine more anyway, with the acrylic case acting as a diffuser for the LEDs making for an impressive light show.
As always, the sound of a keyboard is based on more than just the switch type. So when comparing sound clips, consider the keyboard as a whole. In this case, I have provided above an example sound clip of me typing on the Akko ACR 75 kit with the ASA-Low Profile PBT keycaps and CS Sponge switches at ~90 WPM. For context, you can find sound clips from other keyboards here, including those with tactile switches. The slimmer nature of the case reduces reverberations, and the lubed stabilizers and thicker PBT keycaps combo also results in a bassier response than usual. The foam sheet between the plate and PCB further dampens the bottoming out of switches, which is good given these switches are extremely prone to bottoming out owing to the minor difference between actuation force and bottoming out force even with the more classical 2.0 mm actuation and 4.0 mm travel distance combination. The combination as a whole could have still been somewhat "pingy," but the gasket-mounted FR4 fiberglass plate addresses that nicely. It makes for a fairly loud keyboard all things considered, and the sound is directed upward to where there is no sound leakage through the gaps between the acrylic layers. Typing feels crisp and non-fatiguing overall. While the sound itself is not my favorite, it is still one of the better early tactile switch experiences I have had overall.
Prices
- The Akko ACR 75 DIY acrylic gasket mount kit is a recent release and costs $89.99 from the Akko web shop for all four color options it currently comes in.
- The Akko Prunus Lannesiana ASA-Low Profile PBT keycap set costs $49.99 from the Akko web shop as this writing.
- The Akko CS Sponge switches come in a 45-pack SKU only that costs $11.99 from the Akko web shop.
Mar 8th, 2025 19:37 EST
change timezone
Latest GPU Drivers
New Forum Posts
- Looking for silent 9070 (XT) (3)
- Free Games Thread (4545)
- RX 9000 series GPU Owners Club (15)
- Mismatched Memory Speeds for upcoming CPU Reviews? (97)
- Dune: Awakening benchmark - post your results (36)
- GameTechBench GPU benchmark is already out! (307)
- Should I make a thermal maintenance on my GPU? (81)
- Zen6 is almost here ? (6)
- As we live the age of game remakes, which game you would like to see to have a remake? (349)
- Adventure: Running 8/9th gen Coffee Lake CPUs on Z170 motherboard (ASUS Maximus VIII Ranger) (375)
Popular Reviews
- Sapphire Radeon RX 9070 XT Nitro+ Review - Beating NVIDIA
- ASUS Radeon RX 9070 TUF OC Review
- XFX Radeon RX 9070 XT Mercury OC Magnetic Air Review
- NVIDIA GeForce RTX 5070 Founders Edition Review
- Corsair Vengeance RGB CUDIMM DDR5-8800 48 GB CL42 Review
- MSI MAG B850 Tomahawk Max Wi-Fi Review
- AMD Ryzen 7 9800X3D Review - The Best Gaming Processor
- AMD Radeon RX 9070 Series Technical Deep Dive
- ASUS GeForce RTX 5070 Ti TUF OC Review
- MSI GeForce RTX 5070 Ti Ventus 3X OC Review
Controversial News Posts
- NVIDIA GeForce RTX 50 Cards Spotted with Missing ROPs, NVIDIA Confirms the Issue, Multiple Vendors Affected (513)
- AMD Plans Aggressive Price Competition with Radeon RX 9000 Series (277)
- AMD Radeon RX 9070 and 9070 XT Listed On Amazon - One Buyer Snags a Unit (261)
- AMD RDNA 4 and Radeon RX 9070 Series Unveiled: $549 & $599 (250)
- AMD Mentions Sub-$700 Pricing for Radeon RX 9070 GPU Series, Looks Like NV Minus $50 Again (248)
- NVIDIA Investigates GeForce RTX 50 Series "Blackwell" Black Screen and BSOD Issues (244)
- AMD Radeon RX 9070 and 9070 XT Official Performance Metrics Leaked, +42% 4K Performance Over Radeon RX 7900 GRE (195)
- AMD Radeon RX 9070-series Pricing Leaks Courtesy of MicroCenter (158)