 7
7
CaseLabs MAGNUM M8 Review
Value & Conclusion »Assembly
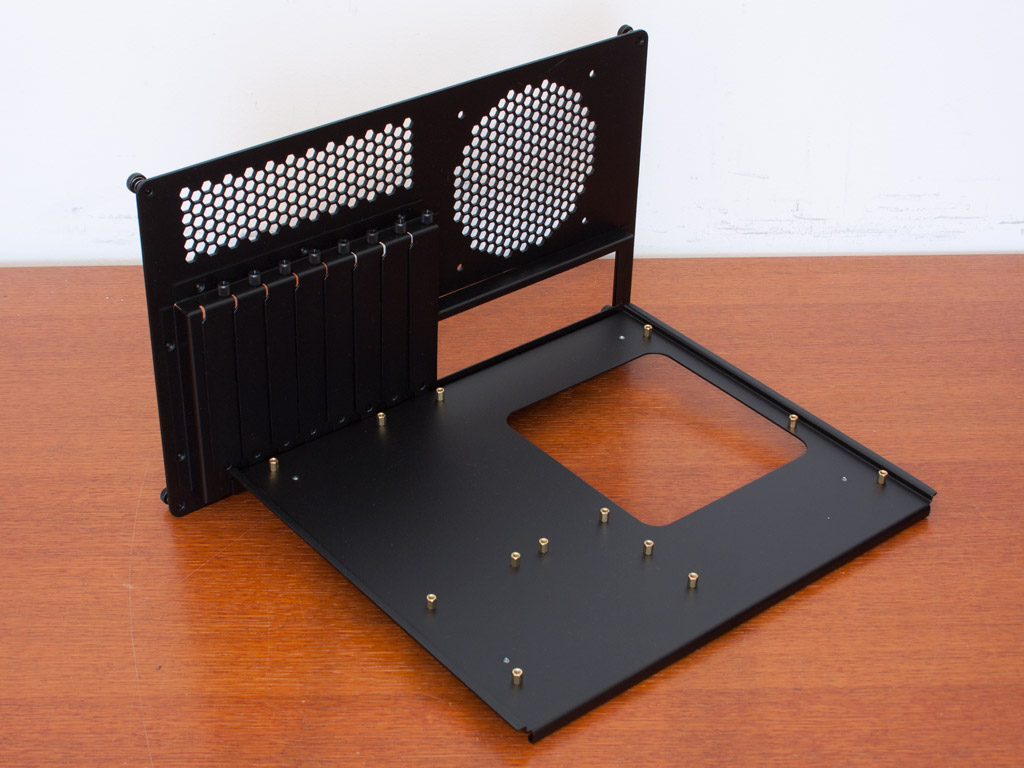

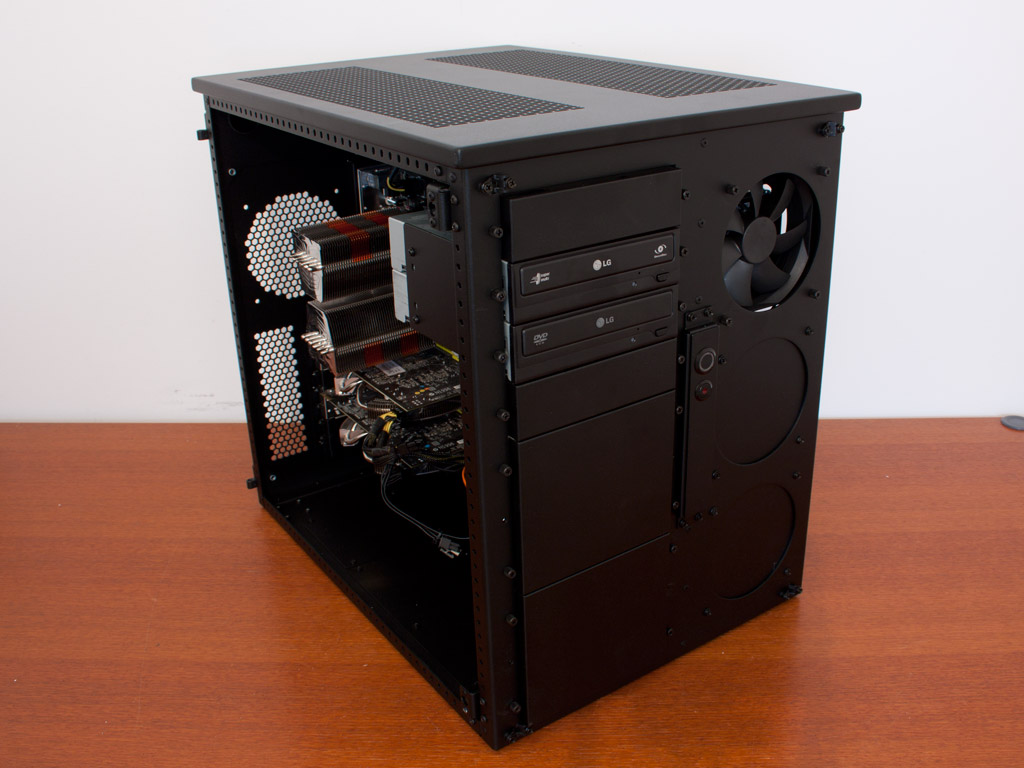
Thanks to the sturdy, removable motherboard tray, you can assemble all the components quite comfortably on the outsides of the chassis. Due to the square shape, even large CPU coolers will be able to installed on the outside of the chassis without getting in the way when pushing the motherboard tray back into the Magnum M8. You should be able to install any CPU cooler and graphic cards of your choice within the case, as there are no space restrictions for either type of part.

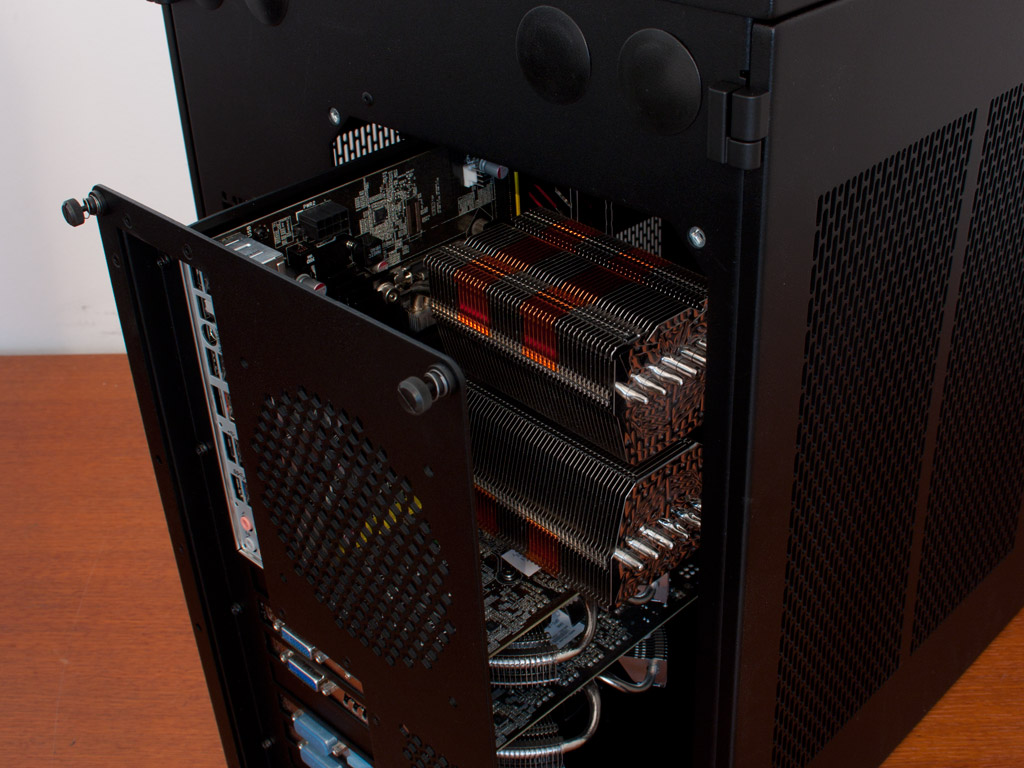
Once the board is inside it should quickly become apparent how much space the Magnum M8 has. You can clearly see the CPU cooler backplate from the other side of the chassis, but due to the placement of the PSU bays, it will be blocked when placing to power supplying inside the case.


Installing the hard drives - be it 2.5 or 3.5" units - is a bit more complicated. As we received the SSD bracket as well, two 2.5 inch drives were prepared and installed on the adapter. Once in place, this entire contraption acts like any other 3.5" variant during the installation process.
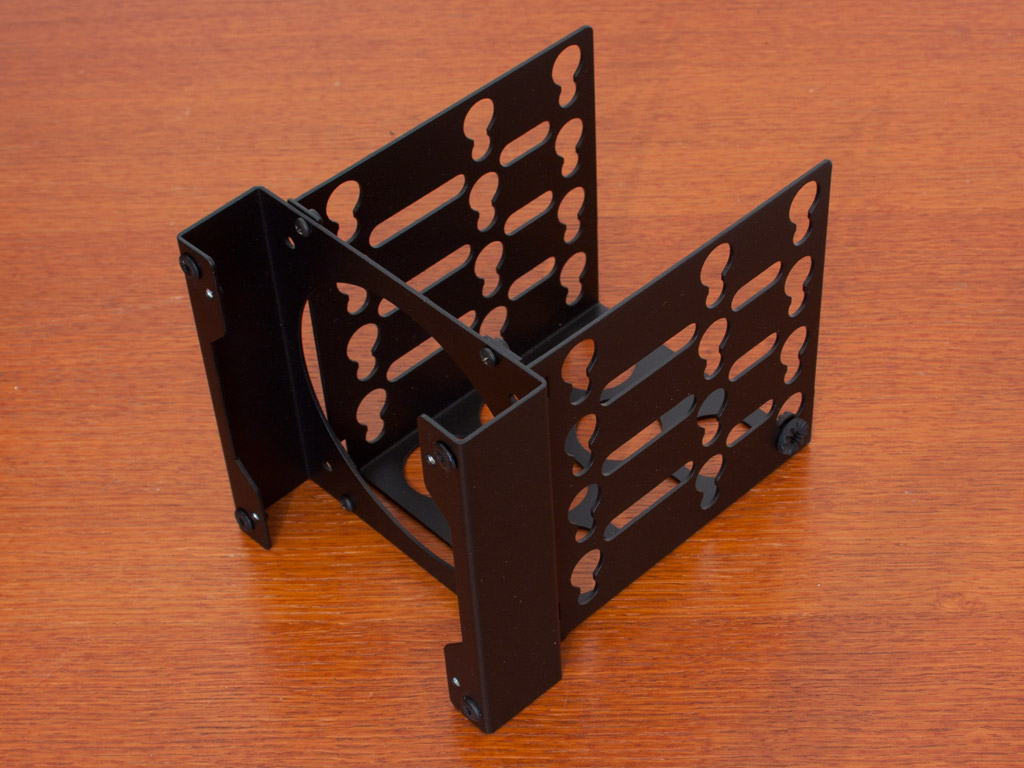
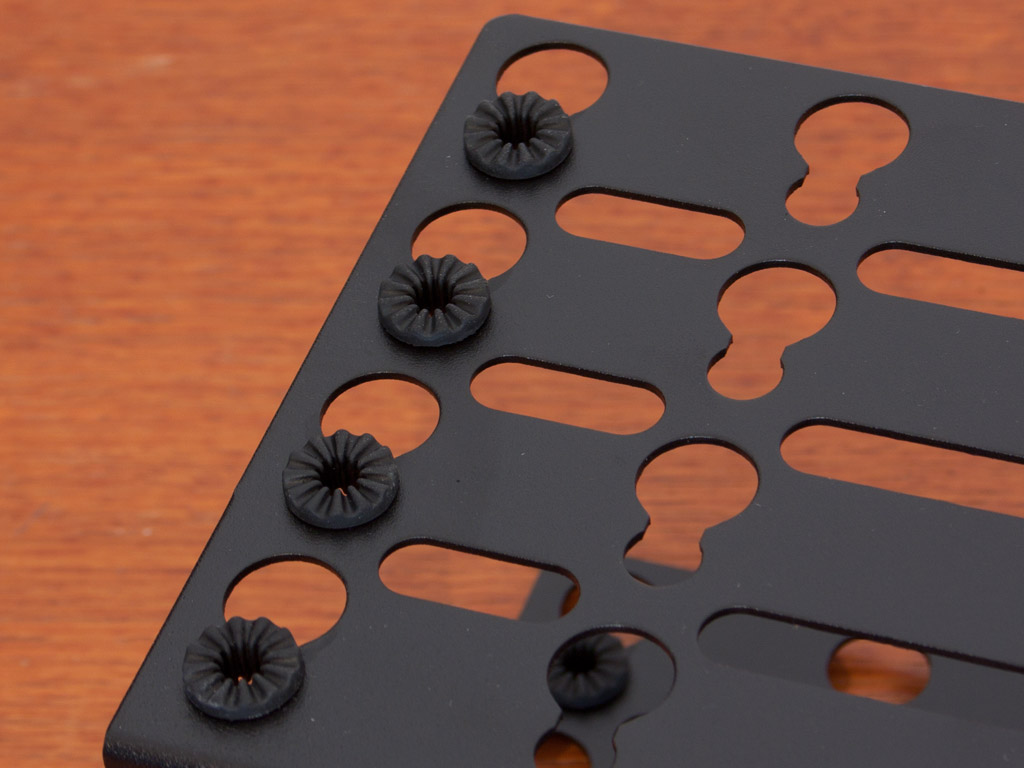
To properly install hard drives in the included cage, you have to remove it from the system and then apply the rubber rings on each of the bays. It would have been nice if CaseLabs would pre-apply these, but putting these in place is quite straight forward.


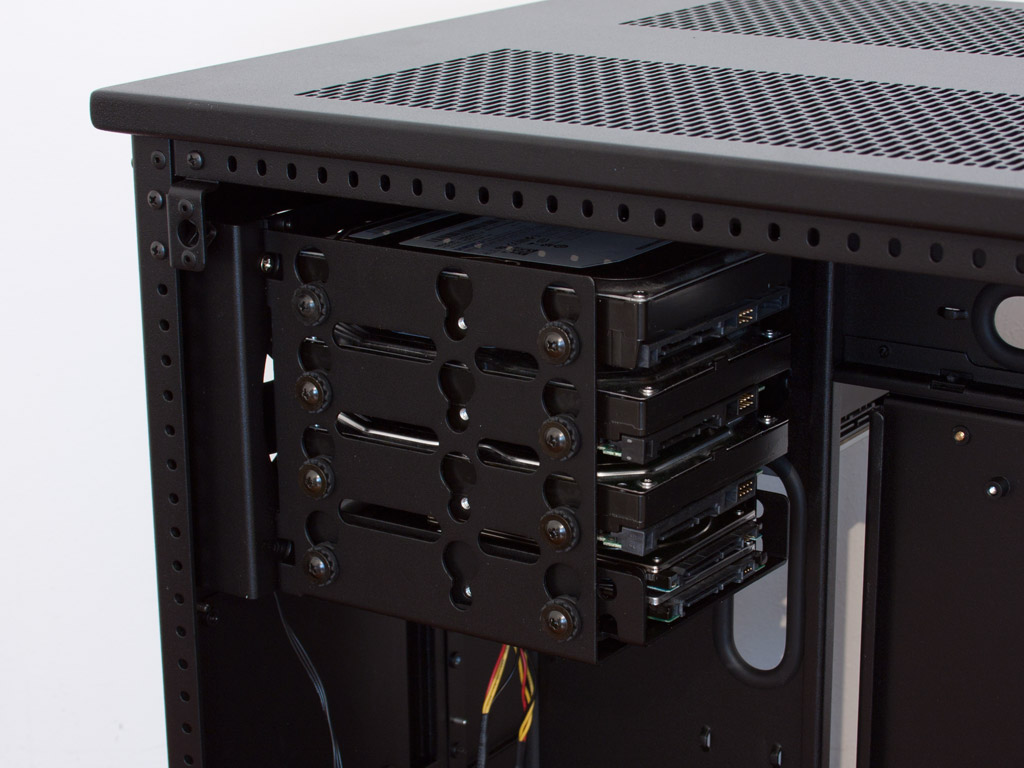
Once prepared, simply place the 2.5 and 3.5" drives in the cage and screw them down with the supplied, special screws. I also installed a 120 mm fan in the front to cool the full cage properly. Once assembled, simply put it back into the case and replace the four thumb screws holding in place.
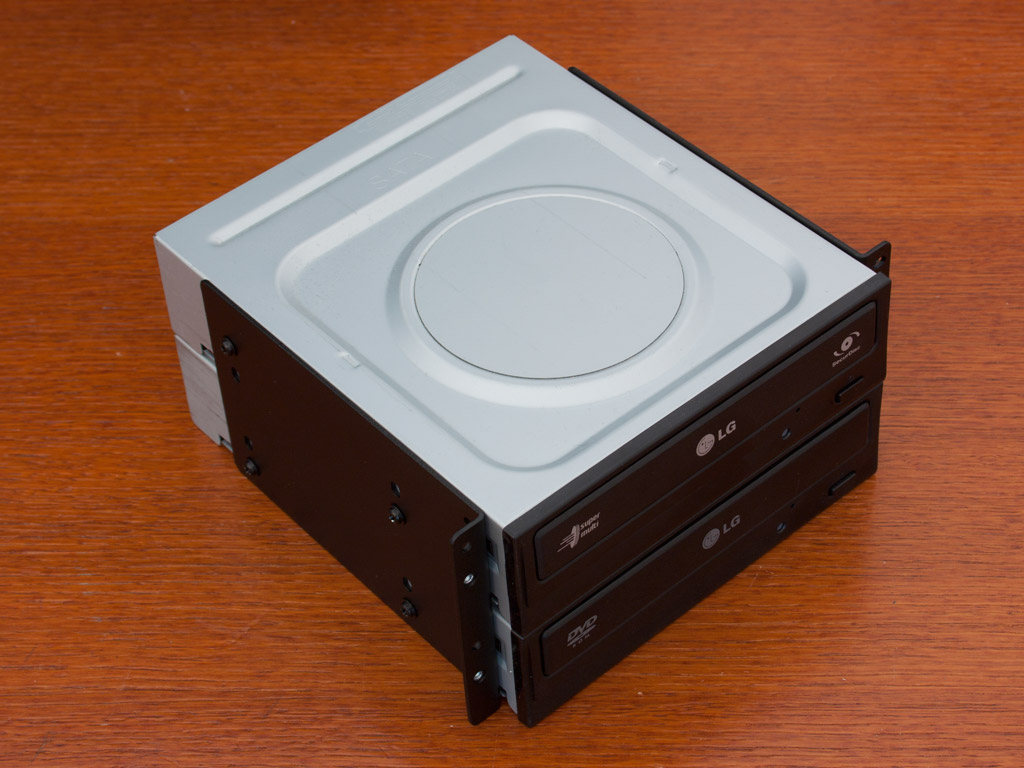
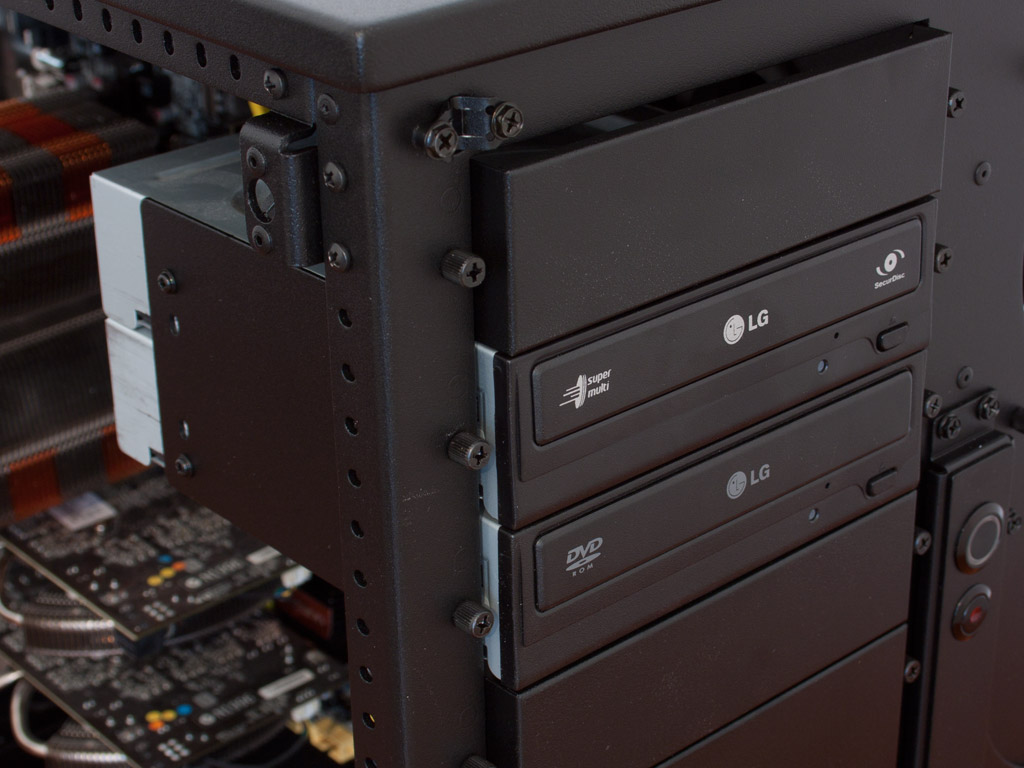

Installing the optical drives is done in a similar manner. You have to prepare the drives first and then place them into the bays from the inside. While CaseLabs includes four separate panels for the same amount of external drive bays, the optional dual bay one was used. Both variants are identical in their installation method, but the dual-bay one allows for two drives to be installed outside of the chassis and then pushed into place. Once again thumb screws hold the drives in place perfectly.
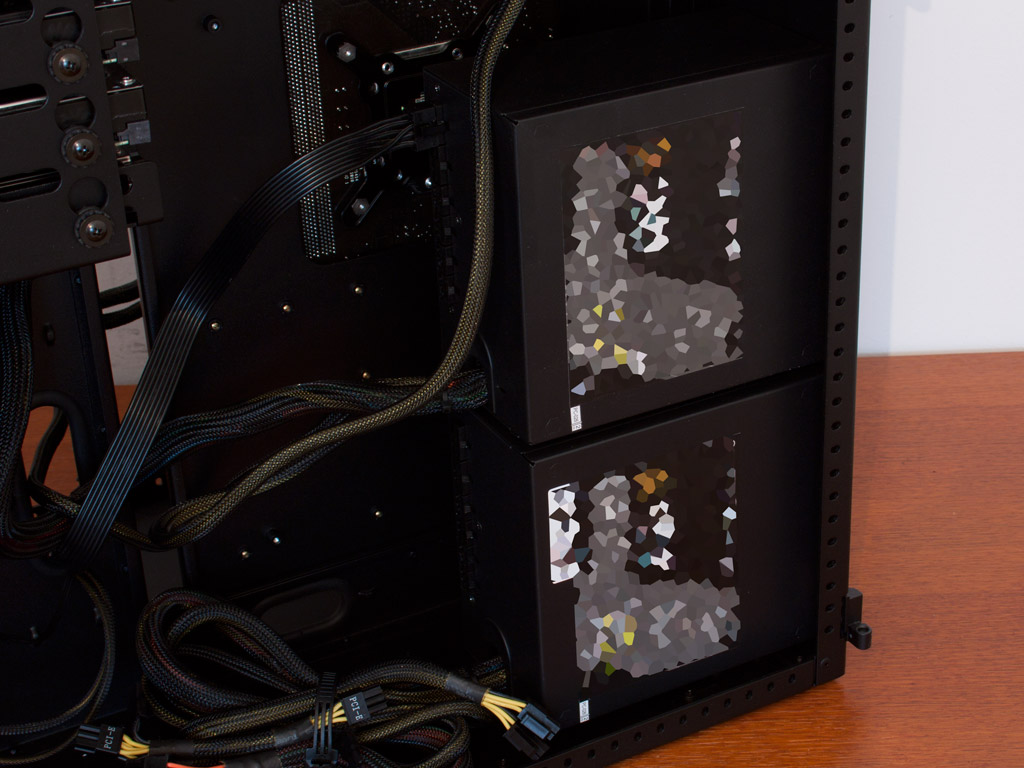
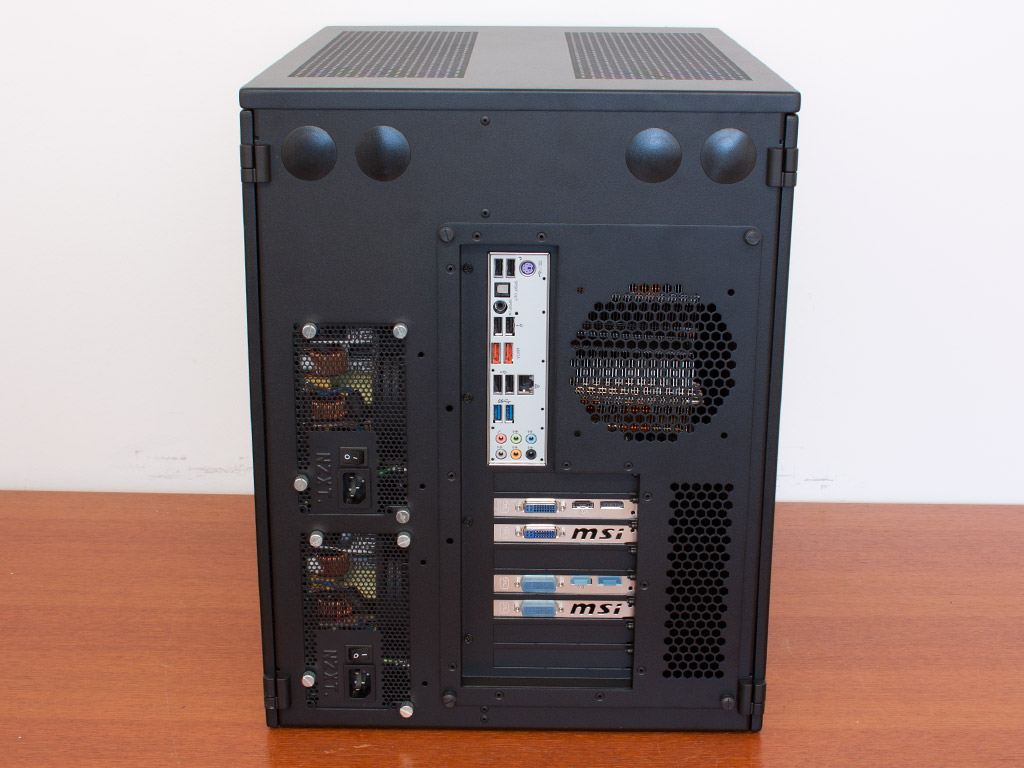
Installing the power supplies is nothing out of the ordinary. Simply line them up with the screw holes and use the screws of your choice to pin them down. I used eight silver thumb screws which were not part of the chassis, as I could not find the screw in the pile of extras and contents - my apologies.

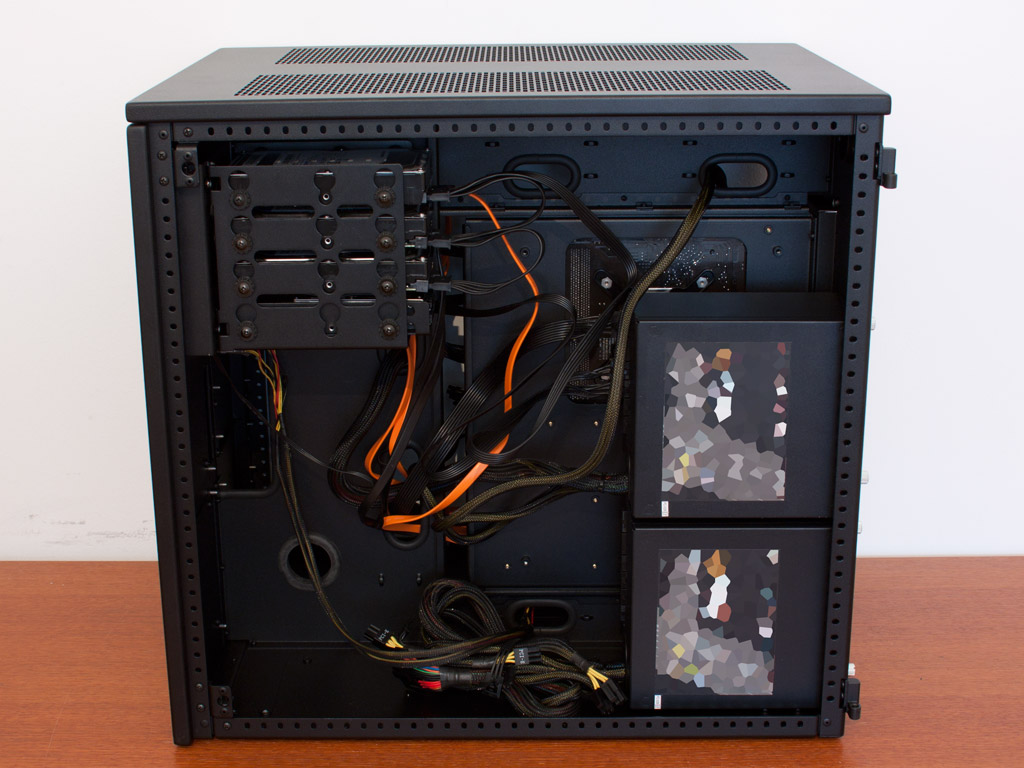
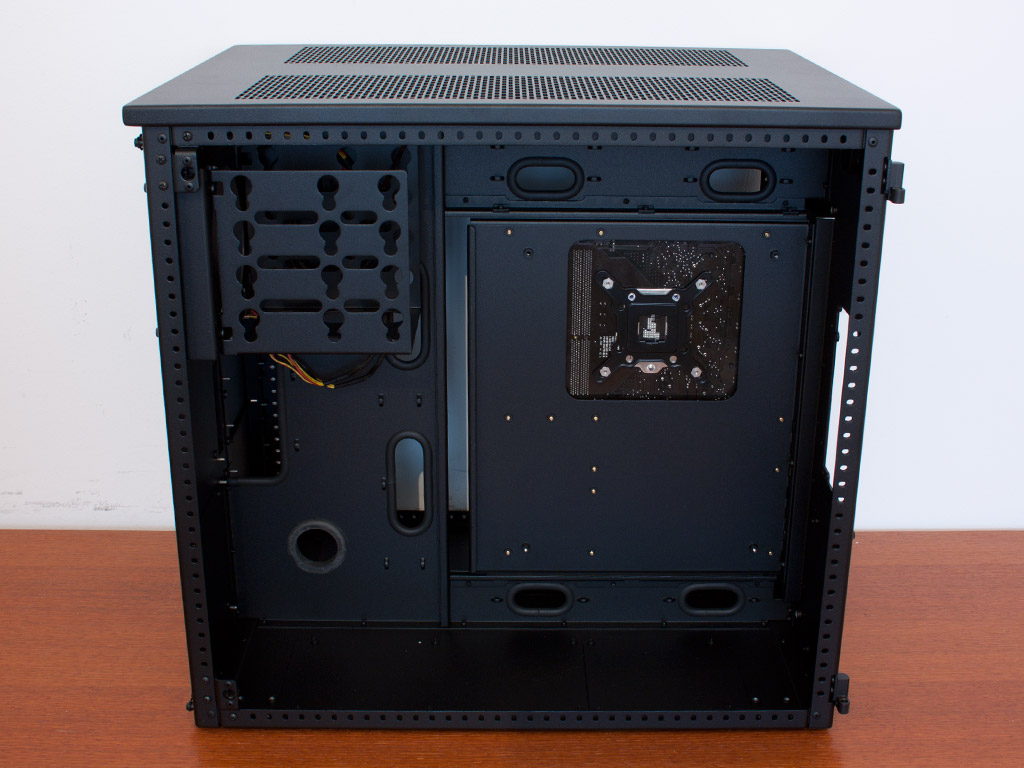
Once everything is in place. there is still plenty of space within the case - thanks to the two compartments. As you can see, the holes allow to keep things quite clean even though I did not use any zip ties in the end. The compartment with the PSUs is a bit messier, but this is due to the fact that none of these are completely modular and I did not end up using one of them to power the Crossfire System.
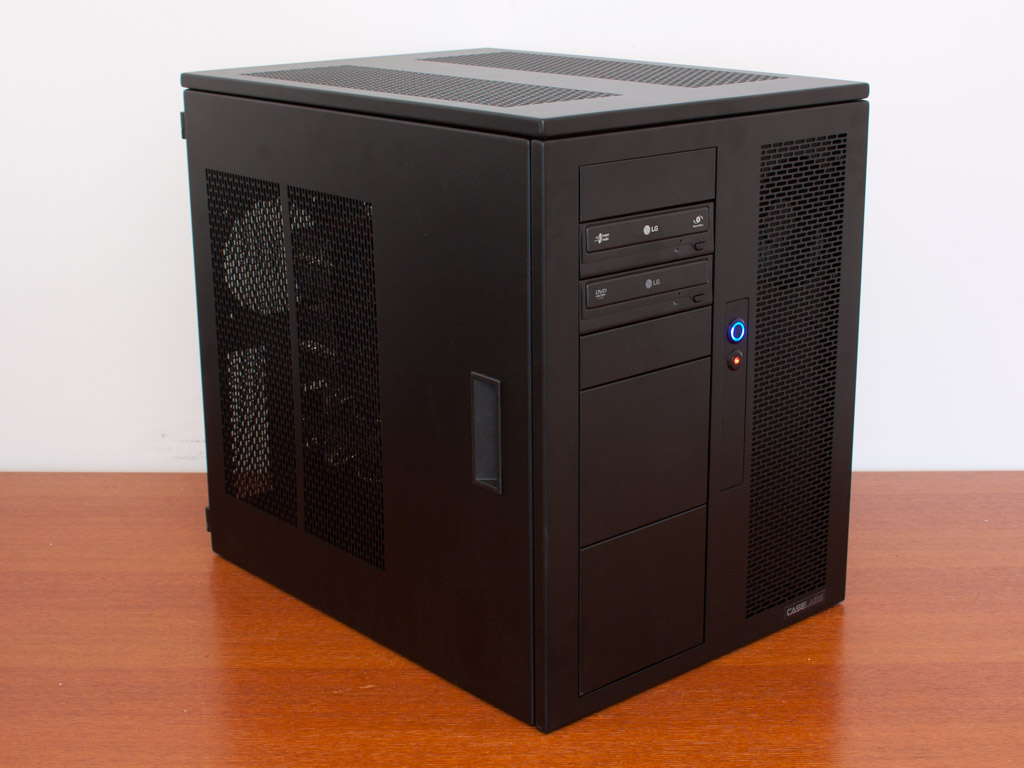
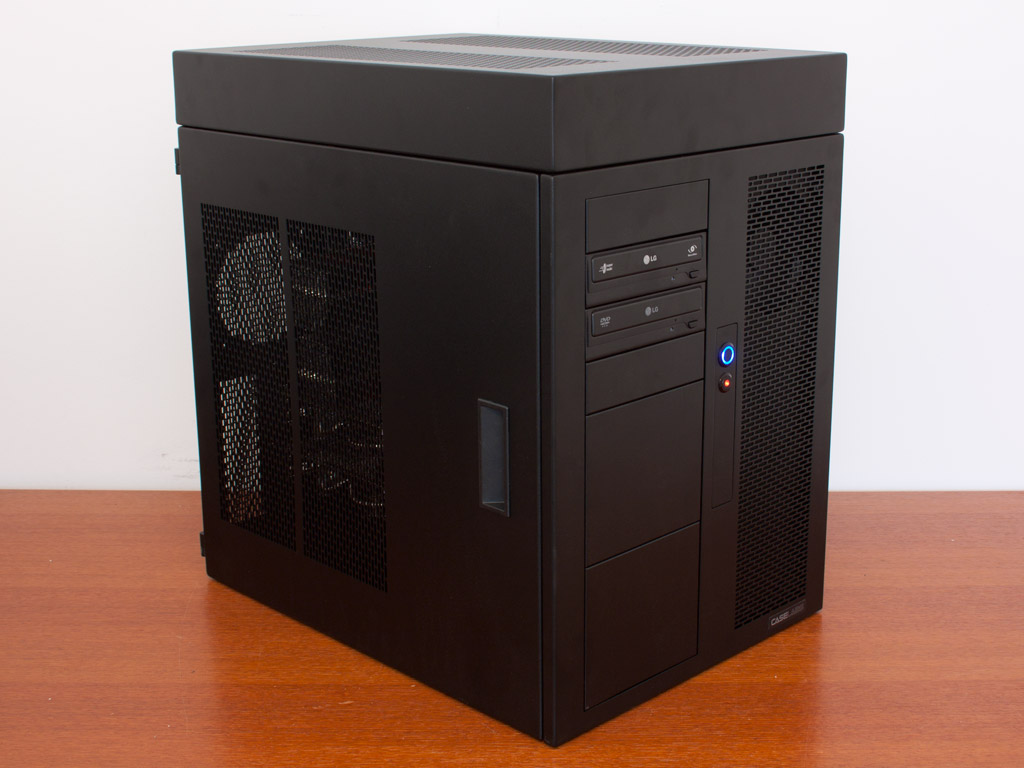
Finished Looks
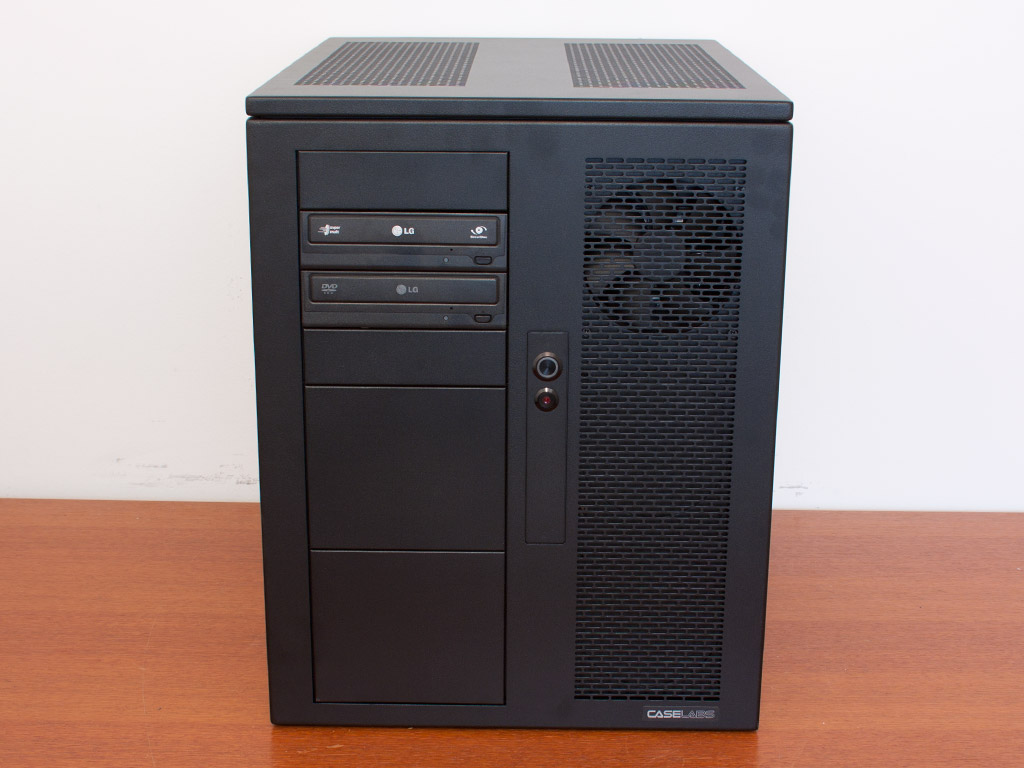
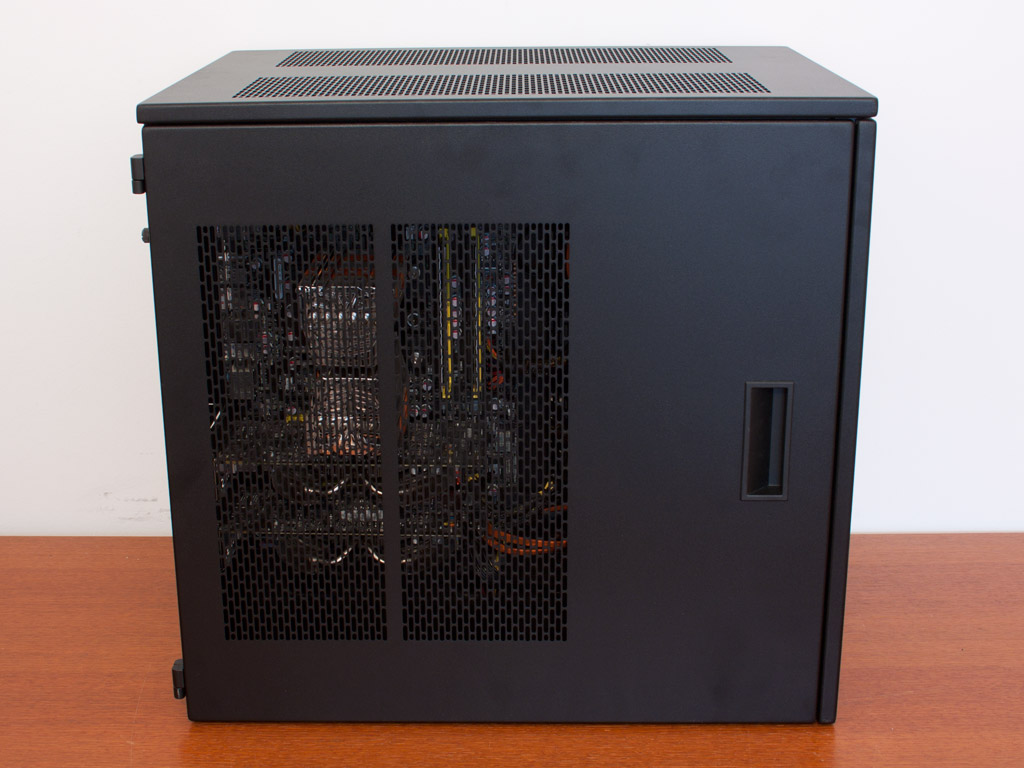

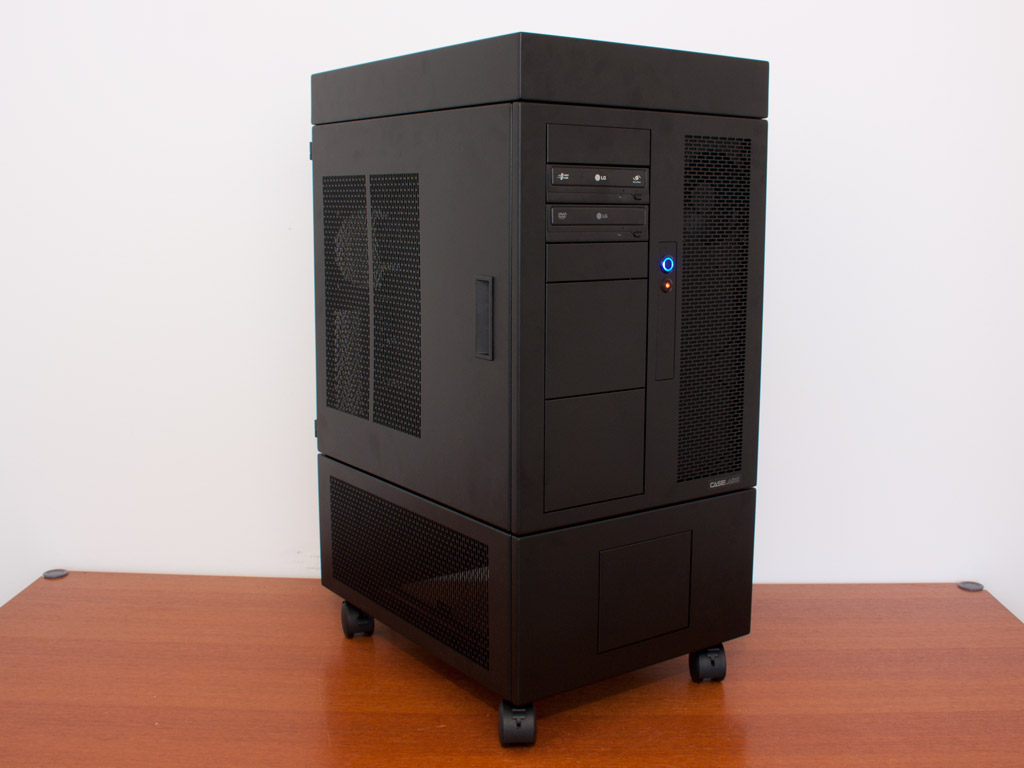
After placing the panels back unto the chassis and closing them up, the Magnum M8 makes an excellent impression. Everything is where you would expect to have it, and the placement of air vents makes sense when viewing both sides of the chassis. On one hand you have the vertical ones to allow for fresh air above the mainboard area, while on the other you have horizontal ones in line with the two PSU bays.

Since CaseLabs utilizes high-quality Lamptron power and reset buttons, they make an excellent impression and have cool LEDs embedded. Due to the use of such standard components you could go ahead and swap the buttons out for ones with different colored LEDs if you wish.
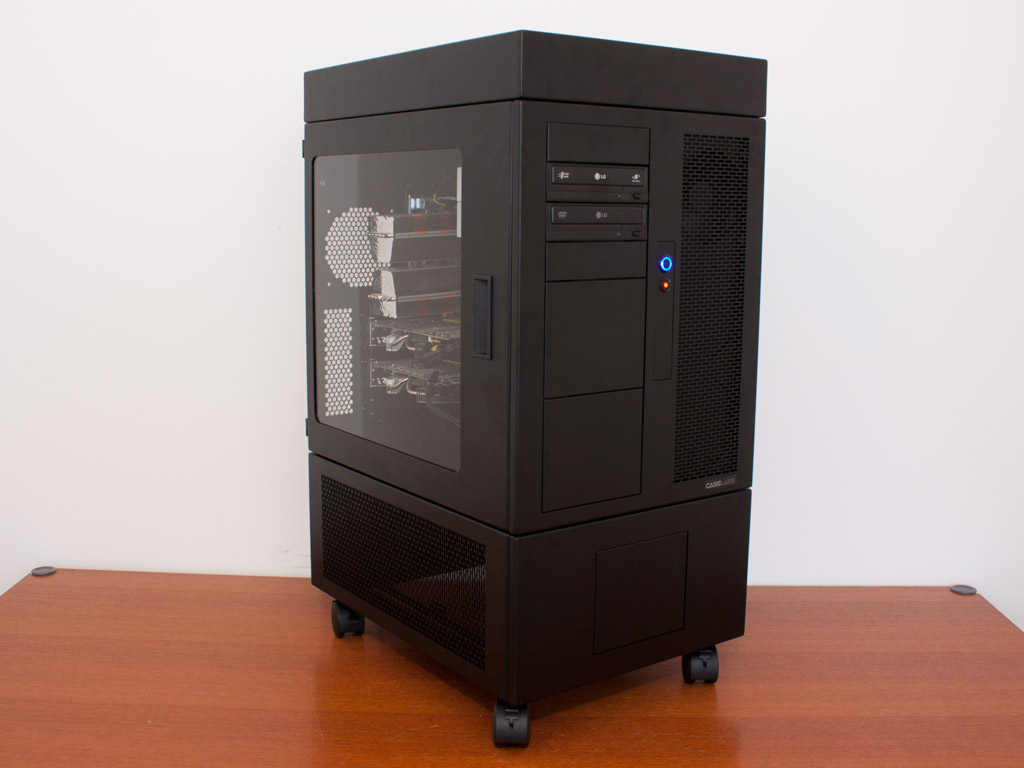
Well, last but not least, it is time to grow the chassis. While the most compact configuration is more than enough for the majority of users, placing the top panel on the case for external radiators is quite easy as you only need to pull the top off and replace it with the optional, higher one. If this is still not enough, you may place the entire case onto the optional pedestal. I also installed the optional casters, which results in a huge chassis. Even so, for those rare, extreme uses, there is no other case out there that offers this much space for radiators, drives and fans. The CaseLabs M10 case would be even bigger. The last modification is the swap of the side panel with the windowed version. That way you can always see what is inside this crazy chassis.
Apr 8th, 2025 08:59 EDT
change timezone
Latest GPU Drivers
New Forum Posts
- The coffee and tea drinkers club. (252)
- Is RX 9070 VRAM temperature regular value or hotspot? (333)
- is it worth using ssd with usb2? (17)
- What's your latest tech purchase? (23499)
- RTX5000 Series Owners Club (165)
- STAR CITIZEN - RSI POLARIS Project (18)
- ## [Golden Sample] RTX 5080 – 3300 MHz @ 1.020 V (Stock Curve) – Ultra-Stable & Efficient (8)
- 5070 cards available below £550 in in the UK (79)
- 9070XT or 7900XT or 7900XTX (133)
- Will you buy a RTX 5090? (471)
Popular Reviews
- The Last Of Us Part 2 Performance Benchmark Review - 30 GPUs Compared
- UPERFECT UStation Delta Max Review - Two Screens In One
- PowerColor Radeon RX 9070 Hellhound Review
- ASUS Prime X870-P Wi-Fi Review
- Upcoming Hardware Launches 2025 (Updated Apr 2025)
- MCHOSE L7 Pro Review
- Sapphire Radeon RX 9070 XT Pulse Review
- Sapphire Radeon RX 9070 XT Nitro+ Review - Beating NVIDIA
- Corsair RM750x Shift 750 W Review
- DDR5 CUDIMM Explained & Benched - The New Memory Standard
Controversial News Posts
- NVIDIA GeForce RTX 5060 Ti 16 GB SKU Likely Launching at $499, According to Supply Chain Leak (161)
- MSI Doesn't Plan Radeon RX 9000 Series GPUs, Skips AMD RDNA 4 Generation Entirely (146)
- Microsoft Introduces Copilot for Gaming (124)
- AMD Radeon RX 9070 XT Reportedly Outperforms RTX 5080 Through Undervolting (119)
- NVIDIA Reportedly Prepares GeForce RTX 5060 and RTX 5060 Ti Unveil Tomorrow (115)
- Over 200,000 Sold Radeon RX 9070 and RX 9070 XT GPUs? AMD Says No Number was Given (100)
- NVIDIA GeForce RTX 5050, RTX 5060, and RTX 5060 Ti Specifications Leak (97)
- Nintendo Switch 2 Launches June 5 at $449.99 with New Hardware and Games (95)