 8
8
Chieftec Hi-Fi Series HM-02B HTPC Case Review
Finished Looks »Assembly
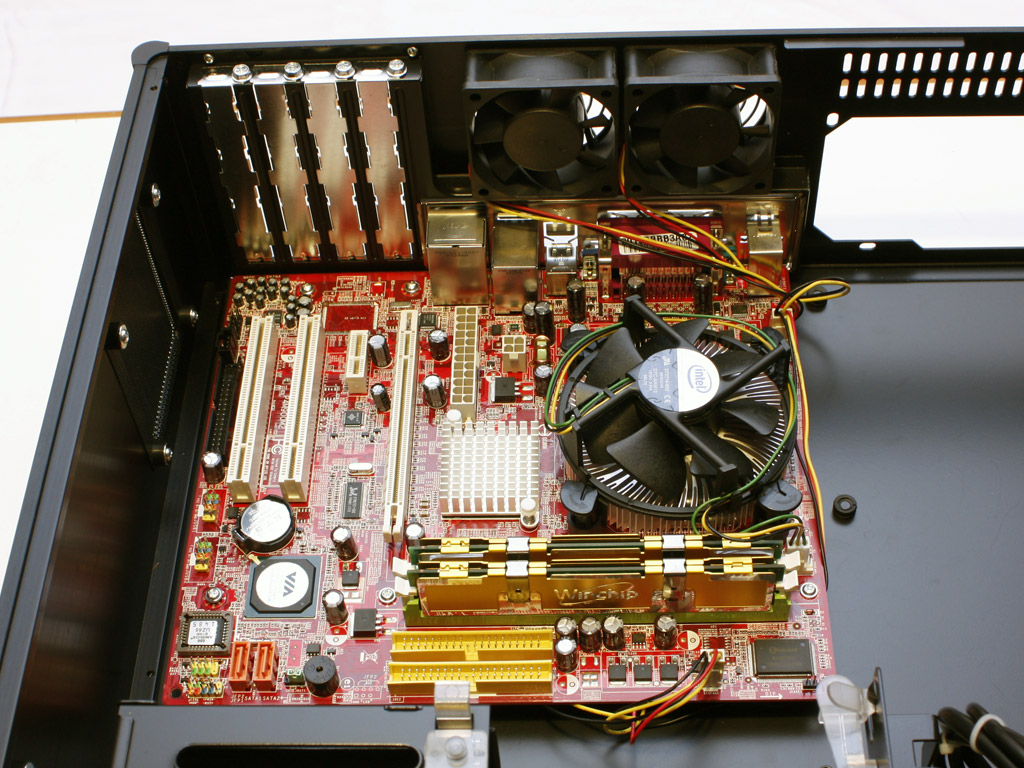
Now let's get back to the chassis and start assembling everything. Installing the mainboard can be done right away, as the stand-offs are already in place. Simply screw the board down - that is it. There is still plenty of space, so you may even use a larger CPU cooler and graphics card if you wish. For our review we will use the OEM heatsink and onboard VGA.


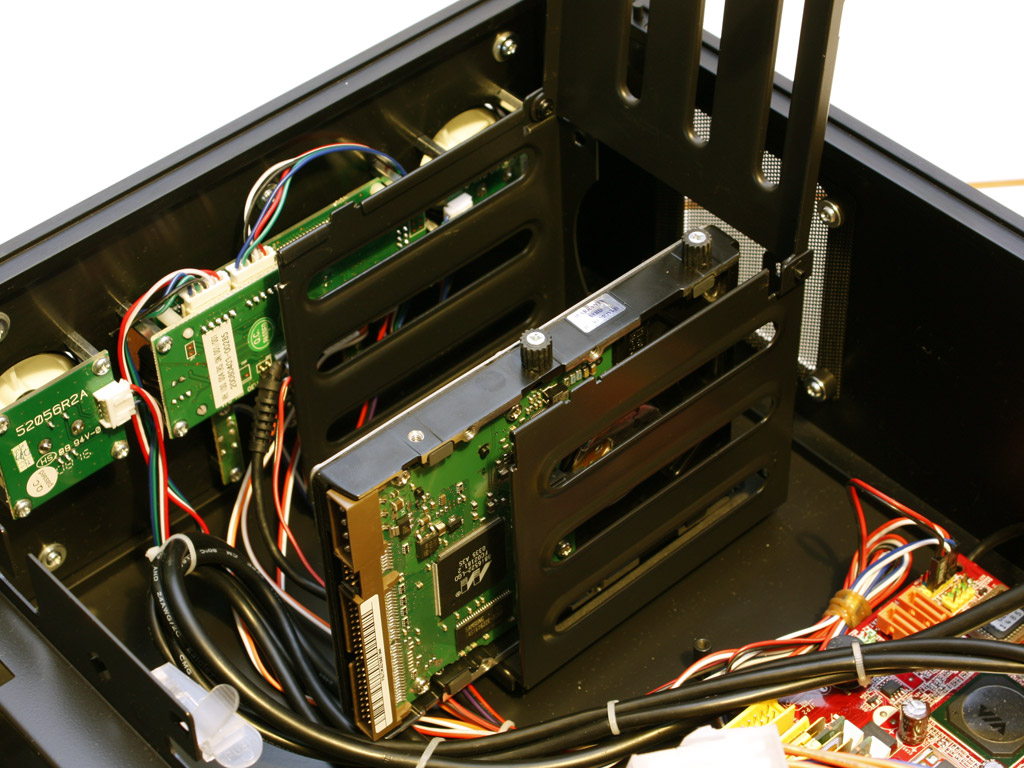
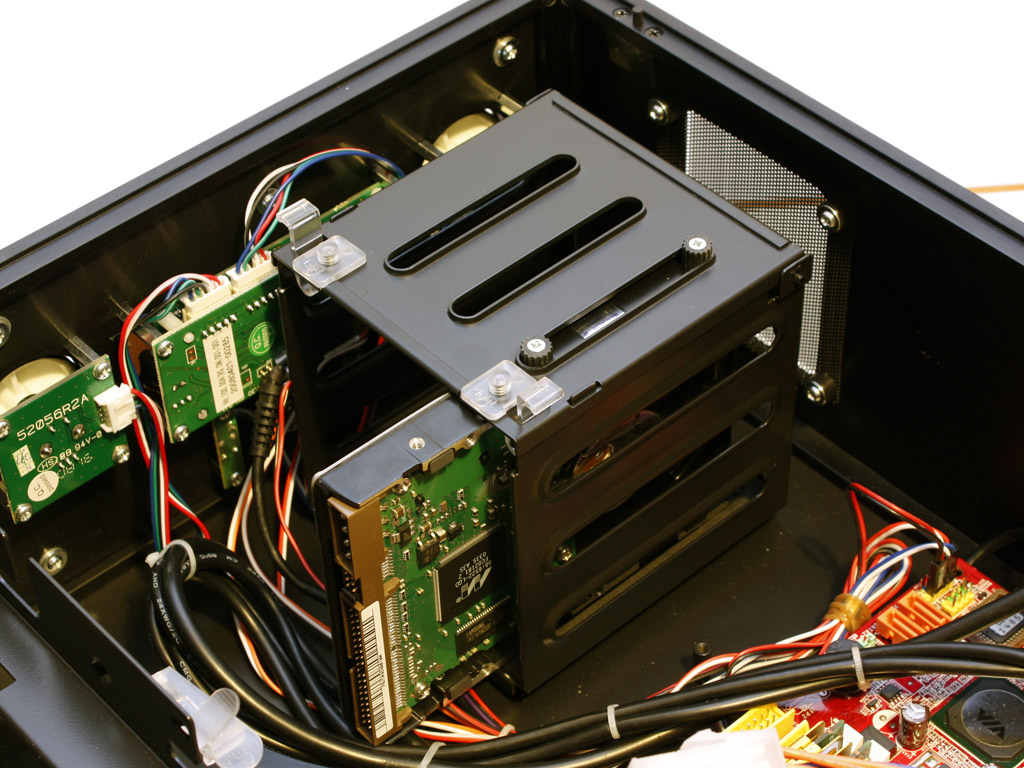
Installing the hard drive can be done without a screw driver. Chieftec has designed a simple but incredibly effective system. First, you screw the appropriate extensions to the hard drive. These are covered in black rubber, to absorb any vibrations of the drive. Next, open up the cage, place the drive into it and close the cage. The two plastic locks will snap into place, holding the hard drive perfectly.


The same system is applied to the optical drive. For this unit, the screws are covered in white rubber and are slightly larger. The insertion is done the same way as the hard drives: slide it into place and lock it down.

Installing the power supply has to be done with the four supplied screws. There is plenty of space left, making larger PSUs a definite possibility.
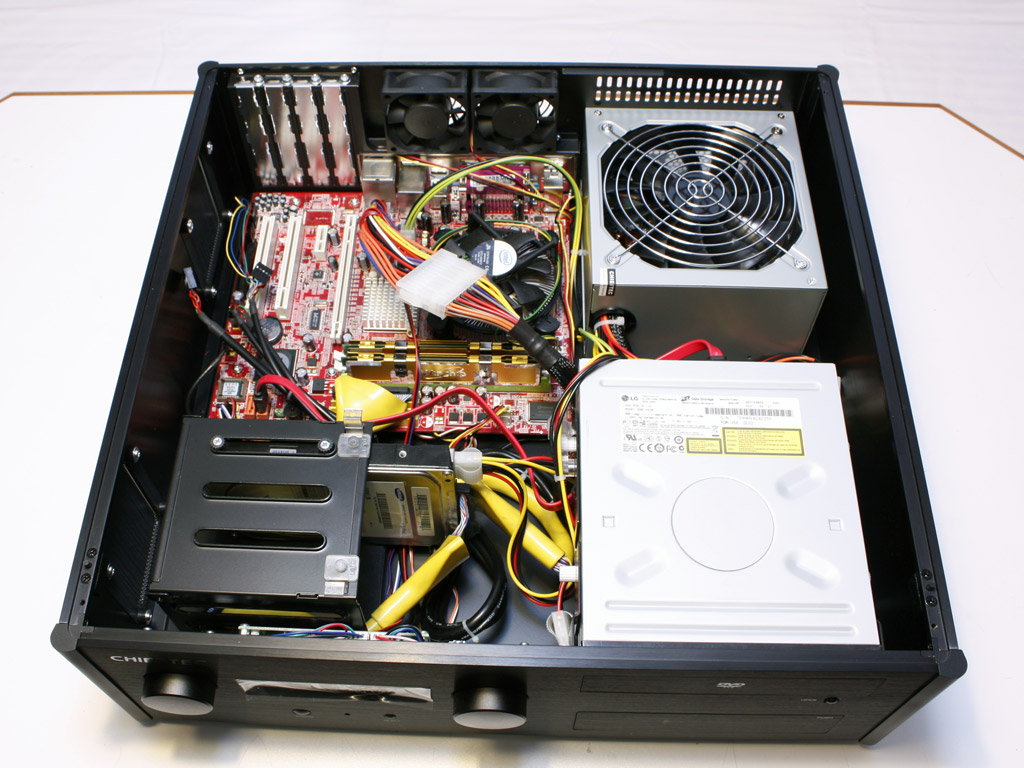
After installing everything and connecting all the cables, the interior still looks quite clean. Hiding the extra cabling can easily be done under the mainboard, which results in what you see above. This is very tidy, considering the restrictive dimensions of the HTPC case. Nonetheless, having four hard drives and possibly a high end graphic card, will add considerably to the needed amount of cables.
Feb 23rd, 2025 22:41 EST
change timezone
Latest GPU Drivers
New Forum Posts
- Nvidia's GPU market share hits 90% in Q4 2024 (gets closer to full monopoly) (530)
- Monitor Battle! Help me choose between two contenders (41)
- Dell Workstation Owners Club (3282)
- SLI is really not Dead if you Have a SLI rig (83)
- EFI partition too small, can't update Windows 11 on laptop (12)
- New fans (2)
- 9800 x3d overheating what is the stock voltage (5)
- Solidigm NVMe Custom Modded Driver for All NVMe Brands SSDs & Any NVMe SSDs (205)
- VRAM do you recommend for 4K gaming nowadays? (17)
- Connector needed? (7)
Popular Reviews
- ASUS GeForce RTX 5070 Ti TUF OC Review
- MSI GeForce RTX 5070 Ti Ventus 3X OC Review
- darkFlash DY470 Review
- MSI GeForce RTX 5070 Ti Vanguard SOC Review
- MSI GeForce RTX 5070 Ti Gaming Trio OC+ Review
- Galax GeForce RTX 5070 Ti 1-Click OC White Review
- Palit GeForce RTX 5070 Ti GameRock OC Review
- Fantech Aria II Pro Review
- Gigabyte GeForce RTX 5090 Gaming OC Review
- AMD Ryzen 7 9800X3D Review - The Best Gaming Processor
Controversial News Posts
- NVIDIA GeForce RTX 5090 Spotted with Missing ROPs, NVIDIA Confirms the Issue, Multiple Vendors Affected, RTX 5070 Ti, Too (449)
- AMD Radeon 9070 XT Rumored to Outpace RTX 5070 Ti by Almost 15% (304)
- AMD Plans Aggressive Price Competition with Radeon RX 9000 Series (271)
- AMD Radeon RX 9070 and 9070 XT Listed On Amazon - One Buyer Snags a Unit (247)
- Edward Snowden Lashes Out at NVIDIA Over GeForce RTX 50 Pricing And Value (241)
- AMD Denies Radeon RX 9070 XT $899 USD Starting Price Point Rumors (239)
- NVIDIA Investigates GeForce RTX 50 Series "Blackwell" Black Screen and BSOD Issues (226)
- New Leak Reveals NVIDIA RTX 5080 Is Slower Than RTX 4090 (215)