 9
9
Cooler Master Cosmos C700M Review
Assembly & Finished Looks »A Closer Look - Inside
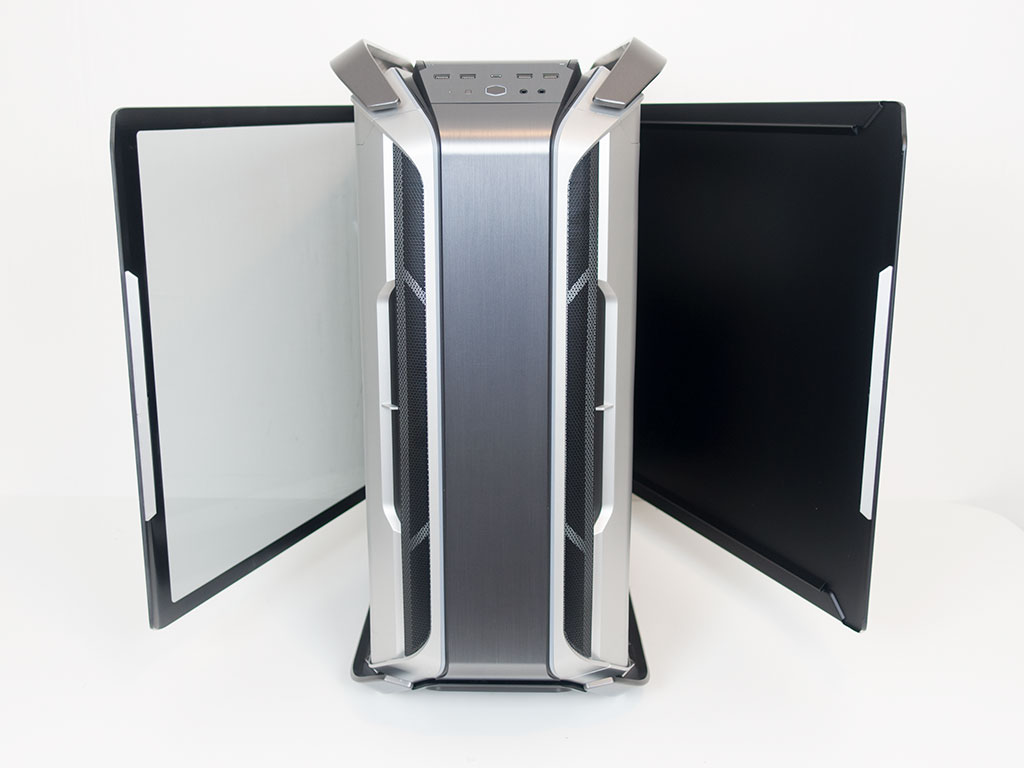
Simply swing each side panel open to access the interior. There are no locks or latches. Instead, magnets hold them in place. This works, but you should really secure the doors if you end up carrying the C700M around, just to make sure the panels don't end up opening at an inopportune time.

Taking a first look at the interior, it becomes apparent that Cooler Master has spent a lot of time on updating the insides. Gone are the two elaborately shaped shields. Instead, you will find a more traditional shroud on the bottom of the chassis which may be removed to give access to the PSU bay and additional 3.5" drives. On the opposing side, a similar approach has been taken with a solid panel covering around 40% of the side.
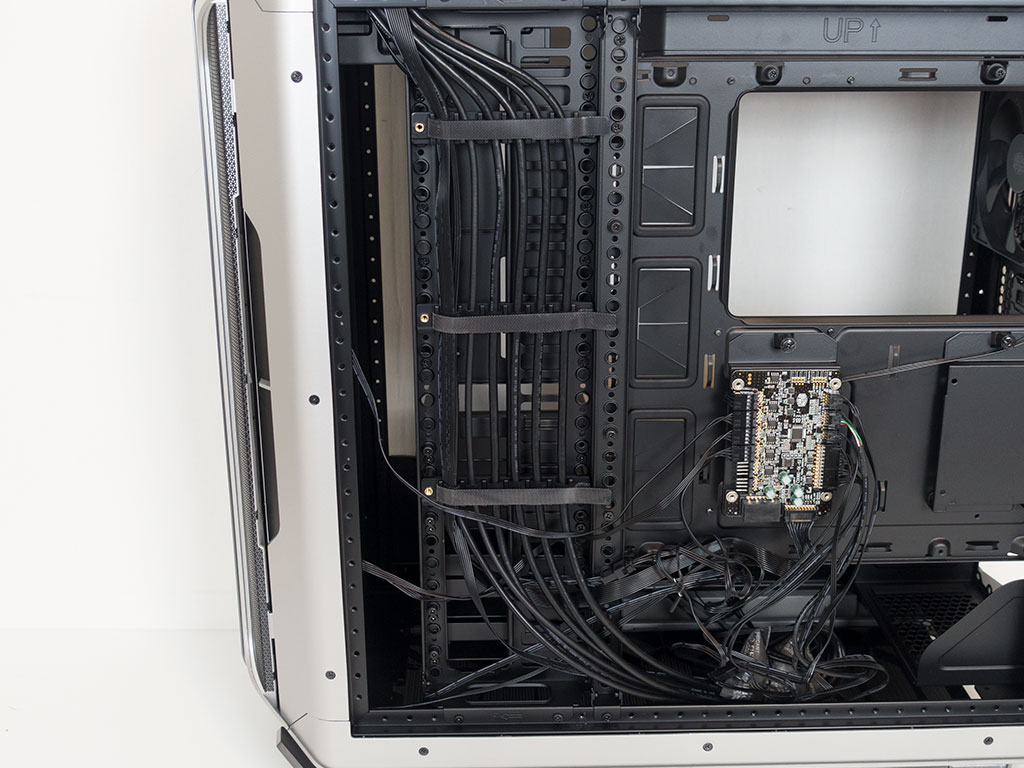
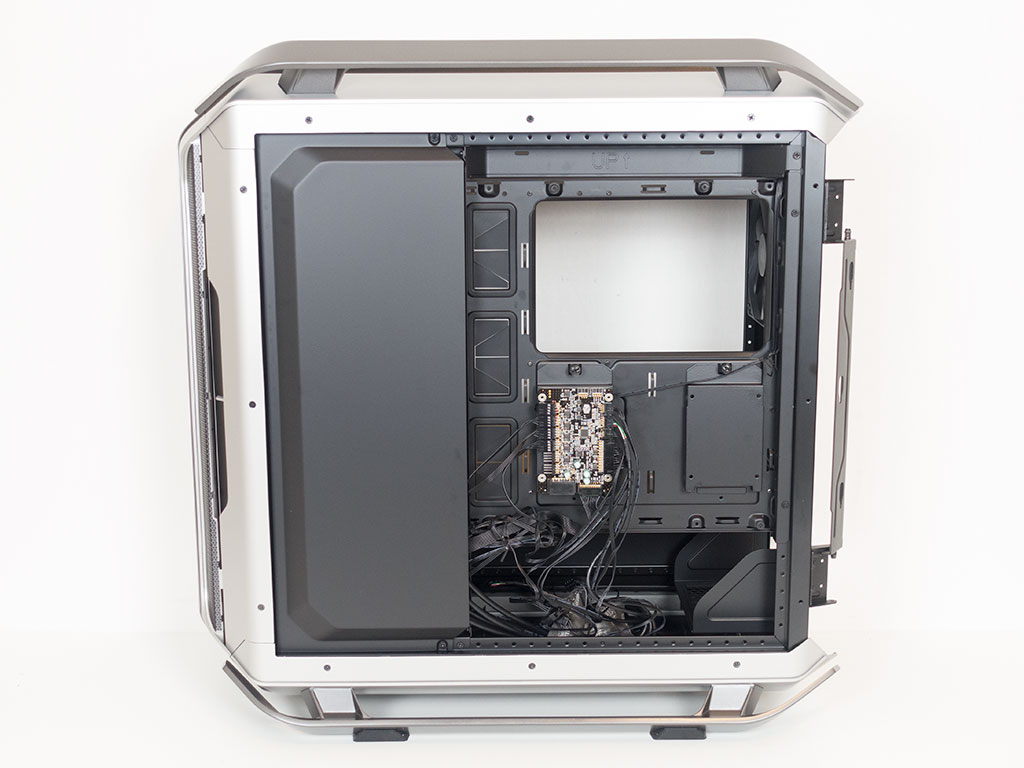
Once that one panel is removed, you will find the next surprise and improvement from the previous C700 chassis: Cooler Master has cleanly routed all the cables from the chassis down the side of the case. You can also see the same elaborate hard drive mounting system as in the P version right behind those cables.
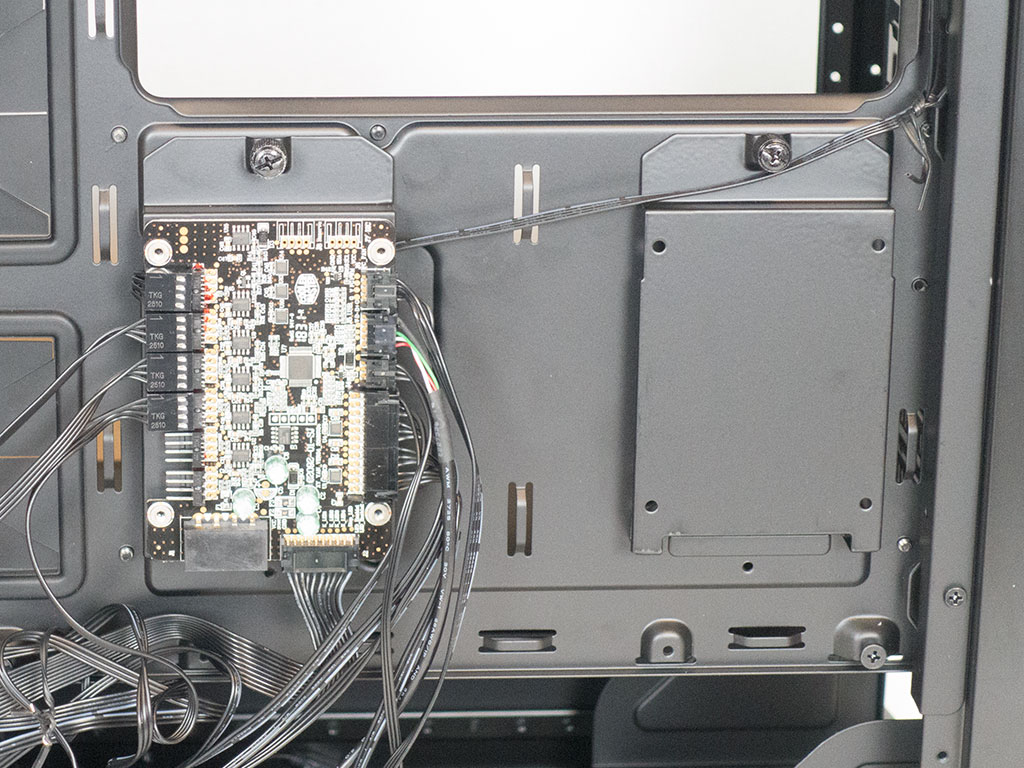
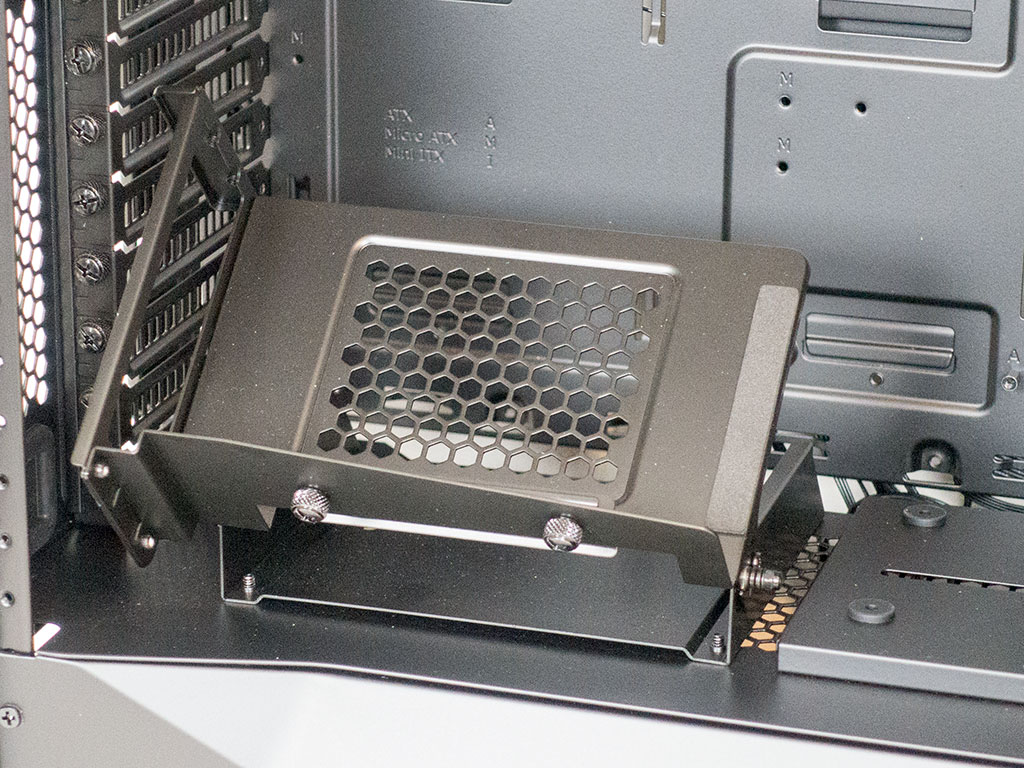
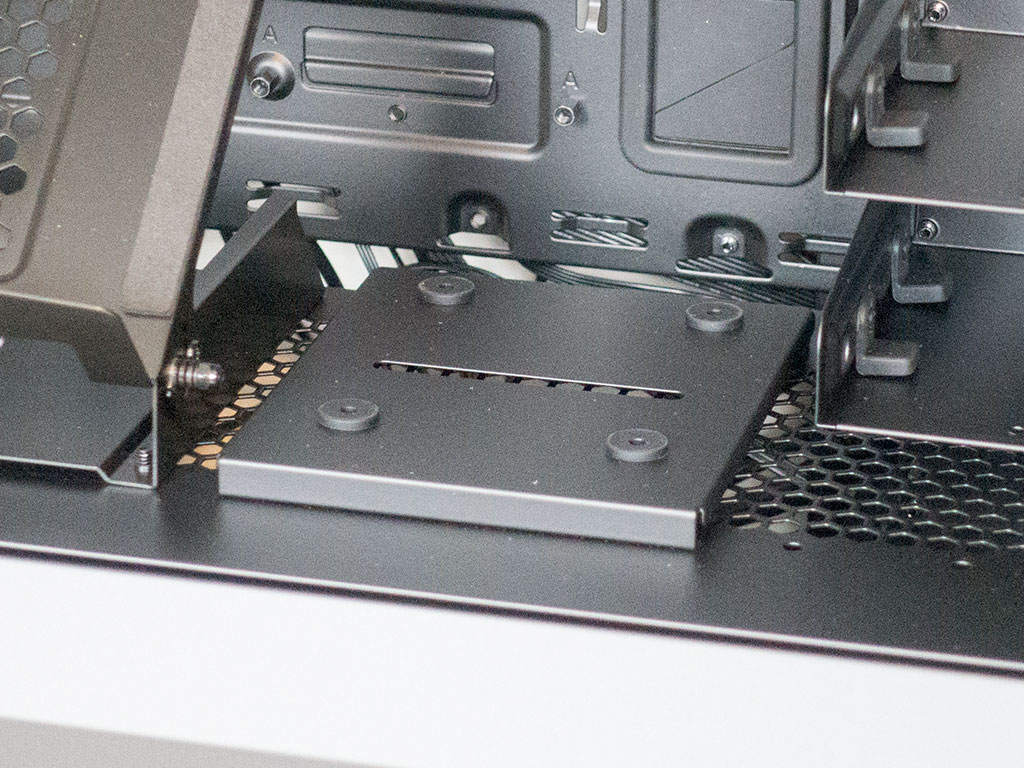
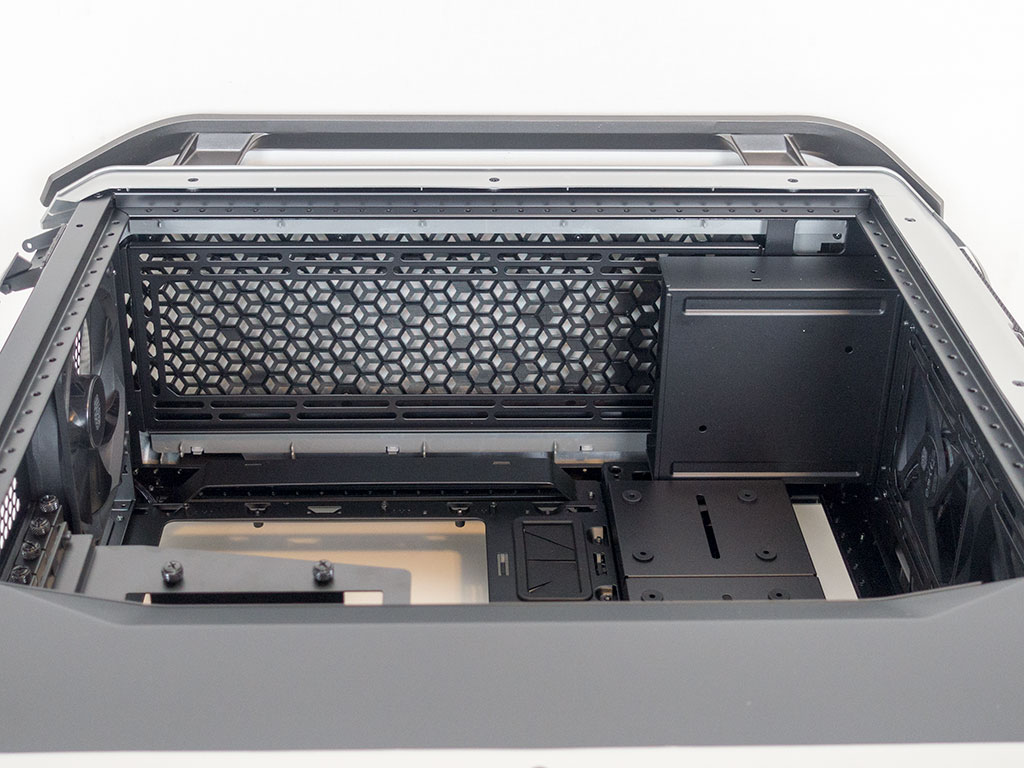
Behind the motherboard, you will find two SSD mounts. However, one of these is already filled with a fairly large PCB that holds both the fan and RGB controllers. You may connect up to six fans to one side and additional RGB lighting elements to the other. It looks different and much sturdier than the one used in the C700P.

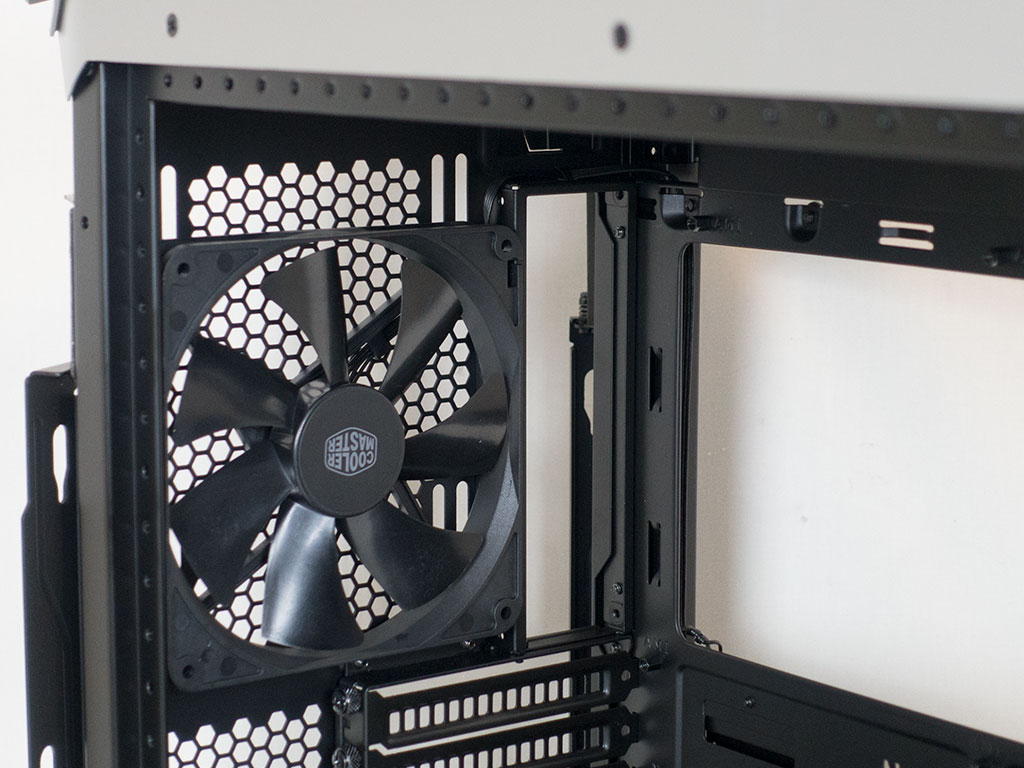
In the front, things look a bit more like in the P series as you have the two 140 mm intake fans mounted to a removable frame that allows you to add more, or even include a liquid-cooling setup of up to 420 mm in size in this area. In the very top, a single 5.25" tray can be found even though the Cosmos C700M offers two such openings in the front. Cooler Master also placed two plates on the area where you usually put 3.5" drives. These plates can be used to install additional 2.5" drives.
The shroud has been redesigned to be a single piece on which you will find the unique GPU stand. Next to it is one more 2.5" mounting plate, which brings the total number of installable drives of that size to five without the additional five 3.5" trays.

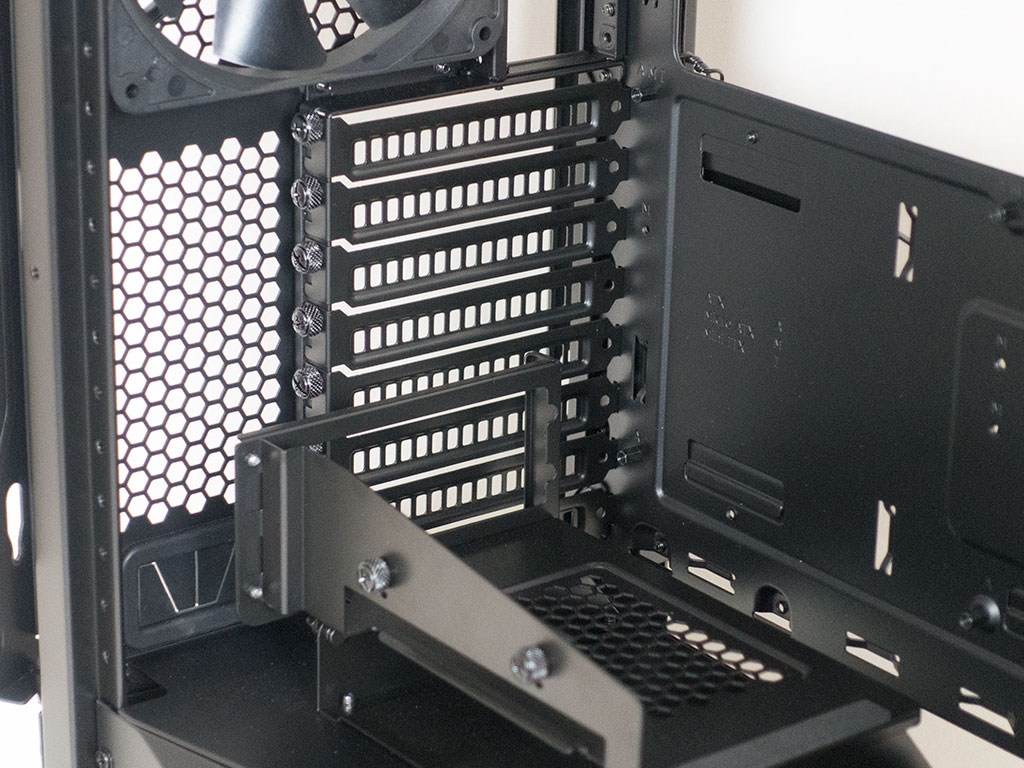
Underneath the shroud, you can clearly see the PSU bay, shaped as a large tray very similar to the hard-drive ones. Above that are the aforementioned eight expansion slots with their covers held in place by traditional screws. Unfortunately, you won't be able to reach these screws properly while the motherboard tray is inside the chassis, which may force you to take the whole thing apart when you want to add a new expansion card. Another addition to the C700M is the GPU presentation tray, which allows you to install a graphics card with the included ribbon cable and angle it to perfectly show it off to curious onlookers. In the very top, you can clearly see the dark gray 140 mm fan of retail quality.
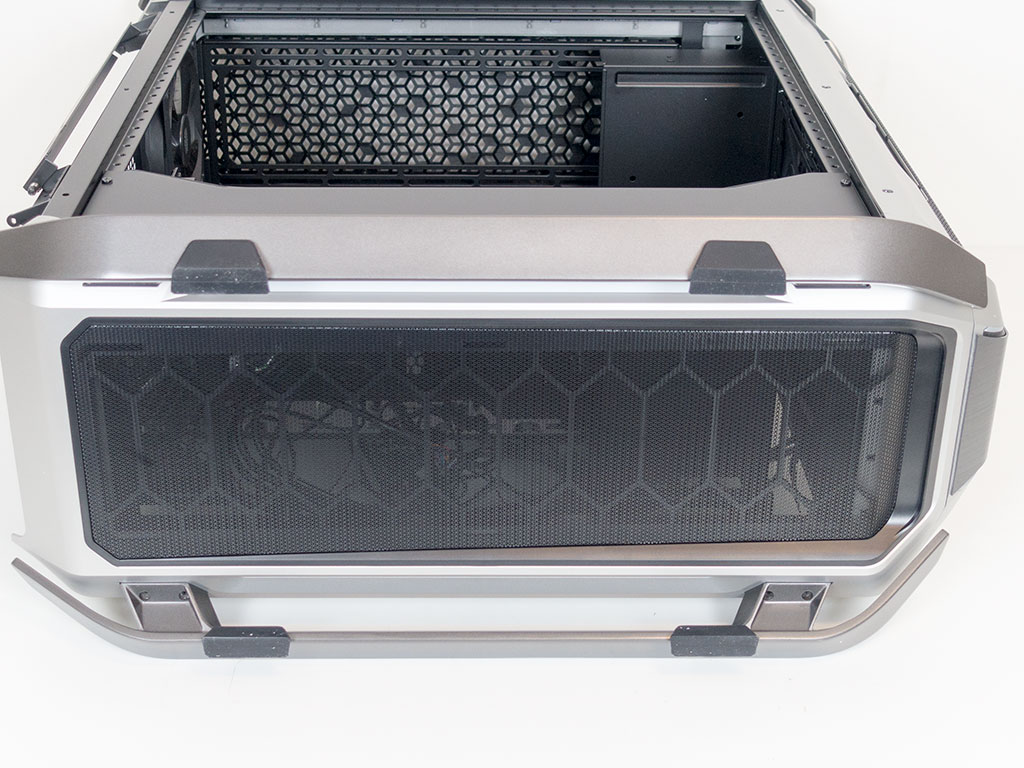
Looking at the floor of the Cosmos C700M, it becomes apparent that it is a gargantuan dust filter. You may pull it out through the front of the chassis, which makes cleaning it a breeze. Cooler Master has also improved the floor of the M variant by allowing you to install two 120 or 140 mm fans or a 240/280 mm radiator here.

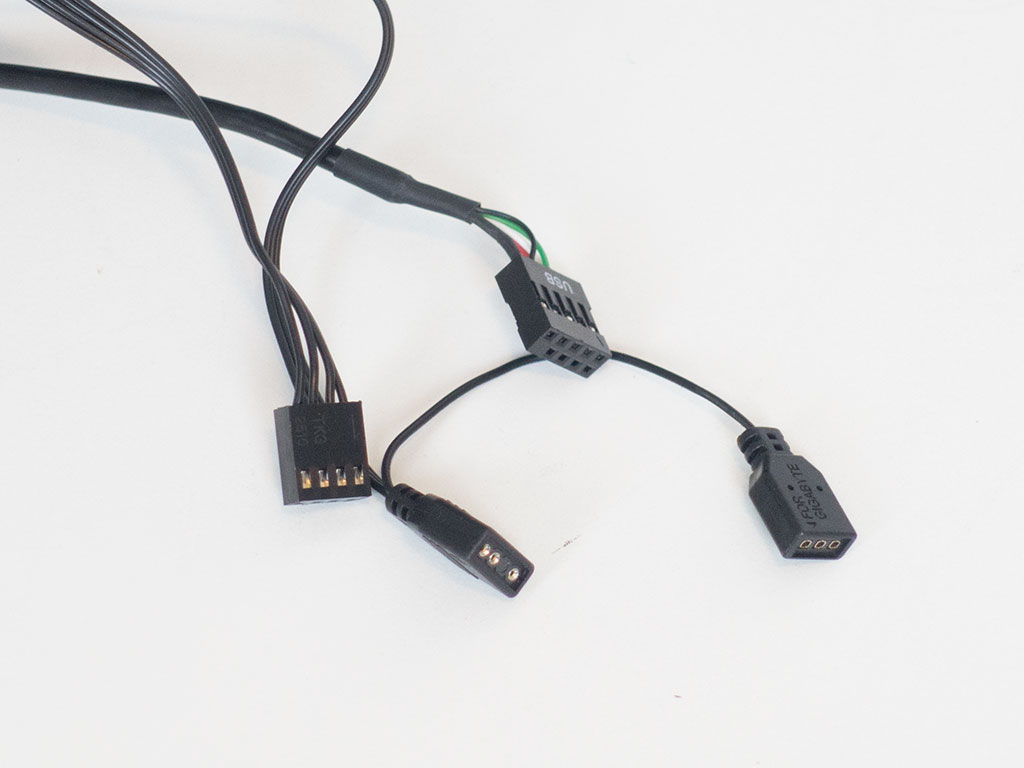
While all the case cables and those for USB 3.0 and audio are of the usual variety, Cooler Master has gone to the bleeding edge by providing a proper USB 3.1 connector for those motherboards that may sport such a plug. On top of that, a 4-pin RGB connector can also be found pre-attached to the controller board, so you may expand your lighting elements, while a PWM fan connector allows you to control the fan speed directly from your motherboard.
Jan 20th, 2025 20:24 EST
change timezone
Latest GPU Drivers
New Forum Posts
- RDNA4 (RX 9070XT / 9070) launch announced for (delayed to) March 2025 (25)
- The coffee and tea appreciation thread (17)
- Laptop fan cable touching top of heatsink and ssd. (3)
- What's your latest tech purchase? (22922)
- RTX 5090 ridiculous price! (88)
- What do you do for a living? (416)
- Free Games Thread (4391)
- What are you playing? (22632)
- Windows 11 General Discussion (5626)
- Cryptocoin Value and Market Trend Discussion (1589)
Popular Reviews
- NVIDIA GeForce RTX 5090 Founders Edition Unboxing
- Fosi Audio K7 Gaming Desktop DAC/Headphone Amplifier Review
- Montech Heritage Pro Review - The Leather Case
- ASRock Arc B570 Challenger OC Review
- NVIDIA GeForce RTX 50 Technical Deep Dive
- be quiet! Light Loop 360 mm AIO Review
- NZXT C1500 Review
- AMD Ryzen 7 9800X3D Review - The Best Gaming Processor
- Sparkle B570 Guardian OC Review
- Intel Arc B580 Review - Excellent Value
Controversial News Posts
- NVIDIA 2025 International CES Keynote: Liveblog (468)
- AMD Debuts Radeon RX 9070 XT and RX 9070 Powered by RDNA 4, and FSR 4 (349)
- NVIDIA GeForce RTX 5090 Features 575 W TDP, RTX 5080 Carries 360 W TDP (217)
- AMD Radeon RX 9070 XT & RX 9070 Custom Models In Stock at European Stores (215)
- AMD Radeon RX 9070 XT Alleged Benchmark Leaks, Underwhelming Performance (204)
- Potential RTX 5090 and RTX 5080 Pricing in China Leaks (173)
- AMD Radeon RX 9070 XT Tested in Cyberpunk 2077 and Black Myth: Wukong (169)
- AMD Radeon RX 9070 XT Boosts up to 3.10 GHz, Board Power Can Reach up to 330W (167)