 6
6
CORSAIR K63 Wireless Mechanical Keyboard Review
Driver »Disassembly

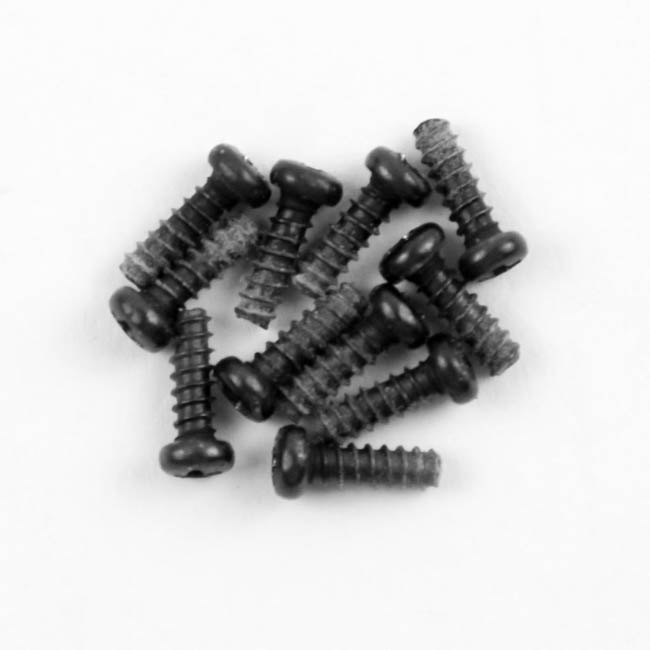

Disassembly of the Corsair K63 Wireless begins with the removal of eleven Phillips head screws that hold the ABS plastic top panel and the rest of the keyboard together. Note that there is a screw hidden under each of the four rubber pads at the corners as well. Once done, you have to use a thin, flat object to pry out the top panel locked in place via multiple interlocking plastic tabs around the edges, and these will break off if you apply too much force, or do so at the wrong point.


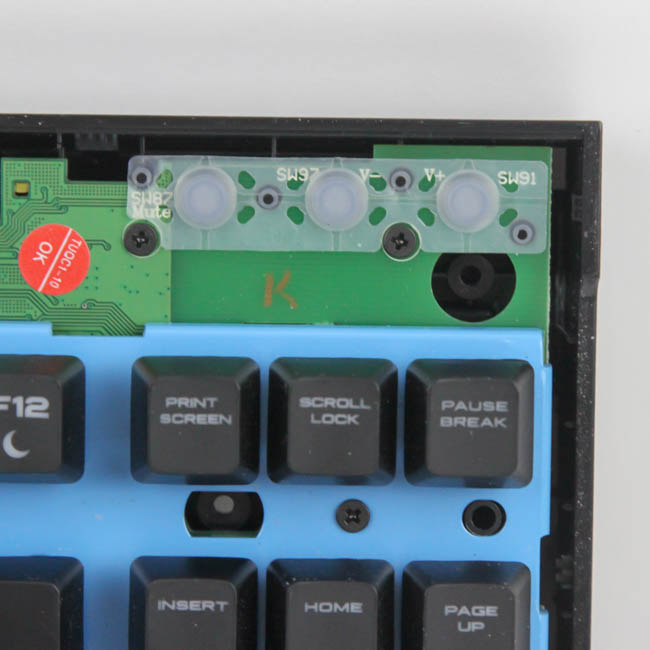
With the top panel piece removed, I can better show you the size of the small plastic tabs you have to deal with here. There is also a foam layer where the panel touches the battery underneath, and this appears to be more so to protect the battery than to prevent any shorting. The remaining piece has the bottom panel still held in place, but here, we can get a better look at the membrane switches used for the dedicated media buttons on the keyboard, complete with their rubber domes.


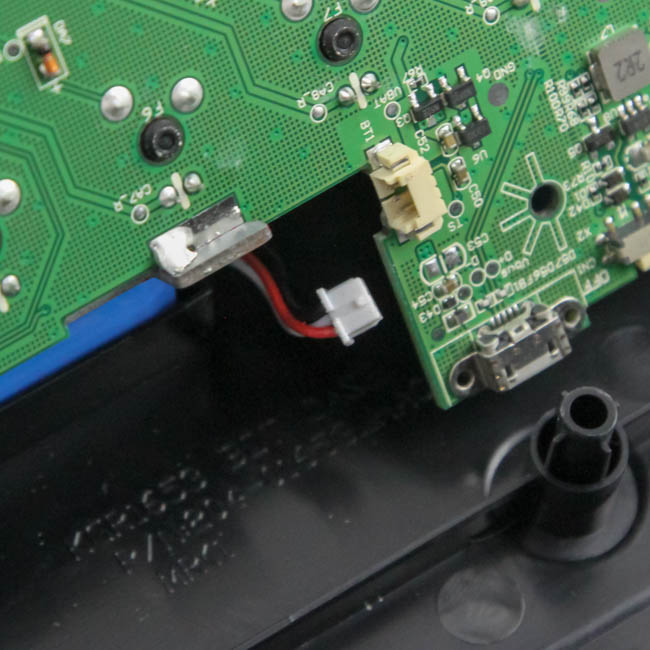

Now remove the eleven black screws and the two smaller, unpainted screws to take the plate/PCB piece off the bottom panel. In order to completely do so, you have to unplug the small internal power cable from the connector on the PCB as seen above. The battery is taped in place, inside a recess in the bottom case panel, which is also where it is deepest, and it can easily be pried off, which shows that it is a 2950 mAh, 11.15 Wh lithium-ion rechargeable battery. The label also suggests that the battery was manufactured by an unknown OEM in April of 2017, and the size of the battery is over ten times that of the one used in the AZIO MK MAC BT. However, having backlighting and the ultra-fast 1 ms response time will heavily eat into the battery's life, so we will see how the K63 Wireless keyboard fares in that department in due time.
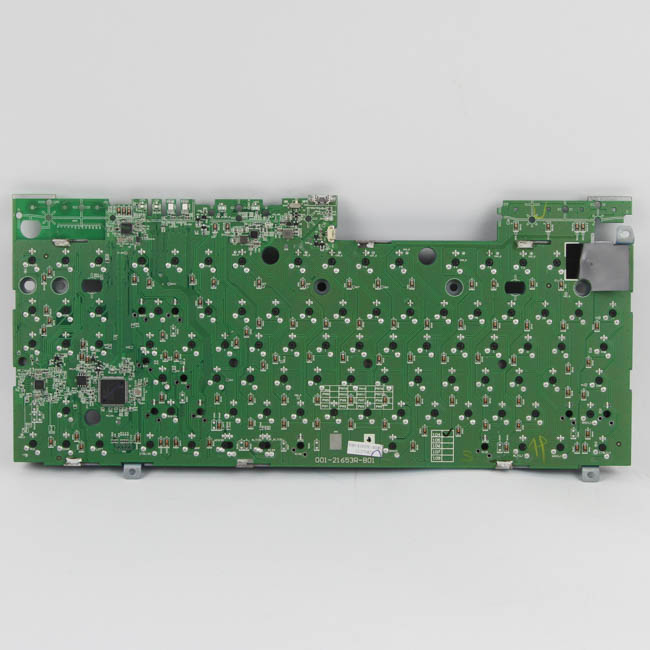

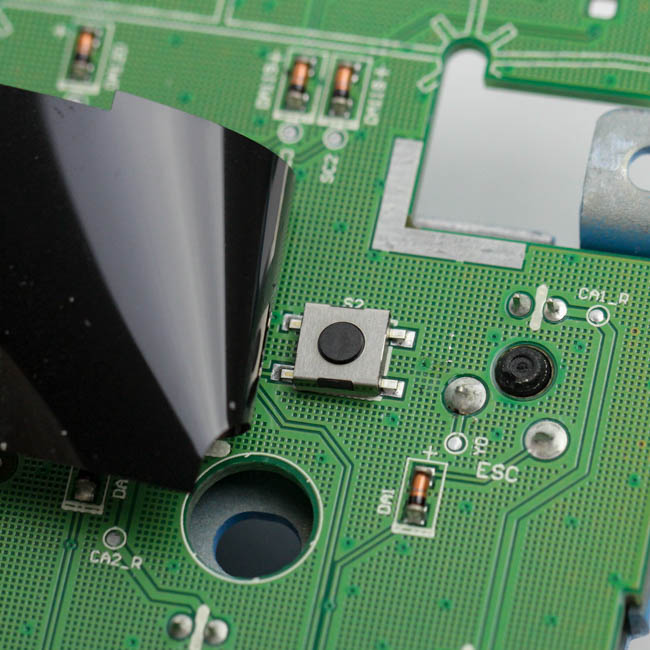
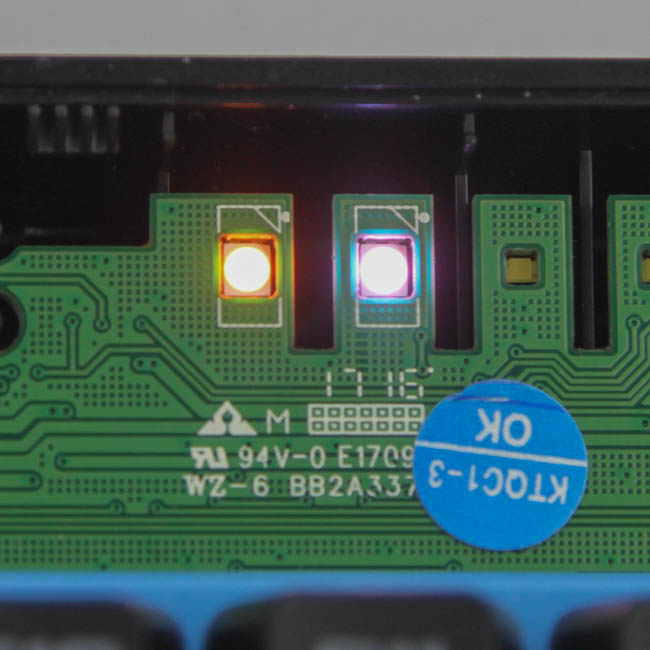
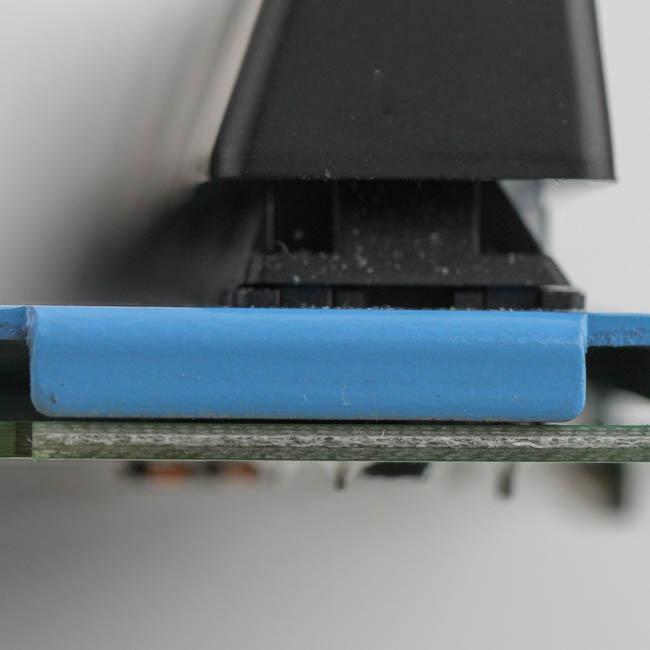
The PCB, green in color here, has an extension at the top to house the media control section, which means there is a lot of empty space under the case as there is nothing but the battery on one side. There are a lot of components here, including the female micro-USB port used for charging and general connectivity alike, and they are all soldered very well. Soldering is likely an automated process to handle the volumes CORSAIR deals with. The previously seen blue steel plate helps provide structural integrity to the unit, with the switches being plate-mounted through and into the PCB. There is a hardware reset button hiding in the back, which can be accessed through a hole in the back of the keyboard (pull out the right side's keyboard foot to see it) in case there is no other alternative. Being a wireless keyboard, the indicator LEDs can also be turned on at this stage (the battery was still connected at this point) to show you the two indicator LEDs in action.
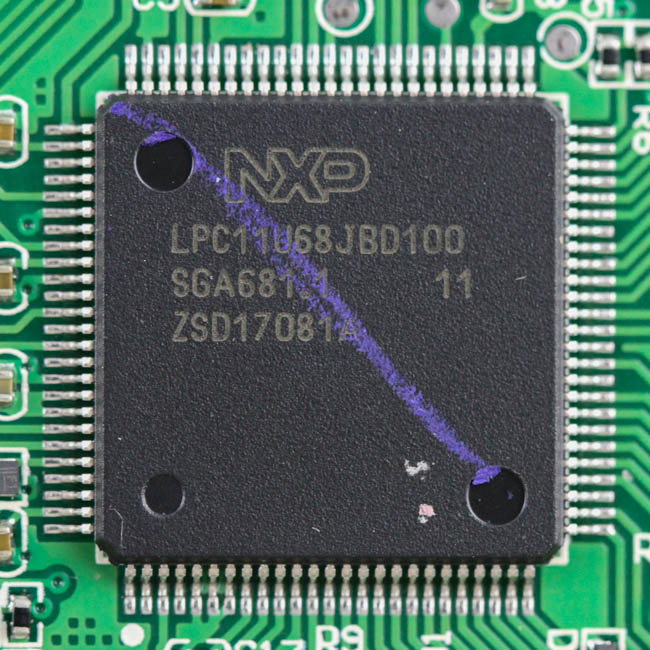
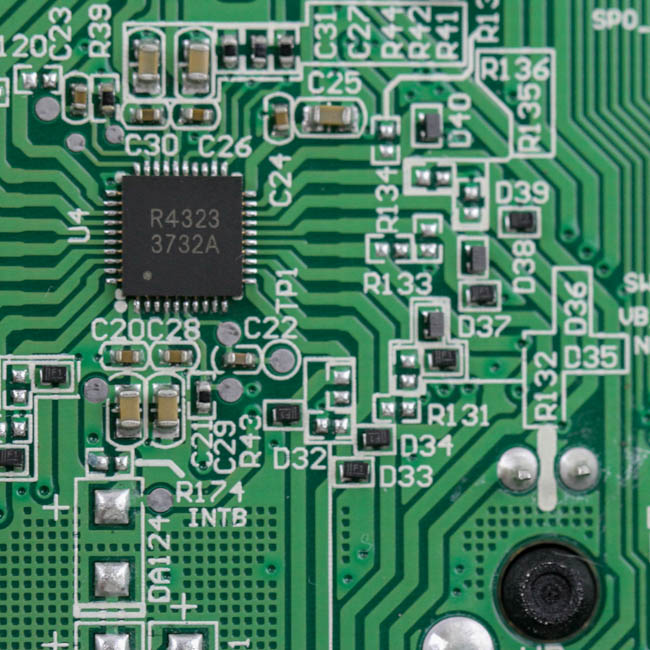
Powering the CORSAIR K63 is an NXP LPC11U68JBD100 32-bit ARM Cortex-M0+/M0 Cores-based USB microcontroller with 256 KB of on-board flash memory and 36 KB SRAM. There is a dedicated flash memory module as well to store all the pre-programmed functions. All the components, including the switches, LEDs, and capacitors, are soldered on to a multi-layered PCB.
Before we move on, be advised that disassembly will void the warranty and that TechPowerUp is not liable for any damages incurred if you decided to go ahead and do so anyway.
Apr 8th, 2025 01:59 EDT
change timezone
Latest GPU Drivers
New Forum Posts
- Kindly help in Identifying GPU and Suitable bios (9)
- AMD RX 9070 XT & RX 9070 non-XT thread (OC, undervolt, benchmarks, ...) (84)
- 12v lines 0 reads occansionally (3)
- Asus X670E Crosshair Crashes (7)
- 9070XT or 7900XT or 7900XTX (122)
- USB case with dual USB-C and dual USB-A (7)
- The coffee and tea drinkers club. (247)
- The easiest way to connect the BOOTSEL test metal terminal and the GND terminal.... (1)
- Anyone with true HDDs still around here? (337)
- is it worth using ssd with usb2? (12)
Popular Reviews
- The Last Of Us Part 2 Performance Benchmark Review - 30 GPUs Compared
- UPERFECT UStation Delta Max Review - Two Screens In One
- ASUS Prime X870-P Wi-Fi Review
- PowerColor Radeon RX 9070 Hellhound Review
- Upcoming Hardware Launches 2025 (Updated Apr 2025)
- MCHOSE L7 Pro Review
- Sapphire Radeon RX 9070 XT Pulse Review
- Corsair RM750x Shift 750 W Review
- Sapphire Radeon RX 9070 XT Nitro+ Review - Beating NVIDIA
- DDR5 CUDIMM Explained & Benched - The New Memory Standard
Controversial News Posts
- NVIDIA GeForce RTX 5060 Ti 16 GB SKU Likely Launching at $499, According to Supply Chain Leak (161)
- MSI Doesn't Plan Radeon RX 9000 Series GPUs, Skips AMD RDNA 4 Generation Entirely (146)
- Microsoft Introduces Copilot for Gaming (124)
- AMD Radeon RX 9070 XT Reportedly Outperforms RTX 5080 Through Undervolting (119)
- NVIDIA Reportedly Prepares GeForce RTX 5060 and RTX 5060 Ti Unveil Tomorrow (115)
- Over 200,000 Sold Radeon RX 9070 and RX 9070 XT GPUs? AMD Says No Number was Given (100)
- NVIDIA GeForce RTX 5050, RTX 5060, and RTX 5060 Ti Specifications Leak (97)
- Nintendo Switch 2 Launches June 5 at $449.99 with New Hardware and Games (92)