 2
2
ECS LIVA One H610 Barebones Mini-PC (Core i3-12100) Review
Test Systems »A look Inside


To get the system operational, you will first need to unscrew the thumbscrew at the back of the chassis, then slide it forward, and it will lift off and away. Considering the fact this is a barebones Mini-PC you will need to get a supported CPU, DDR4 SO-DIMM memory, and of course, either a 2.5-inch SATA drive or an M.2 SSD. For testing purposes, I used an Intel Core i3-12100, 64 GB (2x 32 GB) of 3200 MHz CL22 Patriot memory, and a 512 GB Team Group MP33 NVMe SSD.
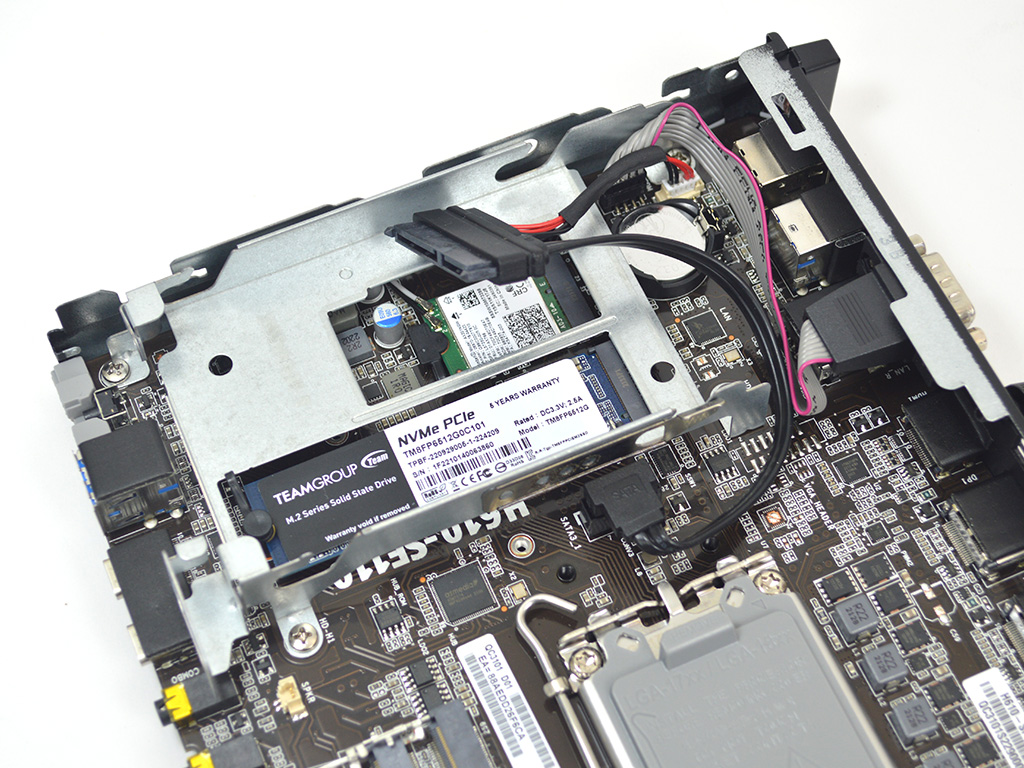
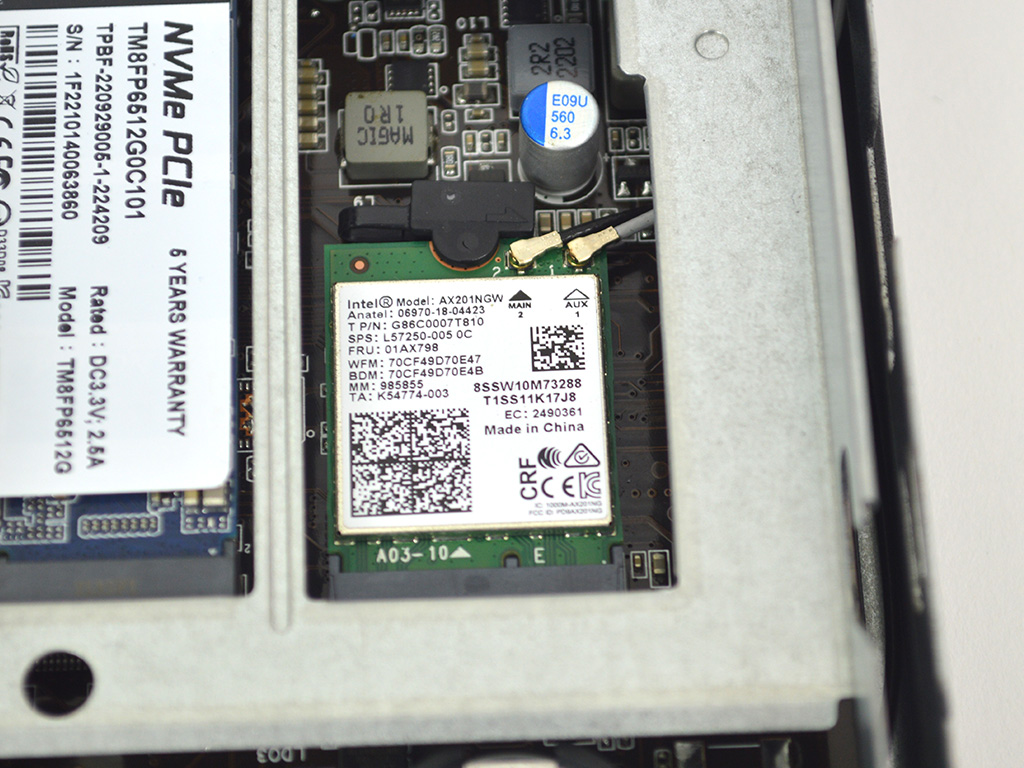
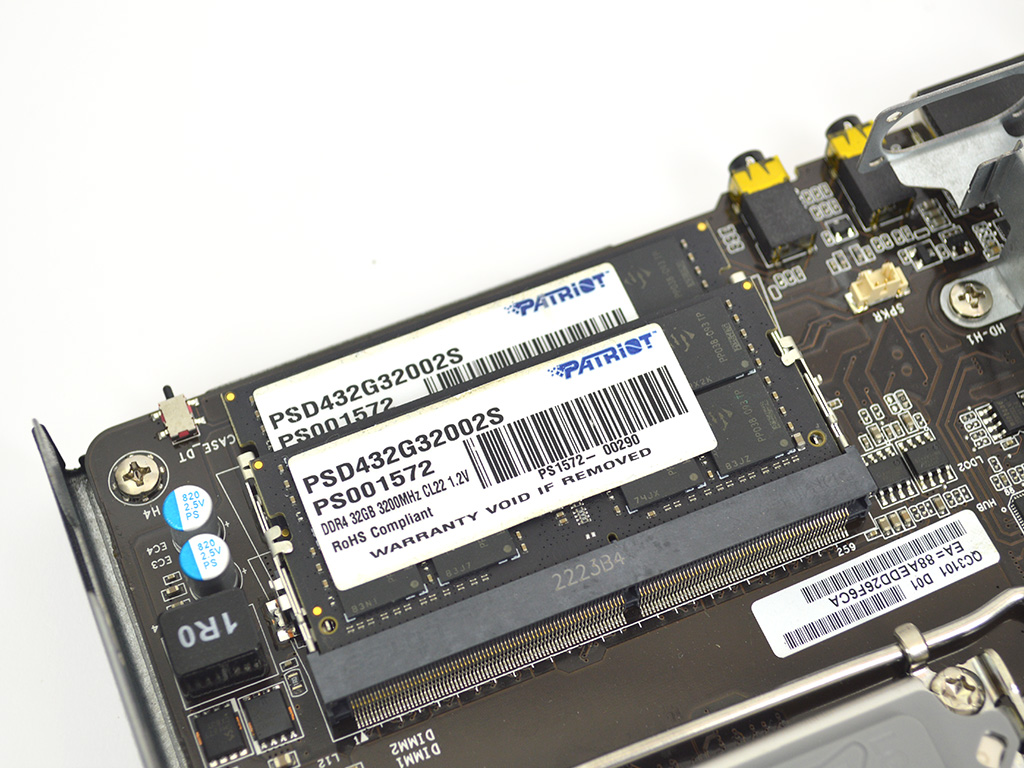
Now with the case fully open, I opted to install the M.2 SSD, which was an incredibly easy process due to ECS using a plastic pushpin design on the LIVA One H610. It pulls up and out of where the screw for the M.2 drive would be located, then install the drive, reinsert the plastic push pin, and you're good to go. The same solution is also used on the Intel AX201NGW Wi-Fi- card. With the OS drive installed, Next, it's time to install the system memory, which is easy enough as you only need to slot it in correctly and push it down till it locks into place.
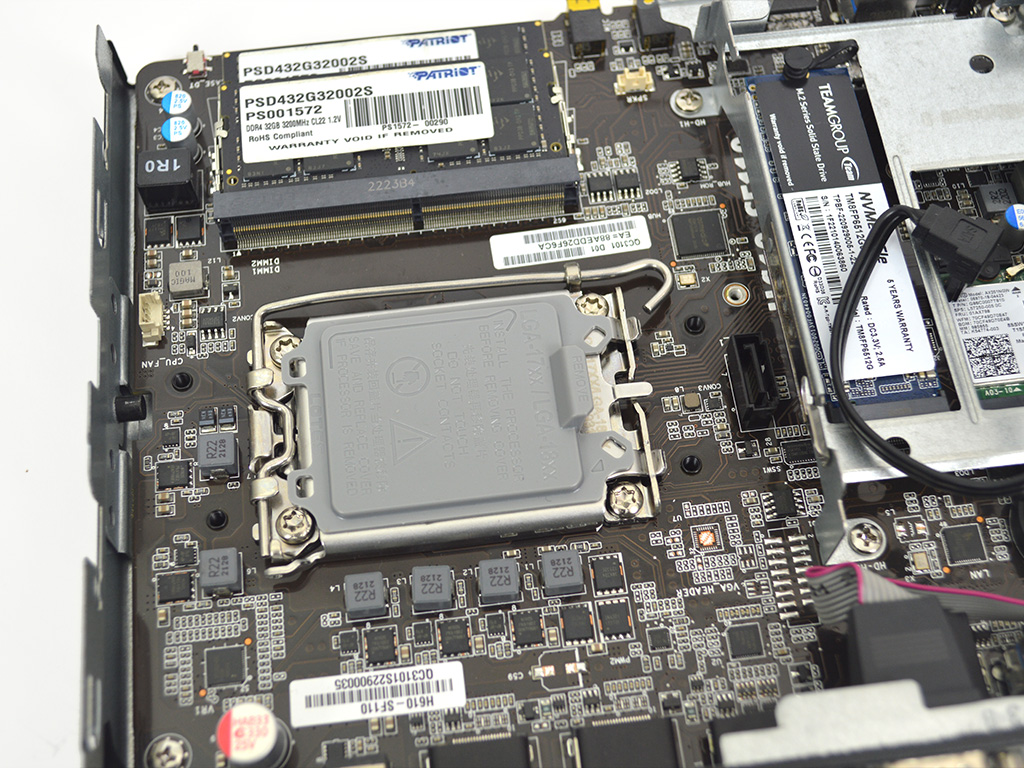
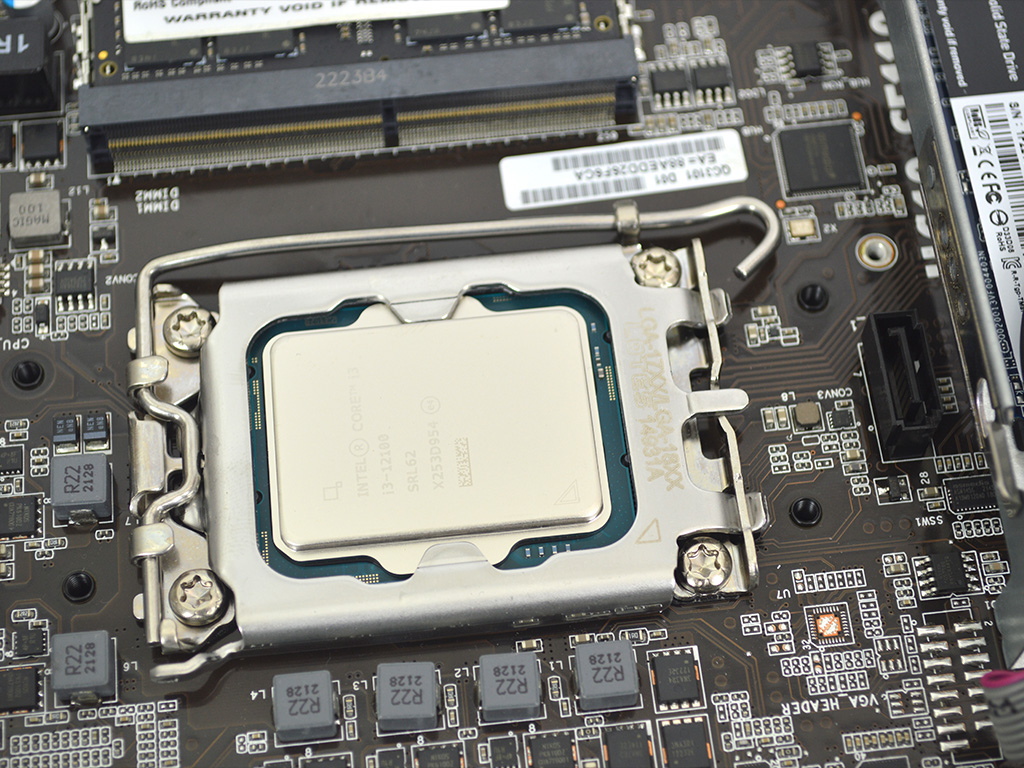
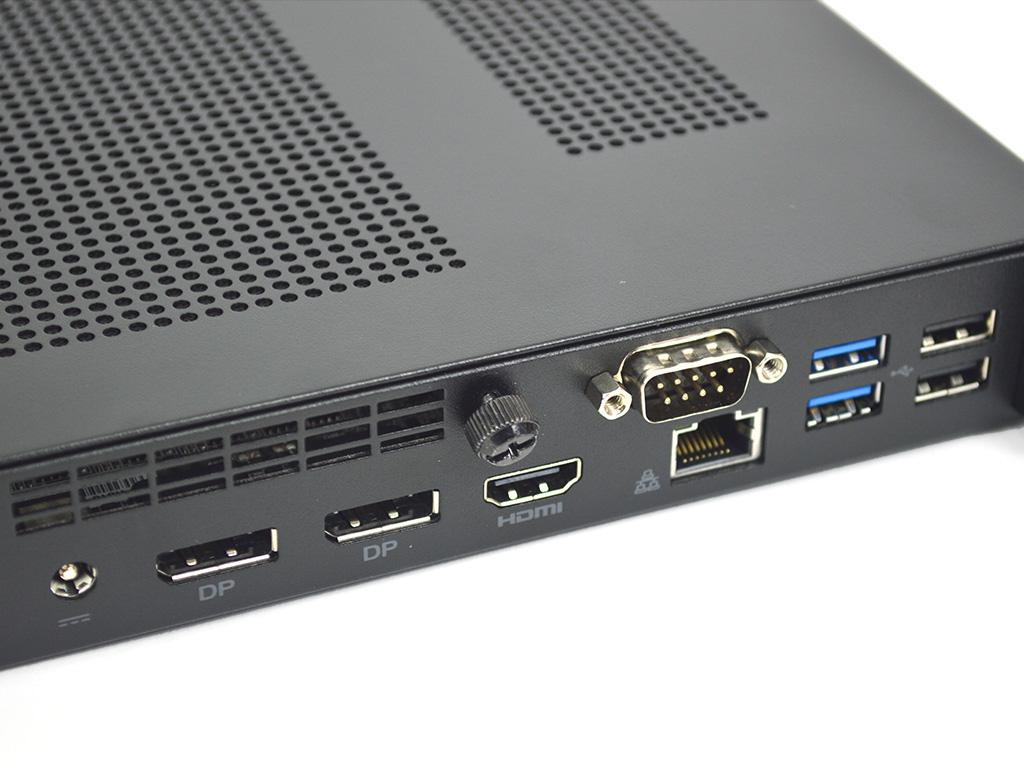
The next step is to install the CPU. The ECS LIVA One H610 supports Intel's 12th and 13th generation of processors with max TDPs of 35 or 65 watts. So you won't be able to slap a 13900K in here, although lower TDP variants such as the 13900TE (35 W) would work just fine, especially since the power brick provided has a maximum rated output of 120 watts to power the whole system. As such, while CPUs like the i5-12400 are supported, its turbo power is within 3 watts of the power bricks rated maximum. So it makes more sense to stick with the Core i3 processors or Intel T-series, which have a lower TDP and max turbo power limit. Regardless of your choice of CPU, you will want to unplug the SATA connector near the CPU socket. Then lift the retention mechanism, insert the CPU, and secure it.

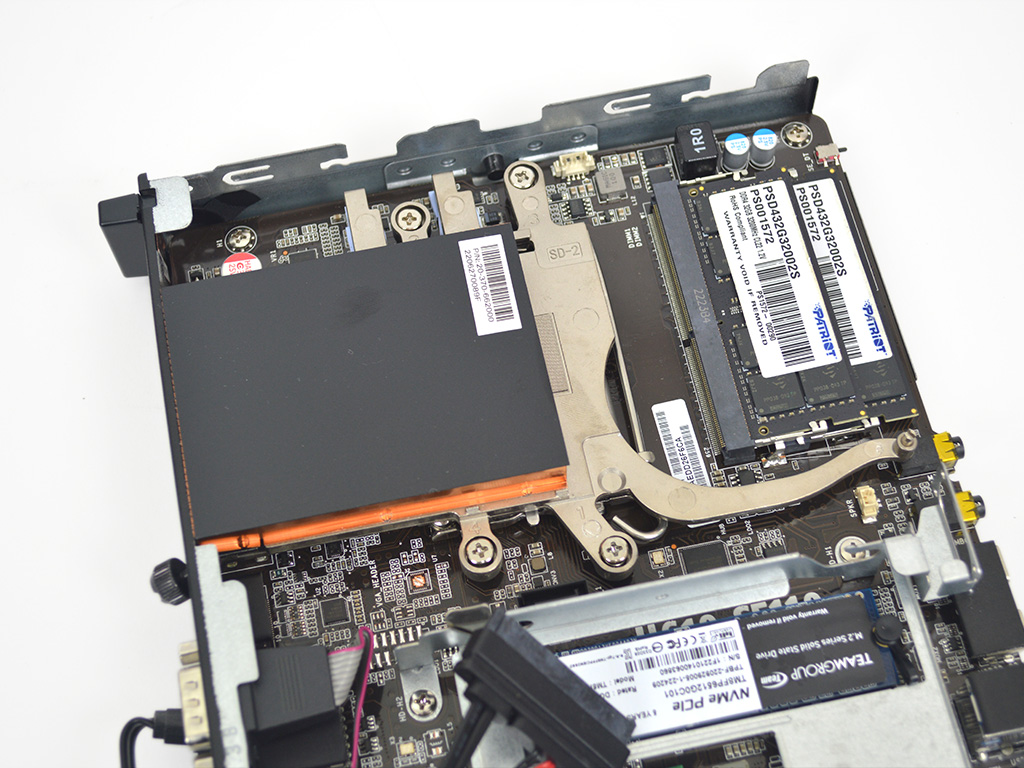
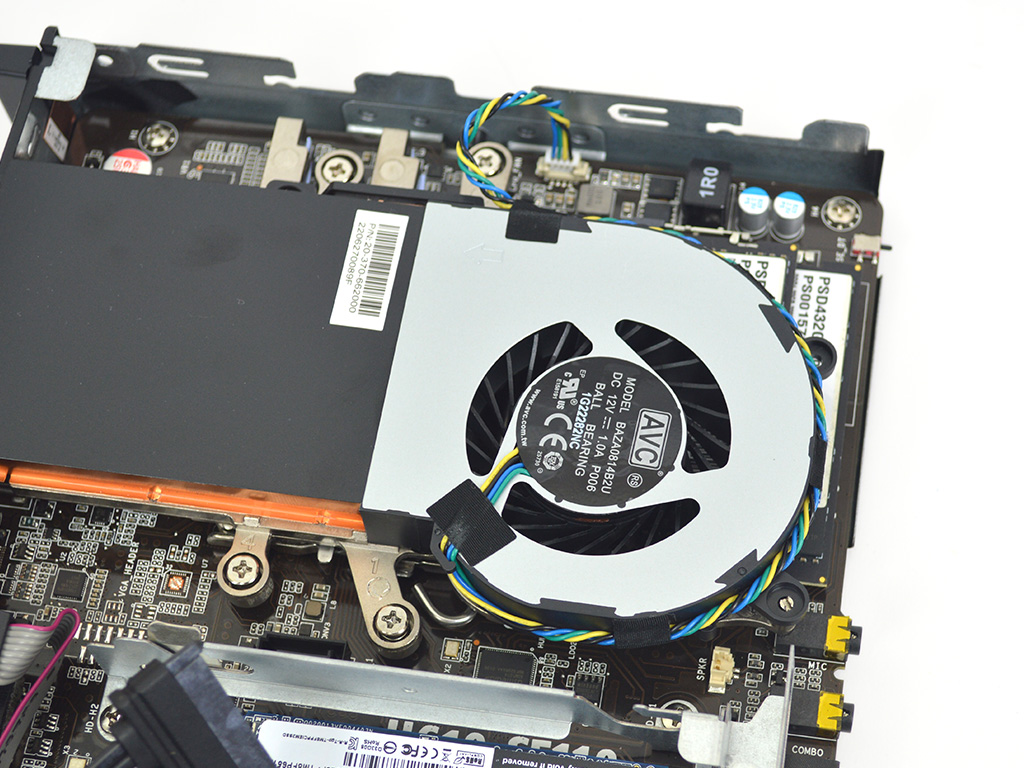
With all the parts installed, you will want to remove the film on the various thermal pads on the heatsink, then line it up with the four holes on the motherboard and secure it in place. Now you can drop the fan onto the supporting pegs and plug it into the CPU fan header. At this point, reposition the front fascia / top cover and secure that with the captive thumb screw, and now your system is ready for the OS install.
Jan 30th, 2025 23:05 EST
change timezone
Latest GPU Drivers
New Forum Posts
- DLSS 4 is better than native resolution? (19)
- Will you buy a RTX 5090? (269)
- What's your latest tech purchase? (23032)
- So who’s paying $100 for GTA 6 then? (102)
- TPU's Nostalgic Hardware Club (19903)
- Is my CPU just throttling or is a Prochot reset causing lag spikes ? (1)
- What are you playing? (22711)
- B650 Arous Elite AX rev1.0 red DRAM light (13)
- Ghetto Mods (4543)
- Solidigm NVMe Custom Modded Driver for All NVMe Brands SSDs & Any NVMe SSDs (201)
Popular Reviews
- NVIDIA GeForce RTX 5080 Founders Edition Review
- NVIDIA DLSS 4 Transformer Review - Better Image Quality for Everyone
- Galax GeForce RTX 5080 1-Click OC Review
- ASUS GeForce RTX 5090 Astral OC Review - Astronomical Premium
- NVIDIA GeForce RTX 5090 Founders Edition Review - The New Flagship
- MSI GeForce RTX 5090 Suprim SOC Review
- MSI GeForce RTX 5090 Suprim Liquid SOC Review
- MSI GeForce RTX 5080 Vanguard SOC Review
- ASUS GeForce RTX 5080 Astral OC Review
- Asus ROG Strix X870-A Gaming Wi-Fi Review
Controversial News Posts
- NVIDIA 2025 International CES Keynote: Liveblog (470)
- AMD Debuts Radeon RX 9070 XT and RX 9070 Powered by RDNA 4, and FSR 4 (349)
- AMD is Taking Time with Radeon RX 9000 to Optimize Software and FSR 4 (251)
- AMD Denies Radeon RX 9070 XT $899 USD Starting Price Point Rumors (227)
- AMD Radeon RX 9070 XT & RX 9070 Custom Models In Stock at European Stores (226)
- NVIDIA GeForce RTX 5090 Features 575 W TDP, RTX 5080 Carries 360 W TDP (217)
- New Leak Reveals NVIDIA RTX 5080 Is Slower Than RTX 4090 (214)
- AMD's Radeon RX 9070 Launch Faces Pricing Hurdles (175)