 11
11
ECS LIVA X2 Mini PC (Braswell) Review
The Board »Physical Teardown
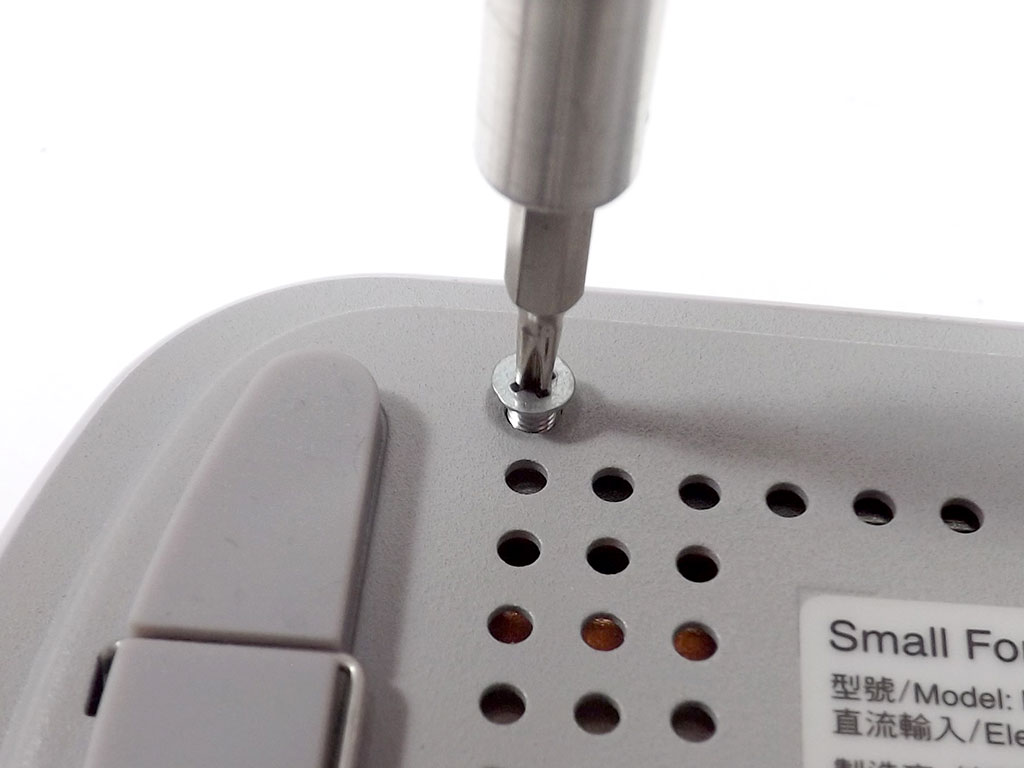

There are four screws on the bottom of the ECS LIVA X2 that need to be removed in order to get to the insides, which you will have to do to add storage to the ECS LIVA X2. Doing so exposes the heatsink, which is also held in place by four srews.


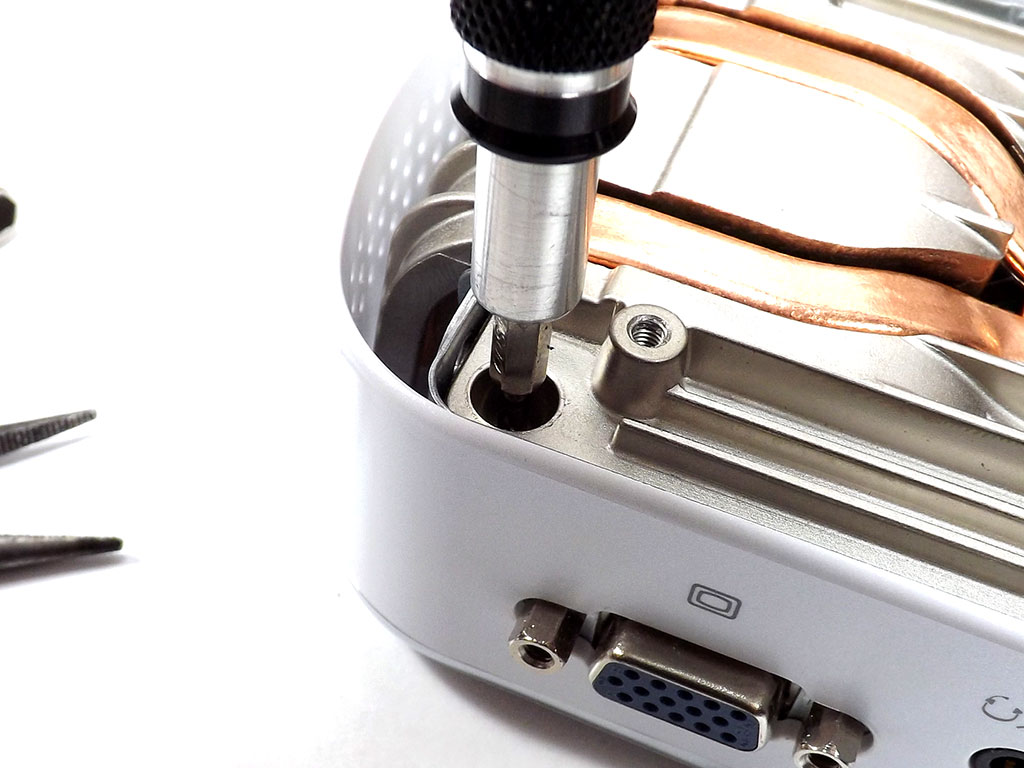
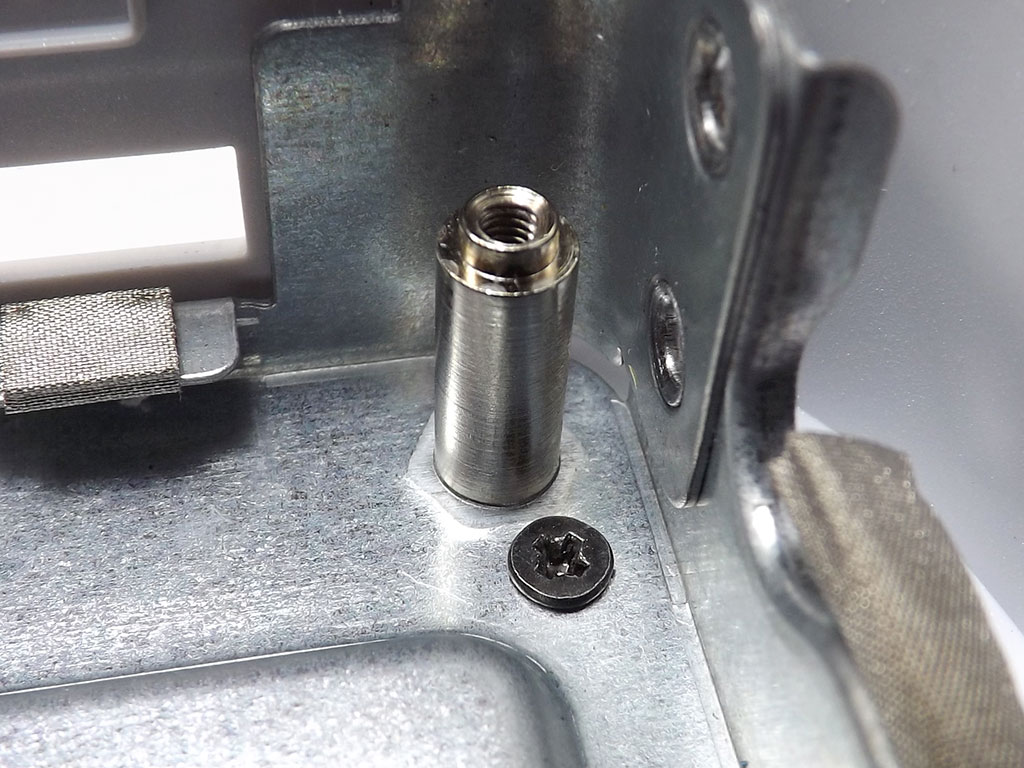
With those gone, the Braswell SoC is exposed, a mess of thermal paste on it. You will need to remove two more screws and the bolts around the D-Sub port to take the PCB out.

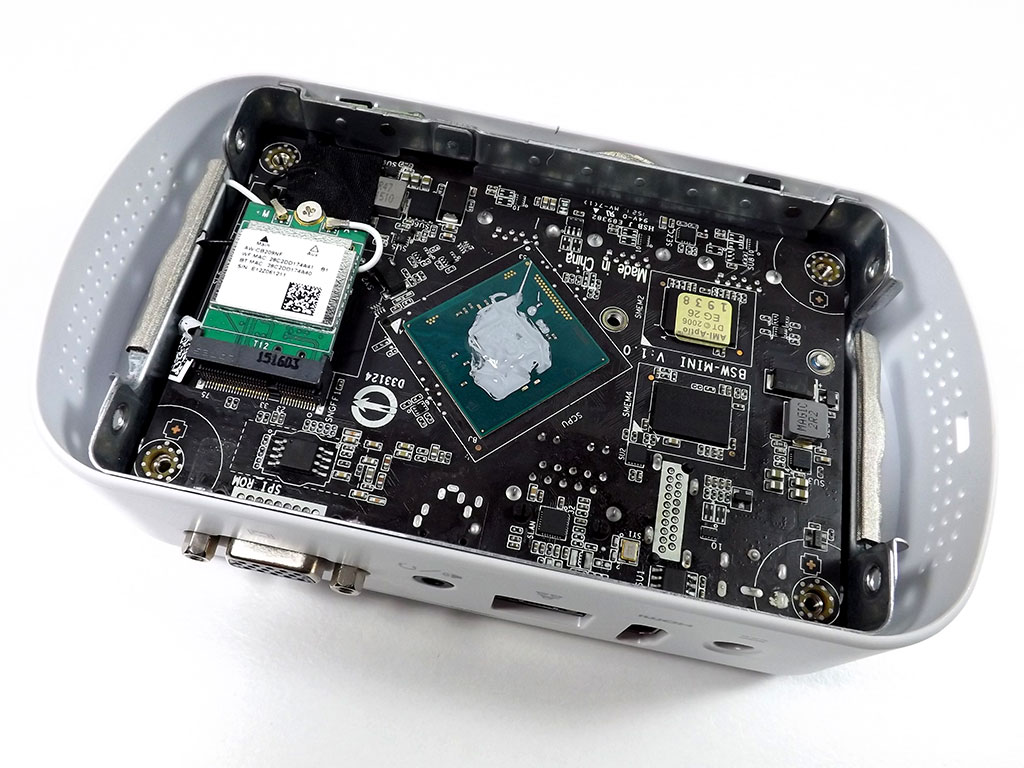
Don't forget to unplug the Wi-Fi cables! They tie into the metal cover that acts as an antenna. The metal cover screws into the plastic top and the heatsink screws into the metal, so you really do have to remove everything to get to the additional storage.
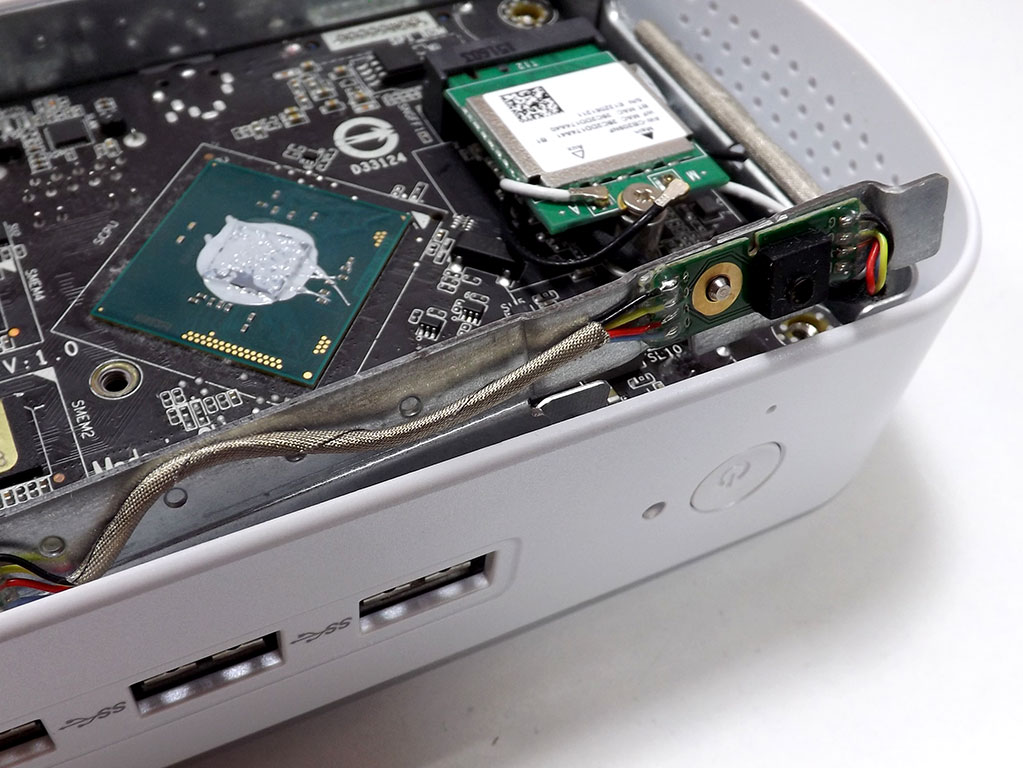

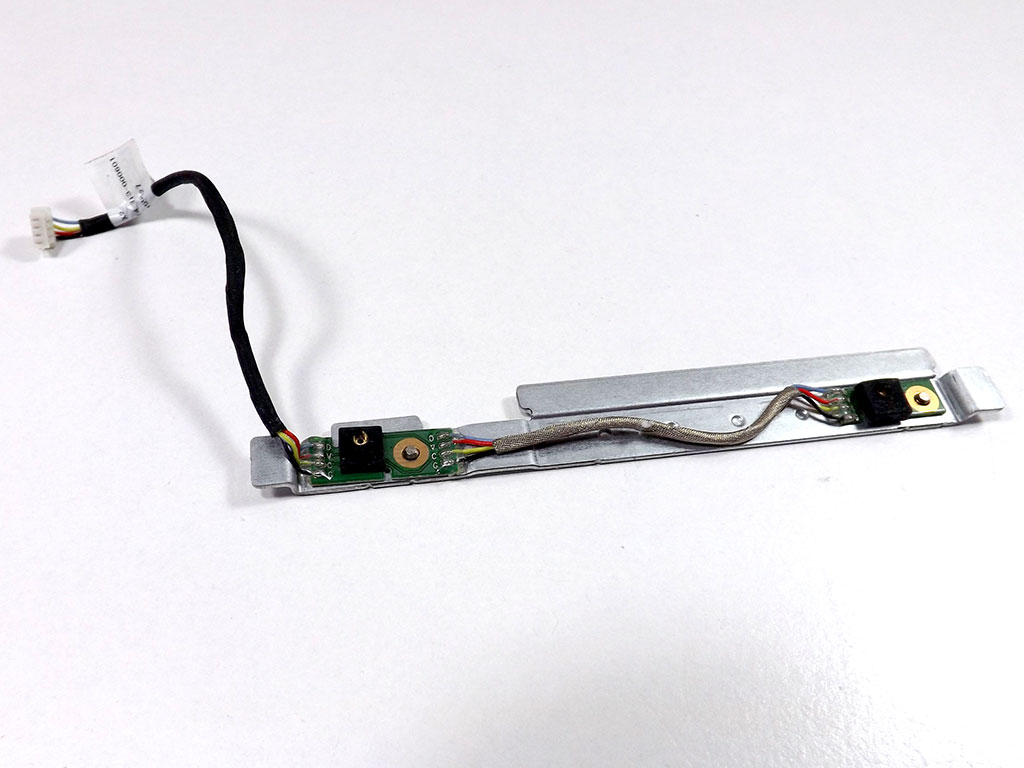
You need to slide out this little guy before pulling out the PCB. A close examination reveals it to be a stereo mic array. This enables Windows 10 Cortana support without having to plug in a mic, a huge improvement compared to past iterations for ECS's LIVA hardware. You'll find it easier to remove the mainboard after it's out and has been unplugged from its 4-pin header.

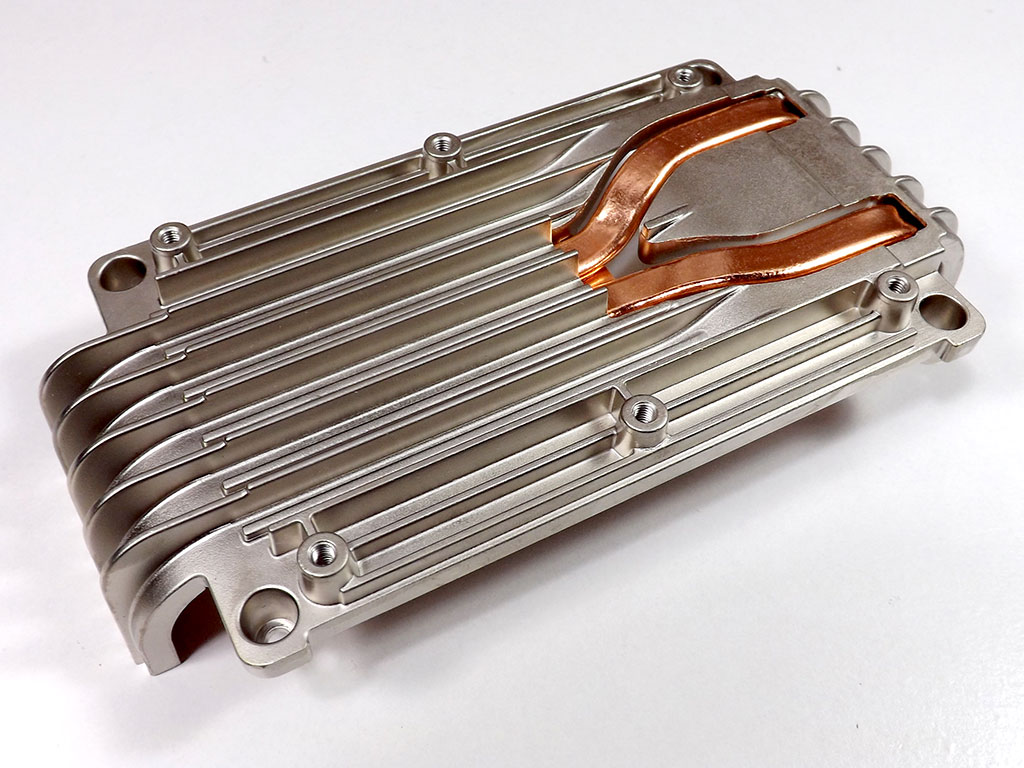
The heatsink is a large mass of aluminum with four heatpipes traveling through it. The Braswell SoC and a couple memory chips make contact with it using different materials; a paste for the Braswell chip and a pad for the memory chips. Two of these heatpipes reach out to the opposite side of the heatsink through a cut-out in the aluminum.
Apr 10th, 2025 00:12 EDT
change timezone
Latest GPU Drivers
New Forum Posts
- 5070ti overclock...what are your settings? (0)
- Will you buy a RTX 5090? (477)
- Asking before I mess up (16)
- Looking 4 a Solid AM5 MB? (24)
- Post your cooling. (211)
- (Some of) What I'd like to See From a Final Fantasy IX Remake (7)
- What's your latest tech purchase? (23506)
- Cyberpunk 2077 Game Discussion (2170)
- ## [Golden Sample] RTX 5080 – 3300 MHz @ 1.020 V (Stock Curve) – Ultra-Stable & Efficient (42)
- Is the Asrock Z790M PG Lightning/D4 decent for i7 12700KF? (4)
Popular Reviews
- The Last Of Us Part 2 Performance Benchmark Review - 30 GPUs Compared
- MCHOSE L7 Pro Review
- ASRock Z890 Taichi OCF Review
- Sapphire Radeon RX 9070 XT Pulse Review
- PowerColor Radeon RX 9070 Hellhound Review
- Upcoming Hardware Launches 2025 (Updated Apr 2025)
- Sapphire Radeon RX 9070 XT Nitro+ Review - Beating NVIDIA
- Acer Predator GM9000 2 TB Review
- UPERFECT UStation Delta Max Review - Two Screens In One
- ASUS GeForce RTX 5080 Astral OC Review
Controversial News Posts
- NVIDIA GeForce RTX 5060 Ti 16 GB SKU Likely Launching at $499, According to Supply Chain Leak (172)
- MSI Doesn't Plan Radeon RX 9000 Series GPUs, Skips AMD RDNA 4 Generation Entirely (146)
- Microsoft Introduces Copilot for Gaming (124)
- AMD Radeon RX 9070 XT Reportedly Outperforms RTX 5080 Through Undervolting (119)
- NVIDIA Reportedly Prepares GeForce RTX 5060 and RTX 5060 Ti Unveil Tomorrow (115)
- Over 200,000 Sold Radeon RX 9070 and RX 9070 XT GPUs? AMD Says No Number was Given (100)
- Nintendo Switch 2 Launches June 5 at $449.99 with New Hardware and Games (99)
- Nintendo Confirms That Switch 2 Joy-Cons Will Not Utilize Hall Effect Stick Technology (99)